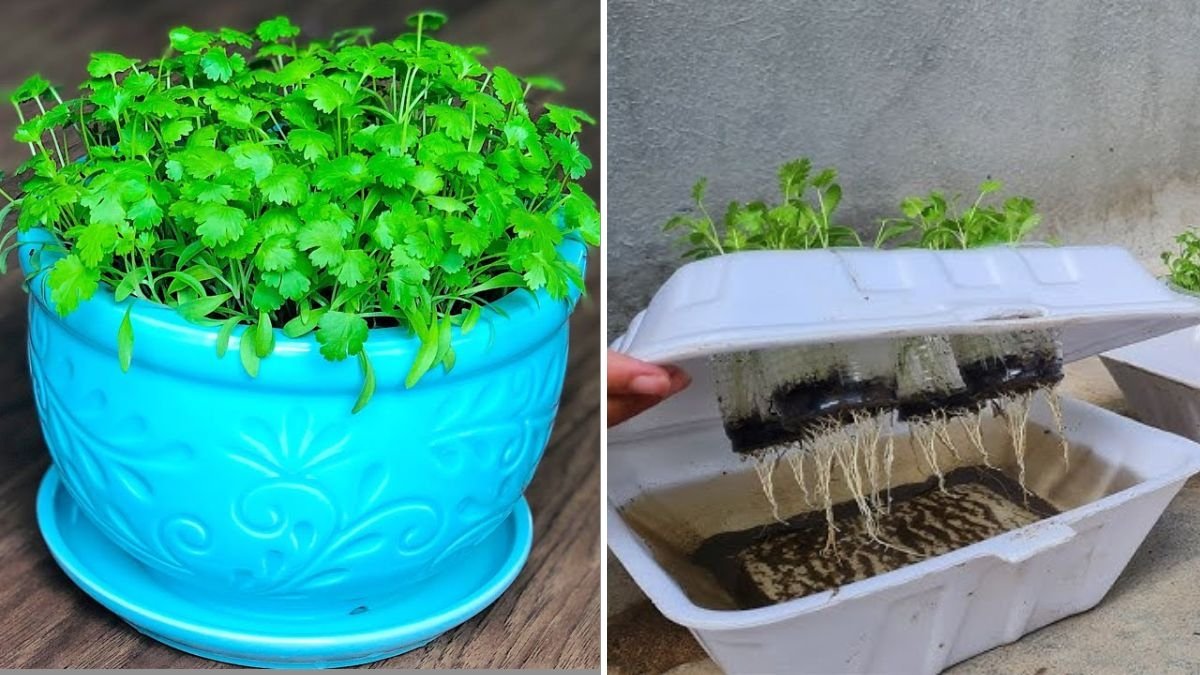
Imagine having a constant supply of fresh, fragrant coriander (dhaniya) right in your kitchen — no messy soil, no garden space required, and no worries about pests or weeds. Sounds too good to be true? Thanks to hydroponics, it’s now easier than ever to grow coriander without soil, all year round.
The viral idea shared in the YouTube video “How to Grow Coriander Without Soil | Coriander (Dhaniya) in Hydroponic System” has inspired home gardeners everywhere to try this modern, efficient growing technique.
Hydroponic gardening isn’t just a trend — it’s the future of urban farming. By growing plants in nutrient-rich water instead of soil, you can achieve faster growth, higher yields, and cleaner produce. In this blog, we’ll explore exactly how to grow coriander in a hydroponic setup — from seed preparation to harvest — right at home.
Step 1: Understanding Hydroponics — The Science Behind Soil-Free Gardening
Hydroponics is a method of growing plants using a water-based nutrient solution instead of traditional soil. The plants get all their essential minerals directly from the water, which saves space, reduces disease, and boosts growth speed.
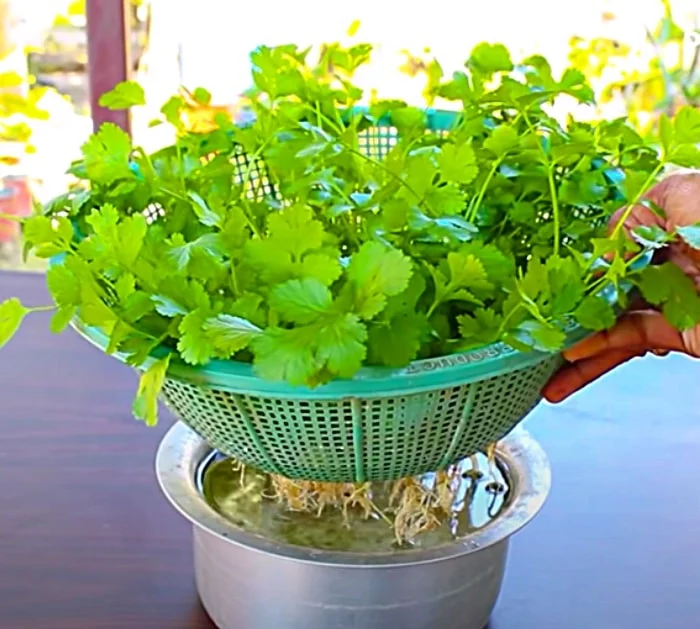
In this system, coriander roots are suspended in water and absorb nutrients efficiently, leading to lush, aromatic leaves.
Benefits of hydroponic coriander:
- Grows 30–50% faster than in soil.
- Requires 90% less water.
- No risk of soil-borne pests or weeds.
- Cleaner, healthier leaves.
- Can be grown indoors, on balconies, or even in kitchens.
Once you understand the basics, you’ll see how simple and rewarding this technique really is.
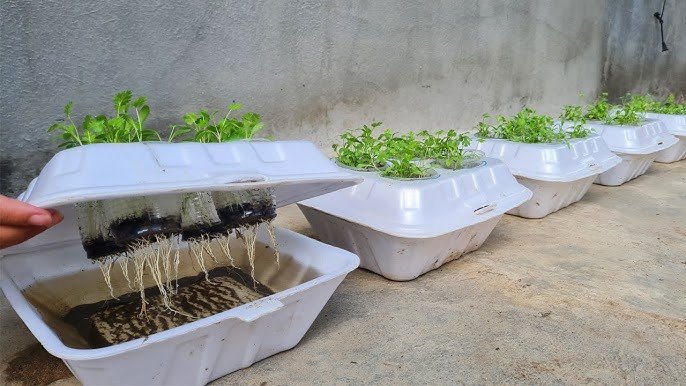
Step 2: Setting Up a Simple Hydroponic System for Coriander
You don’t need an expensive or complicated setup to grow coriander hydroponically. A basic Deep Water Culture (DWC) or Wick System is perfect for beginners.
Here’s what you’ll need:
- Container or Tub:
- A plastic box, bucket, or even an old storage bin works.
- Choose one that’s about 6–8 inches deep.
- Net Pots or Small Plastic Cups:
- These hold the plants above the water surface while letting roots hang into the nutrient solution.
- Growing Medium:
- Instead of soil, use coco peat, perlite, clay pebbles, or rock wool to support the seedlings.
- Nutrient Solution:
- Buy a hydroponic nutrient mix designed for leafy greens.
- Alternatively, you can make a simple homemade solution (we’ll discuss below).
- Air Pump (Optional):
- Helps oxygenate the water to keep roots healthy.
- Especially useful for DWC systems.
- Light Source:
- Place your setup near a sunny window or use LED grow lights for 8–10 hours daily.
Step 3: Preparing Coriander Seeds for Hydroponic Growth
Coriander seeds have a hard outer shell and often come as dual seeds joined together. To improve germination:
- Lightly Crush the Seeds:
- Gently press them with a rolling pin or the back of a spoon to split them into halves.
- Soak Overnight:
- Soak the seeds in room-temperature water for 8–12 hours.
- This softens the shell and activates germination.
- Pre-Germinate (Optional):
- Wrap soaked seeds in a damp cloth for 2–3 days until tiny roots start to appear.
- Then, they’re ready for planting.
Step 4: Planting Coriander in the Hydroponic System
Once your seeds are ready, it’s time to sow them.
- Fill your net pots with the chosen growing medium (e.g., coco peat + perlite mix).
- Sprinkle 5–10 seeds per cup and cover lightly with the medium.
- Moisten the medium using a spray bottle of plain water.
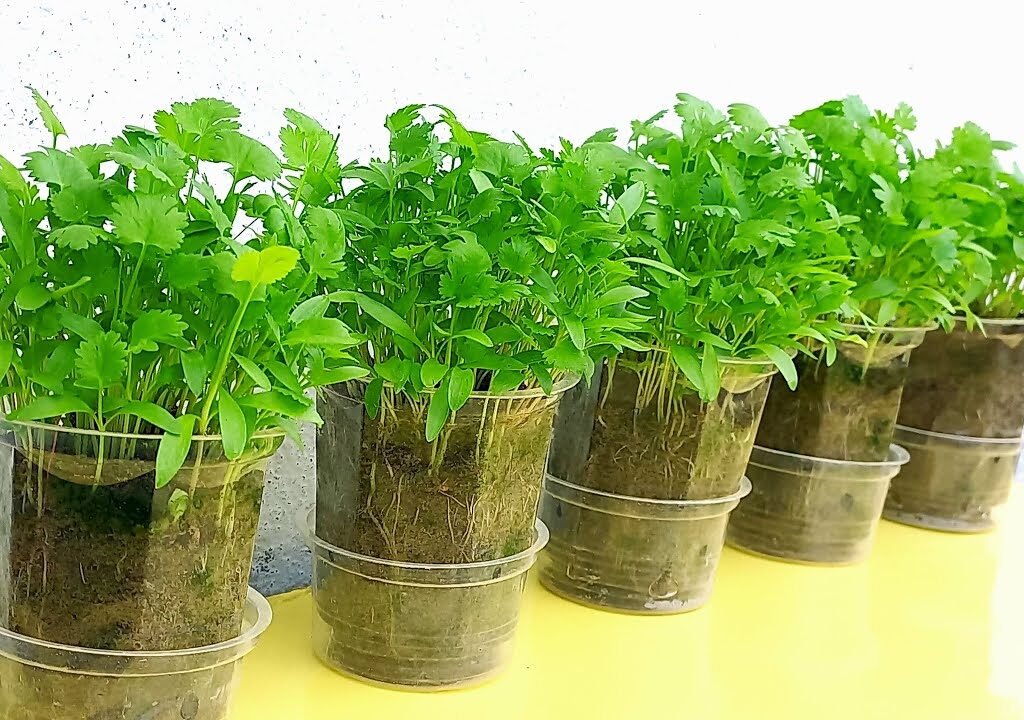
- Place the pots into your hydroponic container so the bottom of each pot just touches the water.
In the first few days, keep the setup in a shaded or semi-lit area until seedlings appear. After germination, move it to a sunny spot or under grow lights.
Step 5: Creating the Nutrient Solution
The magic of hydroponics lies in its nutrient solution — this replaces the role of soil entirely.
You can either use a ready-made hydroponic nutrient mix (available online) or make your own DIY version:
DIY Basic Nutrient Solution for Coriander:
- 1 teaspoon water-soluble fertilizer (NPK 19:19:19)
- ½ teaspoon Epsom salt (for magnesium and sulfur)
- 1 teaspoon calcium nitrate (for leaf growth)
- Mix into 10 liters of clean water.
Always check the pH level — coriander prefers slightly acidic water with a pH of 6.0–6.5. Use a pH testing kit and adjust with lemon juice (to lower) or baking soda (to raise).
Step 6: Caring for Hydroponic Coriander
Once your coriander starts growing, maintenance is minimal but consistent care ensures maximum yield.
1. Lighting:
- Provide at least 6–8 hours of sunlight daily or use a full-spectrum LED grow light.
2. Water Level:
- Maintain a steady water level so the roots remain submerged but not drowning.
- Refill the reservoir with fresh nutrient solution every 7–10 days.
3. Oxygenation:
- If using an air pump, keep it running to avoid stagnant water.
- Without a pump, gently stir the solution every few days to circulate oxygen.
4. Temperature:

- Ideal range is 18°C–28°C (64°F–82°F).
- Avoid placing the setup in direct heat or strong cold drafts.
Step 7: Managing Pests and Diseases Naturally
Hydroponic coriander faces far fewer problems than soil-grown plants, but prevention is still important.
Common Issues & Solutions:
- Yellow Leaves: May indicate nutrient imbalance — replace the solution.
- Fungus or Algae: Avoid direct sunlight on water and keep containers covered.
- Aphids or Whiteflies: Spray neem oil (1 tbsp per liter of water) once a week.
Good airflow around plants keeps them strong and healthy.
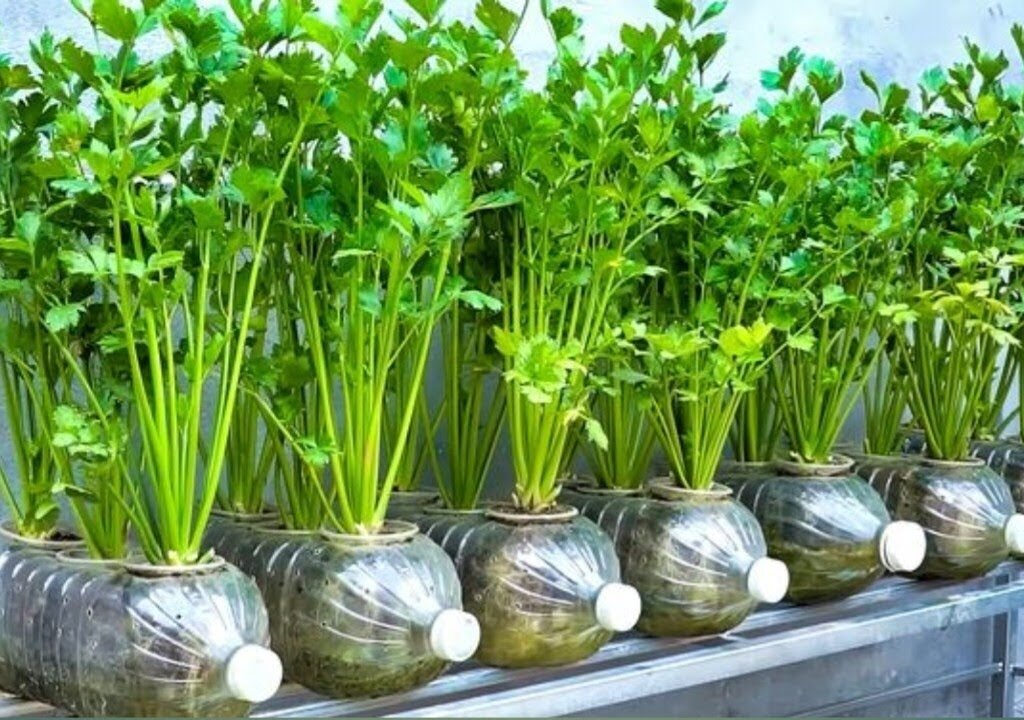
Step 8: Harvesting Your Hydroponic Coriander
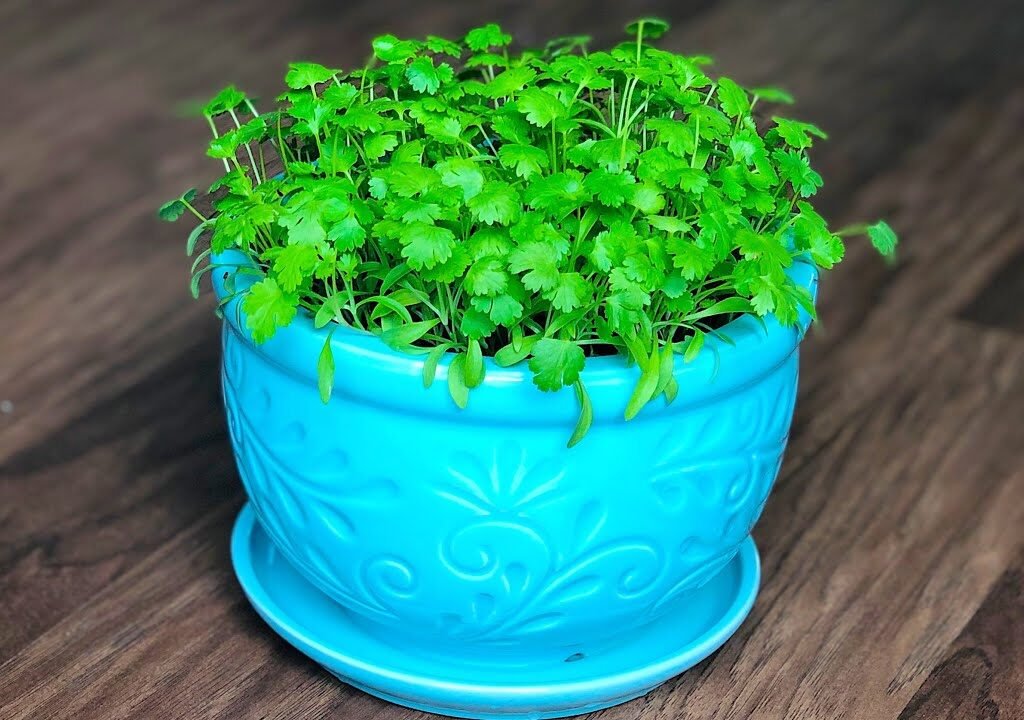
In about 25–30 days, your coriander will be lush and ready for harvesting.
Two methods to harvest:
- Cut-and-Come-Again Method:
- Trim outer leaves when they’re 4–6 inches tall, leaving inner shoots to regrow.
- Allows continuous harvest for up to 6–8 weeks.
- Full Harvest:
- Pull out the entire plant when leaves are mature (around 40–45 days).
- Clean roots and use them fresh or dry them for later use.
Fresh hydroponic coriander has a stronger aroma and cleaner taste than store-bought greens.
Step 9: Continuous Growing — A Year-Round Supply
The best part about hydroponic coriander? You can grow it continuously throughout the year.
After harvesting, simply:
- Rinse your system thoroughly.
- Refill with fresh nutrient solution.
- Plant new germinated seeds.
Because hydroponic systems are compact, you can stagger plantings every 10–15 days to maintain a steady supply — ensuring you’ll always have dhaniya for cooking and garnishing.
Step 10: Tips for Maximum Yield and Healthier Growth
To get the most out of your hydroponic coriander setup, follow these expert tips:
- Choose Fresh Seeds: Older seeds have low germination rates.
- Avoid Overcrowding: Space seeds evenly to prevent competition for nutrients.
- Monitor Nutrient Strength: Too strong a solution can burn roots.
- Keep it Clean: Rinse your containers weekly to prevent salt buildup.
- Use Filtered or RO Water: Tap water with high chlorine can harm roots.
By fine-tuning these factors, your coriander will grow greener, fuller, and more aromatic with each cycle.
Step 11: Advantages of Growing Coriander Hydroponically
This modern gardening method offers many long-term benefits — both practical and environmental:
- Saves Water: Uses up to 90% less water than soil cultivation.
- Space-Efficient: Perfect for balconies, rooftops, or small apartments.
- Faster Growth: Plants grow 30–40% faster with balanced nutrition.
- Cleaner Produce: No soil, no dirt — ready to use straight after rinsing.
- Sustainable: Reusable systems mean less waste and fewer resources.
Hydroponics truly empowers anyone — from beginners to seasoned gardeners — to grow fresh herbs right at home.
Step 12: Expanding Your Hydroponic Garden
Once you’ve mastered coriander, you can easily expand your system to grow other herbs and leafy greens. Great companions include:
- Mint (Pudina) – Thrives in similar nutrient conditions.
- Spinach and Lettuce – Perfect for compact systems.
- Basil and Parsley – Excellent for flavor and fragrance.
This turns your small hydroponic setup into a full-fledged kitchen herb garden — sustainable, stylish, and incredibly useful.
Conclusion: From Seeds to Success — Your Soil-Free Coriander Journey
Growing coriander without soil isn’t just a fun experiment — it’s a smart, sustainable way to enjoy fresh, chemical-free greens every day.
By setting up a simple hydroponic system, you take control of your food supply, save water, and make gardening accessible even in urban apartments. The method shared in “How to Grow Coriander Without Soil | Coriander Dhaniya in Hydroponic System” shows that innovation and nature can beautifully coexist.
So, start today. Gather a few seeds, a container, and a little curiosity — and you’ll soon have a thriving, aromatic coriander garden right at home. Once you taste your first batch of homegrown hydroponic dhaniya, you’ll never want store-bought again.
Leave A Comment