The Secret Recipe for Growing Big, Long, and Abundant Squash Using a Plastic Can, Milk, and

The Secret Recipe for Growing Big, Long, and Abundant Squash Using a Plastic Can, Milk, and

Every gardener dreams of harvesting big, healthy, and plentiful squash—those golden-yellow or deep-green beauties that fill your summer garden and dinner table. But what if the secret to massive, fruitful squash isn’t in expensive fertilizers or fancy equipment, but in something as simple as a plastic can, milk, and eggs?

Sounds unbelievable, right? Yet, this simple method—tested by many home gardeners—has proven to produce vigorous squash plants loaded with long, abundant fruits.

In this article, we’ll uncover exactly how this trick works, how to set it up step by step, and why it’s becoming a favorite organic gardening method across the U.S. Whether you have a backyard, balcony, or even a small corner for containers, you can try this easy hack and watch your squash thrive.


Why Squash Is Worth Growing

Before we get into the secret recipe, let’s appreciate why squash is one of the best vegetables to grow in America:

  • Nutrient-rich: High in vitamin A, potassium, and fiber.
  • Productive: Each plant can produce several pounds of squash.
  • Loves the sun: Perfect for warm American climates from coast to coast.
  • Versatile: Grows well in raised beds, ground gardens, or containers.
  • Tasty and useful: Great for grilling, roasting, soups, and baking.

Squash grows fast, but it also demands nutrition. That’s where the milk and eggs secret comes in—offering a natural, powerful fertilizer that keeps your plants healthy and heavy with fruit.


The Science Behind the Secret

The combination of milk and eggs might sound like something for your breakfast, not your garden—but it’s actually a powerhouse mix of natural nutrients and probiotics.

Here’s how it helps:

  1. Milk:
    • Contains calcium, potassium, and B vitamins, essential for plant cell growth.
    • Prevents blossom-end rot, a common issue with squash and tomatoes.
    • Encourages beneficial microbes in the soil, improving fertility.
  2. Eggs:
    • A natural source of nitrogen, calcium, and phosphorus—key nutrients for flowering and fruiting.
    • The eggshells slowly break down, providing a steady release of minerals.
  3. Plastic Can:
    • Acts as a controlled mini fertilizer chamber, ensuring nutrients go directly to the roots.
    • Helps maintain moisture levels, reducing the need for constant watering.

Together, these simple items form a natural nutrient system that feeds squash consistently and helps them produce larger, healthier, and longer fruits.


What You’ll Need

You don’t need a big farm or expensive materials. Here’s your simple setup list:

Materials:

  • 1 Plastic Can (1–2 gallons, like an old milk jug or water bottle)
  • 1 Raw Egg
  • ½ Cup Milk (fresh or expired)
  • Good Potting Soil or Garden Soil
  • Organic Compost or Manure
  • Squash Seeds or Seedlings
  • A Sunny Spot (at least 6–8 hours of sunlight daily)

Optional: small trowel, watering can, and a stake or trellis if you’re growing vining squash.


Step-by-Step Guide: Growing Squash in a Plastic Can with Milk and

Step 1: Prepare the Plastic Can

Cut off the top of your plastic can or jug to make a wide opening. Poke 4–5 small drainage holes at the bottom so excess water can escape.

This container will serve as your nutrient reservoir and growing pot.


Step 2: Add the and Milk Mixture

Place one raw egg (unbroken) at the bottom of the container. Then pour in half a cup of milk.

Pro tip: Don’t stir or crush the egg. Let it naturally decompose over time—it’ll slowly release nutrients as the plant grows.

These ingredients act like an organic fertilizer capsule, feeding your squash roots naturally for weeks.


Step 3: Add Soil and Compost

Fill the can with a mixture of:

  • 60% garden or potting soil
  • 30% organic compost or aged manure
  • 10% sand or coco peat (for drainage)

Mix gently and fill up the container, leaving 2 inches from the top. The nutrients from the egg and milk will gradually seep up, enriching the soil naturally.


Step 4: Plant the Squash Seeds or Seedlings

Make a small hole about 1 inch deep and drop in 2–3 squash seeds (you can thin them later) or plant one healthy seedling.

Cover lightly with soil and water well. Keep the soil moist but not soggy.

Place the container in a sunny area, ideally where it can get 6–8 hours of full sun daily.


Step 5: Water and Care Routine

Squash loves water—but not too much. Follow this simple care plan:

  • Water: 2–3 times per week, or when the top inch of soil feels dry.
  • Fertilizer: With the egg and milk below, you’ll rarely need additional fertilizer. For an extra boost, spray a diluted milk solution (1 part milk to 4 parts water) on the leaves every two weeks.
  • Mulch: Add straw or dry leaves around the plant to retain moisture and prevent weeds.

Within a few weeks, you’ll notice fast, vigorous growth and deep green leaves—a sign that the natural nutrients are working.


Step 6: Watch for Flowers and Pollination

Squash plants produce both male and female flowers.

  • The male flowers appear first and fall off (don’t worry—it’s normal).
  • The female flowers have a tiny baby squash at the base.

To ensure fruiting:

  • Encourage pollinators like bees by keeping flowers nearby, or
  • Hand-pollinate using a small brush or cotton swab to transfer pollen from male to female flowers.

Within days, you’ll see the tiny squashes start to swell—your harvest is on its way!


Step 7: The Big Harvest

Depending on the squash variety, fruits are usually ready in 50–70 days.

Signs it’s time to harvest:

  • The squash has reached its mature size.
  • The skin feels firm and glossy.
  • The stem connecting the fruit to the plant is slightly dry.

Cut the fruit gently using a garden knife or scissors—don’t pull it, as it can damage the plant.

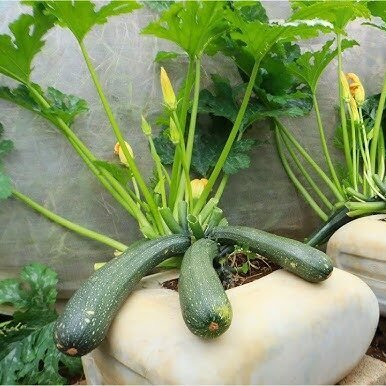
The results? Long, large, and plentiful squash—often bigger than store-bought ones!

Gardeners who tried this “plastic can + milk + egg” trick reported up to 30–40% more yield than traditional growing methods.


Why This Trick Works So Well

This simple experiment combines science and sustainability:

IngredientFunctionResult
EggSlow-release nitrogen & calcium sourceStrong roots and steady growth
MilkBoosts calcium, prevents rotHealthier flowers & fruits
Plastic CanRetains nutrients & controls moistureConsistent feeding
Organic CompostEnriches soil microbesImproves yield quality

In short, it’s a natural fertilizer system that mimics organic farming principles—perfect for home gardeners who want high yields without chemicals.


Extra Tips for Bigger and Better Squash

  1. Use Deep Containers: The deeper the roots can grow, the more fruit you’ll get.
  2. Prune the Vines: Cut off old or damaged leaves to encourage new growth.
  3. Rotate Containers: If possible, rotate your can every few days for even sunlight.
  4. Support Heavy Fruits: Use a trellis or sling to hold long squash off the ground.
  5. Replenish After Harvest: Add a new egg and splash of milk for the next planting round!

The Eco-Friendly Advantage

Besides amazing growth results, this method is:

  • 100% organic – no synthetic fertilizers or pesticides.
  • Budget-friendly – uses simple kitchen ingredients.
  • Waste-free – recycles old plastic cans.
  • Perfect for small spaces – ideal for balconies, patios, or urban gardens.

It’s sustainable, easy, and effective—proof that nature gives us all the tools we need to grow abundant, healthy food.


Conclusion: A Homegrown Success Story

Who knew that a plastic can, milk, and a simple could hold the secret to growing a bounty of big, long, and delicious squash?

This garden hack not only boosts yield but also promotes a natural, chemical-free growing environment—perfect for any American home gardener who loves DIY projects and sustainability.

Next time you’re about to toss out a milk jug or an egg past its prime, remember: they could become the foundation of your next thriving squash plant.

So grab your supplies, set up your mini container garden, and prepare to be amazed when those vines start producing plentiful, picture-perfect squash that’ll make your neighbors green with envy.

The Surprising Results of Growing Sweet Potatoes on a Terrace: A Simple Experiment That Worked Wonders

The Surprising Results of Growing Sweet Potatoes on a Terrace: A Simple Experiment That Worked Wonders

Sweet potatoes are one of America’s favorite comfort foods — hearty, nutritious, and versatile in the kitchen. But what if you could grow your own sweet potatoes right on your terrace or rooftop?

That’s exactly what this gardening experiment set out to test. With just a few containers, some healthy slips (sweet potato sprouts), and a sunny spot, it turned out to be one of the most rewarding small-space gardening projects ever.

Whether you live in an apartment, townhouse, or suburban home, this simple method proves that you don’t need acres of land to harvest pounds of delicious, homegrown sweet potatoes. The results of this terrace gardening experiment were truly surprising — and here’s how you can do it too.


Why Grow Sweet Potatoes on a Terrace?

Sweet potatoes are usually thought of as ground crops, but they’re actually perfect for container and terrace gardening. Here’s why:

  1. They Thrive in Heat: Sweet potatoes love warm weather and sunlight — exactly what your terrace provides.
  2. Easy to Grow in Containers: With deep, loose soil, they grow just as well in pots or grow bags.
  3. Low Maintenance: Once established, they need minimal care and water.
  4. Space Efficient: The vines can trail along railings or hang beautifully over the edges.
  5. Nutritious and Delicious: Packed with vitamins A and C, fiber, and antioxidants.

This experiment was designed to test how productive a small rooftop garden could be — and the results were beyond expectations.


What You’ll Need for the Experiment

You don’t need much to get started — just a few simple gardening essentials:

Supplies List

  • Sweet potato slips (young sprouts from mature sweet potatoes)
  • 3–4 large containers or grow bags (at least 12–18 inches deep)
  • Rich, loose potting mix (well-draining and slightly sandy)
  • Organic compost or fertilizer
  • Watering can or hose
  • Sunny terrace or rooftop spot (minimum 6 hours of sunlight daily)

Optional: Trellis or netting to guide the vines as they grow.


Step-by-Step Guide: The Terrace Sweet Potato Experiment

Step 1: Preparing the Slips

Sweet potatoes are grown from “slips,” which are shoots that sprout from a mature tuber. You can buy ready-to-plant slips from a garden center or grow them yourself.

To grow your own slips:

  1. Place a healthy sweet potato half-submerged in a glass of water, supported by toothpicks.
  2. Within 2–3 weeks, you’ll see sprouts emerging.
  3. Once the shoots are about 6 inches long, gently twist them off and place them in water until roots form.

When roots are about an inch long, they’re ready for planting!


Step 2: Preparing the Containers

For terrace gardening, choose large containers or grow bags that are at least 18 inches deep to allow the tubers to expand underground.

Fill each container with a mix of:

  • 60% potting soil
  • 30% organic compost
  • 10% sand or coco peat for drainage

Mix well and water lightly before planting. Sweet potatoes prefer loose, aerated soil — compact soil can restrict root growth.


Step 3: Planting the Slips

Plant each slip about 4–5 inches deep into the soil, leaving the top leaves above the surface. Space each plant 10–12 inches apart if using large planters.

Water gently to help the roots settle in. Place your containers in a sunny area of the terrace where they’ll receive at least 6–8 hours of sunlight daily.


Step 4: The Growth Phase

Over the next few weeks, your terrace will transform into a lush green space as the sweet potato vines spread out.

  • Water regularly — about 2–3 times per week. The soil should stay moist but not soggy.
  • Fertilize once a month with organic compost or a balanced vegetable fertilizer.
  • Train the vines to climb or trail — they can be guided along railings, trellises, or left to cascade beautifully.

You’ll notice how quickly they grow — a clear sign that they love terrace conditions.


Step 5: Flowering and Root Development

Around 8–10 weeks after planting, small purple flowers may appear — a beautiful sight and a good sign that tubers are forming below the soil.

At this stage:

  • Reduce watering slightly to encourage root growth.
  • Check for pests — though sweet potatoes are relatively pest-resistant, a quick inspection helps keep vines healthy.

The experiment showed that even under rooftop conditions, the plants produced thick, vigorous vines — a good indicator of strong root systems below.


Step 6: The Harvest — The Big Surprise!

After about 100–120 days, it’s time for the exciting part: harvesting.

When the leaves begin to turn yellow and wilt slightly, the tubers are mature. Gently dig into the soil with your hands or a small trowel, taking care not to damage the roots.

What came out was the biggest surprise of the experiment — each container produced 5–8 healthy, plump sweet potatoes!

Even in limited terrace space, the harvest was abundant — proving that sweet potatoes can thrive in containers just as well as in the ground.


Results of the Terrace Sweet Potato Experiment

Here’s what the experiment revealed:

FactorObservation
Growth RateExcellent – vines grew quickly in full sun
Water RequirementModerate – 2–3 times per week was sufficient
Yield per Container5–8 medium to large sweet potatoes
Pest ResistanceVery high – minimal issues
Space EfficiencyOutstanding – grew vertically and horizontally
Taste QualitySweeter and fresher than store-bought ones!

This confirmed that terrace-grown sweet potatoes are not only feasible but highly productive with minimal input.


Tips for Maximum Terrace Yield

If you’re inspired to try this yourself, here are some pro gardener tips for success:

  1. Start in Late Spring: Sweet potatoes love warmth. Plant slips after the last frost.
  2. Use Black Grow Bags: They retain warmth and boost growth.
  3. Prune the Vines: Trim occasionally to redirect energy to the tubers.
  4. Rotate Containers: Move pots around for even sunlight exposure.
  5. Harvest Carefully: Handle tubers gently to prevent bruising.
  6. Cure After Harvest: Let the sweet potatoes dry in a warm, shaded area for 7–10 days to enhance sweetness.

The Benefits of Terrace Gardening

This experiment didn’t just produce sweet potatoes — it transformed a simple terrace into a thriving green sanctuary.

Here’s why more Americans are switching to terrace and rooftop gardening:

  • Eco-Friendly: Reduces carbon footprint and heat on rooftops.
  • Aesthetic Appeal: Lush green vines add natural beauty to your space.
  • Homegrown Health: 100% organic, pesticide-free vegetables.
  • Efficient Water Use: Containers require less water than ground beds.
  • Therapeutic Value: Gardening helps reduce stress and boosts mental well-being.

It’s sustainable living made simple — and it starts right above your head.


Common Mistakes to Avoid

  1. Overwatering: Too much water can cause root rot. Keep soil lightly moist.
  2. Heavy Soil: Dense soil restricts tuber growth; always use loose mix.
  3. Lack of Sunlight: Sweet potatoes need full sun to thrive.
  4. Harvesting Too Early: Wait at least 100 days for mature, sweet tubers.

A little patience goes a long way — sweet potatoes reward you generously if you give them time.


The Sweet Takeaway

This terrace gardening experiment proved one thing — you don’t need farmland to grow a bountiful crop of sweet potatoes. With just a few containers, sunlight, and care, you can produce a surprising harvest of this beloved root vegetable right from your rooftop.

Not only is it easy and cost-effective, but the joy of pulling fresh, homegrown sweet potatoes from your own terrace is truly priceless.

So if you’ve been thinking about trying something new this gardening season, give this sweet potato terrace experiment a shot. The results might surprise you — just like they did for this gardener.

How to Make a 2-in-1 Hanging Garden to Grow Lettuce and Tomatoes — No Yard, No Problem!

How to Make a 2-in-1 Hanging Garden to Grow Lettuce and Tomatoes — No Yard, No Problem!

Who says you need a backyard to grow your own vegetables? With a clever 2-in-1 hanging garden setup, you can grow lettuce and tomatoes right from your porch, balcony, or even an apartment window. This space-saving, low-maintenance gardening trick lets you enjoy crisp greens and juicy tomatoes — all from the same hanging planter!

Perfect for urban gardeners, apartment dwellers, or anyone short on space, this DIY method combines beauty and practicality. It turns unused airspace into a mini garden oasis that delivers a steady harvest of homegrown produce. Plus, it’s budget-friendly and surprisingly easy to make.

Let’s dive into how to create your very own 2-in-1 hanging garden that grows two of America’s favorite vegetables — lettuce and tomatoes — without a patch of soil in the ground.


Why Choose a 2-in-1 Hanging Garden?

This vertical gardening idea is taking off across the U.S. — and for good reason. It’s sustainable, compact, and productive. Here’s why this system is a game-changer:

  1. Saves Space: Perfect for patios, balconies, or small decks.
  2. Efficient Water Use: Hanging planters require less water than garden beds.
  3. Dual Harvests: Grow leafy greens and fruiting vegetables in one compact setup.
  4. Pest Control: Fewer soil-based pests and diseases.
  5. Beautiful and Functional: Adds greenery and life to your home exterior.

Even if you live in a city apartment, this system lets you experience the joy of gardening — and the flavor of fresh, organic produce grown right at home.


What You’ll Need for Your 2-in-1 Hanging Garden

The best part? You can make this system using simple materials — no professional tools or large yard required.

Materials List

  • Two 5-gallon hanging planters (plastic or fabric grow bags work great)
  • Sturdy hanging hooks or ceiling mounts
  • High-quality potting mix (well-draining, nutrient-rich)
  • Tomato plant (cherry or dwarf variety)
  • Lettuce seeds or seedlings
  • Slow-release organic fertilizer or compost
  • Watering can or small drip irrigation setup
  • Optional: Coconut coir or perlite for better drainage

You can find all of these at your local garden center, Home Depot, or online stores like Amazon.


Choosing the Right Plants

The secret to a successful 2-in-1 hanging garden lies in pairing plants that complement each other.

  • Tomatoes: Choose compact, hanging, or determinate varieties such as Tiny Tim, Red Robin, or Tumbling Tom. These grow downward beautifully from hanging planters.
  • Lettuce: Go for loose-leaf types that don’t need deep soil — Buttercrunch, Romaine, Oakleaf, or Black-Seeded Simpson are excellent picks.

This combination is perfect because tomatoes love sun and warmth, while lettuce enjoys a bit of shade — which it conveniently gets from the tomato vines above.


Step-by-Step Guide to Creating Your Hanging Garden

Step 1: Choose the Location

Pick a spot with at least 5–6 hours of sunlight per day — a balcony railing, patio beam, or a sunny window ledge. If possible, choose a spot sheltered from heavy wind since hanging plants can sway.

If growing indoors, you can supplement sunlight with LED grow lights positioned above your planters.


Step 2: Prepare the Hanging Planters

Use two-tier hanging baskets or create your own stacked setup. The top layer will grow lettuce, and the bottom layer will hang tomatoes.

Drill a few small holes in the bottom of each planter for drainage. Line the interior with coconut coir or a fine mesh to keep the soil in place while allowing excess water to drain out.


Step 3: Add Soil and Nutrients

Fill both planters with light, fluffy potting mix mixed with compost. Avoid using garden soil, as it’s too dense for hanging gardens.

Mix in a small amount of slow-release organic fertilizer to give your plants a steady nutrient supply.


Step 4: Plant the Tomatoes (Bottom Planter)

If your planter has an opening at the bottom (like an upside-down tomato grower), gently insert the tomato seedling through the hole so it hangs downward.

If not, plant the tomato in the center of the bottom basket and allow its stems to trail over the edges as it grows.

Water thoroughly and ensure it’s secure in the soil. Tomatoes need space for roots, so the bottom planter should be at least 10–12 inches deep.


Step 5: Plant the Lettuce (Top Planter)

Next, fill the top basket with your potting mix and sprinkle lettuce seeds evenly or plant small seedlings about 6 inches apart.

Because lettuce has shallow roots, it doesn’t need much soil depth — around 6 inches is plenty.

The top basket provides a lush canopy, while the bottom tomato plant benefits from any excess water dripping down — creating a natural water-efficient system.


Step 6: Install the Hanging Setup

Securely attach your hanging hooks or brackets to a strong support beam, porch ceiling, or railing.

Make sure the planters hang at eye level or slightly above so you can easily harvest and water them. You can even connect both baskets using a metal chain or rope for a compact stacked look.


Step 7: Water and Maintain

Water both planters thoroughly after planting. From then on:

  • Water once daily in summer, every 2–3 days in cooler months.
  • Check moisture by touching the topsoil — if it’s dry, it’s time to water.
  • Add a drip irrigation line or self-watering system if you want a low-maintenance setup.

You’ll notice lettuce sprouting within 7–10 days, and tomato flowers appearing after 3–4 weeks.


Pro Tips for Bigger Harvests

  1. Rotate the planters every few days for even sunlight exposure.
  2. Prune tomato vines regularly to prevent shading your lettuce too much.
  3. Harvest lettuce leaves early — it promotes regrowth.
  4. Add compost tea every 2–3 weeks for nutrient boosts.
  5. Use companion plants like basil or marigold nearby to deter pests naturally.

Common Mistakes to Avoid

Even easy systems need attention! Watch out for these:

  • Overwatering: Hanging gardens drain slower; check moisture before watering.
  • Heavy soil: Always use lightweight mixes — dense soil causes poor drainage and root rot.
  • Insufficient sunlight: Tomatoes won’t fruit without enough light.
  • Ignoring support: Make sure your hanging hooks can handle the planter’s full weight (especially when wet).

By avoiding these pitfalls, your hanging garden will thrive season after season.


Why Lettuce and Tomatoes Are the Perfect Pair

This combination isn’t just convenient — it’s gardening chemistry at its best.

  • Tomatoes love warmth and full sunlight.
  • Lettuce prefers cooler conditions and light shade.

When grown together, the tomato leaves shade the lettuce, keeping it from bolting (prematurely flowering) during hot summer days. Meanwhile, the lettuce helps retain moisture in the soil below.

It’s a symbiotic setup that makes the most of your small space.


Harvest Time!

After about 4–5 weeks, your lettuce will be ready for its first harvest. Simply cut the outer leaves, leaving the center intact so it keeps producing.

For tomatoes, expect ripe fruit in 8–10 weeks, depending on the variety. Keep harvesting regularly to encourage new blooms.

Before you know it, you’ll be tossing together homegrown salads made entirely from your hanging garden!


The Eco-Friendly Bonus

Besides convenience, this gardening method is incredibly eco-friendly:

  • Reuses containers instead of buying new ones.
  • Reduces water waste through drip or gravity-fed watering.
  • Cuts down grocery trips and packaging waste.
  • Promotes sustainability — growing local, eating fresh.

You’re not just growing food; you’re making a positive environmental impact — one hanging basket at a time.


Final Thoughts: Small Space, Big Harvest

You don’t need acres of land or fancy equipment to grow your own vegetables. With this 2-in-1 hanging garden system, you can enjoy the freshness of homegrown lettuce and tomatoes right outside your window.

It’s easy to build, simple to maintain, and perfect for anyone who wants to live greener, eat healthier, and make the most of small spaces.

So grab a few hanging baskets, your favorite seeds, and some good soil — and start your mini sky garden today. You’ll be amazed at how rewarding it feels to pluck a ripe tomato or crisp lettuce leaf from your own hanging paradise.

How to Build a Vertical Garden with Automatic Watering: The Smart, Space-Saving Way to Grow Fresh Vegetables at Home

How to Build a Vertical Garden with Automatic Watering: The Smart, Space-Saving Way to Grow Fresh Vegetables at Home

If you’ve ever dreamed of growing your own vegetables but thought you didn’t have the space, here’s some good news — you can build a vertical garden with automatic watering right at home!

Vertical gardening is one of the most innovative and practical ways to grow fresh produce in small areas like balconies, patios, or even indoor walls. Combine that with a smart self-watering system, and you’ve got the ultimate low-maintenance, eco-friendly garden that saves time, water, and effort.

Whether you live in a city apartment or a suburban home, this setup lets you enjoy crisp lettuce, juicy tomatoes, and aromatic herbs — all growing vertically, in a modern and sustainable way.

Let’s dive into how you can build your own vertical vegetable garden with automatic watering, step-by-step.


Why Choose a Vertical Garden with Automatic Watering?

Before we start building, let’s look at why this method is becoming a favorite among urban gardeners across America:

  1. Space-Saving Design – Perfect for apartments, balconies, and small backyards.
  2. Water Efficiency – Automatic watering systems deliver just the right amount of water, reducing waste.
  3. Low Maintenance – Ideal for busy homeowners or beginners who forget to water plants regularly.
  4. Healthier Plants – Consistent watering helps prevent root rot and nutrient stress.
  5. Stylish and Modern – A vertical green wall adds a beautiful touch to any home decor.

With this smart system, you can grow everything from lettuce and spinach to cherry tomatoes and peppers — right from your wall!


What You’ll Need

You don’t need a professional setup to make your own DIY vertical vegetable garden with an automatic watering system. Here’s your materials checklist:

Materials for the Vertical Garden

  • A sturdy wooden pallet, PVC board, or metal frame (depending on your space)
  • Planting pockets or small plastic containers
  • High-quality potting mix
  • Vegetable seedlings or seeds (lettuce, spinach, cherry tomatoes, herbs, etc.)
  • Plastic sheeting (to protect walls from moisture)
  • Hooks or mounting brackets for support

Materials for the Automatic Watering System

  • Plastic tubing or drip irrigation kit
  • Small submersible water pump (available online or in garden stores)
  • Water reservoir or tank (a 5-gallon bucket works great)
  • Digital timer or smart plug
  • Connector joints and drippers

All these items are easily available at U.S. home improvement stores like Home Depot, Lowe’s, or on Amazon.


Step-by-Step: How to Build Your Vertical Garden

Step 1: Choose the Perfect Spot

Pick a sunny location — your balcony, patio wall, or indoor wall near a window are great options. Most vegetables need at least 4–6 hours of sunlight daily.

If you’re building indoors, consider using LED grow lights to supplement natural light.


Step 2: Prepare the Frame

A wooden pallet is one of the most affordable and effective vertical garden structures. Sand it down to avoid splinters, and cover the back and sides with plastic sheeting or a waterproof liner to protect your wall from moisture.

If you prefer a sleeker look, use PVC pipes or modular vertical garden planters — both are lightweight and easy to assemble.


Step 3: Add the Planting Pockets

Attach fabric planting pockets or small plastic containers to your frame using screws or zip ties. Make sure each pocket has a drainage hole.

Arrange them in staggered rows to maximize light exposure and air circulation.

For a beginner-friendly setup, 12–15 pockets are ideal — enough to grow a mix of leafy greens and herbs.


Step 4: Fill with Soil and Plant Your Vegetables

Fill each pocket with nutrient-rich potting mix. Add a little compost or organic fertilizer to encourage healthy growth.

Plant your favorite vegetables — here are a few that thrive in vertical gardens:

  • Lettuce and Spinach – Fast-growing and shallow-rooted.
  • Cherry Tomatoes – Compact and ideal for hanging growth.
  • Cucumbers (mini varieties) – Great for trellising vertically.
  • Peppers and Chilies – Thrive in sunny spots.
  • Herbs like basil, parsley, and thyme – Perfect for the upper rows.

Water lightly after planting to help the roots settle.


Setting Up the Automatic Watering System

Now comes the smart part — the automatic watering setup that keeps your plants hydrated without daily effort.


Step 5: Connect the Tubing

Start by connecting thin plastic tubing (¼-inch drip line) along the top row of your garden. You can use connector joints to run lines down to each pocket.

Attach drippers or small holes near the base of each plant so that water flows directly to the roots.


Step 6: Set Up the Water Source

Place your water reservoir or bucket near the base of the structure. Submerge the small water pump inside it and connect the outlet to your main tubing line.

If you’re growing outdoors, you can also connect the system to a garden hose or rainwater barrel for a more eco-friendly setup.


Step 7: Automate with a Timer

Plug your water pump into a digital timer or smart plug. Set it to water for 5–10 minutes twice a day (adjust depending on your local climate and plant needs).

This simple automation ensures your vegetables receive consistent hydration — even when you’re away on vacation.


Step 8: Maintain and Monitor

Once everything is running, maintenance becomes minimal.

  • Check the water reservoir weekly and refill as needed.
  • Clean the drippers monthly to prevent clogging.
  • Trim and harvest regularly to encourage new growth.
  • Add compost or organic fertilizer every few weeks to keep your plants nourished.

With the automatic watering system doing most of the work, you’ll spend more time enjoying your garden and less time maintaining it.


The Benefits: Why Gardeners Love This System

Here’s why vertical gardening with automatic watering is trending across America:

  1. Saves Up to 70% Water – Drip irrigation reduces waste compared to hand watering.
  2. Perfect for Busy Lifestyles – No need to remember watering schedules.
  3. Improves Air Quality – Living walls filter toxins and increase oxygen indoors.
  4. Grows More in Less Space – Ideal for small homes and city living.
  5. Year-Round Harvests – Grow fresh vegetables indoors, even during winter.

It’s a sustainable and stylish solution that transforms unused walls into lush, productive green spaces.


Pro Tips for Success

  1. Use Moisture Sensors – Add a smart sensor to monitor soil moisture and optimize watering.
  2. Choose Lightweight Soil Mixes – Heavy soil can strain your structure.
  3. Start Small, Then Expand – Begin with 6–8 plants, and scale up once you master the system.
  4. Regularly Rotate Plants – Ensures even sunlight and prevents crowding.
  5. Try Companion Planting – Pair basil with tomatoes or lettuce with carrots for natural pest control.

These small adjustments can make your vertical garden thrive effortlessly.


Eco-Friendly and Budget-Friendly

A DIY vertical garden with automatic watering is not only practical but also environmentally conscious.

By reusing materials like plastic bottles, wood pallets, or old containers, you reduce waste. And by using a water-efficient drip system, you conserve water — which is especially important in drier regions of the U.S.

Best of all, you save money by growing your own organic vegetables instead of buying them at the store.


Common Mistakes to Avoid

Even the best systems can go wrong without care. Here’s what to watch out for:

  • Overwatering – Always test soil moisture before adjusting timers.
  • Poor Drainage – Ensure all pockets have holes to prevent root rot.
  • Wrong Plant Choices – Avoid deep-rooted or sprawling vegetables like pumpkins.
  • Insufficient Sunlight – Most vegetables need direct light for 6 hours daily.

With a little attention, your vertical garden will flourish year-round.


Final Thoughts: Grow Smart, Live Green

Building a vertical vegetable garden with automatic watering is one of the smartest ways to bring fresh, organic produce into your home — without needing a large yard or hours of daily care.

This project blends technology, sustainability, and creativity, allowing you to grow healthy vegetables in a modern, efficient way. It’s perfect for city dwellers, families, and anyone who wants to eat fresher while living greener.

So grab that old pallet, a few seedlings, and a water pump — and start your own smart vertical garden today. You’ll be amazed at how much life (and flavor!) a wall can grow.

Grow Onions at Home Using Just Plastic Bottles: The Easy, Eco-Friendly Way to Get Big Harvests

Grow Onions at Home Using Just Plastic Bottles: The Easy, Eco-Friendly Way to Get Big Harvests

If you’ve ever thought about growing onions but don’t have much space or a traditional garden, here’s some exciting news — you can grow fresh, flavorful onions right at home using just a few small plastic bottles! This simple, sustainable method is not only great for your kitchen garden but also helps reduce plastic waste, making it a win-win for both your pantry and the planet.

Whether you live in a small apartment, a suburban home, or anywhere in between, learning how to grow onions in plastic bottles is an easy and budget-friendly gardening hack that delivers surprisingly big results. Let’s dive into this clever DIY gardening project and see how you can harvest crisp, aromatic onions without even touching the soil in your backyard.


Why Grow Onions in Plastic Bottles?

Before we get to the “how,” let’s talk about the “why.” Plastic bottles are one of the most common household items that usually end up in the trash. Reusing them for gardening not only reduces waste but also makes planting more accessible to anyone, regardless of space or budget.

Here’s why this method works wonders:

  1. Compact and Space-Saving – Perfect for balconies, windowsills, and patios.
  2. Eco-Friendly – Gives plastic bottles a second life and reduces landfill waste.
  3. Easy Maintenance – Transparent bottles make it easy to monitor water levels and root growth.
  4. Pest Control – Less exposure to soil pests compared to traditional garden beds.
  5. Year-Round Growth – You can grow onions indoors, no matter the season.

It’s sustainable gardening made simple — and it’s perfect for beginners!


What You’ll Need

You don’t need fancy equipment or a greenhouse setup for this project. Here’s a list of basic supplies:

  • 3 to 5 small plastic bottles (1–2 liters each)
  • A sharp knife or scissors for cutting holes
  • Onion bulbs or onion sets (available at any garden store)
  • Potting soil or compost-rich garden soil
  • Watering can or spray bottle
  • A sunny window or balcony with at least 4–6 hours of sunlight daily

Pro tip: If you’re using used bottles, make sure to clean them thoroughly and remove the labels to avoid any chemicals or dyes leaching into the soil.


Step-by-Step Guide: How to Grow Onions in Plastic Bottles

Step 1: Prepare the Bottle

Start by cutting the top portion of the bottle (around 2–3 inches from the cap). This open end will serve as your planter’s top. Next, poke small holes in the bottom for drainage. On the sides of the bottle, cut several round openings about 1–1.5 inches wide — these will be the “planting holes” where your onion bulbs will peek out and grow.

If you’re planning to grow green onions (scallions), smaller holes work fine. For bulb onions, make them slightly larger.


Step 2: Add Soil and Layer the Bulbs

Fill the bottle with a few inches of soil, then insert onion bulbs through the side holes, making sure the pointed tops face outward. Continue layering — soil, bulbs, soil — until the bottle is full. Finish with a thin layer of soil on top.

The idea is to have onion bulbs facing outward through each hole, giving them space to grow green shoots.


Step 3: Water Gently and Consistently

After planting, water the bottle lightly. The soil should stay moist but not soggy. Because plastic bottles have limited drainage, it’s important not to overwater — too much moisture can cause rot.

A good trick is to use a spray bottle for even, controlled watering. You’ll notice the green shoots emerging in as little as 7–10 days.


Step 4: Provide Light and Warmth

Onions love sunlight! Place your bottle planters in a bright, sunny spot such as a windowsill, balcony, or near a kitchen window that gets 4–6 hours of sunlight daily.

If you’re growing indoors during colder months, consider using a small grow light to supplement natural light. The warmth will also help onion roots establish faster.


Step 5: Maintenance and Growth

  • Water regularly but avoid soggy soil.
  • Rotate the bottle every few days to ensure even sunlight exposure.
  • You can trim the green shoots when they reach 6–8 inches — these are your fresh green onions!
  • If you’re growing bulb onions, allow them to mature for about 90–120 days before harvesting.

As they grow, the clear plastic bottle lets you easily observe root health and moisture levels — one of the biggest perks of this method.


Step 6: Harvest Time!

When the green tops start to yellow and fall over, your onions are ready for harvest. Simply remove the bottle’s outer layer, gently loosen the soil, and pull out your fully grown onions.

You’ll be amazed at how large and healthy they’ve grown, all inside a recycled bottle!


Best Onion Varieties for Bottle Growing

Not all onions are created equal when it comes to container gardening. Here are a few varieties that thrive in compact setups:

  • Green Onions (Scallions) – Fast-growing and perfect for small bottles.
  • Red Creole – Compact and rich in flavor.
  • Yellow Granex – A mild, sweet variety ideal for salads and cooking.
  • Evergreen Bunching Onions – Great for continuous harvesting.

If you’re new to gardening, start with green onions — they grow quickly, require minimal care, and can be harvested multiple times.


Pro Tips for Maximum Results

Want to boost your onion yield and keep your plants thriving? Try these pro gardener tips:

  1. Fertilize Monthly – Use a liquid organic fertilizer or compost tea every 3–4 weeks.
  2. Use Mulch – A light mulch layer on top can help retain moisture.
  3. Reuse the Soil – After harvesting, mix old soil with fresh compost and reuse it for your next batch.
  4. Regrow from Scraps – You can even regrow onions from the root base of store-bought ones!
  5. Add Companion Plants – Garlic, lettuce, or herbs like chives can share the same growing space for pest control and better growth.

The Eco-Friendly Impact

This onion-growing hack isn’t just about convenience — it’s a small step toward sustainable living. By repurposing plastic bottles, you’re reducing waste and creating a self-sustaining food source at home.

Millions of plastic bottles end up in landfills every year, but with a little creativity, they can become productive planters that supply your kitchen with fresh, organic onions — all while helping the environment.


Common Mistakes to Avoid

Even simple methods can go wrong if you’re not careful. Here’s what to watch out for:

  • Overwatering – Leads to root rot.
  • Insufficient Light – Causes thin, weak shoots.
  • Crowded Bulbs – Don’t overfill the bottle; give each bulb space.
  • Ignoring Drainage Holes – Proper drainage is key to healthy roots.

Remember: onions are hardy plants, but they still need balance — moisture, light, and airflow.


Final Thoughts: A Small Bottle, A Big Harvest

Growing onions in small plastic bottles is one of those clever home gardening ideas that prove you don’t need a backyard or expensive tools to grow your own food. With just a few bottles, a handful of soil, and some patience, you can enjoy an endless supply of crisp, aromatic onions — right from your windowsill.

This method is affordable, fun, and sustainable — making it perfect for families, urban gardeners, and anyone looking to live a little greener. So next time you finish a soda or water bottle, don’t toss it — turn it into your next onion planter and watch the magic happen!

No Garden? No Problem! How to Grow Fresh Vegetables at Home and Feed Your Family All Year Round

No Garden? No Problem! How to Grow Fresh Vegetables at Home and Feed Your Family All Year Round

Across America, more families are discovering a simple truth: you don’t need a garden to grow your own food. Whether you live in a city apartment, a suburban townhouse, or a home with a tiny backyard, you can still produce fresh, organic vegetables right at home — no soil beds required.

With food prices rising and the desire for healthier, pesticide-free produce growing, indoor and container gardening has become a national trend. From windowsills filled with herbs to balconies blooming with tomatoes and lettuce, Americans are learning that feeding your family from your own homegrown vegetables is easier — and more affordable — than ever.

In this guide, you’ll learn how to grow vegetables without a traditional garden, the best plants to start with, and clever ways to turn any space — no matter how small — into a mini food paradise.


1. Why Growing Vegetables at Home Is Easier Than You Think

You might think you need acres of land and fancy tools to grow vegetables. But that’s no longer true. With modern techniques like container gardening, hydroponics, and vertical planting, you can grow almost any vegetable in limited space.

Benefits of No-Garden Vegetable Growing:

  • Saves money: Cut your grocery bill by up to 30%.
  • Healthier food: Control what goes into your soil — no chemicals or pesticides.
  • Sustainable living: Reduce food waste and carbon footprint.
  • Therapeutic hobby: Gardening reduces stress and boosts mood.
  • Family bonding: Teach kids where food comes from and involve them in the process.

From lettuce in a window box to peppers growing under LED lights, the possibilities are endless — and incredibly rewarding.


2. The Best Vegetables to Grow Without a Garden

Not all vegetables thrive indoors or in containers, but many adapt surprisingly well. Here are the top-performing veggies that every beginner can grow easily — even in small apartments.

Leafy Greens (Fast & Easy)

  • Lettuce, spinach, kale, and arugula grow well in shallow containers.
  • They require cool temperatures and partial sunlight.
  • You can start harvesting leaves in just 3–4 weeks.

Tip: Use rectangular planters on windowsills for maximum light exposure.

Tomatoes

  • One of America’s favorite home crops.
  • Choose cherry or patio tomato varieties that do well in pots.
  • Provide 6–8 hours of sunlight or a grow light.
  • Support with small stakes or cages as they grow.

Carrots & Radishes

  • Perfect for deep containers or recycled buckets.
  • Use loose, sandy soil to let roots grow straight.
  • Radishes mature in 25–30 days, carrots in 60–70 days.

Green Onions & Garlic

  • Grow easily from kitchen scraps or bulbs.
  • Need minimal space and thrive in jars or small pots.
  • Perfect for windowsills with indirect sunlight.

Peppers & Chilies

  • Compact and highly productive.
  • Thrive in warm indoor conditions and pots at least 10–12 inches deep.

Cucumbers & Beans

  • Climbing plants that love vertical growth.
  • Train them on trellises or hanging supports for space-saving abundance.

3. Getting Started: Setting Up Your No-Garden Growing Space

The secret to successful no-garden vegetable growing is creating a healthy micro-environment that mimics outdoor conditions.

Step 1: Choose the Right Containers

You can grow vegetables in almost anything — pots, buckets, grow bags, or recycled containers — as long as they have drainage holes.

VegetableMinimum Pot DepthBest Container Type
Lettuce/Spinach6 inchesRectangular window box
Tomatoes12 inches5-gallon bucket
Carrots10 inchesDeep pot or bucket
Peppers10–12 inchesClay or plastic pot
Green Onions4 inchesShallow bowl or jar

Pro Tip: Dark-colored pots retain warmth better — great for tomatoes and peppers.


Step 2: Maximize Sunlight or Use Grow Lights

Most vegetables need 6–8 hours of sunlight per day.

If you don’t have a sunny window, invest in LED grow lights — they’re energy-efficient and simulate natural sunlight.

Ideal Placement Ideas:

  • South-facing windowsills
  • Balconies or patios
  • Indoor shelves with adjustable lights

Step 3: Use High-Quality Soil

Skip ordinary dirt. Go for a light, nutrient-rich potting mix designed for vegetables.

Blend your own using:

  • 50% compost
  • 30% coco peat or peat moss
  • 20% perlite or coarse sand

This mix provides excellent drainage while retaining moisture.


Step 4: Water Smartly

Overwatering is the biggest mistake in container gardening.

Follow these simple rules:

  • Water when the top inch of soil feels dry.
  • Avoid waterlogging — ensure pots have drainage holes.
  • Mist leafy greens with a spray bottle in hot weather.

Pro Tip: Use rainwater if possible — it’s softer and chemical-free.


4. Creative Growing Methods for Any Home

No backyard? No problem! These space-saving techniques will turn any apartment, balcony, or kitchen into a mini farm.

1. Windowsill Gardens

Perfect for herbs, lettuce, and onions.
Use narrow planters and rotate them every few days for even sunlight.

2. Balcony Gardens

Stack pots vertically or hang them on railings.
Grow trailing plants like beans, strawberries, or cherry tomatoes.

3. Vertical Wall Gardens

Attach wall planters or vertical racks indoors.
Ideal for compact veggies like kale, basil, or chard.

4. Hydroponic Systems

Hydroponics — growing without soil — is booming across the U.S.
Systems like Kratky jars or hydro towers let you grow lettuce and herbs using just water and nutrients.

Bonus: You can grow 2–3 times faster than traditional soil gardening.


5. Feeding Your Family: How Much Can You Grow Indoors?

You might be surprised at how much food a few pots can produce.

For a family of four, here’s an example setup:

VegetableNumber of PotsHarvest CycleApprox. Yield
Lettuce3–43 weeks2–3 heads/month
Tomatoes22–3 months8–12 lbs per cycle
Green Onions2ContinuousEndless regrowth
Peppers23–4 months10–20 fruits per plant
Herbs3ContinuousDaily harvest for seasoning

With rotation and regrowth, you can supply a steady stream of fresh veggies year-round.

Pro Tip: Start new seeds every few weeks to maintain continuous harvests.


6. Fertilizing Naturally for Healthy Growth

Your no-garden crops need regular feeding since container soil loses nutrients faster.

Natural Fertilizer Ideas:

  • Compost Tea: Steep compost in water for 2–3 days; use as a liquid feed.
  • Banana Peel Fertilizer: Adds potassium for flowering plants.
  • Epsom Salt Mix: 1 tablespoon per gallon of water boosts magnesium and chlorophyll.
  • Eggshell Powder: Crushed and added to soil for calcium.

Feed your plants every 2–4 weeks depending on growth speed.


7. Pest Control Without Chemicals

Even indoor plants can attract pests, but chemical sprays aren’t your only option.

Natural Remedies:

  • Neem Oil Spray: 1 teaspoon per liter of water; repels aphids and whiteflies.
  • Soap Water: Gently remove small pests.
  • Basil & Mint: Natural pest deterrents when planted nearby.

Keep the area clean and well-ventilated — pests love humidity and clutter.


8. Harvesting and Replanting for Endless Supply

The beauty of home vegetable growing is continuous production.

  • Lettuce and spinach: Harvest outer leaves first; new ones will regrow.
  • Green onions: Cut the tops and replant the bulbs in water or soil.
  • Tomatoes and peppers: Pick regularly to encourage new blooms.

By staggering your planting and harvesting cycles, you’ll enjoy fresh produce all year long without running out.


9. Family Fun: Involve Everyone in the Growing Process

Growing vegetables at home is more than just about food — it’s a lifestyle.

Family-Friendly Ideas:

  • Kids can paint and decorate pots.
  • Make a “grow chart” to track plant progress.
  • Use recycled containers for eco-friendly learning.

Not only will you teach children responsibility and patience, but you’ll also help them develop a connection with nature and healthy eating habits.


10. Final Thoughts: Feed Your Family, Wherever You Live

You don’t need acres of farmland or even a backyard to grow your own food. Whether you’re in a small apartment or a suburban home, growing vegetables for your family is easy, rewarding, and empowering.

All it takes is sunlight, water, and a little creativity. Start with one pot — maybe some lettuce or herbs — and watch your confidence (and harvest) grow.

Soon, your kitchen counters and windowsills will transform into a thriving mini-farm, giving you fresh, organic produce every day — no grocery trip needed.

So go ahead — roll up your sleeves, grab a pot, and start planting today. Your family (and your wallet) will thank you.

How to Regrow Cabbage from Kitchen Scraps: Fast, Easy, and Sustainable Gardening for Every Home

How to Regrow Cabbage from Kitchen Scraps: Fast, Easy, and Sustainable Gardening for Every Home

What if that leftover cabbage core sitting on your cutting board could grow into an entirely new head of cabbage—without ever stepping foot in a store?

That’s right—you can regrow cabbage from kitchen scraps easily, even if you don’t have a backyard garden. With just a bit of patience, sunlight, and water, you can transform a simple cabbage core into a fresh, leafy crop that keeps on giving.

This eco-friendly gardening method has become a favorite across the U.S. among urban gardeners, sustainable living enthusiasts, and homesteaders alike. It’s perfect for those who want to reduce food waste, save money, and enjoy organic, homegrown produce.

In this step-by-step guide, we’ll show you exactly how to regrow cabbage from scraps, how to care for it, and how to get the most yield possible from your kitchen leftovers. Let’s dive in and grow something amazing right from your kitchen!


1. Why Regrow Cabbage? The Sustainable Gardening Trend Taking Over America

In recent years, regrowing vegetables from scraps has exploded in popularity across the United States. From carrots and lettuce to celery and green onions, gardeners are discovering that you don’t always need seeds to grow your food.

Cabbage is one of the easiest vegetables to regrow, and it’s incredibly rewarding. Instead of tossing the core after making coleslaw or stir-fry, you can use it to grow a whole new plant.

Benefits of Regrowing Cabbage at Home:

  • Eco-Friendly: Reduces kitchen waste and landfill impact.
  • Cost-Effective: No seeds or nursery plants required.
  • Fast Results: Visible regrowth in less than a week.
  • Beginner-Friendly: Perfect for kids, schools, and first-time gardeners.
  • Organic Control: You choose the soil, water, and fertilizer—no chemicals.

Regrowing cabbage is more than just a gardening hack—it’s a small, powerful act of sustainability that saves money and connects you with nature.


2. What You’ll Need to Regrow Cabbage

Before you start, make sure you have everything ready. Fortunately, this method is simple and requires minimal supplies.

Supplies List:

  • A fresh cabbage core (the firm center part left after removing leaves)
  • A shallow dish or bowl
  • Clean water (filtered if possible)
  • Toothpicks (optional, for balance)
  • A sunny windowsill or outdoor spot
  • A pot or garden bed
  • Rich potting soil or organic compost mix

3. Step-by-Step: How to Regrow Cabbage from Kitchen Scraps

Now that you’ve got your materials ready, let’s walk through each step carefully to ensure a strong, healthy plant.


Step 1: Prepare the Cabbage Core

After using your cabbage for cooking, leave behind about 2–3 inches of the core at the base (where the leaves were attached).

Rinse it gently under running water to remove any dirt or debris. Avoid cutting off too much of the base—this is where new roots will sprout.


Step 2: Place the Core in Water

  • Fill your dish or bowl with ½ inch of clean water.
  • Place the cabbage core cut-side up and base-down into the water.
  • Optionally, use toothpicks to keep it stable or slightly elevated.

Set the dish in a sunny, warm area—a windowsill that gets at least 6 hours of indirect sunlight works perfectly.

Pro Tip: Replace the water daily to keep it clean and oxygen-rich. This helps prevent mold and bacteria from forming.

Within 3–5 days, you’ll notice tiny green shoots forming in the center and small white roots emerging underneath. That’s your cabbage coming back to life!


Step 3: Transplant to Soil

Once your cabbage has developed roots about 1–2 inches long and visible leaf growth, it’s ready to move into soil.

  • Choose a pot with good drainage or a garden bed with loose, rich soil.
  • Make a hole large enough to cover the base of the cabbage core.
  • Place the core into the soil, covering it halfway.
  • Gently pat down the soil and water thoroughly.

Your transplanted cabbage should be placed somewhere it can receive at least 6 hours of sunlight daily. If indoors, rotate the pot every few days to ensure even light exposure.


Step 4: Provide Proper Care and Maintenance

Cabbage plants are fairly low-maintenance, but they do appreciate consistent care to thrive.

Sunlight:

Cabbage loves sunlight—aim for 6–8 hours per day. Too little light can lead to slow growth or small leaves.

Watering:

Keep the soil moist but not waterlogged. Overwatering can cause rot, while underwatering leads to wilted, tough leaves.

Feeding:

Every 2–3 weeks, add a balanced organic fertilizer or compost tea. Cabbage is a heavy feeder and benefits from extra nutrients during its growth phase.

Temperature:

Cabbage prefers cool weather (55°F–75°F). If you live in a hot region, grow it in partial shade or during the fall and spring seasons.


Step 5: Watch It Grow and Harvest!

Over the next few weeks, your cabbage will continue to develop new layers of leaves. You’ll notice the head beginning to form in the center.

Depending on the variety and environment, your regrown cabbage can reach harvest size in 8–10 weeks.

Harvesting Tips:

  • Wait until the head feels firm and compact.
  • Cut it at the base with a sharp knife, leaving the lower leaves intact.
  • These remaining leaves can regrow smaller heads over time, giving you a second harvest!

4. Common Mistakes to Avoid

Even though regrowing cabbage is simple, a few common mistakes can slow growth or cause failure.

Mistake #1: Leaving the Core in Water Too Long

If you don’t transplant soon enough, the roots may rot. Move to soil as soon as roots are about 1 inch long.

Mistake #2: Poor Drainage

Cabbage hates soggy soil. Always use well-draining soil and a pot with drainage holes.

Mistake #3: Insufficient Sunlight

Without proper sunlight, cabbage plants become leggy and weak. Choose a bright spot or supplement with a grow light indoors.

Mistake #4: Overcrowding

If you’re regrowing multiple cores, keep at least 12–18 inches of space between plants. This ensures enough airflow and prevents fungal issues.


5. Maximizing Your Cabbage Yield

Want to make your regrown cabbage even more productive? Here are a few insider tips that many U.S. gardeners swear by:

Tip #1: Use Organic Compost

Mix compost or worm castings into your soil. This improves fertility, moisture retention, and overall yield.

Tip #2: Rotate Sunlight Exposure

Turn your pot or container every few days so all sides of the cabbage receive equal light.

Tip #3: Mulch for Moisture

Apply a thin layer of mulch or straw around the base. It helps retain moisture, keeps roots cool, and reduces weeds.

Tip #4: Companion Planting

Grow cabbage near herbs like dill, mint, or rosemary to repel pests naturally. Avoid planting next to tomatoes or strawberries, which attract aphids.

Tip #5: Watch for Pests

Cabbage worms and aphids are common threats. Use neem oil spray or a mild soap solution to keep them at bay safely.


6. Beyond Regrowth: Saving Cabbage Seeds

Once your cabbage plant reaches maturity, you can let it flower and go to seed—especially if you’re aiming for long-term sustainability.

How to Collect Seeds:

  1. Allow your cabbage to grow past harvest until it blooms.
  2. The flowers will produce small seed pods.
  3. When the pods turn brown and dry, cut them off and gently remove the seeds.
  4. Store seeds in a cool, dry place for next season.

By saving seeds, you create a self-sustaining cabbage cycle—no store-bought seeds needed ever again!


7. The Bigger Picture: Regrowing Vegetables for a Greener Future

Regrowing cabbage from scraps is more than just a fun experiment—it’s a gateway to sustainable living. Imagine how much food waste Americans could prevent if every household regrew even a few vegetables.

Cabbage isn’t the only veggie you can regrow. Try this method with:

  • Celery (from the base)
  • Lettuce (from the core)
  • Green onions (from roots)
  • Garlic (from cloves)
  • Carrots or beets (from tops)

By doing this, you’re saving money, reducing waste, and playing a role in protecting the planet—one scrap at a time.


Conclusion: Your Kitchen Is a Garden Waiting to Grow

Now that you know how to regrow cabbage from kitchen scraps, there’s no reason to throw those cores away again. With just a little care and patience, you can grow fresh, organic cabbage right from your kitchen counter.

It’s fast, easy, and incredibly satisfying. Every new leaf is a small victory for sustainability—and a step toward a greener, self-sufficient lifestyle.

So next time you chop up cabbage for tacos, coleslaw, or soup, don’t toss the core—plant it! Watch as your kitchen scraps come back to life, bringing fresh flavor and eco-friendly pride to your home.

Growing Carrots From Discarded Stems: The Fast, Efficient, and High-Yield Way to Regrow Fresh Carrots at Home

Growing Carrots From Discarded Stems: The Fast, Efficient, and High-Yield Way to Regrow Fresh Carrots at Home

What if you could turn your kitchen scraps into a never-ending supply of fresh, crunchy carrots—without buying new seeds? Believe it or not, it’s possible! Americans everywhere are embracing sustainable gardening and food waste reduction, and one of the most rewarding projects is growing carrots from discarded stems.

This method doesn’t just save money—it’s fast, eco-friendly, and surprisingly productive. Whether you live in an apartment with a sunny window or a suburban home with a backyard garden, you can regrow carrots easily and efficiently using just the tops you’d normally toss away.

In this detailed guide, you’ll learn how to regrow carrots from scraps the right way—step-by-step—while boosting yield and growth speed. You’ll also discover how to care for them properly, when to harvest, and how to make this simple hack part of your long-term gardening routine.


1. Can You Really Regrow Carrots From Stems?

Let’s start with an important truth: you can’t regrow a whole new carrot root (the orange edible part) from just the stem. The carrot we eat is actually the plant’s taproot, and once it’s been harvested, that part is gone for good.

However, you can regrow the green tops and new roots from the discarded carrot stem—and with the right care, those regrown plants can produce flowers, seeds, and even small new roots for future growth.

Think of it as propagating carrots, not cloning them. The result is a fast, sustainable way to grow leafy carrot greens, attract pollinators, and even regenerate carrot plants that can yield new seeds for next season’s harvest.


2. Why Americans Are Turning to Regrowth Gardening

Across the U.S., home gardeners are finding creative ways to reduce waste and grow fresh produce year-round. Regrowing vegetables from scraps has become a major trend, and carrots are one of the easiest to start with.

Here’s why this method is popular:

  • Eco-Friendly: Reduces food waste and promotes sustainable living.
  • Budget-Friendly: You grow from scraps—no seeds or fancy tools required.
  • Beginner-Friendly: Perfect for kids, classrooms, or urban gardeners.
  • Fast Results: Sprouting begins within days, not weeks.
  • Educational: Great way to learn about plant regeneration and seed saving.

It’s a fun, easy project that turns kitchen waste into garden gold—literally!


3. What You’ll Need to Get Started

Before you dive in, gather a few simple supplies. Most are already in your kitchen or garden shed.

Supplies:

  • Fresh carrot tops (at least 1 inch of stem attached to the top)
  • Shallow dish or bowl
  • Clean water
  • Toothpicks (optional)
  • Pot or container with drainage holes
  • Potting mix or garden soil
  • A sunny spot (windowsill, balcony, or garden bed)

Pro Tip: Choose organic carrots if possible—they’re less likely to be treated with chemicals that can slow regrowth.


4. Step-by-Step Guide: Regrowing Carrots From Stems

Let’s get your carrot regrowth project started the right way.


Step 1: Prepare the Carrot Tops

  • Cut off the top 1–2 inches of the carrot (the stem end, where the greens sprout).
  • Rinse to remove dirt or debris.

Make sure each top has a small flat surface where the stem and orange part meet—this is where new growth will emerge.


Step 2: Place in Water

  • Fill a shallow dish with about ½ inch of clean water.
  • Place the carrot tops cut-side down, green side up.
  • You can use toothpicks to keep them slightly above the water if needed.

Keep the dish in a bright, sunny location (like a windowsill). Avoid direct, harsh afternoon sunlight in the first few days.

Change the water daily to prevent mold and bacterial buildup.

Within 3–5 days, you’ll notice tiny green shoots and white roots forming underneath the stem—proof that your carrot is regenerating!


Step 3: Transplant Into Soil

Once the tops have developed roots around 1 inch long and leafy growth of at least 2 inches, they’re ready to move into soil.

How to Transplant:

  • Fill your pot or garden bed with loose, well-drained soil.
  • Make small holes deep enough to cover the lower part of the carrot top.
  • Place each rooted top gently and cover with soil up to the base of the greens.
  • Water thoroughly.

Keep soil consistently moist (but not soggy) for the first two weeks.


Step 4: Care for Your Regrown Carrots

Now that your carrot tops are in soil, consistent care ensures rapid growth and high yield potential.

Sunlight:

  • Carrots love 6–8 hours of sunlight daily.
  • Place your pot near a sunny window or outdoors in a bright spot.

Watering:

  • Keep soil moist, not drenched.
  • Water when the top inch of soil feels dry.

Fertilizer:

  • Add organic compost or diluted liquid fertilizer every 2–3 weeks.
  • Avoid nitrogen-heavy fertilizers—they promote leaves, not roots.

Within 2–3 weeks, you’ll see vigorous greens and possibly new roots forming underneath!


5. Turning Regrown Tops Into New Carrot Seeds

Here’s where this method becomes truly sustainable. With enough patience, your regrown carrot tops can flower and produce seeds for new carrot plants.

How to Do It:

  1. Allow your carrot tops to grow freely for several weeks.
  2. As they mature, they’ll send up tall stalks with umbrella-shaped flowers.
  3. These blooms attract pollinators like bees and butterflies—great for your garden ecosystem.
  4. After flowering, let the stalks dry naturally.
  5. Collect the tiny brown seeds (known as carrot umbels) for replanting.

Each stem can produce hundreds of new seeds, setting you up for an endless cycle of carrot growing—no store-bought packets needed.


6. Harvesting Carrot Greens (and How to Use Them)

Even if you’re not regrowing full carrots, the greens themselves are delicious, nutrient-rich, and versatile.

Harvest Tips:

  • You can start trimming greens once they’re 6–8 inches tall.
  • Always leave at least 2 inches of growth so the plant continues regenerating.

Ways to Use Carrot Greens:

  • Blend into pesto or green smoothies.
  • Sauté with garlic and olive oil.
  • Chop into soups, salads, or omelets for a zesty flavor boost.

Carrot greens are packed with vitamin K, potassium, and antioxidants, making them a healthy bonus to your regrowth project.


7. Boosting Growth Speed and Yield

Want to make your regrown carrot tops flourish faster and produce more? Try these proven techniques:

Use Warm Water for Starting

Carrots sprout more quickly in water that’s around 70–75°F (21–24°C).

Add a Natural Rooting Agent

Mix a few drops of apple cider vinegar or aloe vera gel into the water to stimulate root growth.

Ensure Proper Drainage

Loose, sandy soil encourages root expansion and prevents rot.

Mulch the Soil

A light layer of mulch or straw helps retain moisture and stabilizes soil temperature.

Rotate Light Exposure

If indoors, rotate the pot every few days so all sides of the plant receive equal sunlight.

With these tweaks, your carrot tops will grow greener, stronger, and faster—often showing visible progress within a single week.


8. Common Problems and Easy Fixes

Even low-maintenance crops like carrots can face issues. Here’s how to troubleshoot:

Problem: Leaves turning yellow
Fix: Too much water or poor drainage. Let soil dry slightly before watering again.

Problem: Mold forming in water stage
Fix: Change water daily and ensure the dish is clean. Add a drop of lemon juice to deter bacteria.

Problem: Weak or thin greens
Fix: Move to a sunnier location or feed with a balanced liquid fertilizer.

Problem: No root formation
Fix: Try using fresh carrot tops or ensure the cut section hasn’t dried out before soaking.


9. Expanding Your Scrap Garden

Once you master carrot regrowth, try this technique with other kitchen scraps!

You can regrow:

  • Green onions (from roots)
  • Celery (from the base)
  • Lettuce (from the crown)
  • Garlic (from cloves)
  • Beets and radishes (from tops)

Before long, you’ll have a mini home garden grown entirely from leftovers—a sustainable, money-saving way to keep your kitchen stocked with fresh produce.


Conclusion: From Scraps to Sustainability

Growing carrots from discarded stems isn’t just a fun DIY project—it’s a statement of sustainability, creativity, and self-reliance. You’re turning waste into life, transforming something ordinary into a continuous source of fresh greens and seeds.

In just a few short weeks, you can watch your kitchen scraps sprout, thrive, and regenerate—proof that nature never really stops giving when you know how to work with it.

So the next time you slice off those carrot tops, don’t toss them out. Instead, start your own fast-growing, high-yield carrot garden right at home. It’s simple, satisfying, and 100% eco-friendly—a small step that makes a big impact.


High-Yield Tomato Gardening at Home: Quick Growth & Early Harvest Tips Every American Gardener Should Know

High-Yield Tomato Gardening at Home: Quick Growth & Early Harvest Tips Every American Gardener Should Know

Few gardening joys compare to plucking a sun-warmed, vine-ripened tomato straight from your garden. But if you’ve ever struggled with slow growth, low yields, or late harvests, you’re not alone. Whether you’re a beginner gardener in Florida or an experienced grower in California, every tomato lover wants the same thing—fast-growing, high-yield plants that deliver juicy fruits early and abundantly.

The good news? You don’t need a greenhouse or fancy fertilizers to make it happen. With a few smart growing techniques, the right soil balance, and timely care, you can enjoy basketfuls of homegrown tomatoes weeks earlier than most gardeners.

This complete guide breaks down how to grow high-yield tomatoes at home, using simple, science-backed tips tailored for the American home gardener—from seed selection to harvest.


1. Start With the Right Tomato Varieties

Not all tomatoes grow the same. To ensure fast growth and early harvest, choosing the right variety is crucial.

Best Quick-Growing & High-Yield Varieties for the U.S.:

  • Early Girl: One of America’s favorite early producers. Fruits ripen in just 50 days and deliver consistent harvests all summer.
  • Bush Early Wonder: Compact, perfect for containers and small gardens, with harvests in under 60 days.
  • Celebrity: Disease-resistant and high-yielding—a reliable choice for steady production.
  • Roma VF: Great for sauces, thick-skinned, and productive.
  • Sungold Cherry: Sweet, bite-sized fruits that appear early and keep coming.

Pro Tip: If you live in colder northern states, opt for “determinate” or “early maturing” types. Southern gardeners can go for “indeterminate” varieties that fruit continuously through warm months.


2. Choose the Perfect Spot: Sunlight Is Everything

Tomatoes are sun worshippers. To maximize yield and speed, they need 6–8 hours of direct sunlight daily.

Location Tips:

  • South-facing gardens or patios get the strongest sun exposure in the U.S.
  • If growing indoors or on balconies, use LED grow lights to supplement light.
  • Keep them away from large trees or fences that block sunlight.

Remember: More sunlight = faster growth and sweeter fruit.


3. Prepare Nutrient-Rich, Well-Drained Soil

Tomatoes are heavy feeders, meaning they need nutrient-dense soil to produce high yields. Start by enriching your soil with organic compost, worm castings, and bone meal.

Ideal Soil Mix:

  • 40% garden soil
  • 40% organic compost
  • 20% perlite or coco peat (for drainage)

Soil pH: Keep it between 6.0 and 6.8—slightly acidic conditions help tomatoes absorb nutrients efficiently.

If you’re growing in containers, choose 5-gallon pots or larger, as roots need space to spread deep and strong.


4. Seed Starting Secrets for Quick Growth

Starting tomatoes from seeds? A little care early on pays off later.

Germination Steps:

  1. Start seeds 6–8 weeks before your region’s last frost date.
  2. Sow seeds ¼ inch deep in seed trays filled with a light seed-starting mix.
  3. Keep trays in a warm spot (around 75–80°F).
  4. Cover with plastic wrap until sprouts appear (usually 5–10 days).

Once seedlings grow two sets of true leaves, transplant them into small pots to strengthen roots.

Bonus Tip: Brush your fingers gently over seedlings daily—this mimics outdoor wind and builds stronger stems.


5. Transplanting for Maximum Growth

When your seedlings reach 6–8 inches tall, it’s time to transplant them outdoors.

Timing:

Wait until nighttime temperatures stay above 55°F. Tomatoes hate cold weather.

How to Transplant:

  • Dig a deep hole—bury two-thirds of the plant (including part of the stem).
  • The buried stem will grow new roots, making your plant stronger and more productive.
  • Add a handful of compost and crushed eggshells to the hole for slow-release calcium.

Water immediately after transplanting to help the roots settle in.


6. Watering Wisely: The Key to Juicy Tomatoes

Tomatoes love moisture but hate soggy roots. Inconsistent watering is the top reason for problems like cracked fruit or blossom-end rot.

Watering Rules:

  • Water deeply, not frequently—about 1–1.5 inches per week.
  • Early morning watering is ideal.
  • Avoid overhead watering; use a drip irrigation system or water at the base.

Pro Tip: Mulch around your plants with straw or shredded leaves to lock in soil moisture and keep roots cool during hot summer days.


7. Feeding for Bigger Yields

For high-yield tomato gardening, consistent feeding makes all the difference.

Natural Fertilizer Routine:

  • At planting: Mix in compost and bone meal.
  • After 2 weeks: Feed with a balanced fertilizer (10-10-10).
  • During flowering: Switch to a potassium-rich fertilizer to boost fruiting.

Organic boosters: Fish emulsion, compost tea, and banana peel fertilizer are excellent natural choices that improve flavor and yield.

Avoid high-nitrogen fertilizers—they promote leafy growth but delay fruit production.


8. Pruning and Support: Help Your Tomatoes Reach for the Sky

Pruning may sound optional, but it’s essential for early, abundant harvests.

Pruning Tips:

  • Remove the lower leaves that touch the soil—this prevents disease.
  • Pinch off suckers (small shoots between the main stem and leaf branch) to channel energy into fruiting.
  • Use stakes, cages, or trellises for vertical support. This keeps air circulating and prevents overcrowding.

A well-supported tomato plant is healthier, cleaner, and produces more fruit.


9. Pest and Disease Protection—Naturally

Even the healthiest tomato gardens attract pests. But with a few natural tricks, you can keep your plants safe without chemicals.

Common Tomato Pests in the U.S.:

  • Aphids: Spray with neem oil or insecticidal soap.
  • Hornworms: Handpick them early morning.
  • Whiteflies: Use sticky traps or introduce beneficial insects like ladybugs.

Disease Prevention Tips:

  • Rotate crops yearly—don’t plant tomatoes in the same spot two years in a row.
  • Avoid watering leaves to prevent fungal infections.
  • Spray a homemade fungicide:
    • 1 tablespoon baking soda
    • 1 teaspoon mild soap
    • 1 gallon water

Spray every two weeks to keep powdery mildew and blight away.


10. Speed Up the Harvest—Early Fruiting Tricks

Want your tomatoes to ripen earlier than your neighbors’? Try these quick-growth hacks:

Pinch early flowers: For young plants, remove the first few blooms. This encourages stronger root and stem development before fruiting.
Boost warmth: Cover plants with black plastic mulch to warm the soil faster in early spring.
Epsom salt boost: Add 1 tablespoon Epsom salt per gallon of water every two weeks. Magnesium helps fruits mature faster and taste sweeter.
Prune wisely: Remove unnecessary leaves to let more sunlight reach developing fruits.

With these tricks, you can enjoy your first ripe tomatoes up to 3 weeks earlier than average.


11. Harvesting the Right Way

Timing your harvest perfectly ensures the best flavor and nutrition.

When to Pick:

  • Fruit is deep red (or orange/yellow for certain varieties).
  • Skin is glossy and firm but slightly soft to touch.
  • Green shoulders may still appear on some heirloom varieties—this is normal.

Gently twist the tomato from the vine or use scissors to avoid damaging the stem.

Storage Tip:
Keep ripe tomatoes at room temperature—not in the fridge—to preserve flavor and texture.


12. Extend the Season for Continuous Harvest

In many U.S. regions, you can extend your tomato season well beyond summer with a few smart strategies:

Greenhouse or hoop cover: Protects plants from early frost in northern states.
Container gardening: Move potted plants indoors during cold snaps.
Propagation: Take stem cuttings from healthy plants, root them in water, and replant for a late-season crop.

With proper care, you can enjoy homegrown tomatoes well into fall—or even year-round in southern states.


Conclusion: Turn Your Backyard into a Tomato Paradise

High-yield tomato gardening isn’t about luck—it’s about timing, technique, and consistency. By choosing the right varieties, feeding your soil, pruning wisely, and giving your plants the sunlight they crave, you’ll enjoy a bumper harvest of juicy, flavorful tomatoes faster than ever before.

Whether you’re growing on a sunny balcony in New York or a backyard plot in Texas, these quick-growth and early-harvest tips make it easy for any American gardener to turn simple tomato plants into a fruit-producing powerhouse.

So grab your gloves, pick your favorite seeds, and get ready to fill your kitchen with the sweet, homegrown taste of success—one tomato at a time.

Turn Plastic Bottles Into a 3-Story Hanging Strawberry Garden: A Genius DIY for Every American Home Grower

Turn Plastic Bottles Into a 3-Story Hanging Strawberry Garden: A Genius DIY for Every American Home Grower

Imagine stepping out onto your porch or balcony and plucking sun-ripened strawberries straight from a cascading vertical garden—no fancy tools, no expensive planters, and no backyard required. Sounds like a dream? With a few plastic bottles and some clever DIY know-how, you can create a 3-story hanging strawberry garden that looks stunning and produces fresh fruit all season long.

In today’s world, where sustainability and self-reliance matter more than ever, this project combines eco-friendly recycling with homegrown deliciousness. Whether you live in a suburban house or a city apartment, this vertical garden idea helps you save space, reduce plastic waste, and enjoy the sweet rewards of your own strawberry patch—all year long.

Let’s walk through how to turn everyday plastic bottles into a beautiful, functional strawberry tower that will make your garden the talk of the neighborhood.


1. Why Choose a Hanging Bottle Garden?

Before diving into the DIY steps, let’s understand why this project is a game-changer for home gardeners across America.

Space-Saving Design:
Perfect for small patios, balconies, or even indoor setups with sunlight access. Vertical gardening allows you to grow more in less space.

Eco-Friendly Solution:
You’ll be recycling plastic bottles that might otherwise end up in landfills. It’s sustainable, smart, and planet-friendly.

Low Maintenance:
Strawberries thrive in well-drained containers, and hanging bottles provide exactly that. Plus, watering is easy and efficient.

Affordable & Accessible:
Forget expensive planters or hydroponic systems. Everything you need is likely already at home or easy to find locally.

Year-Round Freshness:
With proper sunlight or grow lights, you can harvest juicy strawberries even during off-season months.

This simple yet effective method aligns with the American DIY spirit—creative, practical, and rewarding.


2. What You’ll Need

Before you start crafting your strawberry tower, gather these basic supplies:

Materials:

  • 9 large plastic bottles (2-liter soda bottles work best)
  • Twine, rope, or sturdy wire
  • A sharp utility knife or scissors
  • A hand drill or heated metal skewer (for drainage holes)
  • Potting mix (preferably rich in organic matter)
  • Strawberry seedlings (everbearing or day-neutral varieties work best)
  • Watering can or spray bottle
  • Optional: decorative paint or labels

Tools:

  • Measuring tape
  • Marker pen
  • Funnel for adding soil
  • Hooks or a rod for hanging

Pro Tip:
If you’re setting this up indoors or on an apartment balcony, consider using self-watering bottles or placing a small tray underneath to catch excess water.


3. Step-by-Step: How to Build Your 3-Story Strawberry Tower

This DIY is simple, fun, and takes less than two hours to assemble. Follow these steps to create your own vertical hanging strawberry garden:


Step 1: Cut and Prepare the Bottles

  • Clean each plastic bottle thoroughly.
  • Using your knife or scissors, cut a large rectangular opening along one side—this will be where your strawberry plants grow.
  • Near the bottom, drill or puncture 3–5 small holes for drainage.

You can leave the bottle caps on, but drill a tiny hole in each cap to allow slow water flow between layers.


Step 2: Create Hanging Points

  • Drill two small holes on opposite sides near the top of each bottle.
  • Thread rope or wire through these holes and knot them securely.
  • Make sure the length of rope between bottles is equal so your garden hangs evenly.

Step 3: Assemble the Layers

Now it’s time to create your 3-story tower:

  1. Start by hanging the first bottle from a sturdy hook or beam.
  2. Tie the next bottle directly below it, about 10–12 inches apart.
  3. Repeat until you have three layers.

You can hang multiple towers side-by-side for a fuller look—each with three or more levels.


Step 4: Fill with Soil and Plant

  • Add a thin layer of pebbles or coarse sand to the bottom of each bottle for better drainage.
  • Fill the rest with a nutrient-rich potting mix (ideally one that’s slightly acidic, around pH 5.5–6.5).
  • Using your fingers, create small holes in the soil and insert your strawberry seedlings gently.

Make sure the leaves are above the soil surface and the crown (the plant’s base) isn’t buried too deep.


Step 5: Water and Maintain

Water thoroughly until you see water dripping from the drainage holes. The moisture will naturally trickle down to the lower bottles—an efficient, gravity-fed irrigation system.

Maintenance Tips:

  • Water lightly every 1–2 days in warm weather.
  • Fertilize every two weeks with organic compost tea or diluted fish emulsion.
  • Remove any yellowing leaves or runners to promote healthy growth.

4. Choosing the Right Strawberry Varieties

For best results, choose everbearing or day-neutral strawberries. These varieties produce fruit continuously, making them perfect for hanging gardens.

Top U.S.-recommended types include:

  • Albion – Sweet, firm, and tolerant of heat.
  • Seascape – Ideal for containers and indoor growing.
  • Ozark Beauty – Reliable performer for beginners.
  • Tristar – Compact and heavy-yielding.

These cultivars adapt well to vertical setups and perform beautifully in most American climates.


5. Maximizing Sunlight and Temperature

Strawberries love 6–8 hours of sunlight daily. If you’re in a colder northern state, hang your bottles near a sunny window or use grow lights.

For southern regions, ensure your plants get morning sunlight and partial shade in the afternoon to prevent heat stress.

Ideal Temperature:

  • Between 60°F and 80°F for healthy growth.
  • Protect plants from frost with plastic sheeting or bring them indoors during winter.

6. Feeding and Pollination Tips

Even in containers, strawberries are hungry plants. Keep them thriving with consistent feeding.

Fertilizer Schedule:

  • Every 2–3 weeks: Apply a balanced liquid fertilizer (10-10-10).
  • Mid-season: Add a handful of compost to each bottle for a nutrient boost.

Pollination Tip:
If you’re growing indoors, gently shake or brush the flowers using a small paintbrush to mimic bee pollination. This ensures bigger, juicier berries!


7. Decorating and Personalizing Your Hanging Garden

Your vertical strawberry garden doesn’t just produce fruit—it can also be a stunning outdoor feature.

Here are a few design ideas:

  • Paint your bottles with pastel or metallic colors for a stylish, modern look.
  • Add plant labels using popsicle sticks or chalk tags.
  • Mix in companion plants like basil, mint, or marigolds to deter pests and attract pollinators.
  • Hang fairy lights around the tower for an enchanting evening display.

It’s not only functional—it’s decorative too, bringing color and life to any space.


8. Troubleshooting Common Issues

Even the best DIY gardeners encounter a few hiccups. Here’s how to handle them:

Yellow Leaves?
Likely caused by overwatering or poor drainage. Make sure your bottle holes aren’t clogged.

Pests like Aphids or Spider Mites?
Spray with a mild neem oil or soap-water solution weekly.

Small or Sour Berries?
Increase sunlight exposure and add potassium-rich fertilizer like banana peel compost.

Mold on Soil Surface?
Allow better air circulation and reduce watering frequency.


9. Harvesting Your Homegrown Strawberries

You’ll typically see your first harvest about 8–10 weeks after planting. Strawberries are ready to pick when:

  • They’re deep red in color.
  • The fruit feels slightly soft to touch.
  • The caps are green and fresh-looking.

Use scissors to snip berries gently, leaving a small stem attached. This helps them stay fresh longer.

Fresh-picked strawberries can last up to 5 days in the fridge—if you can resist eating them right away!


Conclusion: From Waste to Wonder—Your Sustainable Strawberry Tower

Turning plastic bottles into a 3-story hanging strawberry garden isn’t just a fun weekend project—it’s a small step toward sustainable living and homegrown abundance. You’re recycling waste, saving space, and cultivating food you can proudly serve to your family.

Whether you’re an urban gardener in New York or a homesteader in Texas, this clever DIY proves that anyone can grow delicious strawberries—anywhere.

So grab those empty bottles, gather your seedlings, and get started today. In just a few weeks, you’ll be enjoying the sweet, juicy taste of success—straight from your own eco-friendly strawberry tower.