How to Use Vinegar in the Garden Safely

How to Use Vinegar in the Garden Safely

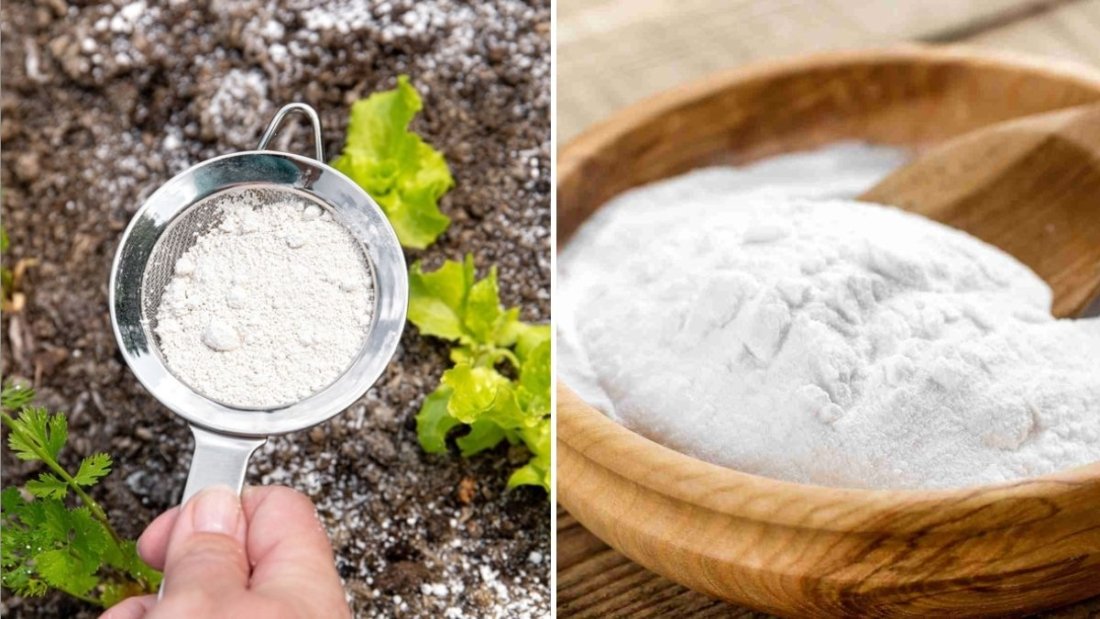
Vinegar, a staple in kitchens worldwide, is increasingly being recognized as a powerful, eco-friendly tool for gardeners. From controlling weeds to deterring pests and even adjusting soil pH, vinegar is versatile, inexpensive, and non-toxic when used correctly. However, because of its acidity, improper use can harm plants, soil health, and beneficial insects. Learning how to use vinegar in the garden safely ensures you get the maximum benefits without unintended damage.

This comprehensive guide will explore the safe uses, methods, concentrations, and precautions when incorporating vinegar into your gardening routine.


Understanding Vinegar’s Role in Gardening

Vinegar’s main active component is acetic acid, which gives it its characteristic acidity. Depending on its concentration, vinegar can:

  1. Act as a natural herbicide: High-concentration vinegar can kill weeds, especially young, tender ones.
  2. Control pests: Vinegar can deter some insects and pests when used carefully.
  3. Adjust soil pH: Diluted vinegar can slightly acidify alkaline soil for acid-loving plants.
  4. Clean tools and containers: Vinegar is an effective natural cleaner that reduces disease spread.

Key Point: Vinegar is non-selective—it can harm any plant it touches. Always apply carefully and sparingly.


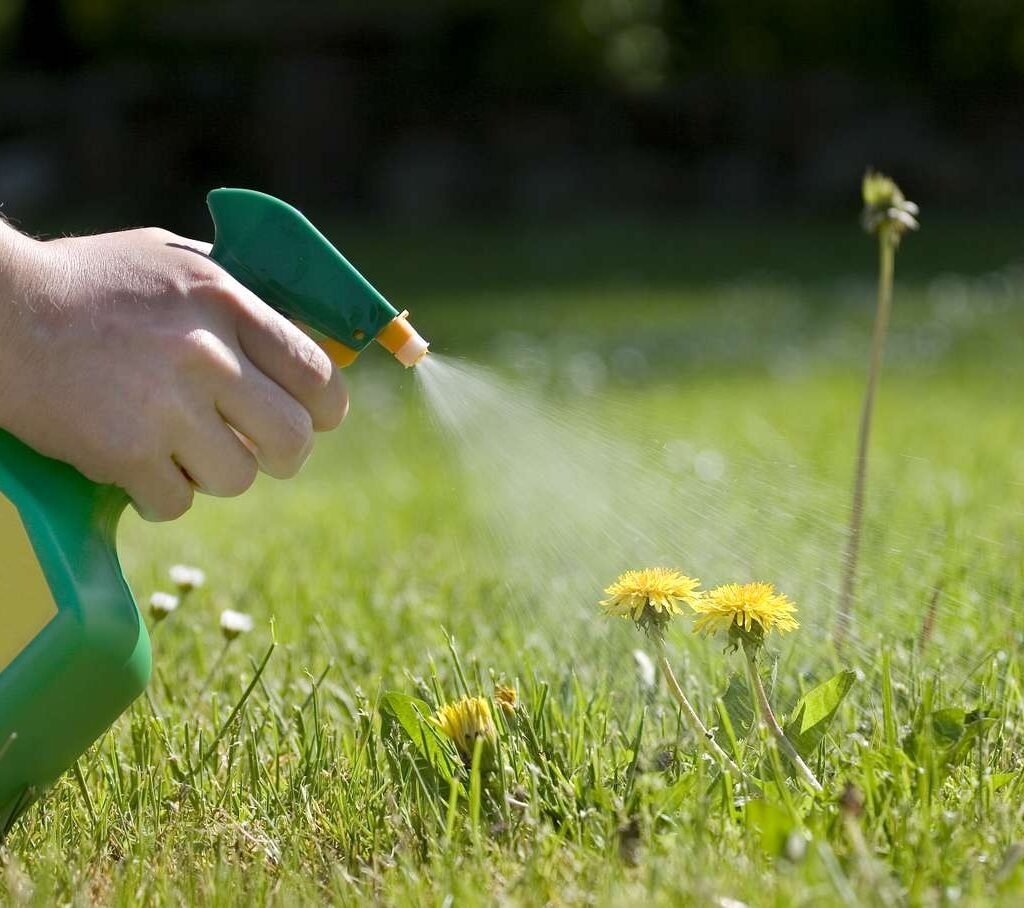
1. Using Vinegar as a Natural Weed Killer

Vinegar is often used as a non-toxic alternative to chemical herbicides, particularly for small weeds or cracks in driveways and pathways.

How to Apply:

  • Use household vinegar (5% acetic acid) for most weeds.
  • For tougher weeds, horticultural vinegar (20% acetic acid) may be used, but handle with extreme care.
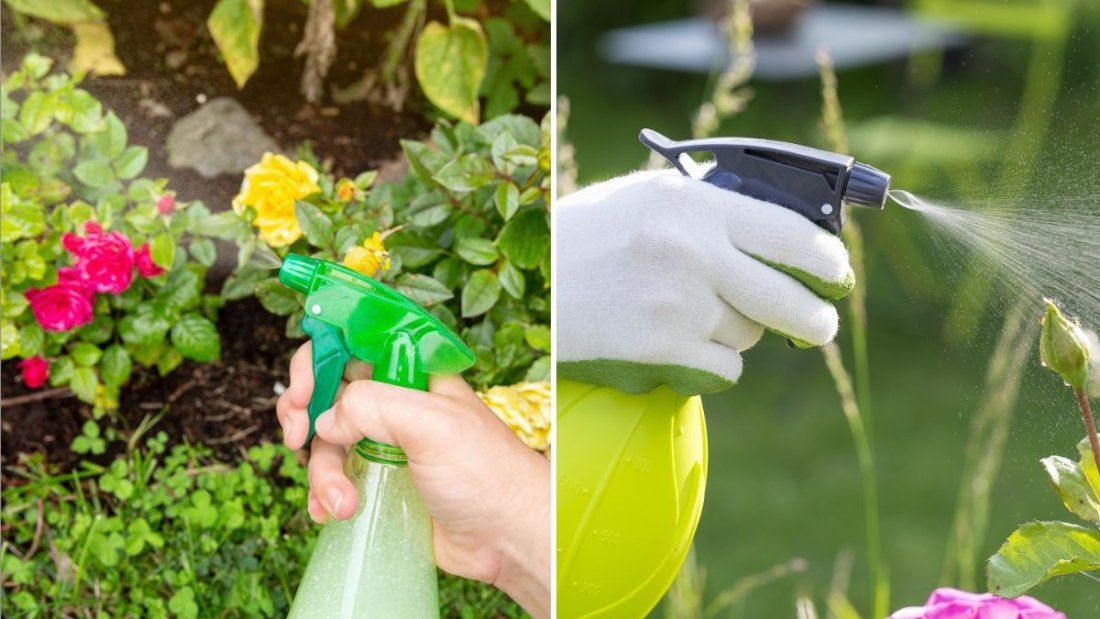
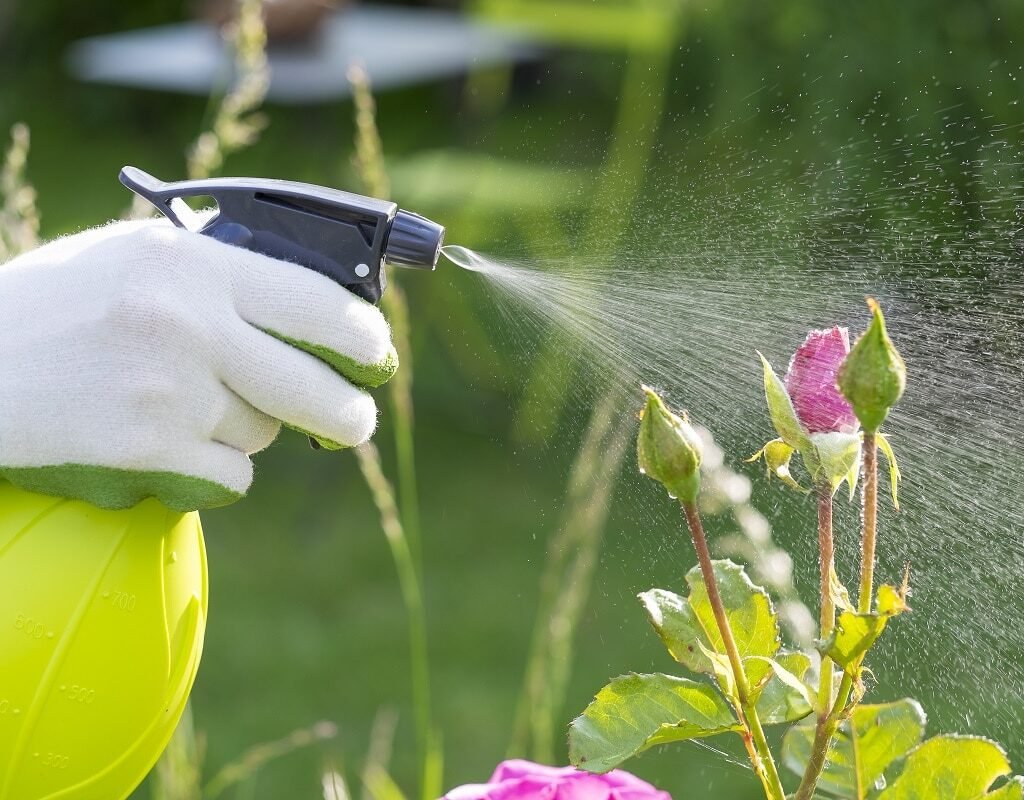
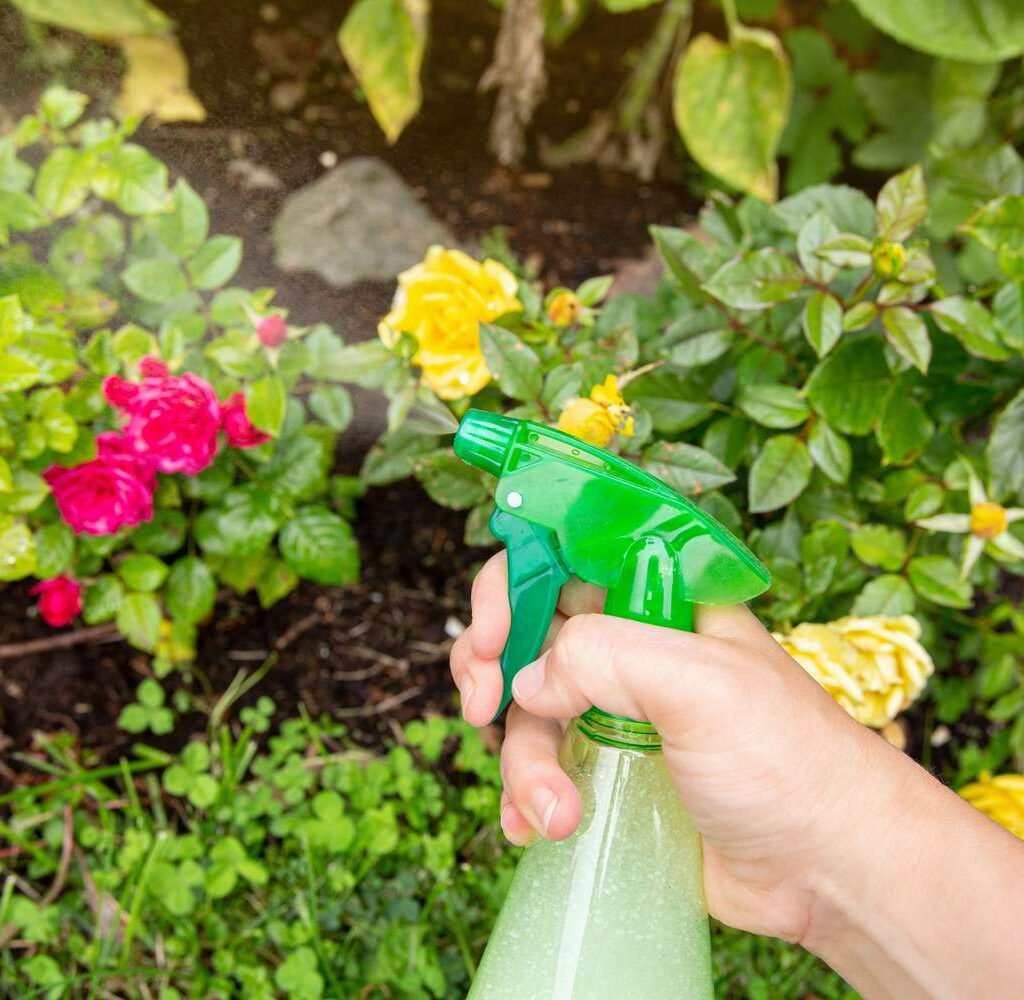
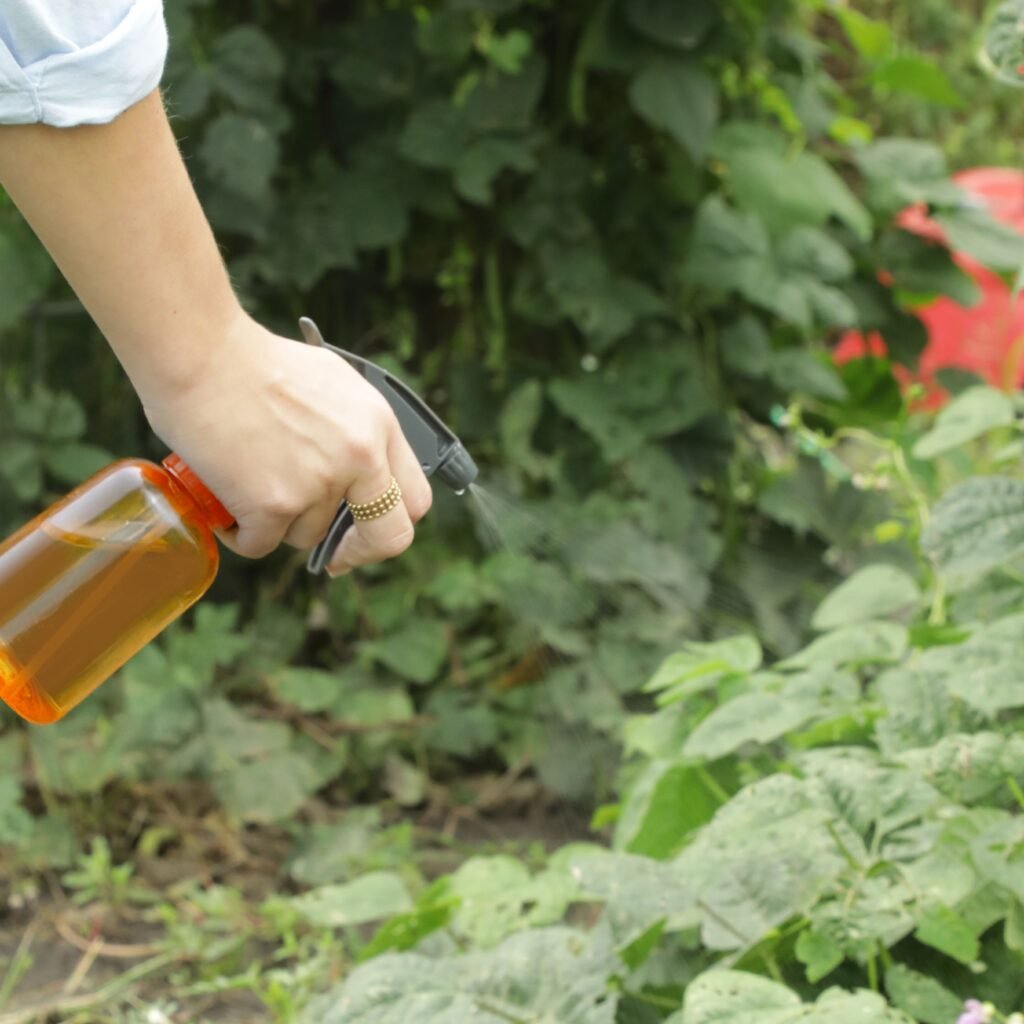
  • Apply directly to the leaves using a spray bottle, preferably on a sunny, dry day.
  • Avoid contact with desirable plants, as vinegar will damage them.

Tips:

  • Young weeds are easier to control than mature, established ones.
  • Multiple applications may be needed for stubborn weeds.
  • Test on a small area first to observe effects.

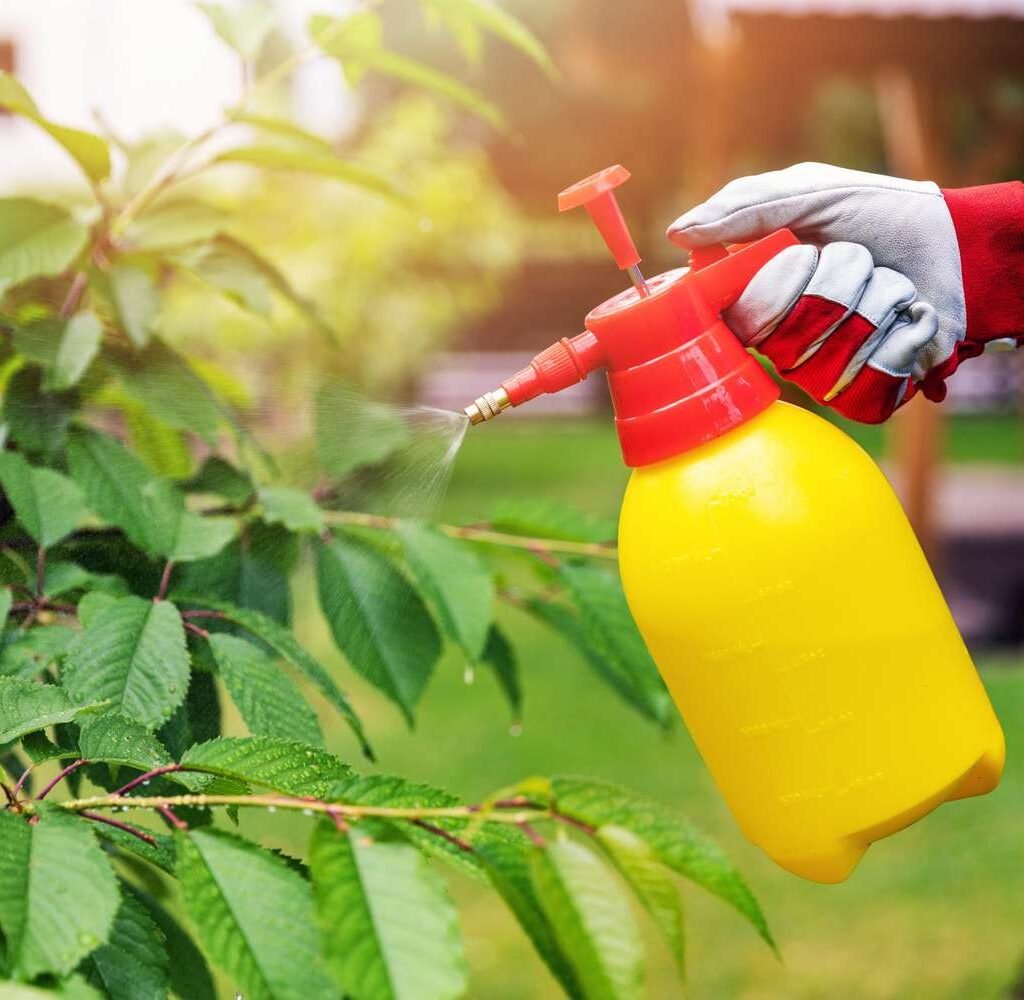
Safety Note: Wear gloves and eye protection, especially with high-concentration vinegar, to prevent irritation.


2. Using Vinegar to Deter Pests

While vinegar is not a full-proof pesticide, it can help repel certain garden pests like ants, slugs, and fruit flies.

Applications:

  • Ant Deterrent: Mix equal parts water and vinegar, and spray along ant trails or entry points.
  • Slug Barrier: Lightly sprinkle vinegar around affected areas, but avoid pouring directly on soil near plants.
  • Fruit Fly Trap: Combine vinegar with a few drops of dish soap in a small container to trap flies.

Tips:

  • Vinegar works best as a deterrent, not a permanent solution.
  • Avoid applying vinegar to beneficial insects or pollinators, as it may harm them.

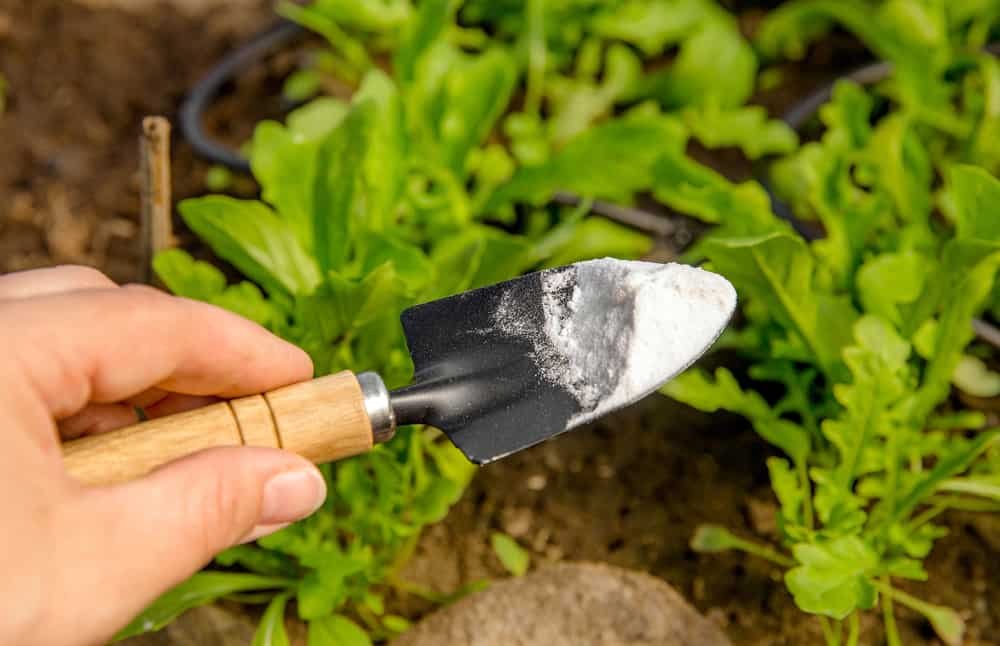
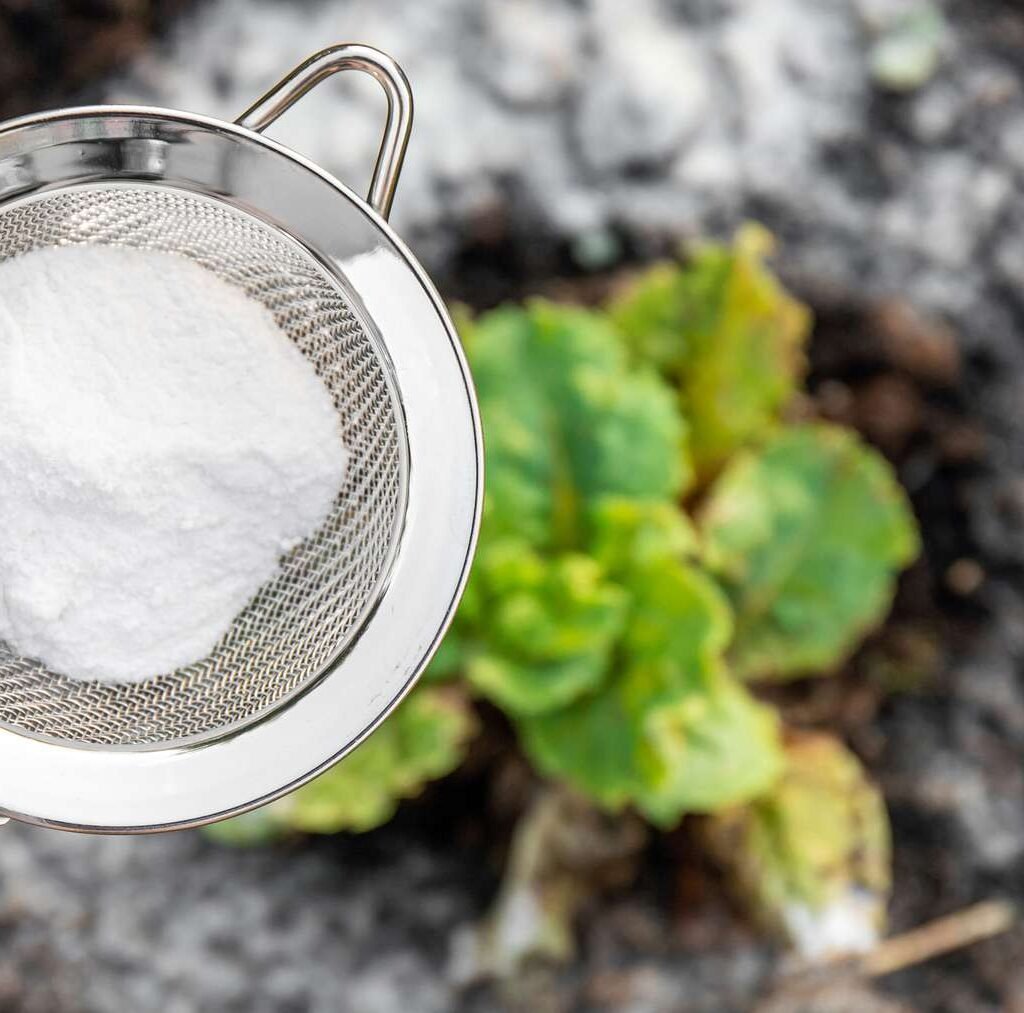
3. Adjusting Soil pH with Vinegar

Vinegar can be used to slightly acidify alkaline soils, which is useful for acid-loving plants like blueberries, azaleas, and hydrangeas.

How to Apply:

  • Dilute 1 tablespoon of vinegar in 1 gallon of water.
  • Water the soil around the base of the plant; do not pour directly onto leaves.
  • Use sparingly and only occasionally, as excessive use can disrupt soil microorganisms and harm plants.

Tips:

  • Test soil pH before using vinegar to ensure it is necessary.
  • Monitor plant health after application to avoid stress or damage.

4. Cleaning Garden Tools and Pots

Vinegar is an effective natural cleaner that removes rust, algae, and dirt, reducing the risk of disease spread.

How to Clean Tools:

  • Mix equal parts vinegar and water in a container.
  • Soak rusty or dirty tools for 10–15 minutes.
  • Scrub with a brush, rinse thoroughly, and dry.

How to Clean Pots:

  • Wipe plastic, clay, or ceramic pots with vinegar to remove residue and algae.
  • Rinse thoroughly to prevent acidity from harming new plants.

Tips:

  • Regular cleaning prevents cross-contamination of pathogens between plants.
  • Avoid prolonged soaking of metal tools to prevent corrosion.

5. Precautions for Safe Use

Vinegar is safe when used correctly, but its acidity can be harmful if misapplied. Follow these precautions:

  1. Avoid Direct Contact with Desirable Plants: Vinegar will damage leaves and stems on any plant.
  2. Use Dilutions: Household vinegar (5%) is usually safe for mild applications; avoid concentrated horticultural vinegar unless experienced.
  3. Protect Soil Life: Overuse can disrupt beneficial microorganisms in the soil.
  4. Wear Protective Gear: Gloves and eye protection are recommended when handling concentrated vinegar.
  5. Avoid Pollinators: Do not spray flowers visited by bees or butterflies, as vinegar can harm them.

6. Application Techniques for Maximum Safety

Spot Treatment

  • Apply vinegar with a small spray bottle or brush to target only weeds or problem areas.

Soil Application

  • Only use diluted vinegar (1 tablespoon per gallon of water) near acid-loving plants.
  • Water thoroughly after application to prevent excessive acidity.

Container Cleaning

  • Wipe down pots and tools; rinse thoroughly before reuse to prevent plant damage.

Tips:

  • Avoid spraying in windy conditions to prevent drift onto desired plants.
  • Apply on dry days for best results when using vinegar as a weed killer.

7. Vinegar Myths in Gardening

  1. “Vinegar will kill all weeds instantly.”
    • It works best on small, young weeds; larger, established weeds may require multiple treatments.
  2. “Vinegar is safe for all plants.”
    • Vinegar is non-selective; any plant it contacts may be damaged.
  3. “Vinegar permanently alters soil pH.”
    • When used in small amounts, vinegar only temporarily affects soil pH. Excessive use can harm soil life.

Tip: Use vinegar as part of an integrated gardening approach rather than a standalone solution.


8. Complementary Uses in the Garden

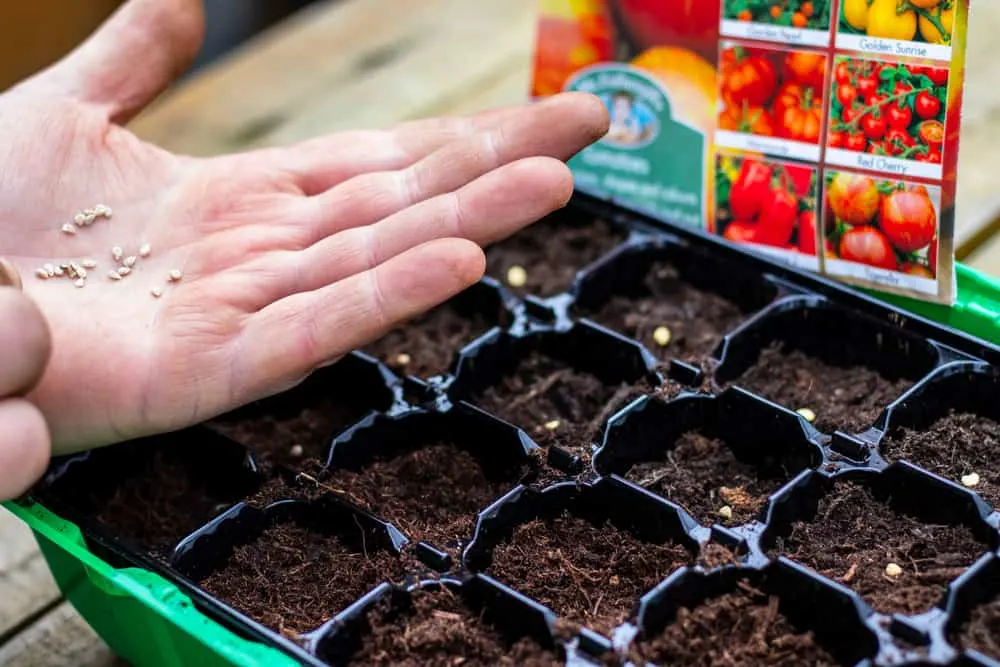
  • Seed Germination: Some gardeners soak seeds in diluted vinegar to reduce fungal growth, but only in very small concentrations.
  • Cleaning Garden Furniture: Vinegar can remove mold and mildew from outdoor furniture safely.
  • Weed Barrier Preparation: Apply diluted vinegar to areas before planting paths or borders to reduce weed growth.

9. Environmental and Cost Benefits

Using vinegar in the garden is:

  • Eco-Friendly: Non-toxic alternative to chemical herbicides and pesticides.
  • Affordable: Inexpensive and widely available.
  • Versatile: Cleans, deters pests, and adjusts soil chemistry safely when used correctly.

Tip: Vinegar complements organic gardening practices by reducing reliance on synthetic chemicals.


10. Final Thoughts

Vinegar is a powerful, multi-purpose tool for gardeners who want natural, low-cost solutions. When used correctly, it can:

  • Control weeds effectively
  • Deter certain pests
  • Slightly adjust soil pH for acid-loving plants
  • Clean tools and pots safely

The key is dilution, precision, and timing. Overuse or improper application can harm desirable plants and beneficial soil organisms. By following these guidelines, you can integrate vinegar safely into your gardening routine, making your garden healthier, more productive, and environmentally friendly.

Incorporating vinegar into your gardening toolkit allows you to manage weeds and pests naturally while reducing chemical dependence. With careful application and respect for its potency, vinegar becomes an eco-friendly ally in cultivating a thriving garden.

How to Water Your Plants the Right Way

How to Water Your Plants the Right Way

Watering may seem like the simplest task in gardening, but doing it correctly is one of the most crucial factors for plant health. Too little water stresses plants, stunting growth, while overwatering can lead to root rot and fungal diseases. Different plants have different needs, and factors such as soil type, weather, and container size all influence how much water is required. By mastering how to water your plants the right way, you can ensure lush growth, vibrant blooms, and a thriving garden.

This guide will walk you through the principles of effective watering, techniques, timing, and tips for both indoor and outdoor plants.


Why Proper Watering Matters

Water is essential for plants because it:

  1. Supports Photosynthesis: Water helps plants convert sunlight into energy.
  2. Transports Nutrients: Water dissolves nutrients in the soil and carries them to roots and leaves.
  3. Regulates Temperature: Evaporation from leaves cools plants in hot weather.
  4. Maintains Cell Structure: Adequate water keeps plants firm and upright.

Incorrect watering—either too much or too little—can cause:

  • Wilting or yellowing leaves
  • Leaf drop or slow growth
  • Root rot and fungal infections
  • Reduced flowering and fruiting

Step 1: Know Your Plants’ Water Needs

Different plants have varying water requirements:

Indoor Plants

  • Succulents & Cacti: Minimal watering; allow soil to dry completely between waterings.
  • Tropical Plants: Moderate to high moisture; prefer evenly moist soil but avoid soggy roots.
  • Flowering Houseplants: Often need consistent watering when the top 1–2 inches of soil dry out.

Outdoor Plants

  • Vegetables & Fruits: Need deep, regular watering to support roots and fruit development.
  • Annual Flowers: Require consistent moisture, especially during hot weather.
  • Perennials & Shrubs: Usually need less frequent watering once established.

Tip: Research each plant’s natural habitat for clues on water requirements. Desert plants need infrequent watering, while rainforest plants thrive in consistently moist soil.


Step 2: Check Soil Moisture Before Watering

Watering without checking soil moisture can lead to overwatering or underwatering.

Methods to Check Moisture:

  1. Finger Test: Insert your finger about 1–2 inches into the soil. If it feels dry, it’s time to water.
  2. Moisture Meter: Useful for precise measurements, especially in pots or indoor plants.
  3. Visual Cues: Wilting, dry soil surface, or soil pulling away from the edges of a container indicates a need for water.

Tip: Soil may look dry on the surface but still retain moisture below. Always check below the top inch of soil.


Step 3: Use the Right Watering Techniques

1. Deep Watering

Deep watering encourages strong root development. Shallow watering leads to weak, surface-level roots.

How to Deep Water:

  • Water slowly at the base of the plant until the soil is moist several inches deep.
  • For containers, water until excess drains from the bottom holes.
  • Avoid splashing water on leaves, especially for plants prone to fungal infections.

2. Watering at the Right Time

Timing affects water absorption and plant health.

  • Morning Watering: Best time for most plants. Water evaporates slower, allowing roots to absorb moisture before the heat of the day.
  • Evening Watering: Acceptable if temperatures are moderate, but avoid watering too late to prevent prolonged damp leaves overnight.
  • Midday Watering: Generally discouraged because water can evaporate quickly and may scorch leaves in direct sunlight.

3. Watering Frequency

Frequency depends on plant type, soil, and climate:

  • Sandy Soil: Drains quickly, requires more frequent watering.
  • Clay Soil: Retains water longer, less frequent watering needed.
  • Mulched Soil: Mulch reduces evaporation, lowering the watering frequency.

Tip: Monitor weather conditions; reduce watering after rainfall or during cooler temperatures.


Step 4: Use the Right Tools

The right tools make watering more efficient and precise:

  1. Watering Can: Ideal for indoor plants, small garden beds, and seedlings.
  2. Hose with Adjustable Nozzle: Useful for outdoor plants; adjustable flow allows gentle watering without washing away soil.
  3. Soaker Hose or Drip Irrigation: Perfect for vegetable gardens or flower beds; delivers water directly to the roots, reducing evaporation.
  4. Self-Watering Containers: Great for indoor plants and busy gardeners; maintain consistent moisture levels.

Tip: Avoid using high-pressure sprays directly on delicate seedlings or flowers, as they can damage leaves and roots.


Step 5: Mulching to Conserve Water

Mulching is an excellent way to retain soil moisture and reduce watering needs.

How to Mulch:

  • Apply a 2–3 inch layer of organic mulch (straw, wood chips, or shredded leaves) around the base of plants.
  • Keep mulch 1–2 inches away from the plant stem to prevent rot.

Benefits of Mulching:

  • Reduces evaporation
  • Keeps soil temperature stable
  • Suppresses weed growth
  • Protects roots from extreme weather

Step 6: Avoid Common Watering Mistakes

  1. Overwatering: Leads to root rot, yellow leaves, and mold growth.
  2. Underwatering: Causes wilting, leaf drop, and stunted growth.
  3. Watering Leaves Instead of Soil: Increases risk of fungal infections.
  4. Ignoring Seasonal Changes: Water less in cool, rainy periods; increase during hot, dry spells.
  5. Using Cold Water on Tropical Plants: Sudden temperature shock can stress roots; use room-temperature water when possible.

Step 7: Watering Tips for Specific Plants

  • Tomatoes: Water deeply at the base; avoid wetting leaves to prevent blight. Mulch around the base to retain moisture.
  • Herbs: Most herbs prefer slightly drier soil. Water when the top inch is dry.
  • Orchids: Water once a week; ensure good drainage and avoid standing water.
  • Indoor Tropical Plants: Maintain evenly moist soil; mist leaves for humidity.

Step 8: Smart Watering Strategies

  • Rainwater Harvesting: Use collected rainwater; it’s free of chemicals like chlorine or fluoride.
  • Self-Watering Planters: Ideal for busy gardeners or for maintaining moisture in indoor plants.
  • Drip Irrigation Systems: Deliver water directly to roots efficiently, conserving water and reducing weeds.
  • Grouping Plants: Place plants with similar water needs together for more efficient watering.

Step 9: Signs Your Plants Are Not Getting Enough Water

  • Wilting leaves or drooping stems
  • Leaf curl or browning edges
  • Dry, compacted soil
  • Slow growth or premature leaf drop

Tip: Early detection prevents permanent damage to your plants. Adjust watering habits as needed.


Step 10: Signs of Overwatering

  • Yellowing or mushy leaves
  • Mold or algae growth on soil surface
  • Foul odor from soil
  • Roots turning brown or rotting

Tip: If overwatering occurs, improve drainage, reduce watering frequency, and remove damaged leaves to encourage recovery.


Conclusion

Watering plants may seem simple, but doing it the right way is essential for healthy, thriving plants. Understanding your plant’s water needs, checking soil moisture, applying water deeply, choosing the right tools, and adjusting for seasonal changes are key steps to success.

By combining proper techniques, timing, and regular observation, you can avoid common pitfalls like overwatering or underwatering, ensuring your plants remain lush, vibrant, and productive. Remember, watering is not just about quantity—it’s about providing the right water, at the right place, at the right time.

With these tips, you can master the art of watering and watch your indoor and outdoor garden flourish all year round.

How to Grow Tomatoes from Seeds Like a Pro

How to Grow Tomatoes from Seeds Like a Pro

Growing tomatoes from seeds is one of the most rewarding gardening experiences. Not only does it allow you to cultivate a wide variety of flavors, colors, and sizes, but starting from seeds also gives you control over plant health and growth from the very beginning. While it may seem intimidating at first, with the right steps and techniques, you can grow robust, productive tomato plants like a seasoned gardener. This guide will walk you through how to grow tomatoes from seeds like a pro, covering seed selection, soil preparation, germination, transplanting, and care tips.


Step 1: Choose the Right Tomato Seeds

The first step to growing healthy tomatoes is selecting the right variety for your garden and climate.

Types of Tomato Seeds:

  1. Determinate (Bush) Varieties:
    • Grow to a fixed height and produce fruit all at once.
    • Ideal for container gardening or small spaces.
  2. Indeterminate (Vining) Varieties:
    • Continue growing and producing fruit throughout the season.
    • Require staking or trellising for support.
  3. Heirloom Varieties:
    • Open-pollinated seeds known for unique flavors and colors.
    • May require more care but reward gardeners with exceptional taste.
  4. Hybrid Varieties:
    • Bred for disease resistance, higher yields, and consistent growth.

Tips:

  • Consider your growing season: choose varieties that mature before the first frost if you have a short season.
  • Check disease resistance labels, particularly for common tomato diseases like blight or fusarium wilt.

Step 2: Prepare the Seed-Starting Containers and Soil

Healthy seedlings start with clean containers and nutrient-rich soil.

Containers:

  • Use seed trays, small pots, or even recycled containers with drainage holes.
  • Avoid deep pots initially; shallow containers allow seedlings to establish roots efficiently.

Soil:

  • Use a lightweight, well-draining seed-starting mix rather than garden soil.
  • Seed-starting mixes are typically sterile, reducing the risk of diseases.
  • You can also mix perlite or vermiculite to improve aeration and drainage.

Tips:

  • Clean containers with mild soap and water to prevent contamination.
  • Moisten the soil slightly before planting seeds to ensure consistent germination.

Step 3: Plant Tomato Seeds

Planting seeds correctly ensures strong, healthy seedlings.

Planting Steps:

  1. Fill containers with the pre-moistened seed-starting mix.
  2. Sow seeds about ¼ inch deep into the soil.
  3. Cover lightly with soil and gently press down.
  4. Water carefully using a spray bottle or fine mist to avoid displacing seeds.

Tips:

  • Plant 2–3 seeds per cell or container; thin to the strongest seedling after germination.
  • Label each container with the variety and planting date for easy tracking.

Step 4: Provide Optimal Conditions for Germination

Tomato seeds germinate best under specific conditions:

  • Temperature: 70–80°F (21–27°C)
  • Light: Bright, indirect sunlight for 12–16 hours daily. If indoors, use grow lights 2–3 inches above seedlings.
  • Moisture: Keep soil consistently moist but not soggy.
  • Humidity: Cover trays with a plastic dome or cling wrap to retain moisture until seeds sprout.

Germination Time:

  • Most tomato seeds sprout within 5–14 days depending on variety and temperature.

Tips:

  • Remove the cover once seedlings emerge to prevent damping-off disease.
  • Rotate seedlings daily to ensure even growth and prevent leaning.

Step 5: Care for Seedlings

Once seedlings have sprouted, proper care is critical for healthy development.

Sunlight:

  • Provide 12–16 hours of light per day; grow lights are ideal for indoor seedlings.
  • Avoid placing seedlings in direct, harsh sunlight initially, which can scorch tender leaves.

Watering:

  • Water at the soil level to avoid wetting leaves, which can promote fungal disease.
  • Allow the top inch of soil to dry slightly between waterings.

Fertilizing:

  • After 2–3 weeks, feed seedlings with a diluted, balanced liquid fertilizer.
  • Avoid over-fertilizing, which can cause weak, leggy growth.

Thinning Seedlings:

  • When seedlings have their first true leaves, thin by snipping weaker seedlings at the base.
  • Maintain the strongest seedling per container.

Tips:

  • Rotate seedlings to promote upright growth.
  • Provide gentle airflow with a small fan to strengthen stems and prevent disease.

Step 6: Transplanting Seedlings

After 5–7 weeks, seedlings are usually ready for hardening off and transplanting.

Hardening Off:

  • Gradually acclimate seedlings to outdoor conditions over 7–10 days.
  • Start with a few hours in a shaded spot and slowly increase sunlight and outdoor exposure.
  • Protect from wind, heavy rain, or frost during the transition.

Transplanting:

  • Choose a sunny location with at least 6–8 hours of direct sunlight.
  • Space plants 18–36 inches apart depending on variety.
  • Plant seedlings deeper than in their container, burying part of the stem; this encourages strong root development.
  • Water thoroughly after planting to reduce transplant shock.

Tips:

  • Mix compost or aged manure into the planting hole for extra nutrients.
  • Consider staking or caging plants at the time of transplant to support growth.

Step 7: Ongoing Care for Tomato Plants

Watering

  • Tomatoes require consistent moisture, especially during flowering and fruiting.
  • Water deeply at the base to encourage strong root development.
  • Avoid overhead watering to reduce disease risk.

Mulching

  • Apply organic mulch (straw, grass clippings, or shredded leaves) around the base.
  • Mulch helps retain soil moisture, suppress weeds, and regulate soil temperature.

Fertilizing

  • Use a balanced, slow-release fertilizer or compost tea every 2–3 weeks.
  • Reduce nitrogen once flowers appear to promote fruiting rather than excessive leafy growth.

Pruning and Support

  • For indeterminate varieties, remove suckers (side shoots) to focus energy on main stems and fruit production.
  • Use stakes, cages, or trellises to support heavy fruit-laden vines.

Pest and Disease Management

  • Monitor regularly for pests like aphids, tomato hornworms, or whiteflies.
  • Inspect leaves for signs of fungal or bacterial disease.
  • Use organic methods like neem oil, insecticidal soap, or companion planting to manage pests.

Step 8: Harvesting Tomatoes

Knowing when and how to harvest ensures maximum flavor and yield.

  • Color: Harvest when fruits reach full color, whether red, yellow, or orange, depending on the variety.
  • Firmness: Slightly firm tomatoes have the best shelf life; avoid picking overly soft fruit.
  • Timing: Harvest in the morning for the best flavor, after the dew has dried.

Tips:

  • Twist or gently cut fruit from the stem to avoid damaging the plant.
  • Regular harvesting encourages continuous fruit production for indeterminate varieties.

Common Mistakes to Avoid

  1. Starting Seeds Too Early or Late: Check your region’s last frost date to optimize timing.
  2. Overwatering or Underwatering: Both can harm seedlings and reduce fruit yield.
  3. Crowding Seedlings: Overcrowded seedlings become leggy and weak.
  4. Neglecting Sunlight: Tomatoes need at least 6–8 hours of direct sun daily.
  5. Ignoring Support Needs: Heavy fruits can break untrained vines.

Bonus Tips for Growing Like a Pro

  • Rotate tomato varieties each year to reduce soil-borne diseases.
  • Companion plant with basil, marigolds, or onions to repel pests naturally.
  • Save seeds from heirloom varieties for future planting and genetic diversity.
  • Mulch heavily to conserve moisture and reduce temperature fluctuations.
  • Keep a gardening journal to track planting dates, growth patterns, and yields.

Final Thoughts

Growing tomatoes from seeds is not only gratifying but also gives you full control over plant health, variety selection, and flavor. By carefully selecting seeds, providing optimal growing conditions, transplanting properly, and maintaining your plants, you can produce bountiful, flavorful tomatoes throughout the season.

From seed to harvest, every step matters: a little planning, patience, and consistent care can turn a tiny seed into a thriving tomato plant, producing juicy fruits for salads, sauces, and fresh eating. With these expert tips, you can confidently grow tomatoes from seeds like a pro, ensuring a garden that’s both productive and satisfying.


How to Make Compost at Home the Easy Way

How to Make Compost at Home the Easy Way

Composting is one of the most eco-friendly and cost-effective ways to enrich your garden soil while reducing household waste. By turning kitchen scraps, garden clippings, and other organic materials into nutrient-rich compost, you provide your plants with natural fertilizers that boost growth and soil health. The best part? You don’t need a large backyard, expensive equipment, or specialized knowledge to get started. This guide will show you how to make compost at home the easy way, with step-by-step instructions, tips for maintaining balance, and tricks to speed up the process.


Why Composting Matters

Composting benefits both your garden and the environment:

  1. Reduces Waste: Diverts kitchen and garden waste from landfills, reducing methane emissions.
  2. Improves Soil Quality: Adds essential nutrients, organic matter, and beneficial microorganisms to your soil.
  3. Enhances Plant Growth: Nutrient-rich compost promotes stronger roots, healthier plants, and more abundant blooms.
  4. Reduces Need for Chemical Fertilizers: Natural compost decreases dependence on synthetic fertilizers.

By composting at home, you create a sustainable cycle—organic waste becomes nourishment for your plants, reducing both waste and your gardening expenses.


Step 1: Choose a Composting Method

There are several ways to compost at home. Pick a method that suits your space, lifestyle, and waste production.

1. Traditional Compost Pile

  • Ideal for those with a backyard.
  • Create a pile in a corner of your garden.
  • Layer green and brown materials to maintain balance.

2. Compost Bin

  • Contained and tidy, perfect for small yards or urban gardens.
  • Bins can be purchased or DIY using wood, wire, or plastic containers.
  • Easier to control moisture and prevent pests.

3. Worm Composting (Vermicomposting)

  • Uses worms (usually red wigglers) to break down food waste.
  • Great for small indoor spaces or apartments.
  • Produces nutrient-dense compost, known as worm castings.

Tip: Start small. Even a small bin or container can produce enough compost for potted plants or a garden bed.


Step 2: Gather Compostable Materials

A successful compost needs a balance of green and brown materials.

Green Materials (Nitrogen-Rich)

  • Kitchen scraps: fruit peels, vegetable scraps, coffee grounds, tea bags.
  • Grass clippings, green garden trimmings.
  • Avoid meat, dairy, or oily foods—they can attract pests.

Brown Materials (Carbon-Rich)

  • Dry leaves, straw, hay, or shredded newspaper.
  • Cardboard pieces, paper towels (unbleached), and sawdust (untreated).

Balance Tip: Aim for roughly 2–3 parts brown to 1 part green. This ensures the compost heats up, decomposes efficiently, and avoids foul odors.


Step 3: Layer and Build Your Compost

Proper layering is key to fast decomposition and a healthy compost pile.

Layering Method:

  1. Start with a layer of coarse brown materials like twigs or straw at the bottom for drainage.
  2. Add a layer of green materials (kitchen scraps, grass clippings).
  3. Follow with another layer of brown materials.
  4. Repeat until your bin or pile is full.

Tip: Chop or shred larger materials for faster decomposition. Small pieces increase surface area, helping microorganisms break down materials efficiently.


Step 4: Maintain Moisture

Your compost should feel like a wrung-out sponge—moist but not soggy.

How to Maintain Moisture:

  • Sprinkle water lightly if the pile is dry.
  • Cover compost with a lid, tarp, or old carpet to retain moisture and heat.
  • If the pile is too wet, add more brown materials like dry leaves or cardboard to absorb excess moisture.

Tip: Regular moisture control prevents bad odors and keeps your compost healthy.


Step 5: Turn Your Compost

Turning your compost introduces oxygen, which accelerates decomposition and prevents anaerobic conditions that can cause foul smells.

How to Turn Compost:

  • Use a garden fork or compost aerator to mix materials every 1–2 weeks.
  • Turn the outer edges toward the center to mix older compost with fresh scraps.
  • Ensure green and brown layers are evenly distributed after turning.

Tip: Frequent turning speeds up the composting process, allowing you to harvest finished compost faster.


Step 6: Monitor Temperature

A well-maintained compost pile heats up as microorganisms break down materials.

Temperature Guidelines:

  • Optimal range: 120–160°F (49–71°C) for hot composting.
  • Cold composting: Slower method, may take 6–12 months but still produces nutrient-rich soil.

Tip: Hot composting kills most weed seeds and pathogens, while cold composting is easier for beginners with minimal effort.


Step 7: Harvest Your Compost

Compost is ready when it is dark, crumbly, and earthy-smelling.

How to Harvest:

  • Use a garden fork to remove finished compost from the bottom of the pile or bin.
  • Sift out large, undecomposed materials and return them to the pile for further decomposition.
  • Store finished compost in a covered container until ready to use.

Tip: Finished compost can be used as top dressing, soil amendment, or mixed into potting soil for houseplants.


Common Composting Mistakes to Avoid

  1. Overloading Green Materials: Too many wet scraps can make your compost slimy and smelly. Always maintain balance with browns.
  2. Ignoring Moisture Levels: Too dry, and decomposition slows; too wet, and the pile becomes anaerobic.
  3. Adding Non-Compostables: Meat, dairy, treated wood, or plastics can attract pests and harm the pile.
  4. Not Turning Regularly: Lack of oxygen slows decomposition and causes unpleasant odors.
  5. Using Contaminated Materials: Avoid plants treated with pesticides or chemicals that may harm soil health.

Benefits of Home Composting

  • Saves Money: Reduces the need for commercial fertilizers and soil conditioners.
  • Environmentally Friendly: Reduces landfill waste and greenhouse gas emissions.
  • Improves Plant Health: Nutrient-rich compost boosts growth, increases disease resistance, and enhances soil texture.
  • Educational: A hands-on way for kids and adults to learn about sustainability and the natural lifecycle of organic matter.

Quick Tips for Easy Home Composting

  • Start Small: A small bin or corner of the garden is enough to get started.
  • Chop Materials: Smaller pieces decompose faster.
  • Use Scraps Wisely: Avoid meat, dairy, and oily foods.
  • Keep Balance: 2–3 parts brown to 1 part green is ideal.
  • Turn and Moisturize: Aeration and moisture control are key to healthy compost.
  • Be Patient: Composting is a natural process; even cold composting produces amazing results over time.

Conclusion

Composting at home is easier than it seems and brings immense benefits for your garden, wallet, and the planet. By following the steps of choosing a method, gathering materials, layering, maintaining moisture, turning, monitoring temperature, and harvesting, anyone can produce nutrient-rich compost without stress.

Whether you’re a beginner or a seasoned gardener, home composting transforms everyday kitchen scraps and garden clippings into black gold that nourishes plants, improves soil health, and promotes sustainable living. With just a little effort, patience, and care, you can create a thriving compost system that enhances your garden’s productivity and beauty year-round.

Start today, and you’ll soon enjoy the satisfaction of turning waste into a resource—all from the comfort of your home.


How to Use Baking Soda in the Garden the Right Way

How to Use Baking Soda in the Garden the Right Way

Baking soda, or sodium bicarbonate, is a versatile household staple often celebrated for its cleaning, deodorizing, and cooking uses. However, its benefits extend far beyond the kitchen—it can be an eco-friendly, cost-effective tool in your garden as well. When used correctly, baking soda can improve plant health, control pests, and enhance soil quality. But like any gardening tool, using it improperly can harm your plants. This guide will walk you through how to use baking soda in the garden the right way, including tips, applications, and precautions for optimal results.


Why Baking Soda Works in the Garden

Baking soda is mildly alkaline, with a pH of around 8.3. This alkalinity makes it effective for:

  1. Fighting Fungal Diseases: Baking soda can inhibit the growth of fungi such as powdery mildew, which commonly affects roses, squash, cucumbers, and other garden plants.
  2. Pest Deterrent: Its texture and chemical properties can deter some pests when applied to soil or plant surfaces.
  3. Soil Balancing: When used in moderation, baking soda can slightly raise soil pH, which may be beneficial for acid-loving plants if carefully monitored.

Key Note: While baking soda has many uses, over-application can damage plants, particularly due to its alkalinity. Always follow recommended concentrations and application methods.


1. Preventing and Treating Powdery Mildew

Powdery mildew is a common fungal disease that creates white, powdery spots on leaves, stems, and flowers. Baking soda can help prevent or reduce its spread.

How to Apply:

  • Mix 1 tablespoon of baking soda with 1 gallon of water.
  • Optional: Add a few drops of mild liquid soap to help the solution stick to leaves.
  • Spray affected plants thoroughly, covering both the tops and undersides of leaves.
  • Apply every 7–10 days, especially during warm, humid conditions that favor fungal growth.

Tips:

  • Test on a small area first to ensure the solution doesn’t burn the leaves.
  • Apply in the early morning or late afternoon to avoid direct sun, which may intensify leaf burn.
  • Combine with good garden hygiene, such as removing infected leaves, to maximize effectiveness.

2. Controlling Garden Pests

Baking soda isn’t a pesticide in the traditional sense, but it can help deter some pests.

Applications:

  • Slugs and Snails: Sprinkle a light line of baking soda around plant bases to create a barrier. The texture and alkalinity can deter slugs and snails.
  • Ants: Baking soda mixed with sugar can act as a natural bait. The sugar attracts ants, and the baking soda disrupts their digestive system.

Tips:

  • Avoid direct application on tender leaves or seedlings, as baking soda can cause leaf burn.
  • Use sparingly—overuse may alter soil pH and affect plant growth.

3. Boosting Soil Health

Baking soda can slightly increase soil pH, which may be useful for gardens with acidic soil. However, it’s not a replacement for proper soil amendments and should be used with caution.

How to Apply:

  • Conduct a soil pH test before application.
  • Sprinkle a small amount of baking soda (1 teaspoon per square foot) and lightly work it into the topsoil.
  • Water thoroughly to help it integrate into the soil.

Tips:

  • Avoid applying baking soda to already alkaline soils, as it may raise the pH too much, leading to nutrient deficiencies.
  • Baking soda is best used as a temporary measure rather than a long-term soil amendment.

4. Cleaning Garden Tools and Pots

Baking soda is an excellent natural cleaner for garden tools, pots, and planters, helping to reduce disease spread.

How to Clean Tools:

  • Mix 3 tablespoons of baking soda with 1 quart of warm water.
  • Scrub pruning shears, trowels, and other tools to remove dirt, sap, and fungal spores.
  • Rinse thoroughly and dry before storing.

How to Clean Pots:

  • Sprinkle baking soda on plastic or clay pots and scrub with a damp brush to remove residue and algae.
  • Rinse thoroughly and allow to dry before reusing for planting.

Tips:

  • Regular cleaning prevents the transfer of pathogens between plants.
  • Use this method instead of harsh chemical cleaners for an eco-friendly approach.

5. Composting Benefits

Adding baking soda in moderation to your compost pile can balance acidity and help control odor.

How to Use:

  • Lightly sprinkle 1–2 tablespoons per cubic foot of compost.
  • Mix thoroughly to ensure even distribution.

Tips:

  • Do not overuse, as excess baking soda can make the compost too alkaline.
  • Use in combination with carbon-rich materials (leaves, straw) to maintain a balanced compost environment.

Precautions When Using Baking Soda

While baking soda is safe when used correctly, over-application can harm plants. Follow these precautions:

  1. Always Dilute: Never apply baking soda directly to leaves or soil without mixing with water.
  2. Test First: Try on a small portion of the plant to check for leaf burn or discoloration.
  3. Avoid Overuse: Excessive application can alter soil pH, which may lead to nutrient deficiencies.
  4. Consider Plant Sensitivity: Some plants are more sensitive to alkaline conditions, such as blueberries, azaleas, and rhododendrons. Avoid using baking soda on acid-loving plants.
  5. Reapply Cautiously: Repeat treatments sparingly and only as needed, particularly for fungal prevention.

Tips for Maximum Effectiveness

  • Timing: Apply fungal sprays early in the morning or late afternoon to reduce leaf burn risk.
  • Consistency: Regular, small treatments are better than large, infrequent applications.
  • Complementary Practices: Baking soda works best alongside proper spacing, good air circulation, and regular pruning.
  • Storage: Store baking soda in a dry, cool place to maintain effectiveness.

DIY Baking Soda Solutions for the Garden

Fungal Spray for Roses:

  • 1 tablespoon baking soda
  • 1 gallon water
  • 1 teaspoon mild liquid soap

Spray weekly for prevention and treatment of powdery mildew.

Slug Deterrent:

  • Light sprinkling around the base of plants
  • Combine with crushed eggshells for added effectiveness

Soil pH Adjustment:

  • 1 teaspoon baking soda per square foot
  • Lightly mix into topsoil and water thoroughly

Environmental Benefits

Using baking soda in the garden is eco-friendly and safer than many chemical alternatives:

  • Reduces the need for synthetic fungicides and pesticides.
  • Minimizes harmful runoff that can affect waterways.
  • Non-toxic for pets and wildlife when used properly.

Final Thoughts

Baking soda is a versatile, cost-effective tool that every gardener can incorporate safely into their routine. From preventing powdery mildew and deterring pests to gently balancing soil pH and cleaning tools, it has multiple benefits—but moderation and correct application are key.

By understanding how to use baking soda in the garden the right way, you can enhance plant health, support eco-friendly gardening, and maintain a thriving, beautiful garden without resorting to harsh chemicals. With proper care, this humble household staple can become an indispensable part of your gardening toolkit.

How to Start a Hydroponic Vegetable Garden at Home: A Complete Beginner’s Guide to Soil-Free Growing

How to Start a Hydroponic Vegetable Garden at Home: A Complete Beginner’s Guide to Soil-Free Growing

Imagine stepping into your kitchen and plucking fresh lettuce, spinach, or tomatoes — all grown without soil, without mess, and right inside your home. Sounds futuristic? It’s happening today, thanks to hydroponic gardening.

The YouTube video “Growing Hydroponic Vegetable Garden at Home – Easy for Beginners” has inspired thousands to embrace this efficient, space-saving, and eco-friendly way to grow food. Hydroponics is no longer just for commercial farmers or tech enthusiasts — anyone can start at home with just a few simple tools.

In this detailed guide, you’ll learn everything you need to know to grow a hydroponic vegetable garden from scratch — including setup, nutrients, lighting, and care tips — even if you’ve never gardened before.


What Is Hydroponic Gardening?

At its core, hydroponics means “working water.” It’s a technique of growing plants without soil, using a nutrient-rich water solution to deliver essential minerals directly to plant roots.

In traditional gardening, soil acts as a medium to hold nutrients and water, but in hydroponics, you bypass the soil altogether and feed plants exactly what they need. This leads to faster growth, higher yields, and healthier plants.

The six main types of hydroponic systems are:

  1. Deep Water Culture (DWC) – Roots are suspended in nutrient water.
  2. Nutrient Film Technique (NFT) – A thin film of nutrient water flows over the roots.
  3. Wick System – A passive system that uses wicks to draw nutrients to roots.
  4. Ebb and Flow (Flood and Drain) – Nutrients flood and drain cyclically.
  5. Drip System – Nutrients are dripped directly onto plant roots.
  6. Aeroponics – Roots hang in the air and are misted with nutrients.

For beginners, the Deep Water Culture and Wick System are easiest to set up at home.


Why Choose Hydroponics?

Hydroponic gardening isn’t just trendy — it’s practical, sustainable, and rewarding. Here are the top reasons to give it a try:

No Soil Needed: Perfect for apartment dwellers and city homes.
Saves Water: Uses up to 90% less water than traditional gardening.
No Weeds or Pests: Say goodbye to backbreaking weeding and harmful pesticides.
Faster Growth: Plants grow 30–50% faster with controlled nutrition.
Year-Round Growing: Grow your favorite veggies regardless of the season.
Compact & Clean: Ideal for kitchens, balconies, or rooftops.

Hydroponics gives you control — over nutrients, light, and temperature — making it possible to grow vegetables anywhere, anytime.


Step 1: Choose the Right Vegetables

As a beginner, start with easy-to-grow vegetables that thrive in hydroponic systems.

Best beginner-friendly hydroponic vegetables include:

  • Lettuce: Grows fast and needs little maintenance.
  • Spinach: Loves cool, moist conditions.
  • Kale: High in nutrients and ideal for beginners.
  • Tomatoes: Popular hydroponic choice with great yields.
  • Cucumbers: Fast-growing and highly productive.
  • Basil, Mint, and Coriander: Great for small spaces and quick harvests.

Start small — maybe with two or three crops — and expand as you gain confidence.


Step 2: Setting Up Your Hydroponic System

You can buy ready-made hydroponic kits online, or build your own with common household items.

Here’s a simple DIY setup for Deep Water Culture (DWC):

You’ll need:

  • A plastic tub or bucket (at least 6–8 inches deep).
  • Net pots or small plastic cups with holes.
  • A growing medium like coco peat, perlite, or clay pebbles.
  • A hydroponic nutrient solution.
  • Air pump and air stone (optional but recommended).
  • LED grow lights (if growing indoors).

How to set it up:

  1. Fill your container with nutrient solution, leaving 2 inches from the top.
  2. Place net pots in the lid so the bottom touches the water.
  3. Add growing medium and plant your seeds or seedlings.
  4. If using an air pump, connect it to keep the solution oxygenated.
  5. Place the setup in a sunny area or under LED grow lights for 10–12 hours daily.

That’s it! You’ve just built your first hydroponic garden.


Step 3: Understanding Nutrients — The Food for Your Plants

In hydroponics, since there’s no soil, plants rely entirely on the nutrient solution you provide.

A good hydroponic nutrient mix includes:

  • Macronutrients: Nitrogen (N), Phosphorus (P), Potassium (K).
  • Secondary Nutrients: Calcium, Magnesium, Sulfur.
  • Micronutrients: Iron, Zinc, Copper, Manganese, Boron.

You can buy pre-mixed hydroponic nutrient solutions for leafy greens, fruits, or herbs.

Pro tip: Maintain the nutrient solution’s pH between 5.5 and 6.5 for best absorption. You can check this using inexpensive pH strips or a digital pH meter.


Step 4: Lighting, Temperature, and Environment

Hydroponic plants thrive in a controlled environment.

Light:

  • Most vegetables need 10–12 hours of light daily.
  • If you don’t get enough sunlight, use full-spectrum LED grow lights.

Temperature:

  • Ideal range: 18°C–28°C (65°F–82°F).
  • Avoid placing systems in hot kitchens or near air conditioners.

Humidity:

  • Keep humidity between 40–60% for optimal growth.

Air Circulation:

  • Use a small fan if growing indoors to prevent fungal growth and strengthen stems.

Step 5: Planting and Germination

You can either sow seeds directly in the growing medium or start seedlings in a separate tray.

For direct sowing:

  1. Moisten the growing medium before planting.
  2. Sow 3–4 seeds per pot and cover lightly.
  3. Mist with water to keep moist until germination.
  4. Once seedlings appear, thin to 1–2 strong plants per pot.

For seedlings:
Start seeds in coco peat or rock wool cubes. Once they develop roots, transfer them into your hydroponic setup.


Step 6: Maintaining Your Hydroponic Garden

Hydroponic gardening is low-maintenance but requires consistency.

Daily:

  • Check water level and refill if necessary.
  • Observe plant leaves for any discoloration or curling (nutrient signs).

Weekly:

  • Replace nutrient solution every 7–10 days.
  • Clean your container to prevent algae or bacteria buildup.

Monthly:

  • Flush the system with clean water to remove salt accumulation.

Keep an eye out for root health — healthy roots should be white and firm, not brown or slimy.


Step 7: Harvesting Your Hydroponic Vegetables

The best part of hydroponic gardening is how fast you can harvest.

Approximate harvesting timelines:

  • Lettuce and spinach: 25–30 days.
  • Kale and herbs: 30–40 days.
  • Tomatoes and cucumbers: 50–70 days.

You can use the cut-and-come-again method for leafy greens — snip outer leaves and let inner ones continue growing. This way, you’ll have a continuous supply of fresh produce.


Step 8: Common Problems and Quick Fixes

Even with hydroponics, beginners may face a few challenges. Here’s how to troubleshoot:

ProblemLikely CauseSolution
Yellow LeavesNutrient deficiency or wrong pHAdjust nutrient mix and pH
Algae in TankToo much light on waterCover tank to block sunlight
Wilting PlantsLow oxygen or water levelAdd air pump / check roots
Slow GrowthLow light or cold temperatureIncrease light hours / warm environment

Most issues can be solved by checking water, light, and nutrients regularly.


Step 9: Expanding Your Hydroponic Setup

Once you master the basics, you can expand your garden to include:

  • Vertical Hydroponic Towers: Grow multiple crops in small spaces.
  • NFT Systems: Ideal for lettuce and herbs with continuous water flow.
  • Kratky Method: A passive, electricity-free hydroponic system perfect for beginners.

You can even automate nutrient delivery and lighting with smart controllers for a high-tech garden experience.


Step 10: Environmental and Health Benefits

Hydroponics is not just about convenience — it’s a sustainable solution for the future.

  • Water Conservation: Hydroponics uses 90% less water.
  • No Soil Degradation: Perfect for areas with poor soil.
  • Reduced Carbon Footprint: Grow food locally instead of importing.
  • Healthier Produce: Pesticide-free, clean, and nutrient-rich.

For urban households, hydroponics offers food security, freshness, and the joy of growing your own meals — even in limited space.


Step 11: Tips for Beginners to Succeed

Start Small: Begin with 2–3 plants before scaling up.
Keep Records: Track nutrient changes, pH levels, and growth times.
Monitor Light: Invest in a timer for consistent light cycles.
Harvest Smart: Regular harvesting encourages new growth.
Stay Clean: Wash hands and tools to prevent contamination.

With time and practice, you’ll develop your rhythm — soon, growing hydroponic vegetables will feel second nature.


Conclusion: From Beginner to Home Hydroponic Gardener

Hydroponic gardening is the perfect blend of science, sustainability, and satisfaction. Whether you’re short on space, tired of unpredictable soil conditions, or simply love the idea of growing your own food, this method opens endless possibilities.

By following the steps in “Growing Hydroponic Vegetable Garden at Home – Easy for Beginners,” you can set up a thriving soil-free garden right in your kitchen or balcony. With a little care, patience, and curiosity, you’ll soon enjoy crisp lettuce, fresh herbs, and juicy tomatoes — all grown with your own hands.

Hydroponics proves that you don’t need land to grow — just a little water, light, and love for plants.

How to Grow Coriander Without Soil: The Complete Guide to Hydroponic Dhaniya Cultivation at Home

How to Grow Coriander Without Soil: The Complete Guide to Hydroponic Dhaniya Cultivation at Home

Imagine having a constant supply of fresh, fragrant coriander (dhaniya) right in your kitchen — no messy soil, no garden space required, and no worries about pests or weeds. Sounds too good to be true? Thanks to hydroponics, it’s now easier than ever to grow coriander without soil, all year round.

The viral idea shared in the YouTube video “How to Grow Coriander Without Soil | Coriander (Dhaniya) in Hydroponic System” has inspired home gardeners everywhere to try this modern, efficient growing technique.

Hydroponic gardening isn’t just a trend — it’s the future of urban farming. By growing plants in nutrient-rich water instead of soil, you can achieve faster growth, higher yields, and cleaner produce. In this blog, we’ll explore exactly how to grow coriander in a hydroponic setup — from seed preparation to harvest — right at home.


Step 1: Understanding Hydroponics — The Science Behind Soil-Free Gardening

Hydroponics is a method of growing plants using a water-based nutrient solution instead of traditional soil. The plants get all their essential minerals directly from the water, which saves space, reduces disease, and boosts growth speed.

In this system, coriander roots are suspended in water and absorb nutrients efficiently, leading to lush, aromatic leaves.

Benefits of hydroponic coriander:

  • Grows 30–50% faster than in soil.
  • Requires 90% less water.
  • No risk of soil-borne pests or weeds.
  • Cleaner, healthier leaves.
  • Can be grown indoors, on balconies, or even in kitchens.

Once you understand the basics, you’ll see how simple and rewarding this technique really is.


Step 2: Setting Up a Simple Hydroponic System for Coriander

You don’t need an expensive or complicated setup to grow coriander hydroponically. A basic Deep Water Culture (DWC) or Wick System is perfect for beginners.

Here’s what you’ll need:

  1. Container or Tub:
    • A plastic box, bucket, or even an old storage bin works.
    • Choose one that’s about 6–8 inches deep.
  2. Net Pots or Small Plastic Cups:
    • These hold the plants above the water surface while letting roots hang into the nutrient solution.
  3. Growing Medium:
    • Instead of soil, use coco peat, perlite, clay pebbles, or rock wool to support the seedlings.
  4. Nutrient Solution:
    • Buy a hydroponic nutrient mix designed for leafy greens.
    • Alternatively, you can make a simple homemade solution (we’ll discuss below).
  5. Air Pump (Optional):
    • Helps oxygenate the water to keep roots healthy.
    • Especially useful for DWC systems.
  6. Light Source:
    • Place your setup near a sunny window or use LED grow lights for 8–10 hours daily.

Step 3: Preparing Coriander Seeds for Hydroponic Growth

Coriander seeds have a hard outer shell and often come as dual seeds joined together. To improve germination:

  1. Lightly Crush the Seeds:
    • Gently press them with a rolling pin or the back of a spoon to split them into halves.
  2. Soak Overnight:
    • Soak the seeds in room-temperature water for 8–12 hours.
    • This softens the shell and activates germination.
  3. Pre-Germinate (Optional):
    • Wrap soaked seeds in a damp cloth for 2–3 days until tiny roots start to appear.
    • Then, they’re ready for planting.

Step 4: Planting Coriander in the Hydroponic System

Once your seeds are ready, it’s time to sow them.

  1. Fill your net pots with the chosen growing medium (e.g., coco peat + perlite mix).
  2. Sprinkle 5–10 seeds per cup and cover lightly with the medium.
  3. Moisten the medium using a spray bottle of plain water.
  4. Place the pots into your hydroponic container so the bottom of each pot just touches the water.

In the first few days, keep the setup in a shaded or semi-lit area until seedlings appear. After germination, move it to a sunny spot or under grow lights.


Step 5: Creating the Nutrient Solution

The magic of hydroponics lies in its nutrient solution — this replaces the role of soil entirely.

You can either use a ready-made hydroponic nutrient mix (available online) or make your own DIY version:

DIY Basic Nutrient Solution for Coriander:

  • 1 teaspoon water-soluble fertilizer (NPK 19:19:19)
  • ½ teaspoon Epsom salt (for magnesium and sulfur)
  • 1 teaspoon calcium nitrate (for leaf growth)
  • Mix into 10 liters of clean water.

Always check the pH level — coriander prefers slightly acidic water with a pH of 6.0–6.5. Use a pH testing kit and adjust with lemon juice (to lower) or baking soda (to raise).


Step 6: Caring for Hydroponic Coriander

Once your coriander starts growing, maintenance is minimal but consistent care ensures maximum yield.

1. Lighting:

  • Provide at least 6–8 hours of sunlight daily or use a full-spectrum LED grow light.

2. Water Level:

  • Maintain a steady water level so the roots remain submerged but not drowning.
  • Refill the reservoir with fresh nutrient solution every 7–10 days.

3. Oxygenation:

  • If using an air pump, keep it running to avoid stagnant water.
  • Without a pump, gently stir the solution every few days to circulate oxygen.

4. Temperature:

  • Ideal range is 18°C–28°C (64°F–82°F).
  • Avoid placing the setup in direct heat or strong cold drafts.

Step 7: Managing Pests and Diseases Naturally

Hydroponic coriander faces far fewer problems than soil-grown plants, but prevention is still important.

Common Issues & Solutions:

  • Yellow Leaves: May indicate nutrient imbalance — replace the solution.
  • Fungus or Algae: Avoid direct sunlight on water and keep containers covered.
  • Aphids or Whiteflies: Spray neem oil (1 tbsp per liter of water) once a week.

Good airflow around plants keeps them strong and healthy.


Step 8: Harvesting Your Hydroponic Coriander

In about 25–30 days, your coriander will be lush and ready for harvesting.

Two methods to harvest:

  1. Cut-and-Come-Again Method:
    • Trim outer leaves when they’re 4–6 inches tall, leaving inner shoots to regrow.
    • Allows continuous harvest for up to 6–8 weeks.
  2. Full Harvest:
    • Pull out the entire plant when leaves are mature (around 40–45 days).
    • Clean roots and use them fresh or dry them for later use.

Fresh hydroponic coriander has a stronger aroma and cleaner taste than store-bought greens.


Step 9: Continuous Growing — A Year-Round Supply

The best part about hydroponic coriander? You can grow it continuously throughout the year.

After harvesting, simply:

  1. Rinse your system thoroughly.
  2. Refill with fresh nutrient solution.
  3. Plant new germinated seeds.

Because hydroponic systems are compact, you can stagger plantings every 10–15 days to maintain a steady supply — ensuring you’ll always have dhaniya for cooking and garnishing.


Step 10: Tips for Maximum Yield and Healthier Growth

To get the most out of your hydroponic coriander setup, follow these expert tips:

  • Choose Fresh Seeds: Older seeds have low germination rates.
  • Avoid Overcrowding: Space seeds evenly to prevent competition for nutrients.
  • Monitor Nutrient Strength: Too strong a solution can burn roots.
  • Keep it Clean: Rinse your containers weekly to prevent salt buildup.
  • Use Filtered or RO Water: Tap water with high chlorine can harm roots.

By fine-tuning these factors, your coriander will grow greener, fuller, and more aromatic with each cycle.


Step 11: Advantages of Growing Coriander Hydroponically

This modern gardening method offers many long-term benefits — both practical and environmental:

  1. Saves Water: Uses up to 90% less water than soil cultivation.
  2. Space-Efficient: Perfect for balconies, rooftops, or small apartments.
  3. Faster Growth: Plants grow 30–40% faster with balanced nutrition.
  4. Cleaner Produce: No soil, no dirt — ready to use straight after rinsing.
  5. Sustainable: Reusable systems mean less waste and fewer resources.

Hydroponics truly empowers anyone — from beginners to seasoned gardeners — to grow fresh herbs right at home.


Step 12: Expanding Your Hydroponic Garden

Once you’ve mastered coriander, you can easily expand your system to grow other herbs and leafy greens. Great companions include:

  • Mint (Pudina) – Thrives in similar nutrient conditions.
  • Spinach and Lettuce – Perfect for compact systems.
  • Basil and Parsley – Excellent for flavor and fragrance.

This turns your small hydroponic setup into a full-fledged kitchen herb garden — sustainable, stylish, and incredibly useful.


Conclusion: From Seeds to Success — Your Soil-Free Coriander Journey

Growing coriander without soil isn’t just a fun experiment — it’s a smart, sustainable way to enjoy fresh, chemical-free greens every day.

By setting up a simple hydroponic system, you take control of your food supply, save water, and make gardening accessible even in urban apartments. The method shared in “How to Grow Coriander Without Soil | Coriander Dhaniya in Hydroponic System” shows that innovation and nature can beautifully coexist.

So, start today. Gather a few seeds, a container, and a little curiosity — and you’ll soon have a thriving, aromatic coriander garden right at home. Once you taste your first batch of homegrown hydroponic dhaniya, you’ll never want store-bought again.


The Hanging Garden Secret: How to Grow Crisp Lettuce Without Watering (and Get High Yields All Year)

The Hanging Garden Secret: How to Grow Crisp Lettuce Without Watering (and Get High Yields All Year)

Imagine walking out to your balcony or backyard and picking fresh, crisp lettuce every single day — all without ever having to water the plants. Sounds impossible? That’s the magic behind the revolutionary “Hanging Garden Growing Lettuce Without Watering” method that’s taken YouTube and home gardening communities by storm.

This innovative approach not only saves time and water but also produces stunningly healthy and abundant lettuce crops. By combining clever design, soil science, and natural capillary action, gardeners are discovering how to grow lettuce in hanging systems that practically take care of themselves.

Whether you’re short on space, live in a dry region, or simply want to make your gardening routine more efficient, this no-water lettuce system can transform your gardening experience — and your salads.


Step 1: The Concept — How Can Lettuce Grow Without Watering?

At first glance, “growing lettuce without watering” sounds like a gardening myth. But the secret lies in self-watering hanging systems that create a controlled, moisture-retaining environment.

Here’s how it works:

  • The hanging garden uses a reservoir or moisture-retaining layer at the base.
  • A wicking mechanism — often fabric strips, cotton ropes, or coconut fibers — draws water upward through capillary action.
  • The plants take up only the moisture they need from below, eliminating both overwatering and drought stress.

This setup mimics the way nature hydrates plants after rain — from below the soil surface — leading to healthier roots and faster growth.

When combined with nutrient-rich, lightweight soil and the perfect hanging structure, the results are astonishing: lush, water-efficient, and continuous lettuce harvests.


Step 2: Choosing the Right Hanging Structure

The foundation of this system is the container or structure where your lettuce will grow. There are many designs you can try, depending on your available space and materials:

  • Hanging Buckets or Plastic Bottles: Recycled containers with drainage holes work perfectly.
  • Tiered Hanging Baskets: Great for balconies or patios, they maximize vertical space.
  • PVC Pipe Planters: A creative option for a “wall garden” effect — lightweight and easy to maintain.
  • Fabric Grow Bags or Vertical Garden Pockets: These naturally promote airflow and root health.

Ensure each container has:

  1. A water reservoir at the bottom.
  2. A wicking system (cotton rope or cloth strip) that connects the water base to the soil.
  3. Drainage holes or overflow points to prevent flooding.

The key is maintaining consistent moisture — not too dry, not too wet.


Step 3: Preparing the Perfect Soil Mix

Lettuce thrives in soft, airy, and nutrient-rich soil that holds moisture well. Since the goal is to grow without frequent watering, your soil mix should retain water without compacting.

Here’s an ideal self-hydrating mix:

  • 40% Coco peat or peat moss (for water retention)
  • 30% Compost or organic manure (for nutrients)
  • 20% Perlite or sand (for drainage and aeration)
  • 10% Vermicompost or leaf mold (for slow-release nutrition)

You can also add a handful of wood ash or bone meal to enhance calcium and potassium levels, both crucial for strong, crisp lettuce leaves.


Step 4: Selecting the Best Lettuce Varieties for Hanging Gardens

Not all lettuce types grow equally well in hanging setups. For the best results, choose loose-leaf or compact varieties that don’t need deep root systems.

Some excellent choices include:

  • Butterhead (Boston or Bibb) – Tender and sweet, grows quickly.
  • Loose Leaf (Oakleaf or Black Seeded Simpson) – Ideal for cut-and-come-again harvesting.
  • Romaine (Little Gem) – Sturdy, vertical leaves that fit compact systems.
  • Lollo Rosso or Red Leaf Lettuce – Adds vibrant color to your garden and salads.

Try mixing different varieties in the same container for a colorful, nutrient-rich mini salad garden.


Step 5: Setting Up the Self-Watering System

This step is where the “no watering” magic happens.

Follow these steps to build your hanging self-watering lettuce garden:

  1. Prepare the container:
    • Drill small drainage holes near the bottom edge for overflow.
    • Create a water reservoir below the soil (about 2–3 inches deep).
  2. Insert wicks:
    • Use cotton ropes or strips of old cloth.
    • Thread them through the bottom holes so that one end sits in the water reservoir and the other extends into the soil.
  3. Add the soil mix:
    • Fill the container with your prepared soil, pressing gently around the wicks to ensure good contact.
  4. Plant lettuce seeds or seedlings:
    • Sow seeds ½ inch deep and 2 inches apart.
    • Lightly cover them with soil.
  5. Fill the reservoir with water:
    • Once filled, your system will keep the soil evenly moist through wicking.

The beauty of this setup is that the plants take up moisture on demand, preventing both underwatering and rot.


Step 6: Light, Temperature, and Care

Lettuce is a cool-weather crop, but it grows well year-round in the right conditions — especially when hanging off the ground, where air circulation is better.

  • Light: Ensure 4–6 hours of indirect sunlight daily. Too much heat can cause bitterness.
  • Temperature: Ideal range is 10°C–25°C (50°F–77°F).
  • Fertilizing: Once every two weeks, feed with a diluted liquid compost tea or organic fertilizer.
  • Airflow: Hanging gardens naturally improve airflow, reducing mold and pest risk.

During hotter months, move the garden to partial shade or use a light mesh cover to protect delicate leaves.


Step 7: Maximizing Productivity — The High-Yield Secret

One reason this method is praised for “high productivity” is because of continuous harvesting and regrowth.

Here’s how to get endless lettuce:

  • Cut-and-Come-Again Method: Instead of uprooting, trim outer leaves when they’re 4–6 inches long.
  • Rotate Plants: Every few weeks, replant new seedlings to ensure a steady harvest.
  • Add Nutrients Regularly: After each harvest, sprinkle a thin layer of compost on top of the soil.

The wicking system keeps the roots active, allowing lettuce to regrow quickly and produce multiple harvests from a single planting.


Step 8: Natural Pest and Disease Management

Even though hanging gardens have fewer pest issues, you might occasionally spot aphids or fungus gnats.

Here are eco-friendly remedies:

  • Neem Oil Spray: 1 tablespoon neem oil + 1 liter water + a few drops of mild soap.
  • Garlic and Chili Spray: Natural insect repellent that’s safe for leafy crops.
  • Companion Herbs: Plant basil, mint, or marigold nearby to deter pests naturally.

Keep leaves dry and ensure air circulation between containers — this prevents fungal problems and keeps your lettuce fresh.


Step 9: Water Management — The Self-Regulating System

The beauty of this method is that it saves up to 90% of water compared to traditional soil gardening.

  • You only need to refill the reservoir once every 7–10 days, depending on climate.
  • Rainwater can be collected directly if your setup is outdoors.
  • Evaporation is minimal since the soil surface stays shaded by the plants.

This self-sustaining design makes it perfect for urban gardeners, busy professionals, or regions with water scarcity.


Step 10: Harvesting and Enjoying Your Lettuce

Within 25–40 days, your hanging garden will be ready for its first harvest.

  • Use clean scissors to snip the outer leaves.
  • Avoid cutting the central growing point if you want regrowth.
  • Rinse leaves gently in cool water and store in the refrigerator for up to a week.

Freshly harvested lettuce has a crisp texture and natural sweetness that store-bought greens simply can’t match.


Step 11: Expanding the Concept — More Than Just Lettuce

Once you master lettuce, this hanging, self-watering technique can be applied to other crops too:

  • Spinach and Kale: Similar moisture needs, thrive in hanging planters.
  • Strawberries: Perfect for vertical gardens with wicking systems.
  • Herbs: Basil, parsley, and coriander flourish in these self-watering containers.

You can create a full vertical “living kitchen wall” that provides fresh greens year-round.


Step 12: The Benefits — Why This Method Is a Game-Changer

Growing lettuce without watering might sound like a novelty, but it offers powerful practical advantages:

  • Saves water — ideal for sustainable gardening.
  • Low maintenance — perfect for busy lifestyles.
  • Space-efficient — great for balconies and small apartments.
  • Fewer pests and diseases — plants are elevated and better ventilated.
  • Consistent yields — plants receive steady moisture and nutrients.

It’s an elegant blend of science, creativity, and sustainability — and proof that gardening doesn’t need to be complicated to be rewarding.


Conclusion: Redefining Smart Gardening

The “Hanging Garden Growing Lettuce Without Watering” technique represents the future of home gardening — sustainable, space-saving, and self-sufficient.

With a simple combination of wicking systems, smart soil mixes, and thoughtful design, anyone can grow fresh, nutritious lettuce right at home — no daily watering, no wasted effort, and no dependency on the weather.

So if you’ve ever thought gardening was too time-consuming or messy, this is your sign to start small. Hang up a few containers, prepare your soil, and let nature (and gravity) do the rest.

In just a few weeks, you’ll be harvesting beautiful, crunchy lettuce — and you’ll never look at store-bought greens the same way again.

Grow Potatoes All Year Round: The Secret Method of Using Plastic Containers for Endless Harvests

Grow Potatoes All Year Round: The Secret Method of Using Plastic Containers for Endless Harvests

Imagine stepping into your balcony or backyard and harvesting fresh, homegrown potatoes any time of the year. No waiting for the right season, no need for large garden plots—just a few plastic containers, some soil, and a little know-how.

That’s the beauty of the method shared in the viral YouTube video “Using this method, You Can Grow Potatoes All Year Round. Growing Potatoes in Plastic Containers.” It’s changing how home gardeners approach potato cultivation.

Growing potatoes in containers is not only possible—it’s easy, space-efficient, and incredibly rewarding. This guide will walk you step-by-step through the process, from selecting the right containers to maintaining an endless cycle of potato harvests, ensuring you’ll never have to buy store-bought potatoes again.


Step 1: Why Choose Plastic Containers for Growing Potatoes?

Plastic containers offer several advantages that make them perfect for potato growing:

  • Portability: You can move them to follow the sun or protect them from rain and frost.
  • Temperature Control: Plastic retains warmth, which potatoes love, especially during cooler months.
  • Space Efficiency: Ideal for small balconies, terraces, or even indoor setups.
  • Reusable and Sustainable: Old buckets, tubs, or storage bins can be repurposed, reducing waste.

Choose sturdy plastic containers that are at least 12–18 inches deep and 14–20 inches wide. The deeper the container, the more space your potatoes have to form tubers underground.


Step 2: Preparing the Container for Optimal Growth

Proper preparation ensures that your potato plants thrive.

Follow these steps:

  1. Drill Drainage Holes: Potatoes hate soggy roots. Drill several small holes at the bottom for water drainage.
  2. Add a Base Layer: Place small stones or broken terracotta pieces at the bottom to improve aeration.
  3. Prepare the Soil Mix: The best mix for container-grown potatoes is light, loose, and rich in organic matter. Ideal soil mix:
    • 50% garden soil or compost
    • 25% coco peat or peat moss
    • 25% perlite or sand for drainage

Mix in a handful of wood ash or bone meal—this boosts potassium and phosphorus, essential for healthy tubers.


Step 3: Choosing and Preparing Seed Potatoes

The “secret” behind continuous potato growth lies in using high-quality seed potatoes—these are small tubers specifically grown for planting, not eating.

  • Buy certified disease-free seed potatoes from a reliable source.
  • A week before planting, place them in a bright area (not direct sun) to encourage chitting—the formation of small sprouts.
  • Once sprouts are about 1 inch long, they’re ready for planting.

You can also use sprouting potatoes from your kitchen, but remove any rotten or damaged parts before planting.


Step 4: Planting Potatoes the Right Way

Now comes the exciting part—getting your hands dirty!

  1. Fill the container with 4–6 inches of prepared soil mix.
  2. Place 2–3 seed potatoes, sprouts facing upward, spaced a few inches apart.
  3. Cover them with another 3–4 inches of soil.
  4. Water thoroughly but avoid overwatering.

As the plants grow, they’ll begin to form stems above the soil and tubers beneath it.


Step 5: The Secret Technique – “Hilling” for Bigger Harvests

One of the most important (and often overlooked) steps in container potato growing is hilling.

Hilling means gradually adding soil around the growing stems as the plants get taller. This encourages more tubers to form along the buried stems.

Here’s how to do it:

  • When your potato plants grow about 6–8 inches tall, gently add more soil around them until only the top leaves are visible.
  • Repeat this every 1–2 weeks until the soil reaches the top of the container.

By doing this, you maximize the number of potatoes that develop, turning a single container into a mini potato factory.


Step 6: Providing Light, Water, and Care

Potatoes are sun-hungry plants. To grow successfully all year:

  • Sunlight: Give them at least 6 hours of direct sunlight daily.
    • If growing indoors, use full-spectrum grow lights to replicate natural light.
  • Watering: Keep the soil consistently moist but never waterlogged.
    • Test by sticking your finger an inch into the soil—if it feels dry, water lightly.
  • Temperature: Potatoes prefer temperatures between 15°C–25°C (59°F–77°F).
    • In hot summers, move the containers to partial shade to prevent overheating.

To boost growth, feed the plants with a liquid compost tea or organic fertilizer every two weeks.


Step 7: Natural Pest and Disease Prevention

Even container-grown potatoes can face a few challenges. Here’s how to prevent them naturally:

  • Aphids and Mites: Spray a mix of neem oil and mild soap water weekly.
  • Fungal Issues: Ensure proper airflow and avoid watering the leaves.
  • Soil Rot: Always use fresh or sterilized soil for new plantings.

Adding companion plants like basil, marigold, or garlic nearby also helps deter pests naturally.


Step 8: Knowing When to Harvest

Timing your harvest is key to getting the best flavor and texture.

  • When the potato plants begin to flower, you can start gently digging for new potatoes (small, tender ones).
  • For full-sized potatoes, wait until the foliage turns yellow and starts to die back.

Simply tip the container over and sift through the soil to collect your golden treasures. Wash them gently, dry them in shade for a few hours, and store them in a cool, dark place.


Step 9: The Year-Round Cycle – Never Run Out of Potatoes

Here’s the real magic—continuous growing.

Instead of growing one big batch and waiting for the next season, you can stagger your plantings:

  1. Divide your containers into batches (e.g., 3–4 containers).
  2. Plant new seed potatoes every 4–6 weeks.
  3. As one batch matures, another will be in the growing stage.

This simple rotation ensures you always have fresh potatoes ready for harvest throughout the year.

For winter growing, move containers indoors near windows or under grow lights. In hot summers, keep them shaded during peak afternoon hours.


Step 10: Reusing Soil and Containers

After harvesting, don’t throw away the soil—recycle it wisely.

  • Mix in fresh compost or organic manure to restore nutrients.
  • Let the soil rest for a couple of weeks before planting the next batch.
  • Wash containers thoroughly and disinfect with mild vinegar water to prevent disease buildup.

This sustainable approach keeps your garden eco-friendly and productive for years.


Step 11: Creative Container Ideas

You don’t have to stick to traditional pots—many everyday items can be transformed into potato planters. Here are some clever ideas:

  • Old paint buckets or storage bins
  • Laundry baskets lined with jute or plastic
  • Reusable shopping bags or grow bags
  • Cut-off water barrels

Just remember: ensure proper drainage holes and good airflow.


Step 12: Troubleshooting Common Potato Problems

Even experienced growers face a few hiccups. Here’s how to handle them:

  • Yellowing Leaves: Could indicate overwatering or nutrient deficiency. Cut back on water and add compost tea.
  • Small Potatoes: Often due to lack of sunlight or insufficient hilling.
  • Rotten Tubers: Caused by poor drainage—improve soil aeration.
  • No Flowers: Not a major issue; some varieties produce little to no blooms but still yield well.

Consistency is key—once your plants settle into a rhythm, they’ll reward you generously.


Step 13: Health and Taste Benefits of Homegrown Potatoes

Growing your own potatoes isn’t just about convenience—it’s about quality. Store-bought potatoes are often treated with chemical sprout inhibitors, while your homegrown ones are 100% natural.

Benefits include:

  • Higher nutrient content, especially vitamin C and potassium.
  • Better taste and texture, since you harvest them fresh.
  • Freedom from pesticides and additives.
  • Zero waste—use only what you need.

Plus, the satisfaction of cooking with potatoes you nurtured yourself is unmatched.


Conclusion: The Power of the Plastic Container Garden

Who knew that something as simple as a plastic container could unlock an endless potato harvest?

By mastering this method—choosing the right containers, managing light, and rotating plantings—you can grow delicious, fresh potatoes 365 days a year.

This isn’t just gardening; it’s a small act of self-sufficiency and sustainability. Whether you live in a city apartment or a countryside home, your next potato patch can start today—with nothing more than a bucket, some soil, and a little patience.

So, roll up your sleeves, grab a container, and begin your journey to never buying potatoes again. The secret’s out—and it’s simpler than you think.

No Need to Buy Tomatoes Anymore: The Secret to Growing Juicy Tomatoes All Year Round

No Need to Buy Tomatoes Anymore: The Secret to Growing Juicy Tomatoes All Year Round

If you’ve ever plucked a sun-ripened tomato straight from your garden, you know the joy that comes with growing your own food. The vibrant color, the burst of flavor, and the satisfaction of knowing it came from your own hands—nothing compares. But what if you could enjoy that experience every single month of the year?

That’s exactly what many home gardeners are now discovering—a simple, smart method to grow tomatoes year-round, even without a sprawling backyard or perfect weather. Inspired by the viral idea shared in the YouTube video titled “No Need to Buy Tomatoes Anymore. I Discovered the Secret to Growing Tomatoes All Year Round,” this guide dives deep into how you can recreate this success yourself.

Whether you live in a sunny tropical climate or face cold winters, there’s a way to keep your tomato supply fresh, steady, and delicious—all from your home.


Step 1: Choosing the Right Tomato Variety

The first secret to year-round tomato growth is variety selection. Not all tomatoes are built for continuous production. Some thrive only during specific seasons, while others are perfect for container and indoor growing.

Here are some tried-and-true options that perform exceptionally well indoors or under controlled environments:

  • Cherry Tomatoes: Compact, fast-growing, and highly productive. Varieties like Tiny Tim and Sweet 100 are perfect for pots and balconies.
  • Roma (Plum) Tomatoes: Excellent for sauces and canning; they grow well in containers with enough sunlight.
  • Patio or Dwarf Varieties: Designed for limited spaces, these plants produce abundantly in small pots or grow bags.

When starting your year-round tomato journey, look for determinant or semi-determinate varieties—these are easier to manage in confined spaces and yield consistently.


Step 2: Setting Up Your Growing Space

The beauty of this “no-need-to-buy-tomatoes” method is its flexibility. You don’t need a garden bed—just creativity and the right setup.

Here are three popular growing options:

1. Container Gardening:

Use 12–15 inch deep containers or grow bags. Ensure they have proper drainage holes. Fill them with a well-aerated potting mix—a blend of compost, coco peat, and perlite is ideal.

2. Hydroponic System:

If you love tech-driven gardening, hydroponics is the future. Tomatoes grow faster in nutrient-rich water without soil, and you can control light and nutrition precisely.

3. Indoor Setup Near Windows or Under Grow Lights:

For colder climates, position your tomato plants near a south-facing window or use LED grow lights that provide full-spectrum light. Tomatoes need at least 8–10 hours of light daily to thrive and fruit continuously.


Step 3: Propagating Tomatoes the Smart Way

One of the biggest “secrets” revealed in the YouTube video is the propagation trick—you can grow new tomato plants from old ones, eliminating the need to buy new seedlings.

Here’s how it works:

  1. Cut a 6-inch stem from a healthy tomato plant.
  2. Remove the lower leaves, leaving only the top two or three.
  3. Place the cutting in water or directly into moist soil.
  4. Within a week, roots will begin to sprout.

This simple process lets you clone your healthiest plants and keep a continuous rotation growing all year. Once one plant begins to age or slow down in production, a new one can take its place.


Step 4: Maintaining Ideal Growing Conditions

Tomatoes are sun-loving plants, and while they’re adaptable, they need consistent conditions for continuous growth.

Here’s what to focus on:

  • Temperature: Tomatoes thrive between 20°C to 28°C (68°F–82°F). Avoid cold drafts or extreme heat indoors.
  • Humidity: Maintain around 50–70% humidity—too much can cause fungal issues, while too little affects fruiting.
  • Soil Moisture: Keep the soil evenly moist, but not soggy. Water deeply once every 2–3 days, adjusting based on the environment.
  • Fertilizer: Every two weeks, feed your plants with a balanced organic fertilizer rich in potassium and phosphorus for healthy flowering and fruiting.

A great DIY feed can be made using banana peel compost tea or eggshell powder, both excellent sources of natural nutrients.


Step 5: Pollination – The Hidden Key Indoors

When growing tomatoes indoors or in enclosed setups, pollination can be tricky because bees and wind aren’t around to do the job. Luckily, there are simple ways to mimic nature’s work:

  • Hand Pollination: Gently shake or tap the flowers to release pollen.
  • Electric Toothbrush Method: Touch a vibrating toothbrush to the base of each flower—it simulates a bee’s buzz and improves pollination rates.
  • Air Circulation: A small oscillating fan can help move pollen around and also prevent fungal growth.

This small daily habit ensures that your tomato plants continue to produce fruit even in the heart of winter.


Step 6: Pest and Disease Control Naturally

One concern about growing tomatoes indoors is pest management. Aphids, whiteflies, and fungus gnats can sometimes appear, especially in humid conditions.

Here are safe and effective natural remedies:

  • Neem Oil Spray: Mix 1 tablespoon neem oil, a few drops of dish soap, and a liter of water. Spray weekly to deter pests.
  • Garlic and Chili Spray: Acts as both an antifungal and insect repellent.
  • Companion Plants: Basil, marigold, or mint can be planted nearby—they repel many harmful insects naturally.

Keeping the leaves dry, ensuring good airflow, and cleaning fallen debris regularly will also minimize issues.


Step 7: Continuous Harvest and Regrowth

Now comes the most rewarding part—harvesting and replanting for continuous yield.

  • Harvest tomatoes when they’re fully colored but still firm. This encourages the plant to produce more fruit.
  • As older plants slow down, take stem cuttings to start a fresh batch.
  • Rotate your plants every few months to ensure constant supply.

With this rotation system, you’ll always have tomatoes in different stages—some flowering, some fruiting, and some just starting out.


Step 8: Bonus – Grow Tomatoes from Kitchen Scraps

Did you know you can start your tomato garden using just a slice of tomato?

Here’s a quick method that’s taken over the internet:

  1. Take a ripe tomato and cut it into thin slices.
  2. Lay them on moist potting soil in a tray.
  3. Cover lightly with more soil and keep it damp.
  4. Within a week, you’ll see tiny sprouts emerging!

Select the strongest seedlings and transfer them to pots. This zero-cost method ensures you’ll never run out of tomato plants again.


Step 9: Winter Tomato Growing Tips

If you live in a region with harsh winters, you can still keep your tomato production alive indoors:

  • Use grow tents or mini greenhouses with heat mats to maintain warmth.
  • Reduce watering frequency but maintain consistent lighting.
  • Choose cold-tolerant varieties like Glacier or Siberian tomatoes.

These small adjustments keep your plants thriving even when it’s snowing outside.


Step 10: The Joy and Benefits of Growing Your Own

Growing tomatoes year-round is more than just a gardening trick—it’s a lifestyle change. Here’s what you gain:

  • Fresh, chemical-free produce every day.
  • Savings—no need to buy expensive store-bought tomatoes.
  • Sustainability—you reduce packaging waste and your carbon footprint.
  • Emotional satisfaction—gardening is proven to lower stress and boost happiness.

Plus, once you master tomatoes, you can use the same principles to grow peppers, herbs, and leafy greens all year long.


Conclusion: Your Tomato Journey Starts Now

You don’t need acres of land, a greenhouse, or professional tools to enjoy homegrown tomatoes every day. All you need is curiosity, a few containers, and the right care routine.

The secret revealed in “No Need to Buy Tomatoes Anymore” isn’t a magic trick—it’s about understanding plant needs and creating a cycle of growth that never ends.

Start small, experiment, and soon your kitchen windowsill or balcony will become your personal tomato haven. Once you taste your first homegrown tomato in the middle of winter, you’ll realize—you truly never need to buy tomatoes again.