How To Tell If Your Tomatoes Are Getting Too Much Water

How To Tell If Your Tomatoes Are Getting Too Much Water

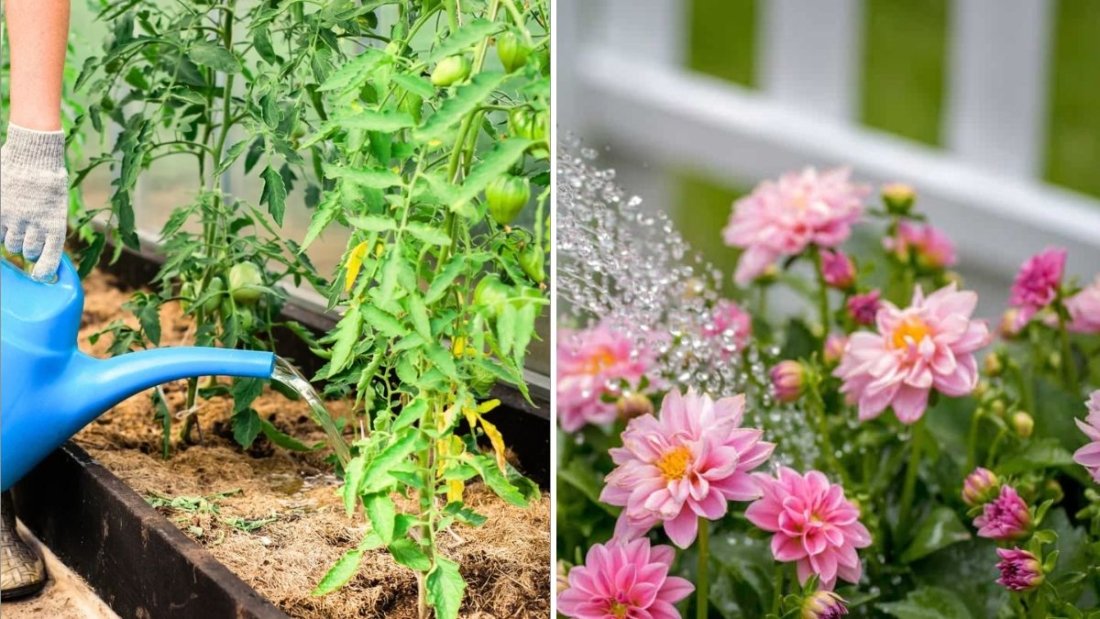
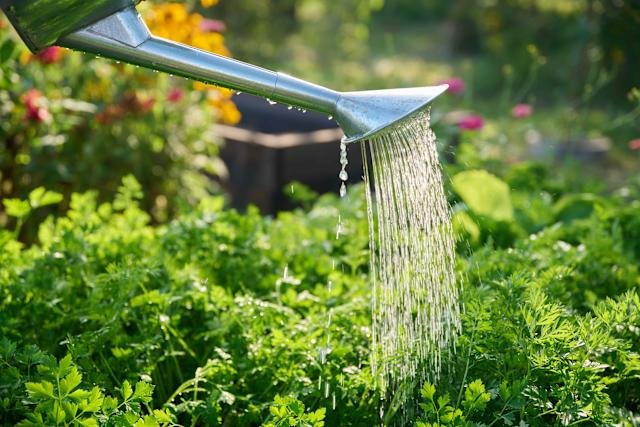
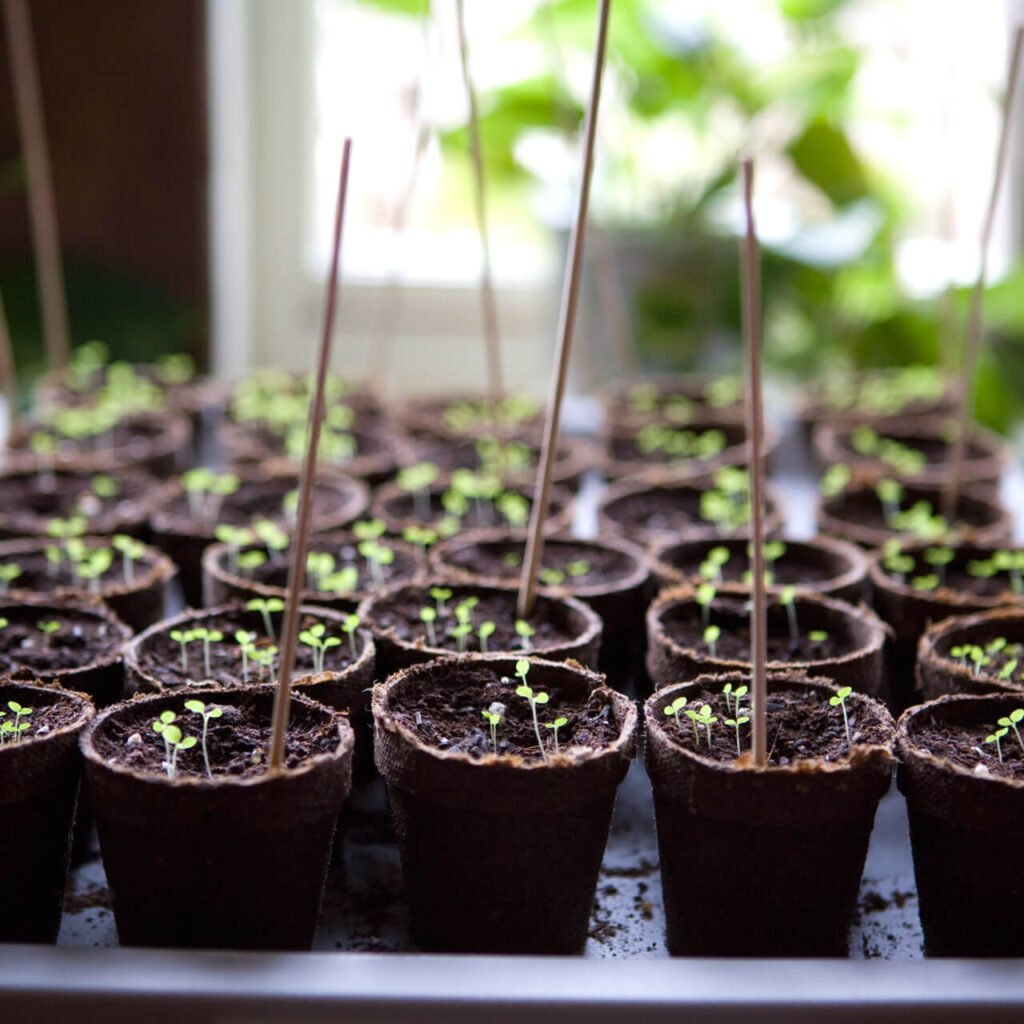
Tomatoes are one of the most rewarding crops to grow—lush green vines, clusters of fruit, and that first burst of flavor that only comes from homegrown produce. But even the healthiest tomato plant can suffer if you overwater it. While it might seem that more water equals faster growth, tomatoes are surprisingly sensitive to moisture levels. Too much water can drown their roots, invite disease, and ruin the flavor of the fruit you’ve worked so hard to grow.

This guide breaks down exactly how to tell if your tomatoes are getting too much water, what causes the problem, and how to fix it before your plants wilt beyond repair.


Why Overwatering Is a Common Tomato Problem

Tomatoes need a consistent water supply, but they also require oxygen in the soil. When the soil stays soggy, air pockets disappear, roots can’t breathe, and harmful bacteria thrive. Overwatering often happens when gardeners mistake wilted leaves for drought stress or forget that a rainy stretch counts toward a plant’s weekly water needs.

The right amount of water keeps the soil evenly moist—not soaked. A good rule of thumb is that tomato plants need 1 to 1.5 inches of water per week, including rainfall. But that number changes with soil type, container size, temperature, and humidity.


1. The Telltale Signs of Overwatered Tomatoes

If you suspect your tomatoes are drowning, look for these signs:

1.1 Wilting Despite Moist Soil

It’s easy to assume drooping leaves mean your plant is thirsty, but wilting can also happen when roots are waterlogged. Check the soil first—if it’s damp and the plant is still drooping, overwatering is likely the cause.

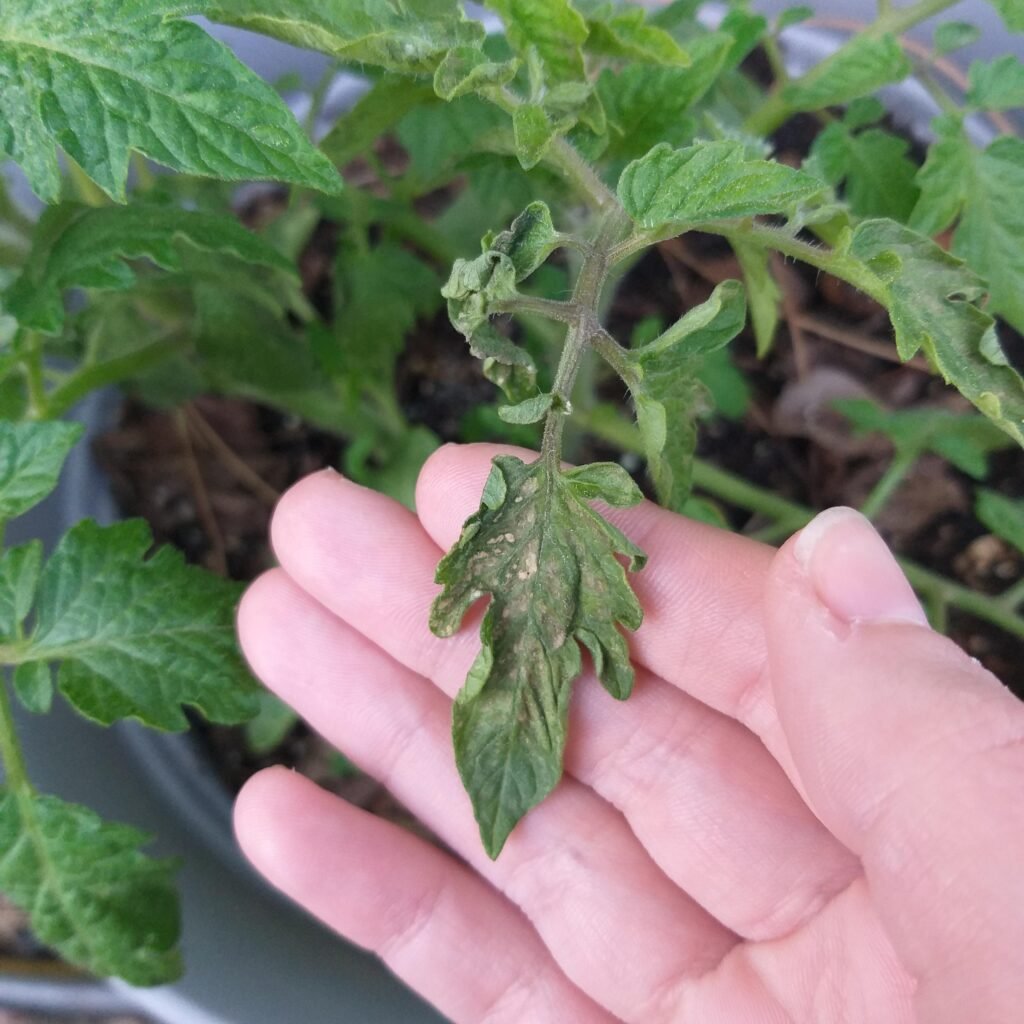
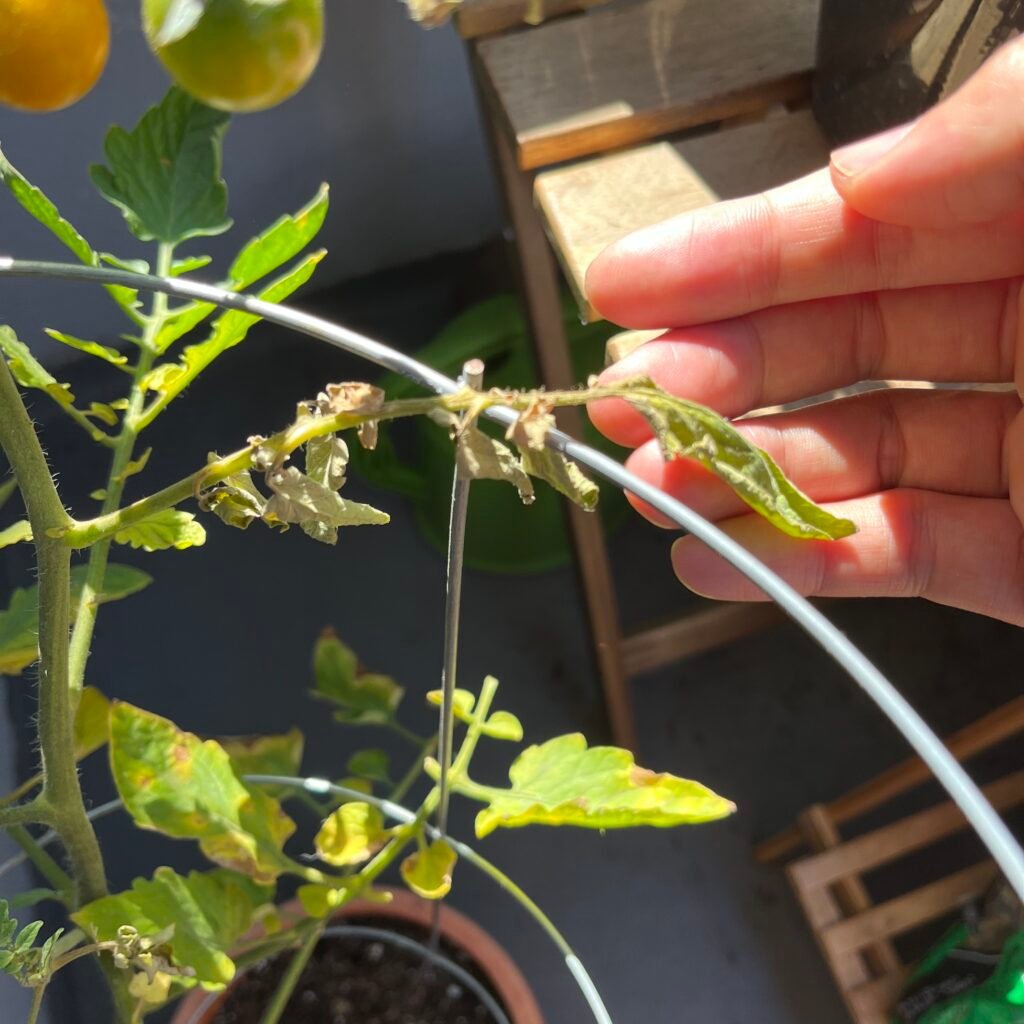
1.2 Yellowing Leaves

The lower leaves often turn pale green or yellow when the roots are struggling to absorb nutrients from saturated soil. The plant’s vascular system slows down, leaving foliage discolored and limp.

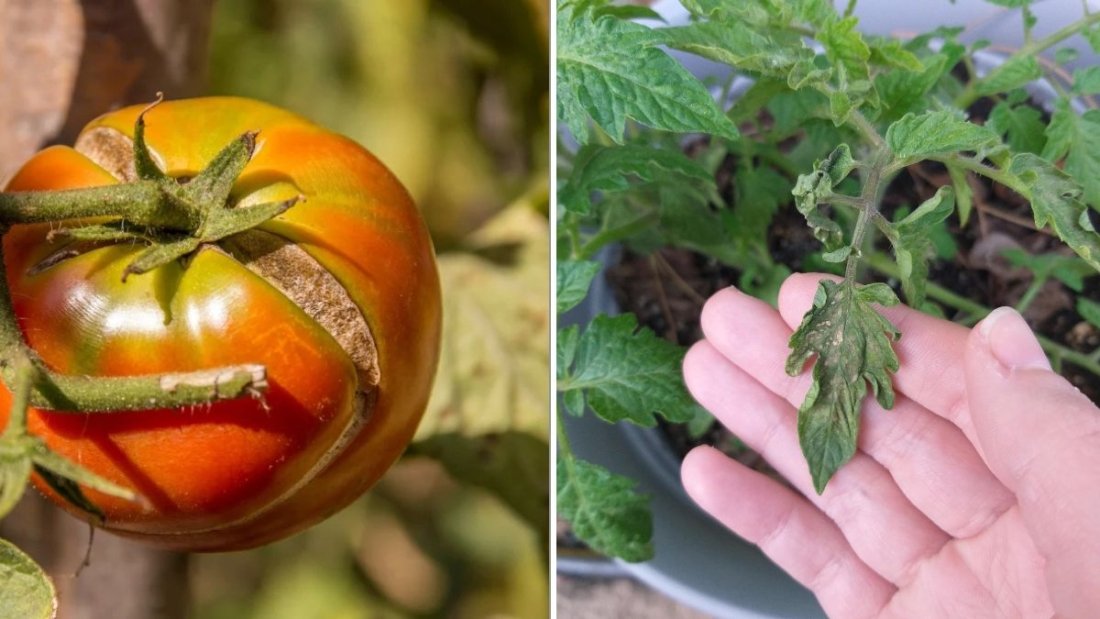
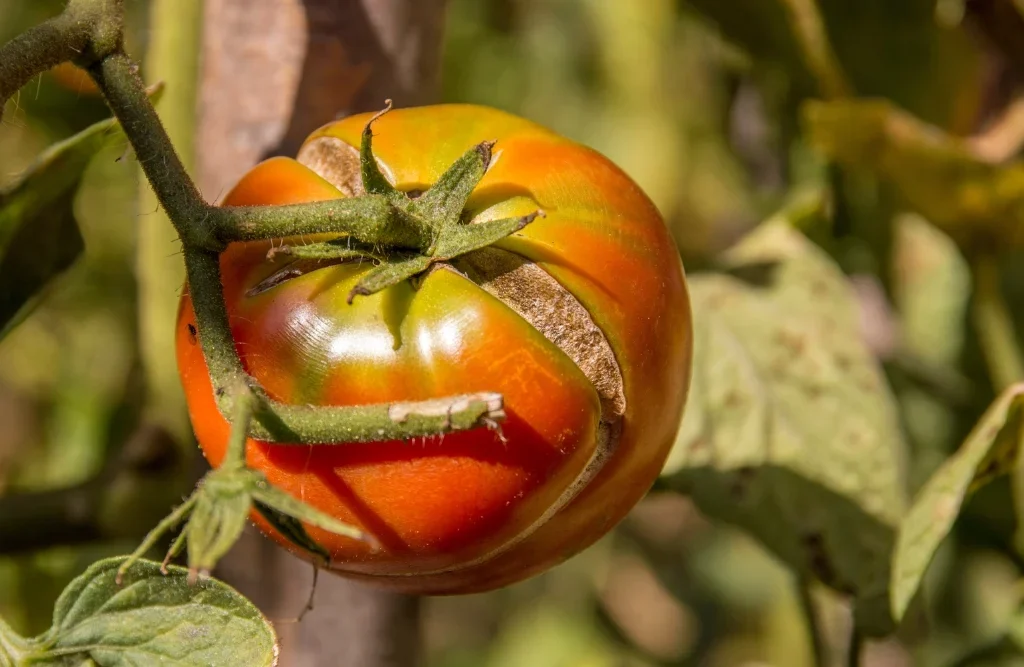
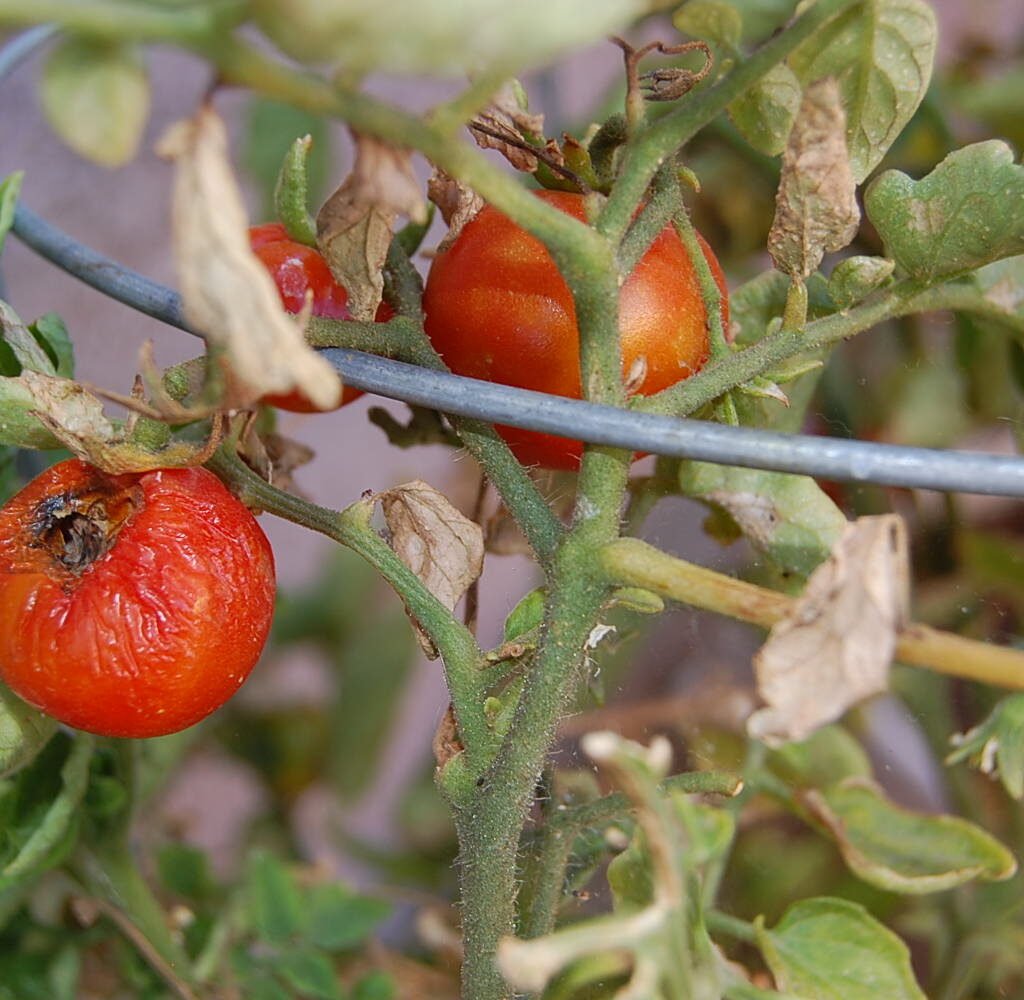
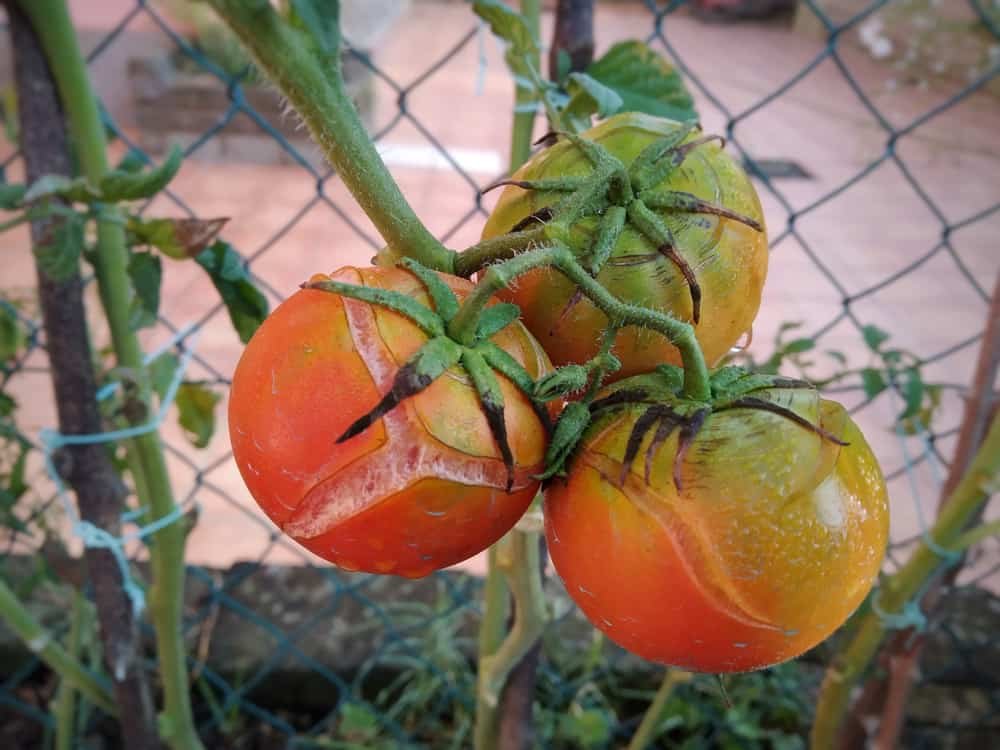
1.3 Blisters or Cracked Skin on Fruit

Too much water causes the fruit to swell faster than the skin can stretch, resulting in cracks or splits on ripening tomatoes. This not only affects appearance but also makes fruit more vulnerable to rot and pests.

1.4 Mold or Fungus on the Soil Surface

Constantly wet soil can encourage fungal growth. A thin layer of green or white mold on the top of the soil is a clear sign that you’re watering too often.

1.5 Root Rot and Foul Smells

When oxygen levels drop, roots start decaying. Gently dig near the base of the plant—if the roots look brown, mushy, or smell sour, root rot has likely set in.

1.6 Leaf Curling and Stunted Growth

Overwatered tomatoes may develop tight, curled leaves as a stress response. They also grow slower and produce fewer blossoms because the plant directs its energy toward survival instead of fruiting.


2. The Science Behind What Happens Underground

When you overwater, the soil becomes compacted and airless. The lack of oxygen means the plant’s roots can’t perform respiration—a process that helps convert nutrients into energy. Without this energy, the tomato’s growth slows, nutrient uptake declines, and the roots begin to die back.

Meanwhile, beneficial microbes that thrive in oxygenated soil die off, and anaerobic bacteria (those that live without oxygen) take over. These bacteria release toxins that further damage the plant. The result: a sickly, stressed tomato that struggles to recover even after watering is corrected.


3. How to Test Soil Moisture Correctly

Avoid guessing how wet your soil is. Here are reliable ways to test:

  • Finger Test: Stick your finger 2 inches into the soil. If it feels wet or cool at that depth, hold off on watering.
  • Soil Moisture Meter: These inexpensive tools give a quick digital reading. Aim for a “moist” level, not “wet.”
  • Weight Test for Containers: Lift your pot after watering and again when dry. Over time, you’ll learn the difference in weight and know when your plant truly needs more water.

If you garden in raised beds or containers, remember that soil dries out faster than in-ground plots—so watering habits must adjust accordingly.


4. Fixing Overwatered Tomatoes

Catching the problem early makes recovery possible. Here’s how to help your plants bounce back:

4.1 Stop Watering Temporarily

Pause watering for several days and let the soil dry naturally. Don’t let it bake completely dry—just return to a balanced moisture level.

4.2 Improve Drainage

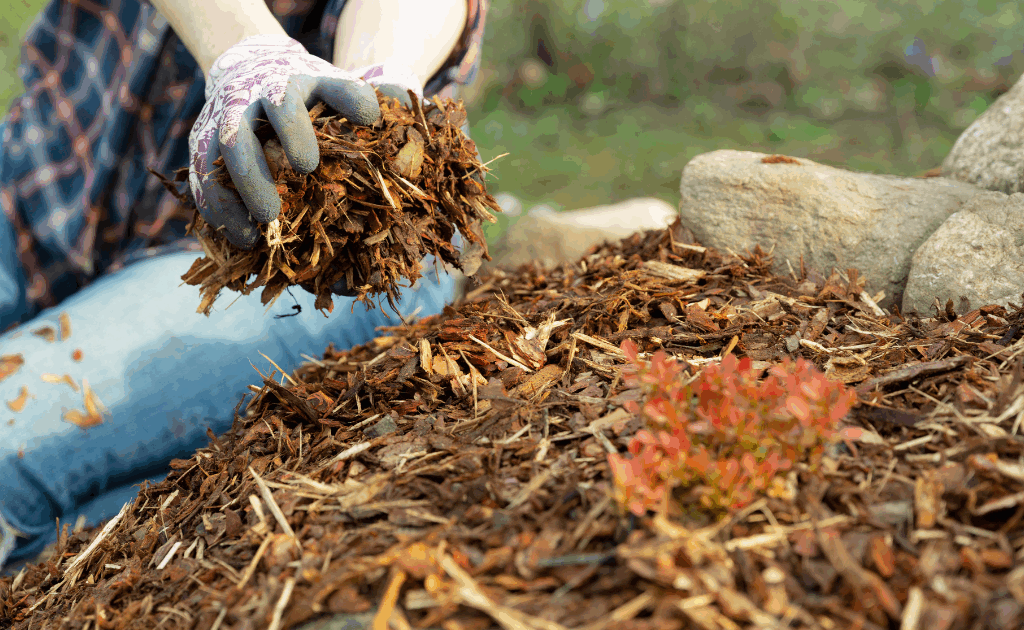
If your soil stays soggy, amend it with organic matter like compost or peat moss to improve structure and drainage. Raised beds or containers should have drainage holes at the bottom to allow excess water to escape.

4.3 Loosen Compacted Soil

Gently aerate the top inch or two around the base of the plant. This helps oxygen reach the roots. Avoid digging too deeply near the stem, as that can damage the root system.

4.4 Mulch Wisely

Mulch helps regulate moisture, but using too much can trap water. Stick to a thin 1–2 inch layer of straw or shredded leaves once the soil has dried out.

4.5 Prune Damaged Leaves

Cut away yellowed or diseased foliage to help the plant redirect its energy toward healthy growth and new blooms.

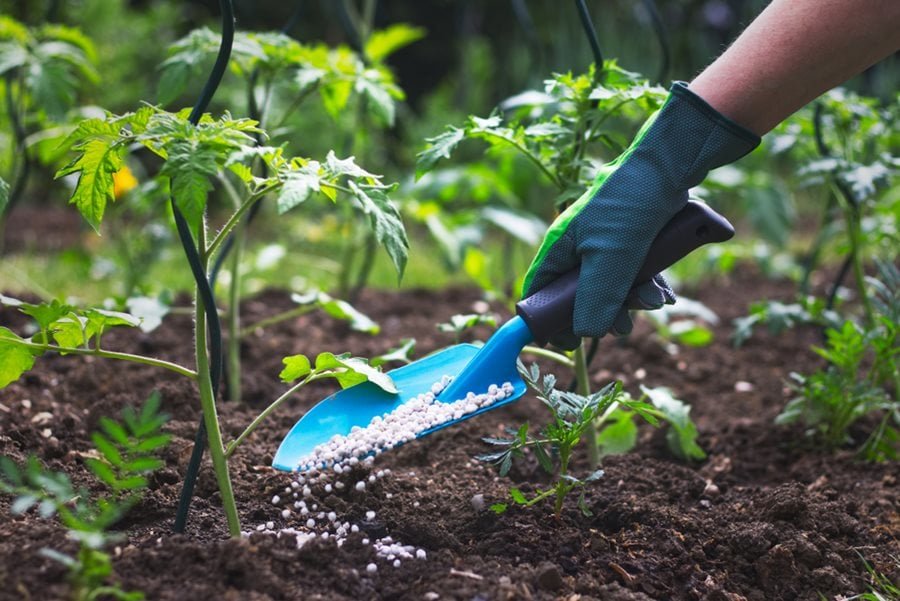
4.6 Feed Sparingly After Stress

Once recovery begins, offer a balanced liquid fertilizer at half strength to encourage root regrowth and fruit production. Avoid overfertilizing, which can further stress the plant.


5. Preventing Overwatering in the Future

Once your tomatoes recover, take these preventive steps to keep them thriving:

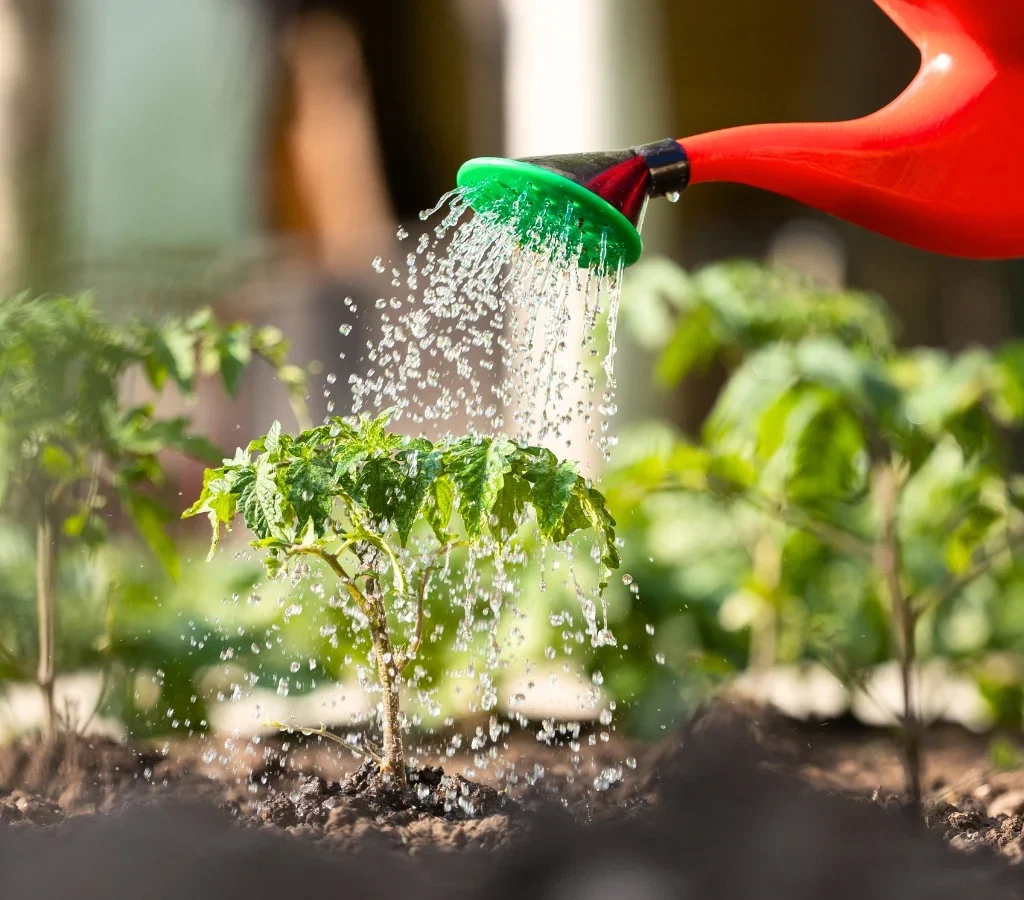
  1. Create a Watering Schedule: Water deeply two to three times per week rather than lightly every day. This encourages strong, deep roots.
  2. Water Early in the Day: Morning watering reduces evaporation and allows foliage to dry, lowering the risk of fungal diseases.
  3. Use Drip Irrigation or Soaker Hoses: These systems deliver moisture directly to the roots without oversaturating the soil.
  4. Watch the Weather: Skip watering after rain. Use a rain gauge to track weekly totals.
  5. Choose the Right Soil Mix: In containers, use a well-draining potting mix labeled for vegetables. Garden soil alone can compact and hold too much moisture.
  6. Elevate Containers: Lift pots slightly off the ground using bricks or pot feet to prevent water from pooling underneath.

6. Distinguishing Between Overwatering and Underwatering

The symptoms can look similar, but there are key differences:

SymptomOverwateringUnderwatering
Leaf colorYellow or pale greenDry and brown edges
Soil feelWet or coolDry and crumbly
FruitCracks or splitsSmall, dry, or with blossom-end rot
Root conditionBrown and mushyDry and brittle

When in doubt, always check the soil before watering. It’s better to err on the side of slightly dry than too wet—tomatoes recover faster from mild drought than from root rot.


7. The Payoff of Proper Watering

Once you find the right watering balance, your tomato plants will reward you with lush foliage, strong stems, and flavorful fruit. Consistent moisture levels lead to:

  • Better-tasting tomatoes with richer color and fewer cracks
  • Stronger roots that resist disease
  • More abundant harvests through healthy flowering and fruit set

Proper watering is the foundation of tomato success. The secret is to water deeply but infrequently, ensuring the soil dries slightly between sessions.


Final Thoughts

Tomato plants are resilient, but they have their limits. Overwatering can quietly undo weeks of hard work by suffocating the roots and spoiling your harvest. The good news is that once you recognize the signs—wilted leaves, yellowing foliage, and cracked fruit—you can take quick action to restore balance.

Remember, tomato gardening is as much about observation as it is about care. Learn to “read” your plants, test your soil often, and let nature do part of the work. With a little patience and consistency, you’ll find that sweet spot where your tomatoes flourish—neither parched nor drowning, but perfectly quenched and ready to thrive all season long.

How to Mulch Properly in Winter for Protection

How to Mulch Properly in Winter for Protection

When winter approaches and temperatures begin to dip, most gardeners start thinking about protecting their plants from the cold. One of the simplest and most effective ways to shield your garden through the frosty months is mulching. Proper winter mulching doesn’t just keep plants warm—it stabilizes soil temperatures, preserves moisture, prevents erosion, and creates a healthier environment for spring regrowth.

However, there’s a right and wrong way to mulch for winter protection. Too little mulch leaves roots exposed to freezing winds, while too much can trap moisture and lead to rot. The key is knowing when, where, and how to apply mulch for maximum benefit. Let’s explore how to mulch properly in winter so your garden wakes up strong and ready when spring returns.


Why Mulching Matters in Winter

During winter, soil goes through repeated cycles of freezing and thawing. These fluctuations can cause frost heave, where plant roots are literally pushed upward out of the ground, exposing them to cold air and killing tender roots. A good layer of mulch acts as insulation, keeping soil temperatures more consistent and preventing this damage.

Benefits of winter mulching include:

  1. Temperature regulation: Prevents roots from freezing during cold snaps and overheating during unexpected warm spells.
  2. Moisture retention: Keeps soil from drying out due to cold winds and low humidity.
  3. Erosion control: Protects topsoil from being washed or blown away.
  4. Weed suppression: Limits the growth of winter weeds that compete for nutrients.
  5. Soil health improvement: As mulch breaks down, it adds organic matter, enriching the soil for spring.

Step 1: Choose the Right Mulch Material

Not all mulches are equal, especially when it comes to winter protection. You’ll want something that insulates well, allows air circulation, and breaks down gradually to feed the soil. Here are some excellent options:

1. Organic Mulches (Best for Insulation and Soil Health)

  • Straw: Light and airy, straw traps air pockets that insulate plant roots. Avoid hay—it often contains weed seeds.
  • Shredded leaves: One of the best and most readily available winter mulches. They decompose slowly and improve soil structure.
  • Pine needles: Excellent for acid-loving plants like azaleas, blueberries, and rhododendrons. They don’t mat down easily, allowing airflow.
  • Wood chips or bark: Perfect for trees and shrubs; they decompose slowly, offering long-term protection.
  • Compost: Provides nutrients while protecting soil, though it’s best used under another mulch layer for insulation.

2. Inorganic Mulches (Useful for Specific Cases)

  • Gravel or stones: Good for preventing erosion but not ideal for temperature insulation.
  • Landscape fabric: Can suppress weeds but may trap too much moisture in winter.

Pro Tip: Organic mulches are generally the best choice for most gardens in winter—they protect now and feed the soil later.


Step 2: Know When to Apply Winter Mulch

Timing is crucial. Mulching too early can trap warm air in the soil, encouraging new growth that will be damaged by frost. Mulching too late, after the ground freezes solid, prevents insulation from doing its job.

Best timing:

  • Apply winter mulch after the first hard frost, when the ground is cold but not yet frozen.
  • In most regions, this means late November to early December.

This timing locks in soil moisture and creates a stable temperature barrier before harsh winter weather sets in.

Tip: If you’re in a milder climate, delay mulching until nighttime temperatures consistently drop below 40°F (4°C).


Step 3: Prepare Your Garden Before Mulching

Before laying down mulch, take a few preparatory steps to ensure your plants get maximum benefit:

  1. Clean up debris: Remove weeds, dead leaves, and diseased plant matter. This prevents pests and fungal spores from overwintering.
  2. Water thoroughly: Moist soil retains heat better than dry soil. Give your plants a deep watering a day or two before mulching.
  3. Cut back perennials: Trim dead stems to a few inches above ground to make mulching easier and reduce disease risk.
  4. Mark plant locations: Use small stakes to mark where plants are, so you don’t bury them too deeply later.

Step 4: Apply Mulch Properly

Now comes the most important part—the actual application. Proper depth and placement determine whether mulch protects or harms your plants.

For Perennials and Flower Beds:

  • Apply mulch 2–4 inches thick around the base of plants.
  • Keep mulch 1–2 inches away from crowns or stems to prevent rot.
  • For extra-sensitive perennials (like delphiniums or chrysanthemums), mound mulch a little higher for added insulation.

For Trees and Shrubs:

  • Spread mulch in a wide circle around the base, extending to the tree’s drip line (the outer edge of its canopy).
  • Keep mulch at least 4–6 inches away from the trunk to prevent bark rot and rodent damage.
  • Use a layer about 3–5 inches deep for adequate protection.

For Bulbs:

  • After the ground has frozen, add 4–6 inches of loose mulch over bulb beds to prevent frost from heaving bulbs upward.
  • Straw, shredded leaves, or evergreen boughs work best for bulbs.

For Vegetable Gardens:

  • Spread 2–3 inches of compost over beds, then top with straw or shredded leaves.
  • This combination nourishes the soil through winter while keeping it insulated from erosion and freezing.

Pro Tip: Don’t pile mulch into thick, compact layers—air needs to circulate, and overly dense mulch can suffocate roots or attract mold.


Step 5: Check and Maintain Mulch Throughout Winter

Winter weather can be unpredictable. Strong winds, heavy rain, or snow can displace mulch and expose roots. Check your mulch every few weeks and reapply or fluff it up as needed.

Maintenance tips:

  • After heavy snow melts, gently rake mulch back into place if it has compacted.
  • Avoid disturbing frozen soil. Wait for mild days to adjust mulch depth.
  • Watch for pests, such as mice or voles, that may take shelter under thick mulch layers near tree trunks.

If pests are a problem, use coarse materials like pine bark or gravel near tree bases to deter nesting.


Step 6: Remove or Adjust Mulch in Early Spring

As temperatures rise, it’s important to gradually remove winter mulch to prevent plants from overheating or rotting.

  • Begin removing mulch once daytime temperatures consistently stay above 45°F (7°C) and the danger of hard frost has passed.
  • For perennials and bulbs, gently pull mulch away from crowns and shoots to let new growth emerge.
  • For trees and shrubs, simply spread the mulch out thinner for continued weed suppression and moisture retention during the growing season.

Pro Tip: Don’t remove all mulch—keep a 1–2 inch layer year-round to conserve moisture and regulate temperature.


Common Winter Mulching Mistakes to Avoid

  1. Applying too early: Leads to premature growth that frost can kill.
  2. Piling mulch against stems or trunks: Encourages rot and pest infestations.
  3. Using dense materials like fresh grass clippings: These can mat down, blocking air and trapping moisture.
  4. Over-mulching: A layer thicker than 6 inches can suffocate roots and delay spring warming.
  5. Neglecting soil moisture: Dry soil under mulch can still damage roots, especially in windy or drought-prone areas.

Best Mulching Combinations for Winter Protection

  • Flower beds: Compost (1 inch) + shredded leaves (2 inches).
  • Shrubs and trees: Bark chips (3 inches) + pine needles (1 inch top layer).
  • Vegetable beds: Compost (2 inches) + straw (2 inches).
  • Bulb gardens: Straw (3 inches) + evergreen boughs for wind protection.

These combinations provide both insulation and nutrients, ensuring your garden soil stays fertile and protected through the cold months.


Final Thoughts

Winter mulching is more than just a seasonal chore—it’s an investment in your garden’s long-term health. When done properly, mulch acts like a cozy blanket, shielding plants from the cold while enriching the soil beneath.

By choosing the right materials, applying mulch at the right time, and maintaining it through winter, you’re setting the stage for strong, resilient growth when spring finally arrives. Come April, your plants will thank you with healthy roots, lush foliage, and vibrant blooms—all because you took the time to protect them when they needed it most.

So before the frost settles in for good, grab your rake, your favorite mulch, and give your garden the care it deserves. A little effort now will reward you with beauty and abundance in the seasons ahead.

 7 Plants That Love Early Spring Sunlight

 7 Plants That Love Early Spring Sunlight

After months of cold, gray skies, the first signs of spring sunshine are a gardener’s dream come true. Those golden rays don’t just warm the soil—they also awaken the first wave of plants eager to stretch toward the light. Early spring sunlight may be softer and gentler than summer’s intensity, but it’s still powerful enough to spark new life.

If you’re eager to fill your garden with color and vitality right from the start of the season, you’ll want plants that can make the most of early sunlight while tolerating lingering chills. Below are seven outstanding plants that love early spring sunshine and bring beauty and resilience to your landscape.


1. Crocus (Crocus vernus)

Few flowers announce the arrival of spring as joyfully as crocuses. These cheerful blooms often push through the last patches of snow, painting the garden in shades of purple, yellow, and white long before most plants wake up.

Why They Love Early Sunlight:
Crocuses thrive in the cool, bright conditions of late winter and early spring. Their flowers open wide on sunny days to attract early pollinators and close again at night or on cloudy days to conserve energy.

Growing Tips:

  • Sunlight: Full to partial sun.
  • Soil: Well-drained soil enriched with organic matter.
  • Planting: Plant corms in fall about 3–4 inches deep and 3 inches apart.
  • Watering: Minimal; crocuses prefer slightly dry conditions once established.

Bonus: Plant them in clusters or drifts for the most striking effect, and let them naturalize in lawns or rock gardens where they’ll return year after year.


2. Daffodils (Narcissus spp.)

Daffodils are the quintessential spring bloomers—bright, trumpet-shaped flowers that bring sunshine to your garden even before the trees leaf out. They’re hardy, deer-resistant, and eager to soak up the gentle spring sun.

Why They Love Early Sunlight:
Daffodils sprout just as sunlight begins to warm the soil. The light helps their leaves photosynthesize efficiently before taller plants cast shade later in the season.

Growing Tips:

  • Sunlight: Full sun to light shade.
  • Soil: Well-drained, moderately fertile soil.
  • Planting: Plant bulbs 6 inches deep in fall, pointy end up.
  • Care: Deadhead faded blooms but allow foliage to remain until it yellows—this helps bulbs store energy for next year.

Pro Tip: Combine early-, mid-, and late-blooming daffodil varieties for a continuous display of color from February through May.


3. Hellebores (Helleborus orientalis)

Also known as Lenten roses, hellebores are among the first perennials to bloom each spring—sometimes even when snow is still on the ground. Their nodding, cup-shaped flowers come in an elegant palette of pink, cream, plum, and green.

Why They Love Early Sunlight:
Hellebores prefer the mild brightness of early spring when sunlight is gentle and soil moisture is high. They thrive before the tree canopy fills in, enjoying several weeks of filtered sunshine.

Growing Tips:

  • Sunlight: Partial to full sun in early spring; dappled shade later in the year.
  • Soil: Rich, well-draining soil with consistent moisture.
  • Planting: Plant in fall or early spring; keep crowns just above the soil surface.
  • Care: Remove old, damaged leaves in late winter to make room for new growth.

Fun Fact: Hellebores are long-lived perennials—some clumps can bloom reliably for 20 years or more!


4. Tulips (Tulipa spp.)

Nothing says “spring” quite like a bed of tulips glowing in the morning light. These bulbs thrive in cool conditions and love the full sun that early spring provides before the heat of summer arrives.

Why They Love Early Sunlight:
Tulips store energy all winter long and burst to life when the soil begins to warm under the strengthening spring sun. The light helps them grow sturdy stems and develop vibrant flower colors.

Growing Tips:

  • Sunlight: Full sun is best for strong stems and bold blooms.
  • Soil: Loose, sandy, well-drained soil.
  • Planting: Set bulbs 6–8 inches deep in fall, pointed side up.
  • Care: Water after planting, then sparingly until growth appears. Remove spent flowers to prevent energy waste on seed production.

Pro Tip: Plant tulips in layers with other bulbs like crocuses and daffodils for a multi-tiered spring display.


5. Pansies (Viola × wittrockiana)

These bright, happy-faced flowers thrive in cool weather and are among the first annuals you can plant outdoors in spring. Available in countless color combinations—from deep purples to sunshine yellows—pansies love basking in the mild sunlight of early spring days.

Why They Love Early Sunlight:
Pansies prefer cooler temperatures and gentle sun. Too much summer heat can cause them to fade, but early spring sunshine is their ideal growing condition.

Growing Tips:

  • Sunlight: Full to partial sun.
  • Soil: Moist, fertile, well-drained soil.
  • Planting: Set transplants outdoors 2–4 weeks before your last frost date.
  • Care: Water regularly; deadhead to encourage more blooms.

Bonus: Pair pansies with spring bulbs—they complement each other perfectly and keep garden beds colorful even after bulbs finish blooming.


6. Bleeding Heart (Dicentra spectabilis)

With its delicate arching stems and heart-shaped pink or white flowers, the bleeding heart is one of spring’s most romantic perennials. It bursts into bloom just as the early sun begins to warm shaded corners of the garden.

Why They Love Early Sunlight:
Bleeding hearts enjoy the soft morning light of early spring before trees leaf out. Too much intense summer sun can cause them to go dormant early, so the timing of spring sunlight is perfect for their short but spectacular blooming season.

Growing Tips:

  • Sunlight: Partial sun to light shade.
  • Soil: Moist, rich, well-drained soil.
  • Planting: Plant bare roots or transplants in early spring.
  • Care: Keep soil consistently moist; mulch to retain water. Cut back foliage once it yellows after blooming.

Pro Tip: Pair bleeding hearts with hostas or ferns, which fill in the space once bleeding hearts die back in midsummer.


7. Hyacinths (Hyacinthus orientalis)

Hyacinths are prized for their vibrant colors and heavenly fragrance. Their tightly packed flower spikes appear in early spring, thriving in cool temperatures and bright sunshine.

Why They Love Early Sunlight:
Hyacinths absorb nutrients from the soil and sunlight early in the season before warmer weather sets in. The gentle spring rays help produce their signature rich hues and strong stems.

Growing Tips:

  • Sunlight: Full sun to light shade.
  • Soil: Fertile, well-draining soil enriched with compost.
  • Planting: Plant bulbs 6 inches deep in fall.
  • Care: Water when soil feels dry and remove spent blooms to keep bulbs healthy.

Bonus: Hyacinths make excellent container plants—place them near windows or entryways to enjoy their scent up close.


How to Make the Most of Early Spring Sunlight

While choosing the right plants is essential, how you prepare your garden for early sunlight can enhance their growth even more.

1. Clean Up Winter Debris:
Clear away leaves and dead plant material so sunlight can reach emerging shoots.

2. Loosen the Soil:
A quick tilling or hand-turning of soil helps improve drainage and oxygen flow for new roots.

3. Add Organic Matter:
A thin layer of compost replenishes nutrients lost over winter and boosts early growth.

4. Use Mulch Wisely:
Apply mulch after the soil warms up a bit to conserve moisture without blocking sunlight from the ground.

5. Water Moderately:
Spring rain often provides enough moisture, but keep an eye on young plants—they dry out quickly in sunny, breezy weather.


Final Thoughts

Early spring sunlight is a gardener’s best ally—it’s gentle enough for delicate new growth but strong enough to spark a surge of energy below and above the soil. The plants that thrive during this transitional season—like crocuses, daffodils, and hellebores—are built to make the most of it, turning those first golden rays into lush, colorful displays.

By planting these seven sun-loving species and preparing your garden with a bit of foresight, you’ll enjoy a spectacular burst of life just when you need it most—after a long, quiet winter. When the early light hits their blooms, your garden won’t just wake up; it will sing with the promise of a new growing season.

How to Fertilize in Fall for Spring Growth

How to Fertilize in Fall for Spring Growth

As the growing season winds down and the air turns crisp, most gardeners start to hang up their tools and assume the garden is ready to rest. But here’s a secret that experienced gardeners swear by: fall is one of the most important times of the year to fertilize. While your plants may look like they’re preparing for dormancy, beneath the soil, they’re actually gearing up for next year’s growth.

Applying fertilizer in fall helps plants store essential nutrients, strengthens their root systems, and sets the stage for a vigorous burst of spring growth. Whether you’re tending to lawns, perennials, shrubs, or trees, understanding when and how to fertilize in fall can make all the difference. Let’s dive into the best strategies for nourishing your garden before winter arrives.


Why Fall Fertilization Matters

During summer, plants use up much of the available nutrients in the soil. By the time fall arrives, they may be depleted, especially after months of heavy watering, harvesting, and heat stress. Fertilizing in fall replenishes these nutrients at just the right moment—when plants are shifting their energy from top growth to root development.

Here’s why fall fertilizing is so beneficial:

  1. Root Strengthening: In cooler weather, plants focus on growing strong roots rather than new leaves. Fertilizer supports this underground growth, helping plants survive the winter and thrive in spring.
  2. Nutrient Storage: Trees, shrubs, and perennials absorb nutrients in fall and store them for next year’s leaf and flower production.
  3. Improved Soil Health: Fertilizers—especially organic ones—add beneficial microbes and improve soil structure.
  4. Earlier Spring Green-Up: Lawns and garden beds fertilized in fall come back faster and greener once temperatures rise.
  5. Winter Hardiness: Well-fed plants are more resilient against frost, disease, and fluctuating temperatures.

In short, fertilizing in fall isn’t just about giving plants an extra boost—it’s about setting them up for long-term success.


Step 1: Know the Right Timing

Timing is everything. Fertilizing too early can trigger new leafy growth that will be damaged by frost. Fertilizing too late means the ground might be too cold for nutrient absorption.

The best time:

  • Generally 4–6 weeks before the ground freezes.
  • For most regions, that’s between late September and early November.

During this window, plants are still active enough to take in nutrients, but temperatures are cool enough to encourage root development rather than top growth.

Tip: Check your local first frost date, and plan your fall fertilizing accordingly.


Step 2: Test Your Soil

Before adding any fertilizer, it’s important to know what your soil actually needs. A soil test provides valuable information about nutrient levels and pH balance, helping you avoid under- or over-fertilization.

You can:

  • Purchase a simple home soil testing kit.
  • Or send a sample to your local agricultural extension office for detailed analysis.

A soil test typically measures nitrogen (N), phosphorus (P), potassium (K), and sometimes secondary nutrients like calcium and magnesium.

Once you know what your soil lacks, you can choose the right fertilizer blend for your plants’ needs.


Step 3: Choose the Right Fertilizer

Not all fertilizers are created equal. The type and formulation you choose should depend on what you’re fertilizing and your soil’s nutrient profile.

1. For Lawns:
Use a slow-release, high-nitrogen fertilizer (look for an NPK ratio like 20-8-8). Nitrogen promotes strong root growth and helps grass store energy for spring greening.
Avoid quick-release products—they can burn the grass or stimulate tender growth just before frost.

2. For Trees and Shrubs:
A balanced fertilizer (such as 10-10-10 or 12-6-6) works well. Trees and shrubs focus on root expansion in fall, so phosphorus and potassium are vital for strengthening their base and improving cold resistance.

3. For Perennials and Bulbs:
Choose a low-nitrogen, higher-phosphorus fertilizer (like 5-10-10). Phosphorus supports root and bulb development, ensuring vigorous blooms next spring.

4. For Vegetable Beds:
After harvest, add compost or a slow-release organic fertilizer rich in potassium and phosphorus to replenish nutrients lost during the growing season.

Organic options like bone meal, composted manure, seaweed extract, or worm castings not only feed plants but also enrich the soil with microbes that break down nutrients slowly over time.


Step 4: Apply Fertilizer Properly

How you apply fertilizer in fall depends on what type of plants you’re treating. Let’s break it down by area:

For Lawns:

  1. Mow the grass slightly shorter than usual.
  2. Rake away leaves or debris so fertilizer reaches the soil.
  3. Apply fertilizer evenly with a spreader.
  4. Water lightly to help nutrients penetrate the soil but avoid runoff.

Pro Tip: A second “winterizer” application about 30 days after the first helps lawns store even more energy for spring growth.


For Garden Beds and Perennials:

  1. Cut back any dead or dying foliage.
  2. Loosen the top few inches of soil.
  3. Sprinkle fertilizer around the base of each plant, keeping it a few inches away from stems.
  4. Water well to move nutrients into the root zone.
  5. Finish with a layer of mulch to protect the roots and prevent nutrient leaching.

For Trees and Shrubs:

  1. Spread fertilizer evenly under the canopy, extending out to the drip line (where rain falls off the leaves).
  2. Avoid piling fertilizer near the trunk—it can burn the bark.
  3. Lightly rake or aerate the soil so nutrients can reach the roots.
  4. Water thoroughly afterward.

For Bulbs:

  1. When planting spring-flowering bulbs (like tulips or daffodils), mix bone meal or bulb fertilizer into the soil at planting time.
  2. Water well to help the nutrients settle around the bulbs.
  3. After planting, cover with mulch to insulate the soil during winter.

Step 5: Don’t Forget the Soil Builders

While synthetic fertilizers deliver a nutrient boost, organic matter does the heavy lifting when it comes to improving long-term soil structure and fertility.

Add compost or manure in fall for maximum benefit:

  • Compost slowly breaks down over winter, releasing nutrients right when plants need them in spring.
  • Organic matter improves drainage in clay soil and water retention in sandy soil.
  • It encourages beneficial earthworms and microbes that create a thriving soil ecosystem.

Spread a 2–3 inch layer of compost or aged manure over garden beds, then lightly mix it into the top few inches of soil before winter sets in.


Step 6: Water After Fertilizing

Even in cool weather, water plays a critical role in helping nutrients reach plant roots. Without moisture, fertilizer granules can sit on the surface and lose their effectiveness.

  • Water deeply but gently after applying fertilizer.
  • Aim to moisten the soil to a depth of 6 inches.
  • Avoid overwatering—too much runoff can wash away nutrients.

If your area experiences regular autumn rains, time your fertilizing just before a light rainfall for effortless distribution.


Common Fall Fertilizing Mistakes to Avoid

  1. Fertilizing too late: Once the ground freezes, nutrients can’t be absorbed and may wash away in spring.
  2. Over-fertilizing: Excess nutrients can burn roots and pollute groundwater. Always follow the recommended dosage on the label.
  3. Ignoring mulch: Fertilizer without mulch can leach away too quickly in rain or snowmelt.
  4. Neglecting soil testing: Applying random fertilizers without knowing soil conditions can throw off nutrient balance.
  5. Skipping organic matter: Synthetic fertilizers alone can deplete soil life over time. Always pair them with compost for the best results.

Final Thoughts

Fertilizing in fall might feel counterintuitive—after all, the growing season is ending—but in reality, it’s one of the smartest moves you can make for a lush, healthy garden next spring. By focusing on soil health, root growth, and nutrient storage now, you’re ensuring your plants wake up strong and ready to grow when warmer days return.

So before you pack away your tools, give your garden one last act of care. A thoughtful fall fertilizing routine is like tucking your plants in for winter with a hearty meal—come spring, they’ll reward you with vibrant growth, richer blooms, and a thriving landscape that reflects your effort all year long.

5 Summer Watering Mistakes That Kill Plants

5 Summer Watering Mistakes That Kill Plants

Summer can be both a blessing and a challenge for gardeners. Warm sunshine fuels growth, but intense heat and dry air can quickly turn your thriving plants into wilted casualties if watering isn’t done right. While it may seem simple—just add water—many gardeners unintentionally make watering mistakes that do more harm than good.

If you’ve ever found your plants drooping, yellowing, or dying despite your best efforts, the issue might not be how much water you give, but how you give it. Here are five common summer watering mistakes and how to avoid them to keep your garden healthy and vibrant all season long.


1. Watering at the Wrong Time of Day

Timing is everything when it comes to watering. One of the biggest and most common mistakes gardeners make is watering during the heat of the day, often between 10 a.m. and 4 p.m. During this period, the sun is at its peak, and much of the water evaporates before it ever reaches the plant’s roots. This wastes water and leaves your plants thirsty.

Why It’s a Problem:

  • High temperatures cause rapid evaporation.
  • Wet leaves can scorch when exposed to intense sunlight.
  • Plants receive less hydration when they need it most.

The Right Way:

  • Water early in the morning—ideally between 5 a.m. and 9 a.m. The cooler air reduces evaporation, and plants have time to absorb moisture before the day’s heat.
  • If morning watering isn’t possible, the next best option is late evening, around 6 p.m. to 8 p.m. Just ensure leaves dry before nightfall to prevent fungal growth.

Pro Tip: Install a simple timer on your irrigation system or hose to ensure consistent early-morning watering, even if you’re not around.


2. Watering Too Often (or Too Little)

It’s easy to assume plants need daily watering in summer, but that’s rarely the case. Overwatering is just as harmful—sometimes even more so—than underwatering. Too much water fills air spaces in the soil, suffocating roots and promoting rot. On the other hand, underwatering stresses plants, causing drooping, stunted growth, and leaf drop.

Why It’s a Problem:

  • Overwatering: Roots become deprived of oxygen, leading to root rot and fungal infections.
  • Underwatering: Plants can’t transport nutrients effectively, resulting in dry, crispy leaves and reduced flowering.

The Right Way:

  • Water deeply but infrequently. Instead of shallow, daily sprinkles, soak the soil thoroughly so water penetrates at least 6 inches deep.
  • Allow the top 1–2 inches of soil to dry out before watering again. This encourages roots to grow deeper, making plants more resilient to drought.

How to Test Soil Moisture:
Insert your finger about two inches into the soil near the base of the plant:

  • If it feels moist, wait another day before watering.
  • If it feels dry, it’s time to water.

Pro Tip: Use a moisture meter for more accurate readings, especially if you’re unsure how your soil retains water.


3. Using the Wrong Watering Technique

Even if you water at the right time and frequency, how you water makes a huge difference. Spraying water overhead may seem quick and easy, but it often leads to waste, disease, and weak plant growth.

Why It’s a Problem:

  • Overhead watering leaves foliage wet, inviting fungal diseases like powdery mildew and blight.
  • A strong jet of water can compact soil and damage tender plants.
  • Shallow watering only wets the surface, encouraging shallow root growth.

The Right Way:

  • Water at the base of the plant, aiming directly at the root zone where moisture is needed most.
  • Use a soaker hose or drip irrigation system to deliver water slowly and evenly. This minimizes waste and ensures deeper penetration.
  • For potted plants, water until it drains from the bottom, ensuring roots get evenly hydrated.

Pro Tip: Mulch around your plants after watering. A 2–3 inch layer of organic mulch (like straw, compost, or bark chips) retains moisture, reduces evaporation, and prevents soil from drying out too quickly.


4. Ignoring Soil Type and Drainage

Not all soils are created equal. The same watering routine that works in one garden can be disastrous in another depending on soil type. For instance, sandy soil drains quickly and may need more frequent watering, while clay soil holds moisture longer and can easily become waterlogged.

Why It’s a Problem:

  • Poorly drained soil leads to standing water and root rot.
  • Fast-draining soil causes water to run off before plants can absorb it.
  • Compacted or neglected soil reduces water infiltration, starving roots even if you water regularly.

The Right Way:

  • Know your soil type:
    • Sandy soil: Water more often but for shorter durations.
    • Clay soil: Water slowly to allow moisture to soak in without pooling.
    • Loamy soil: The ideal mix—it retains moisture but drains well.
  • Improve drainage by adding organic matter such as compost or aged manure. This not only enhances water retention but also boosts soil aeration.
  • Avoid walking on wet garden beds, which compacts the soil and makes it harder for water to reach roots.

Pro Tip: Create a simple watering basin or depression around each plant’s base to direct water where it’s needed most, especially for fruit trees or shrubs.


5. Forgetting to Adjust for Weather and Plant Needs

Watering should never be a “set it and forget it” task. Conditions change daily, and so should your watering routine. Rainfall, humidity, temperature, and plant maturity all influence how much water your garden needs. Overwatering after a rainstorm or underwatering during a heatwave are both easy mistakes to make.

Why It’s a Problem:

  • Overwatering after rain keeps soil too wet, suffocating roots.
  • Ignoring prolonged heat or wind causes plants to lose water faster through transpiration.
  • Using the same schedule for all plants fails to account for their unique needs.

The Right Way:

  • Monitor the weather. Skip watering after rainfall or when humidity is high, and increase it during extended dry spells.
  • Group plants by water needs. Place drought-tolerant species (like succulents or lavender) separately from water-loving ones (like hydrangeas or ferns) to avoid confusion.
  • Watch for stress signs: Wilted, curling, or yellowing leaves often signal improper watering—adjust accordingly.
  • Use mulch and shade covers during extreme heat to keep soil cooler and reduce evaporation.

Pro Tip: Invest in a smart irrigation controller or rain sensor. These devices automatically adjust watering schedules based on real-time weather data, helping conserve water and prevent overwatering.


Bonus: Special Considerations for Containers and Lawns

  • Container plants: Pots dry out faster than garden beds. Check daily, and water until excess runs out the drainage holes. Use larger containers to reduce water loss and group pots together to create a humid microclimate.
  • Lawns: Many homeowners water lawns too frequently. Instead, water deeply—about 1 inch per week, including rainfall. This encourages grass roots to grow deeper and stay green even during dry spells.

Final Thoughts

Water is life for your garden—but only when used wisely. The difference between thriving, lush plants and wilted, diseased ones often comes down to watering habits. By avoiding these five summer watering mistakes—watering at the wrong time, watering too often or too little, using poor techniques, neglecting soil type, and failing to adjust for weather—you can keep your plants hydrated, healthy, and stress-free all season long.

Remember, good watering is about consistency and observation, not routine alone. Take time to feel the soil, notice your plants’ responses, and adapt as the weather shifts. With mindful watering, your garden will not just survive summer—it will flourish.

How to Start Seeds Indoors in Late Winter

How to Start Seeds Indoors in Late Winter

If you’re itching to get back into the garden while the world outside is still wrapped in frost, starting seeds indoors in late winter is the perfect way to satisfy that urge. Not only does it give you a head start on the growing season, but it also allows you to nurture stronger, healthier plants that are ready to thrive when spring finally arrives. Whether you’re a first-time gardener or a seasoned grower, this guide covers everything you need to know—from choosing the right seeds to transplanting robust seedlings outdoors.


Why Start Seeds Indoors?

Starting seeds indoors allows you to:

  • Extend the growing season: Plants like tomatoes, peppers, and eggplants need long, warm growing periods. By starting early, you give them a head start before the last frost.
  • Save money: A single packet of seeds can produce dozens of plants for the cost of one nursery start.
  • Access unique varieties: Many heirloom and specialty plants are available only as seeds, not as store-bought seedlings.
  • Control growing conditions: Indoors, you can manage temperature, moisture, and light to ensure optimal germination and early growth.

Step 1: Choose the Right Seeds

Late winter is the ideal time to start warm-season crops indoors. These are plants that require consistent warmth and cannot tolerate frost. Some good options include:

  • Vegetables: Tomatoes, peppers, eggplants, broccoli, cabbage, kale, and leeks.
  • Herbs: Basil, parsley, thyme, and oregano.
  • Flowers: Marigolds, zinnias, petunias, and snapdragons.

Check each seed packet for the “start indoors” date. This is usually listed as a number of weeks before your last expected frost date (e.g., “start indoors 6–8 weeks before last frost”). You can find your local frost date by searching online for your region or checking with your local agricultural extension service.


Step 2: Gather Your Supplies

You don’t need an elaborate setup to start seeds indoors, but having the right materials will make the process easier and more successful. Here’s what you’ll need:

  • Seed trays or containers: You can use commercial seed-starting trays, biodegradable pots, or even repurposed yogurt cups. Just make sure they have drainage holes.
  • Seed-starting mix: Use a fine, sterile mix designed specifically for starting seeds. Avoid garden soil—it’s too heavy and may harbor pests or diseases.
  • Light source: A sunny windowsill works for some plants, but grow lights provide more consistent results. Use full-spectrum fluorescent or LED grow lights.
  • Heat source: A seedling heat mat can help maintain a steady soil temperature (usually 70–75°F), which encourages faster germination.
  • Humidity dome or plastic wrap: Keeps moisture in until seeds sprout.
  • Watering tool: A spray bottle or small watering can for gentle watering.

Step 3: Prepare Your Containers and Soil

Fill your seed trays or pots with the seed-starting mix, leaving about a half-inch of space at the top. Moisten the mix with warm water until it feels damp but not soggy. Level the surface gently without compacting the soil too tightly—seeds need air and moisture to germinate.

If reusing containers from last year, wash them thoroughly in warm, soapy water and rinse with a mild bleach solution (1 part bleach to 9 parts water) to eliminate lingering bacteria or fungi.


Step 4: Planting the Seeds

Each seed variety has its own preferred depth for planting—usually listed on the packet. As a general rule:

  • Tiny seeds (like basil or lettuce) should be pressed gently onto the soil surface and barely covered.
  • Larger seeds (like tomatoes or marigolds) should be buried about ¼ inch deep.

Plant two seeds per cell or pot to ensure at least one germinates. Once seedlings emerge, you can thin the weaker one.

After sowing, mist the surface lightly with water and cover the tray with a plastic dome or wrap to retain humidity.


Step 5: Provide Light and Warmth

Most seeds need warmth—not light—to germinate. Place the trays on a heat mat or near a warm appliance until you see sprouts appear. Check daily, keeping the soil moist but not soaked.

Once the seedlings emerge, light becomes crucial. Move them to a bright, south-facing window or under grow lights. Position the lights 2–4 inches above the seedlings, and keep them on for 14–16 hours a day. Adjust the height as plants grow to avoid leggy stems caused by stretching toward light.

Ideal indoor conditions:

  • Temperature: 65–75°F during the day, slightly cooler at night.
  • Humidity: Moderate, with good airflow to prevent mold or damping off.

Step 6: Watering and Feeding

Watering is a delicate balance—too little and seedlings dry out, too much and roots suffocate. The soil should remain evenly moist, like a wrung-out sponge.

Use a bottom-watering method: place trays in a shallow pan of water for a few minutes so the soil absorbs moisture from below. This helps prevent fungal diseases.

Once seedlings develop their first set of “true leaves” (the second pair to appear), begin feeding them with a diluted liquid fertilizer (about one-quarter strength). Continue every 1–2 weeks until transplanting.


Step 7: Thinning and Transplanting Seedlings

When seedlings are about 2–3 inches tall, thin them to one per cell by snipping the smaller one at soil level. Don’t pull it out—it could disturb the remaining seedling’s roots.

As plants grow, they may outgrow their starting cells. When roots start poking through the drainage holes or the leaves overlap, it’s time to pot them up into larger containers using a lightweight potting mix. This gives roots more room and helps prevent stress before transplanting outdoors.


Step 8: Hardening Off Before Moving Outside

One of the most important (and often overlooked) steps is hardening off—gradually acclimating your indoor-grown seedlings to outdoor conditions.

Start about 7–10 days before transplanting:

  1. Move plants outside to a sheltered, shady spot for a few hours each day.
  2. Gradually increase their time outdoors and exposure to sunlight.
  3. Bring them inside at night if temperatures drop below 50°F.
  4. By the end of the week, they should be able to handle full sun and light wind.

Skipping this step can shock your plants, stunting their growth or even killing them.


Step 9: Transplanting Into the Garden

Wait until the soil has warmed and all danger of frost has passed before planting outdoors. Prepare your garden bed with compost or well-rotted manure, and water the seedlings well before transplanting.

  • Dig holes slightly larger than the seedling’s root ball.
  • Gently remove plants from their pots, keeping the soil intact.
  • Set them into the ground at the same depth (or slightly deeper for tomatoes).
  • Water thoroughly after planting and add mulch to conserve moisture.

Your once-tiny seedlings are now ready to flourish in the open garden.


Troubleshooting Common Problems

  • Leggy seedlings: Not enough light. Move closer to a window or lower grow lights.
  • Mold or fungus: Too much moisture and poor airflow. Allow the surface to dry between waterings.
  • Yellowing leaves: Overwatering or nutrient deficiency. Reduce watering and start mild feeding.
  • Slow germination: Check temperature—cold soil can delay sprouting.

Final Thoughts

Starting seeds indoors in late winter bridges the gap between the quiet dormancy of winter and the vibrancy of spring. It’s a rewarding ritual that connects you to the rhythm of the seasons and gives your garden a head start. With a little patience, proper care, and the right setup, you’ll soon have a thriving collection of seedlings ready to burst into life as soon as the weather warms.

Whether you’re growing a few tomato plants for the patio or a full bed of colorful blooms, those tiny seeds you nurture now will be the foundation of a lush, productive garden all season long.

How to Grow a Garden That Doubles as an Outdoor Pantry

How to Grow a Garden That Doubles as an Outdoor Pantry

Imagine stepping into your backyard and harvesting fresh herbs for tonight’s dinner, picking crisp greens for a salad, or pulling carrots right from the soil for a quick snack. With the right planning, your garden can become more than a beautiful space—it can function as an outdoor pantry, providing fresh, nutritious food for your household year-round.

Creating a pantry-style garden isn’t about planting everything you can think of. It’s about designing a productive, diverse, and efficient space that yields staples you’ll actually use. Here’s how to build a garden that doubles as a living pantry.


Step 1: Plan Around Your Family’s Needs

The first step in creating a food-producing garden is deciding what you and your family actually eat. While exotic vegetables may be fun, your outdoor pantry will be most useful if it grows staples you use weekly.

Ask yourself:

  • Which vegetables, fruits, and herbs do we buy most often?
  • Do we want quick-harvest crops (like lettuce) or storage crops (like potatoes and onions)?
  • How much space do we realistically have?

Pro tip: Start with 5–7 core crops you know you’ll use, then expand gradually.


Step 2: Choose Pantry-Friendly Crops

Not all garden crops are ideal for an outdoor pantry. Some grow quickly but don’t store well, while others are perfect for long-term use. Here’s a mix to consider:

Vegetables

  • Tomatoes: A pantry essential. Use fresh, can into sauces, or dry.
  • Potatoes: Long shelf life when stored in a cool, dark space.
  • Onions & Garlic: Easy to grow and store for months.
  • Carrots & Beets: Root crops keep well in soil or storage boxes filled with sand.
  • Lettuce & Greens: Fast-growing, ensuring a steady supply of fresh salads.

Herbs

  • Basil, Oregano, Thyme, and Parsley: Can be used fresh or dried for year-round cooking.
  • Mint & Lemon Balm: Perfect for teas and refreshing drinks.

Fruits

  • Berries (Strawberries, Blueberries, Raspberries): Provide sweet treats and can be frozen or made into jams.
  • Apple or Pear Trees: A long-term investment in fresh produce and pantry storage.

Step 3: Design Your Pantry Garden Layout

Think of your garden as a functional kitchen space—organization is key.

  • Raised Beds: Perfect for intensive planting of herbs, salad greens, and root crops.
  • Perennial Corners: Dedicate areas for fruit bushes and trees, which require little annual effort once established.
  • Vertical Space: Use trellises for cucumbers, beans, and peas to save ground room.
  • Succession Planting: After harvesting one crop (like radishes), immediately replant with another (like spinach).

Hack: Place frequently used herbs (like basil or parsley) closest to your kitchen door for easy access.


Step 4: Extend Your Harvest Season

To keep your outdoor pantry stocked as long as possible, use season-extension techniques:

  • Cold Frames or Row Covers: Protect crops from frost and allow early spring or late fall planting.
  • Succession Planting: Sow greens every 2–3 weeks for a continuous supply.
  • Fall Planting: Grow storage crops like garlic, onions, and kale for harvest into winter.

Step 5: Learn to Store Your Harvest

Growing food is only half the equation—storing it well is what makes your garden a true pantry.

Short-Term Storage

  • Leafy greens: Refrigerate in damp cloth or perforated bags.
  • Herbs: Store fresh in water jars on the counter or dry them in bunches.

Long-Term Storage

  • Root Cellaring: Potatoes, carrots, and beets last months in cool, dark conditions.
  • Drying: Herbs, tomatoes, and peppers can be air-dried or dehydrated.
  • Canning & Pickling: Tomatoes, cucumbers, and beans preserve beautifully in jars.
  • Freezing: Berries, peas, and greens freeze well with minimal prep.

Step 6: Companion Plant for Productivity

To maximize your pantry’s output, plant crops that support one another:

  • Tomatoes + Basil: Basil repels pests and enhances growth.
  • Carrots + Onions: Onions deter carrot flies.
  • Corn + Beans + Squash: The classic “Three Sisters” system provides balance and high yields.

Companion planting not only saves space but also reduces pests naturally, minimizing your reliance on chemicals.


Step 7: Make It Low Maintenance

A pantry garden doesn’t have to be high-effort. With a few smart hacks, you can keep it manageable:

  • Mulching: Retains moisture and reduces weeds.
  • Drip Irrigation: Saves water and time compared to hand watering.
  • Perennials: Invest in long-term crops like asparagus, rhubarb, and berry bushes.
  • Composting: Turn kitchen scraps into free fertilizer to keep soil fertile year after year.

Step 8: Add Some Extras for Variety

Beyond staples, you can grow fun “luxury” crops that enhance your pantry:

  • Chili Peppers: For homemade hot sauce.
  • Cucumbers: Perfect for pickles.
  • Zucchini: A versatile summer crop that produces abundantly.
  • Specialty Herbs (like Cilantro or Dill): Adds flavor diversity to your cooking.

Common Mistakes to Avoid

  1. Planting Too Much of One Crop: Unless you love zucchini, don’t overplant! Balance variety with practicality.
  2. Ignoring Storage Needs: Some crops won’t keep long. Plan storage before planting.
  3. Skipping Soil Prep: Pantry gardens need rich, healthy soil for sustained productivity.
  4. Neglecting Succession Planting: Without replanting, your pantry garden may run out of food mid-season.

Final Thoughts

A garden that doubles as an outdoor pantry is more than a way to save money—it’s a lifestyle shift toward healthier eating and greater self-sufficiency. With the right crops, layout, and storage methods, your backyard can supply fresh salads, herbs, root vegetables, and fruits throughout the year.

Start small with essentials like tomatoes, greens, and herbs, and gradually expand to storage crops and perennials. Over time, you’ll find yourself making fewer trips to the grocery store and enjoying fresher, more flavorful meals straight from your own yard.

An outdoor pantry garden not only nourishes your family but also deepens your connection to nature and the seasons. With thoughtful planning, your backyard can truly become an extension of your kitchen—a living pantry that feeds both body and soul.

7 Unusual Houseplants That Are Trending Right Now

7 Unusual Houseplants That Are Trending Right Now

Houseplants have become more than just décor—they’re a lifestyle. From creating calming indoor jungles to improving air quality, plant ownership has skyrocketed in popularity in recent years. While classics like pothos, snake plants, and monsteras remain favorites, there’s a new wave of unusual houseplants making their way into living rooms and Instagram feeds.

If you’re looking to add something unique to your collection or simply want to stand out from the crowd, here are seven trending houseplants that are delightfully unusual and surprisingly easy to grow.


1. String of Dolphins (Senecio peregrinus)

If you want a plant that sparks conversation, the String of Dolphins is a must. Its small, plump leaves are shaped like tiny leaping dolphins—yes, really!

  • Why it’s trending: Its whimsical appearance makes it one of the most Instagram-worthy plants right now. Collectors love its rare shape and trailing growth.
  • Care tips: Like most succulents, it prefers bright, indirect light and well-draining soil. Allow the soil to dry between waterings. Overwatering is the biggest risk.
  • Extra perk: When happy, it produces small white flowers with a cinnamon-like scent.

2. Chinese Money Plant (Pilea peperomioides)

Also called the “friendship plant,” the Chinese Money Plant has round, coin-like leaves that grow on tall, thin stems, creating a bold and graphic look.

  • Why it’s trending: With minimalist design still in fashion, this plant fits perfectly in modern interiors. Its clean, circular leaves make it a natural fit for Scandinavian-style décor.
  • Care tips: Place it in bright, indirect light. Water once the soil starts to dry out. It’s fast-growing and often produces baby offshoots, which you can replant or give away.
  • Fun fact: It’s considered a symbol of wealth and good fortune in Feng Shui.

3. Polka Dot Begonia (Begonia maculata)

This houseplant looks like it stepped out of a fashion runway. Its dark green leaves are covered in dramatic silver polka dots, with deep red undersides that glow when light shines through.

  • Why it’s trending: Plant enthusiasts can’t resist its bold, graphic leaves that photograph beautifully for social media. It’s often dubbed one of the most “fashionable” houseplants.
  • Care tips: Begonias love bright but indirect light and humidity. Keep the soil slightly moist, but don’t let it sit in water. A pebble tray or humidifier will help in dry climates.
  • Bonus: It blooms indoors with clusters of white flowers if it’s thriving.

4. Zebra Plant (Aphelandra squarrosa)

Known for its striking striped foliage, the Zebra Plant is an eye-catching addition to any collection. Its glossy dark green leaves are marked with bold white veins, resembling zebra stripes.

  • Why it’s trending: It’s dramatic, exotic, and instantly elevates your indoor jungle. Plus, it sometimes produces bright yellow cone-shaped flowers that last for weeks.
  • Care tips: Zebra plants thrive in warm, humid environments with bright, indirect light. Keep the soil evenly moist, but not soggy. They can be finicky but are rewarding when cared for correctly.
  • Pro tip: Mist regularly or keep it in a bathroom with good light for added humidity.

5. Shingle Plant (Rhaphidophora hayi)

If you’re tired of the usual climbing houseplants, the Shingle Plant offers something different. Instead of dangling or sprawling, its leaves press flat against the surface it climbs, creating a unique shingle-like effect.

  • Why it’s trending: It gives vertical gardens and moss poles a modern twist. Its tight, overlapping leaves create a living wall look that’s perfect for design-savvy plant parents.
  • Care tips: Provide a vertical board or moss pole for it to climb. It prefers medium to bright, indirect light and consistent watering. Don’t let the soil dry out completely.
  • Style idea: Use it as a living art piece by training it to climb a flat wooden panel.

6. Fishbone Cactus (Epiphyllum anguliger)

Also called the “zigzag cactus” or “ric-rac cactus,” this plant is loved for its dramatic, jagged leaves that resemble a fish skeleton.

  • Why it’s trending: Its funky, sculptural look adds instant personality to any room. It’s especially popular among collectors of unusual succulents and cacti.
  • Care tips: Despite being a cactus, it actually prefers indirect light and slightly moist soil (it’s a rainforest cactus, not a desert one). Water when the top inch of soil dries out.
  • Surprise: With proper care, it can produce stunning, fragrant white flowers that open at night.

7. Black Velvet Alocasia (Alocasia reginula)

If you’re after something truly dramatic, the Black Velvet Alocasia delivers. Its deep, almost black leaves are contrasted by striking silvery-white veins, giving it a luxurious, velvet-like texture.

  • Why it’s trending: Dark-leafed plants are having a moment in interior design. This rare variety adds mood and elegance, making it highly sought after by plant collectors.
  • Care tips: Prefers bright, indirect light and well-draining soil. Keep the soil lightly moist and humidity high. It’s more sensitive than some houseplants, but its beauty is worth the effort.
  • Decor tip: Pair it with lighter-colored plants for dramatic contrast in your collection.

Why These Unusual Houseplants Are Trending

So, what’s fueling the popularity of these unusual varieties?

  1. Social Media Influence: Instagram, TikTok, and Pinterest are driving plant trends. Eye-catching, photogenic plants rise to fame quickly.
  2. Desire for Rarity: Plant parents love showing off unique finds that aren’t seen in every home.
  3. Interior Design Synergy: Designers now use plants as focal points. Bold shapes and unusual colors fit modern aesthetics.
  4. Wellness Culture: Beyond their looks, unusual plants spark joy and curiosity, boosting mental well-being.

How to Care for Unusual Houseplants

Unusual plants often get a reputation for being fussy, but with the right care basics, they’ll thrive:

  • Light: Most prefer bright, indirect light. Direct sun can scorch delicate leaves.
  • Water: Learn each plant’s rhythm. Succulents like the String of Dolphins need less water, while tropicals like the Zebra Plant enjoy evenly moist soil.
  • Humidity: Many trending plants come from tropical environments—regular misting or a humidifier helps.
  • Soil: Use well-draining soil mixes suited to the plant type (succulent mix for cacti, airy potting mix for tropicals).
  • Observation: Check leaves regularly for signs of stress, like yellowing or drooping.

Final Thoughts

If you’re ready to branch out from the ordinary, these seven unusual houseplants—String of Dolphins, Chinese Money Plant, Polka Dot Begonia, Zebra Plant, Shingle Plant, Fishbone Cactus, and Black Velvet Alocasia—are the perfect way to refresh your indoor jungle.

Not only do they bring personality and flair to your home, but they also connect you to a growing community of plant enthusiasts who value uniqueness and creativity in their collections. Whether you want whimsical dolphin leaves, bold polka dots, or the moody elegance of black velvet foliage, there’s a trending plant out there to match your style.

Houseplants are more than décor—they’re companions. And these unusual varieties are sure to spark joy, conversation, and maybe even a little envy among your guests.

Should You Try Companion Planting? Here’s What Experts Think

Should You Try Companion Planting? Here’s What Experts Think

Companion planting has long been a favorite topic among gardeners. The idea is simple: certain plants grow better when planted together, while others can harm one another. Gardeners have passed down these tips for centuries—pairing tomatoes with basil, or beans with corn, for example. But how much of this advice is based on tradition, and how much is backed by science? Should you really try companion planting in your own garden?

We spoke with gardening experts and reviewed the research to break down the benefits, potential drawbacks, and practical strategies of companion planting.


What Is Companion Planting?

Companion planting is the practice of placing specific plants next to each other in the garden to encourage growth, improve flavor, or deter pests. Instead of planting large blocks of a single crop (monoculture), companion planting relies on diversity—just like natural ecosystems.

There are a few main reasons people practice it:

  • Pest Control: Some plants repel insects that harm neighboring crops.
  • Pollination Support: Flowers attract beneficial insects, improving crop yields.
  • Nutrient Sharing: Certain plants, like legumes, enrich the soil for others.
  • Space Efficiency: Different root depths and growth patterns let you grow more in less space.

The Benefits of Companion Planting

Experts generally agree that companion planting can have real benefits—though not every claim holds equal weight.

1. Natural Pest Management

Strong-scented plants like marigolds, basil, and onions can deter pests such as aphids, beetles, and nematodes. For instance, planting carrots near onions can help repel carrot flies.

Expert Take: “Companion planting works best when paired with good gardening practices,” says Dr. Helen Rowe, a horticulture professor. “It’s not a cure-all, but it can reduce pest pressure without relying on chemicals.”

2. Improved Pollination

Flowers such as lavender, sunflowers, and borage draw pollinators to your garden. When bees and butterflies come for nectar, they often pollinate your vegetables, too.

3. Soil Health and Nutrients

Legumes like beans and peas fix nitrogen in the soil, enriching it for nitrogen-hungry crops like corn or leafy greens. This makes crop rotation and companion planting natural soil enhancers.

4. Maximized Space

Tall plants can provide shade for crops that prefer cooler soil. For example, corn offers natural support for climbing beans, while squash spreads at ground level, suppressing weeds—a trio famously known as the “Three Sisters” planting method.


Popular Companion Planting Combinations

Here are some tried-and-true pairings gardeners swear by:

  • Tomatoes + Basil: Basil may deter tomato hornworms and can improve tomato flavor.
  • Corn + Beans + Squash: The traditional Native American “Three Sisters” system.
  • Carrots + Onions: Onion scent confuses carrot flies.
  • Cabbage + Dill: Dill attracts beneficial insects like wasps that prey on cabbage worms.
  • Lettuce + Radishes: Radishes mature quickly, creating space for slow-growing lettuce.

Myths and Misconceptions

While companion planting has many benefits, not every claim holds up under scientific scrutiny.

  • Flavor Enhancement: The idea that basil automatically improves tomato flavor is debated. Some gardeners notice a difference, but research is limited.
  • All-in-One Pest Solutions: Companion planting can help, but it won’t eliminate all pests. Integrated pest management (crop rotation, soil care, barriers) is still essential.
  • One-Size-Fits-All: What works in one region may not work in another due to climate, soil, and pest variations.

The Downsides of Companion Planting

While generally low-risk, companion planting does come with challenges:

  • Competition for Resources: Some combinations can stunt growth if plants compete for light, water, or nutrients.
  • Complex Planning: Companion planting requires forethought and record-keeping. It may not be ideal for beginner gardeners.
  • Inconsistent Results: Because many claims come from tradition rather than research, not all pairings will work for every gardener.

Expert Note: “Companion planting is not magic. It’s about creating beneficial relationships between plants, but gardeners still need to pay attention to soil, spacing, and maintenance,” says Jeff Logan, an organic farming consultant.


Expert Recommendations: How to Do It Right

If you want to try companion planting, here’s what experts suggest:

  1. Start Small: Experiment with one or two pairings before redesigning your entire garden.
  2. Observe and Record: Take notes on what works in your specific conditions.
  3. Use Native Plants: Local flowers and herbs attract pollinators better than exotic varieties.
  4. Combine with Other Practices: Rotate crops, mulch, and maintain soil health for best results.
  5. Balance Diversity and Order: While diversity helps, overcrowding plants can backfire.

Should You Try Companion Planting?

So, is companion planting worth the effort? Most experts agree: yes—with realistic expectations.

It’s unlikely to be a silver bullet, but it can:

  • Reduce reliance on pesticides
  • Improve soil naturally
  • Attract pollinators
  • Make your garden more resilient and productive

If you enjoy experimenting and observing your plants, companion planting is a rewarding approach. Even if results vary, the added biodiversity almost always benefits the overall ecosystem in your yard.


Final Thoughts

Companion planting blends centuries of gardening wisdom with modern ecological understanding. While not every traditional pairing is backed by science, many strategies—like combining legumes with heavy feeders, or planting flowers alongside vegetables—have proven benefits.

At its core, companion planting is about working with nature rather than against it. By embracing diversity, supporting pollinators, and experimenting with plant partnerships, you can create a garden that’s healthier, more productive, and more enjoyable.

So, should you try companion planting? Absolutely—just start small, keep an open mind, and let your garden (and the experts) show you what works best.

How to Build a Bee Hotel in Your Backyard

How to Build a Bee Hotel in Your Backyard

Pollinators are the unsung heroes of our gardens. While honeybees and bumblebees often get most of the spotlight, solitary bees like mason bees and leafcutter bees play a crucial role in pollination too. In fact, many of these solitary bees are more efficient pollinators than honeybees. Yet they struggle to find nesting places in our modern, manicured landscapes.

That’s where a bee hotel comes in. By creating a simple habitat in your backyard, you can give these hardworking insects a safe place to live, breed, and thrive—all while boosting your garden’s productivity. The best part? Building a bee hotel is inexpensive, fun, and a great project for the whole family.

Here’s a step-by-step guide to creating your own bee hotel, plus tips to keep it safe and welcoming for your buzzing guests.


Why Build a Bee Hotel?

Before diving into the how-to, it helps to understand why bee hotels matter:

  • Boost Pollination: More bees mean more flowers, fruits, and vegetables thriving in your garden.
  • Support Biodiversity: Many native bee species are in decline due to habitat loss. A bee hotel gives them shelter.
  • Educational Value: Watching bees nest and work is a great way to learn about nature, especially for kids.
  • Low Maintenance: Once set up, bee hotels require little upkeep compared to other wildlife projects.

Step 1: Choose the Right Location

Location is everything when it comes to building a bee hotel. Bees prefer a spot that is:

  • Sunny: South- or southeast-facing positions work best, since warmth helps bees stay active.
  • Sheltered: Avoid areas with strong winds or heavy rain exposure.
  • Near Flowers: Bees need nearby food sources—plant pollinator-friendly blooms within a few meters.

Tip: Mount the hotel at least 3–5 feet above the ground to protect from predators and flooding.


Step 2: Pick the Right Materials

A bee hotel should mimic natural nesting environments, such as hollow stems, wood cavities, and crevices. You can use:

  • Untreated Wood Blocks: Drill holes of varying diameters (2–10mm) about 4–6 inches deep.
  • Hollow Stems: Bamboo, reeds, or hollow plant stems work perfectly.
  • Logs or Branches: As long as they’re untreated and free of chemicals.
  • Recycled Materials: Old cans, wooden boxes, or crates can serve as the hotel’s frame.

Important: Never use treated wood or plastic. Bees are sensitive to chemicals, and poor ventilation can trap moisture, leading to mold.


Step 3: Design and Build the Frame

The frame is essentially the “house” that holds the nesting materials. It can be as simple or creative as you like:

  1. Use a wooden box, crate, or even a section of old pallet.
  2. Make sure it has a back panel so the materials don’t fall out.
  3. A sloping roof is recommended to help rainwater run off.
  4. Fill the frame tightly with nesting materials like bamboo or drilled wood blocks.

Think of the frame as a bookshelf—neat rows and tightly packed materials help bees feel safe.


Step 4: Drill Nesting Holes Correctly

If you’re making holes in wood blocks, follow these guidelines:

  • Depth: At least 4 inches to allow proper nesting.
  • Diameter: Provide a mix (2mm for tiny bees, 10mm for larger species).
  • Smoothness: Sand hole edges to prevent wing damage.
  • Closed Ends: Bees prefer cavities with only one entrance.

Avoid drilling all the way through the wood; closed ends help protect larvae.


Step 5: Add Variety for Different Bees

Not all solitary bees nest the same way. By offering a mix of materials, you’ll attract more species:

  • Mason Bees: Love small drilled holes and tubes.
  • Leafcutter Bees: Prefer larger cavities and use leaf pieces to line their nests.
  • Carpenter Bees: Like untreated softwood for boring.

The more diverse the hotel, the more pollinators you’ll attract.


Step 6: Secure and Mount the Hotel

Mount your bee hotel securely to prevent shaking or tipping. Bees don’t like instability. Attach it firmly to a wall, fence, or sturdy post. Make sure it’s level so nesting holes don’t face upward, which could let rain in.

Tip: Avoid hanging it from a string or hook—wind movement can discourage bees from settling.


Step 7: Maintain Your Bee Hotel

Although bee hotels are low-maintenance, some care ensures they remain safe:

  • Clean Every 1–2 Years: Replace worn or moldy materials.
  • Avoid Parasites: Occasionally check for signs of mites or wasps taking over.
  • Don’t Relocate: Keep the hotel in the same spot year to year to avoid disorienting returning bees.

After winter, you may notice mud- or leaf-sealed holes. That’s a good sign—bees have laid eggs inside. By spring, new bees will emerge to continue the cycle.


Step 8: Plant a Pollinator-Friendly Garden

A bee hotel is only part of the equation. Without flowers, bees won’t stick around. Add pollinator-friendly plants such as lavender, sunflowers, coneflowers, clover, and native wildflowers. Aim for a mix that blooms throughout the growing season so bees always have food.

Bonus Hack: Avoid pesticides and herbicides. They harm bees and undo the benefits of your hotel.


Step 9: Add Water and Mud Sources

Some solitary bees, like mason bees, need mud to seal their nests. Provide a shallow dish of damp soil or mud nearby. Similarly, a shallow birdbath or dish with stones can help bees safely access water.

This small addition makes your hotel much more attractive to potential residents.


Step 10: Enjoy and Observe

Once your bee hotel is set up, the fun begins. Watch bees investigate, nest, and eventually seal their homes. This process is fascinating, especially for kids, and helps connect your household to the rhythms of nature.

Keep a garden journal to track which species visit, when they emerge, and how your flowers respond to the increased pollination.


Common Mistakes to Avoid

  • Using Plastic Tubes: They trap moisture and grow mold.
  • Making Holes Too Shallow: Bees need depth for egg chambers.
  • Neglecting Maintenance: Over time, dirty or parasite-infested hotels can harm bee populations.
  • Placing in the Shade: Bees need warmth to thrive.

Final Thoughts

Building a bee hotel in your backyard is more than just a fun DIY project—it’s a meaningful step toward supporting biodiversity, protecting pollinators, and improving your garden’s health. With a few recycled materials, some simple tools, and a thoughtful setup, you can create a safe haven for solitary bees that will reward you with abundant blooms and a thriving ecosystem.

By giving bees a home, you’re not just helping your backyard—you’re helping the planet, one buzzing guest at a time.