10 Garden Hacks That Save You Money and Time

10 Garden Hacks That Save You Money and Time

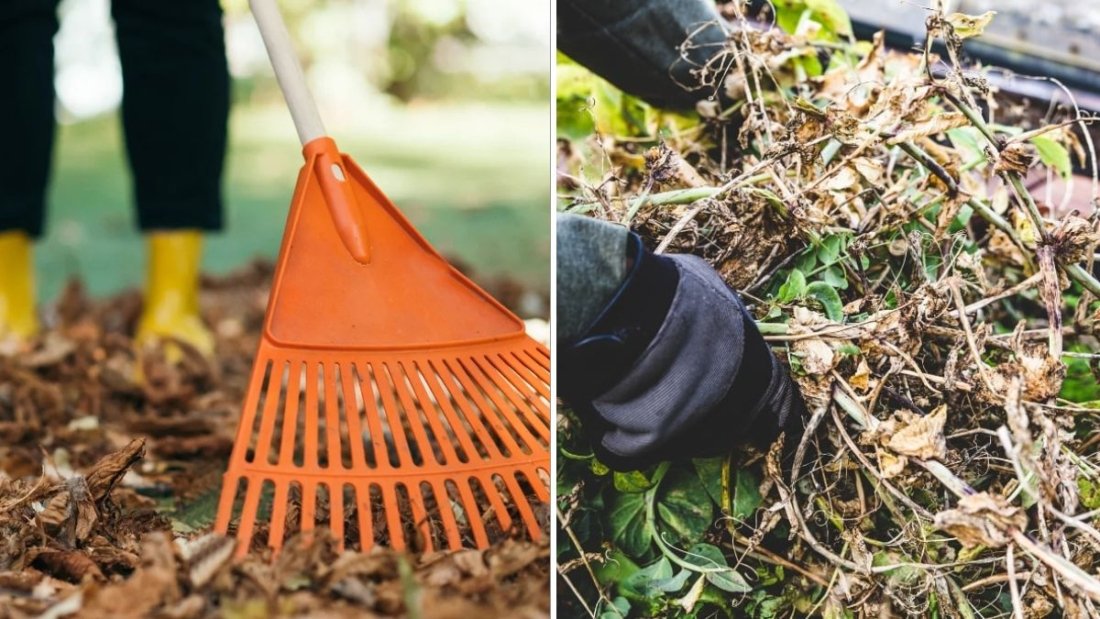
Gardening is a labor of love, but let’s be honest—between the cost of supplies, hours of upkeep, and endless to-do lists, it can sometimes feel overwhelming. The good news? With a little creativity, you can cut expenses and reclaim your time without sacrificing the beauty or productivity of your garden. Whether you’re a beginner or a seasoned green thumb, these ten garden hacks will help you save both money and time while keeping your outdoor space thriving.


1. Repurpose Household Items as Garden Tools

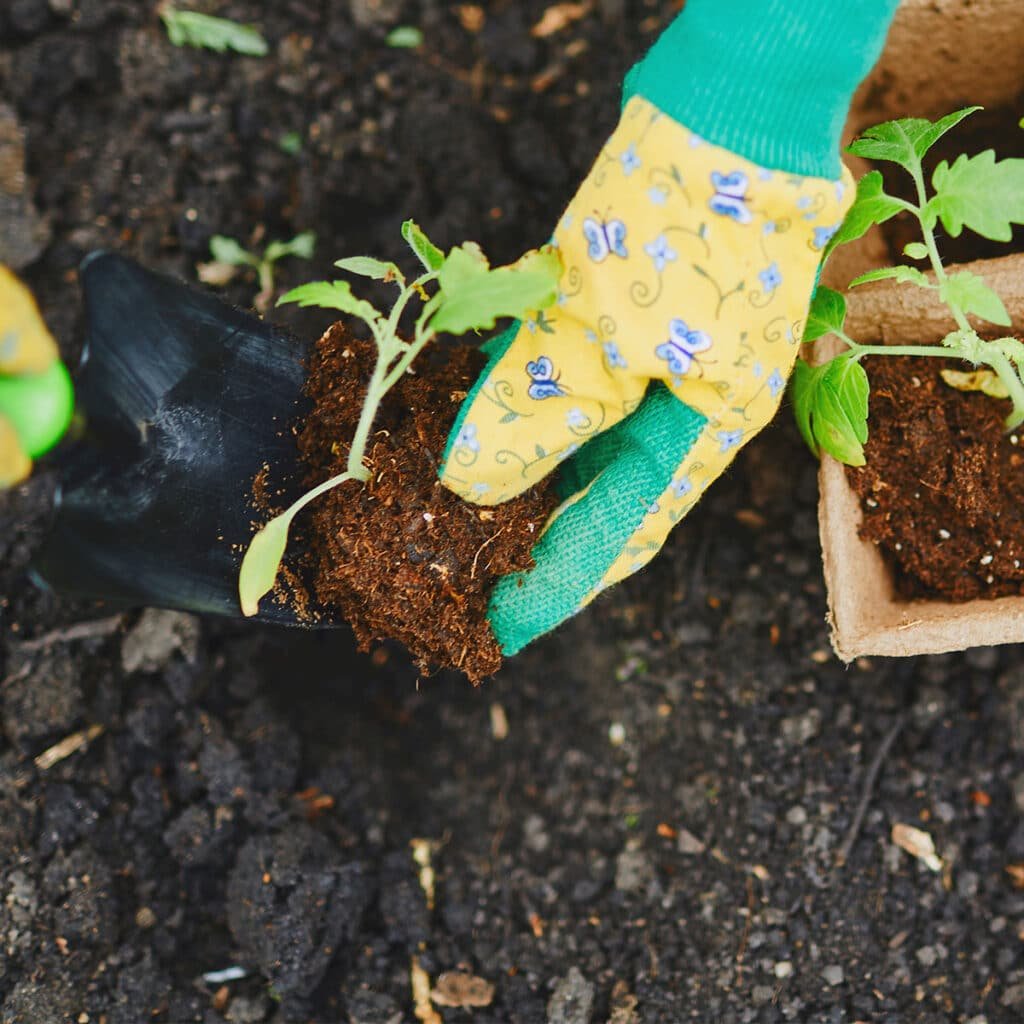
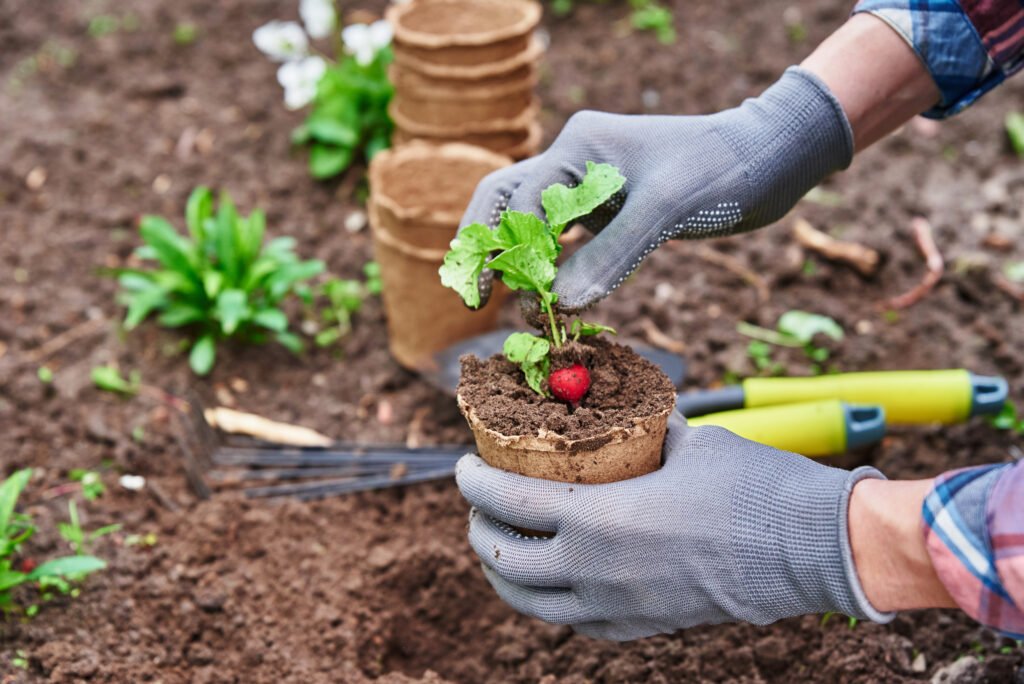
Why spend extra money on fancy containers or tools when you already have hidden treasures at home? Empty milk jugs, plastic bottles, and yogurt cups make excellent seed starters. An old spoon can double as a soil scoop, while broken kitchen utensils can work as small weeders. Even coffee cans or large jars can become plant pots with a few drainage holes. This simple hack not only cuts costs but also reduces waste, making your garden more sustainable.

Tip: Cut a two-liter bottle in half, use the bottom as a mini greenhouse, and place it over delicate seedlings to protect them from pests and frost.


2. Make Your Own Compost Instead of Buying Fertilizer

One of the biggest gardening expenses is store-bought fertilizer. But you can create nutrient-rich compost for free using kitchen scraps and yard waste. Vegetable peelings, coffee grounds, eggshells, and grass clippings all break down into powerful soil food that enriches your plants naturally.

Composting doesn’t require a fancy bin—you can start with a simple pile in a corner of your yard. Just remember to balance green (nitrogen-rich) materials like food scraps with brown (carbon-rich) ones like leaves and cardboard.

Money Saver: Compost reduces your need for expensive soil amendments and chemical fertilizers while helping your plants grow stronger and healthier.


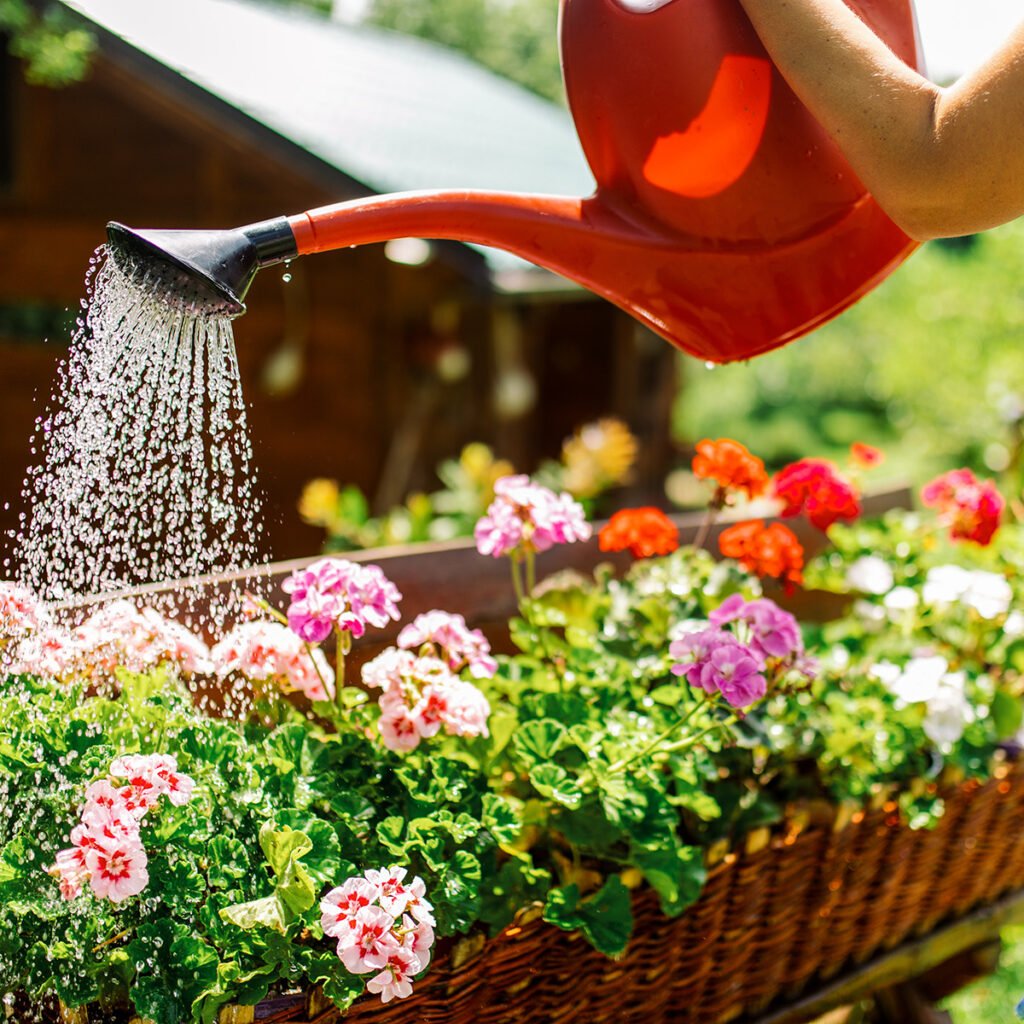
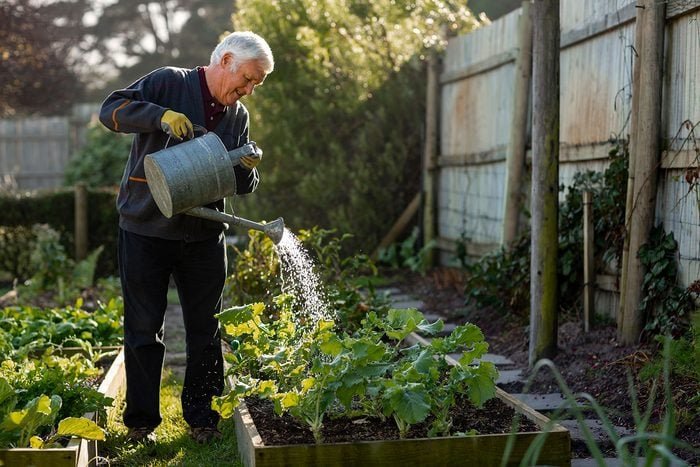
3. Collect Rainwater for Free Irrigation

Water bills can skyrocket during the summer, especially if you have a large garden. Instead of relying solely on tap water, install a rain barrel to collect runoff from your roof. You’ll have a free, natural water source for your plants.

Rainwater is actually better for your garden since it’s free of chlorine and chemicals found in treated tap water. This hack is a win-win: eco-friendly and cost-effective.

Time Saver: Attach a drip irrigation hose to your rain barrel for automatic, low-effort watering.


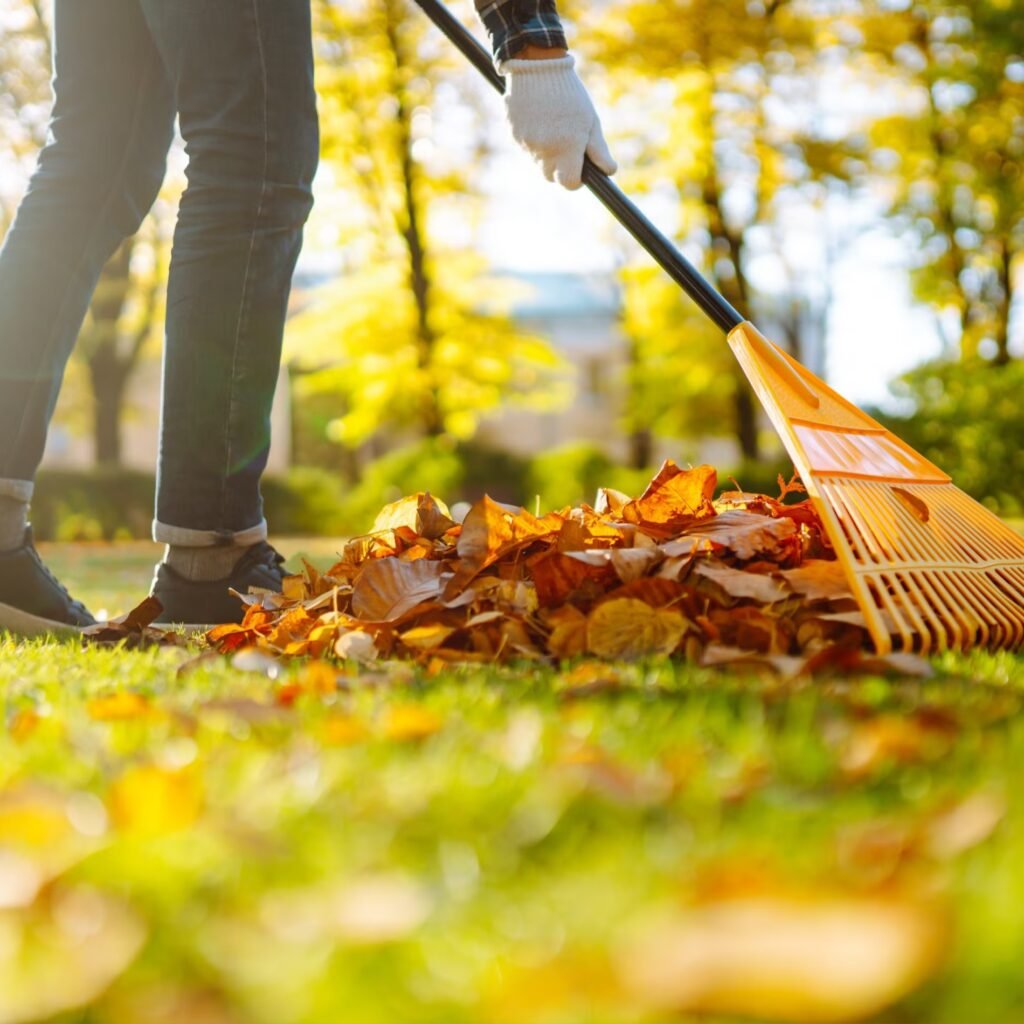
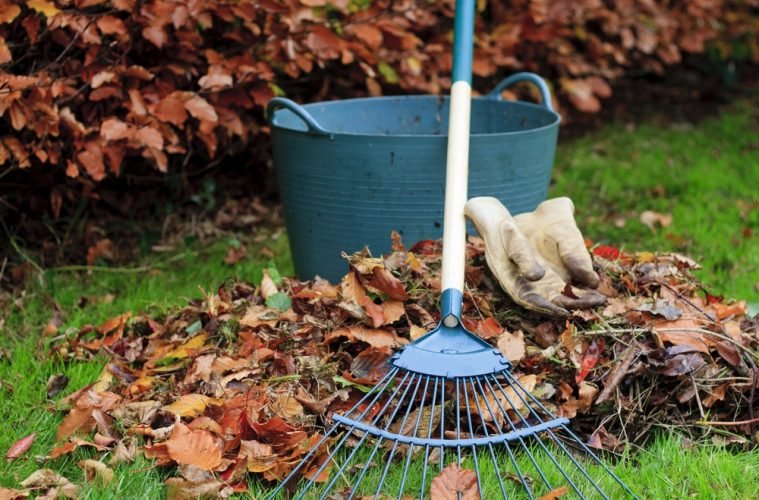
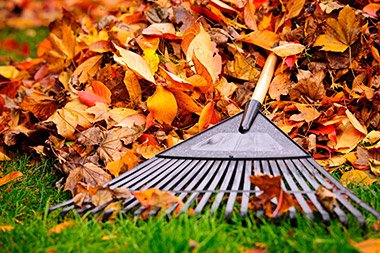
4. Mulch with Everyday Materials

Mulching keeps soil moist, reduces weeds, and adds nutrients—but buying bags of mulch can be pricey. Instead, try free or cheap alternatives. Shredded leaves, grass clippings, pine needles, straw, or even shredded newspaper work wonderfully as mulch.

Not only will this save you money, but it also reduces how often you need to water and weed.

Hack: Spread a thick layer of mulch around your plants to trap moisture, meaning fewer watering sessions for you.


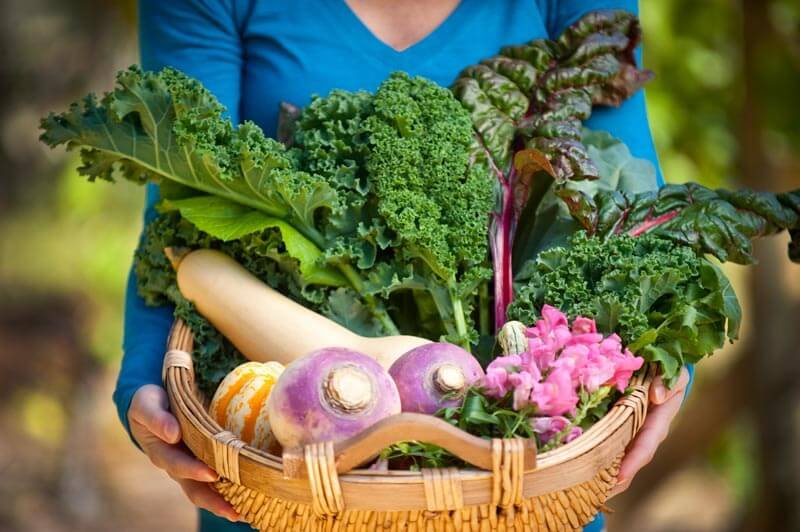
5. Save Seeds from This Year’s Harvest

Instead of buying new seed packets every spring, save seeds from the plants you already have. Tomatoes, peppers, beans, and herbs like basil are particularly easy to harvest seeds from.

Simply dry the seeds thoroughly and store them in labeled envelopes in a cool, dry place. This hack ensures you’ll have free planting material year after year.

Bonus: By saving seeds from your healthiest plants, you’re naturally creating stronger, more resilient crops for your garden.


6. Plant Perennials for Long-Term Savings

Annuals may be pretty, but they need to be replanted each year, which costs both money and time. Instead, invest in perennials—plants that return year after year with minimal upkeep.

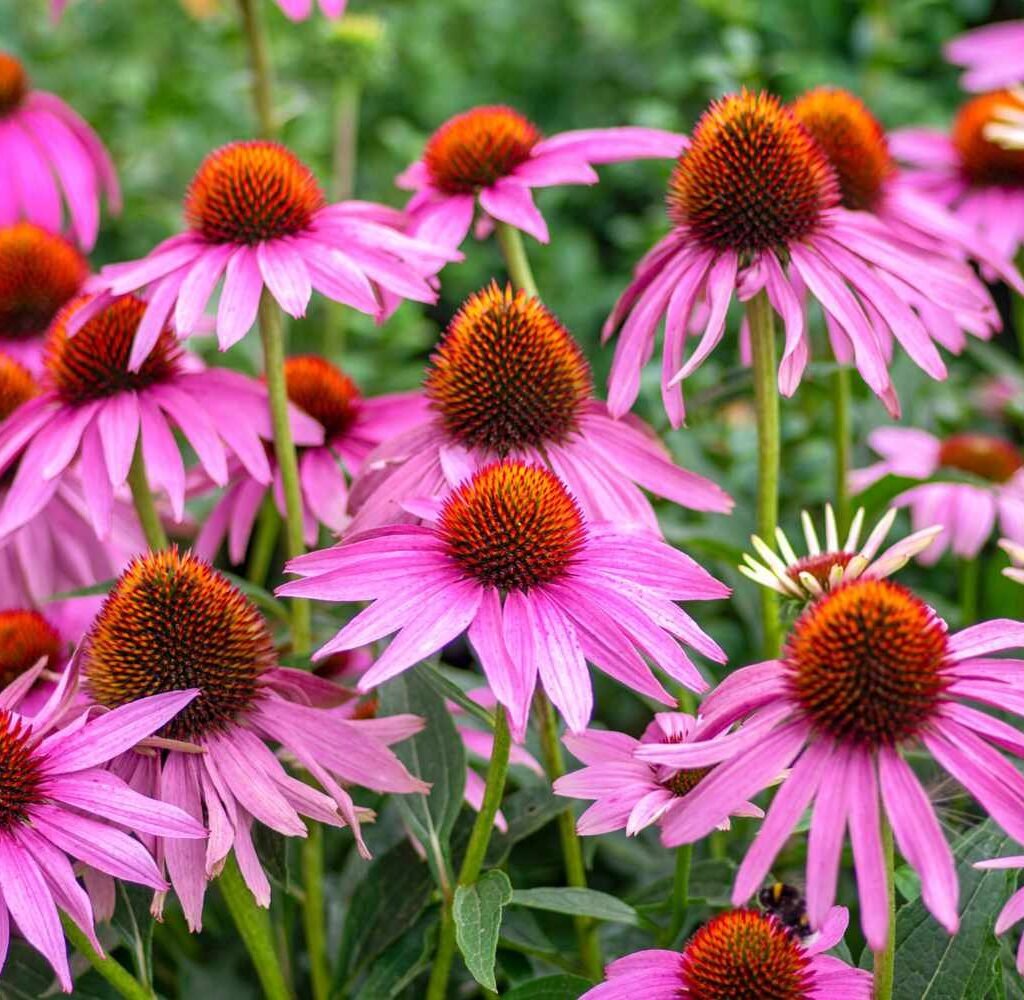
Herbs like chives, thyme, and oregano, as well as flowers like lavender, coneflowers, and daylilies, are great perennial options. You’ll spend less time replanting and more time enjoying a lush, thriving garden.

Tip: Mix perennials with a few high-impact annuals for both beauty and long-term savings.


7. Use Coffee Grounds and Eggshells as Natural Fertilizers

Don’t toss those morning leftovers! Coffee grounds add nitrogen to the soil, making them a great fertilizer for leafy greens like spinach and lettuce. Crushed eggshells provide calcium, which helps prevent blossom end rot in tomatoes and peppers.

Scatter them directly into your soil or add them to your compost pile for an extra nutrient boost.

Hack: Coffee grounds can also deter slugs and snails, saving you time spent battling pests.


8. DIY Trellises and Supports from Recycled Materials

Climbing plants like cucumbers, peas, and beans need support—but store-bought trellises can be expensive. Instead, make your own using old ladders, tree branches, or even wooden pallets.

Tomatoes also benefit from DIY cages made from wire fencing or rebar. With a little creativity, you can build sturdy plant supports at little to no cost.

Time Saver: Strong trellises keep plants off the ground, making them easier to harvest and reducing disease risk.


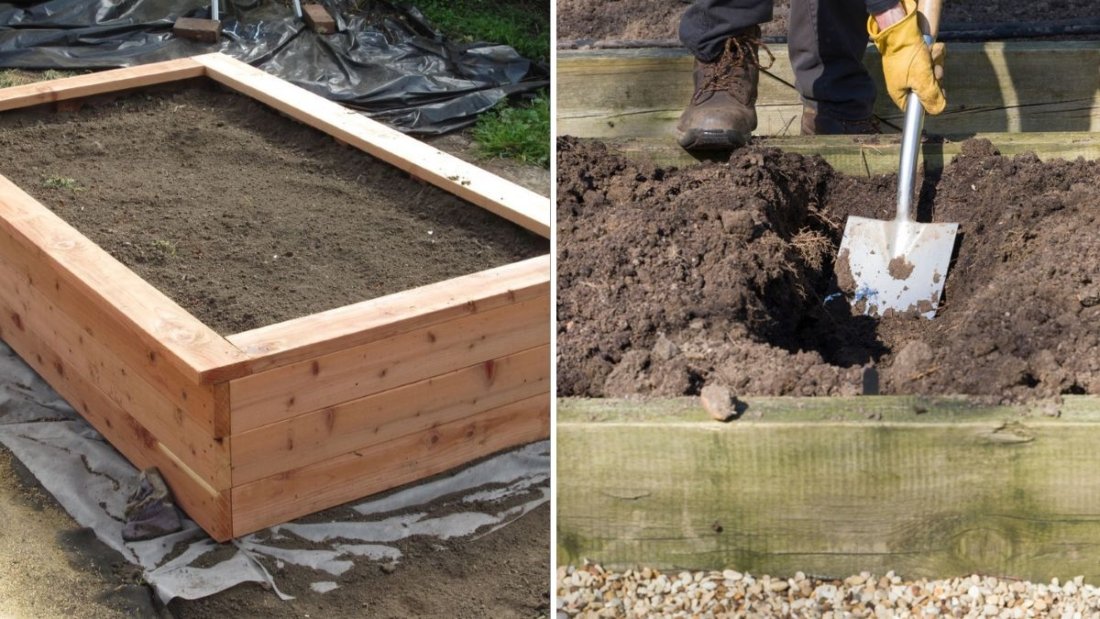
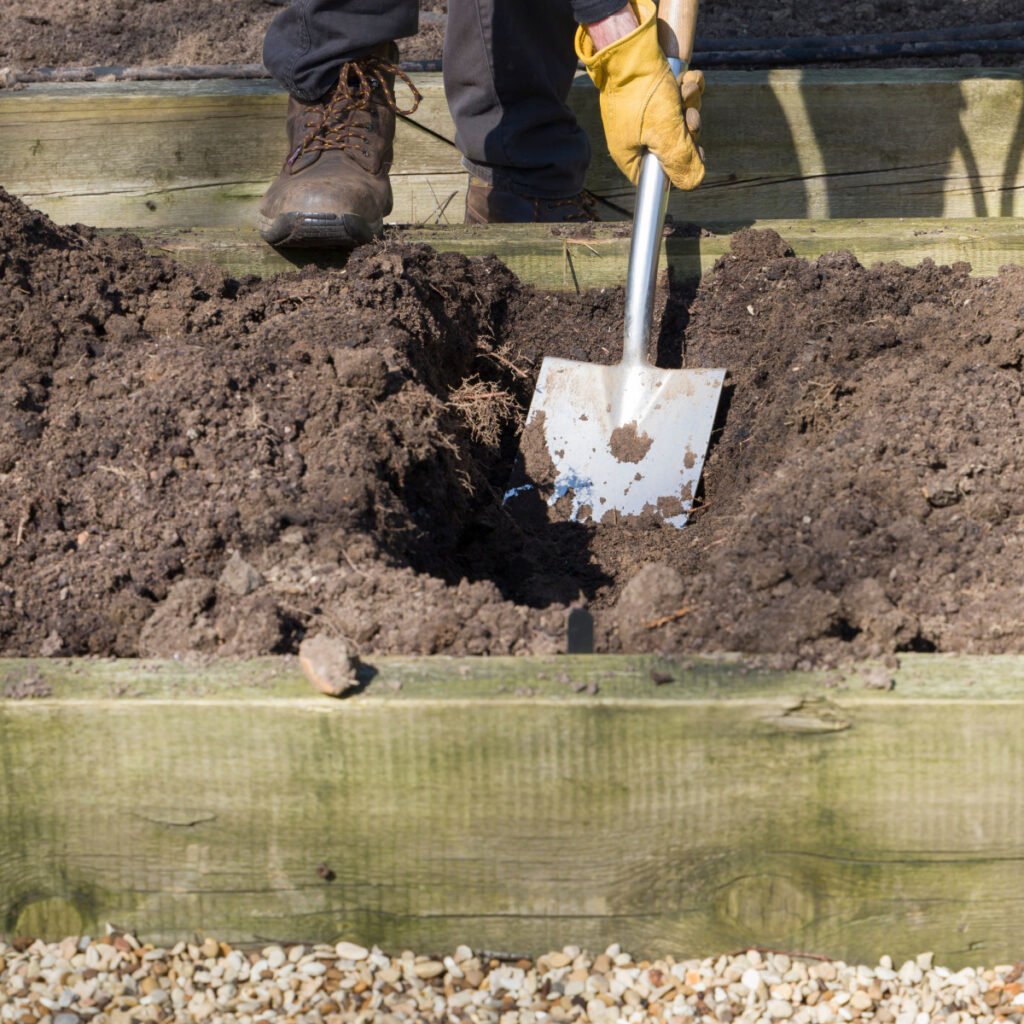
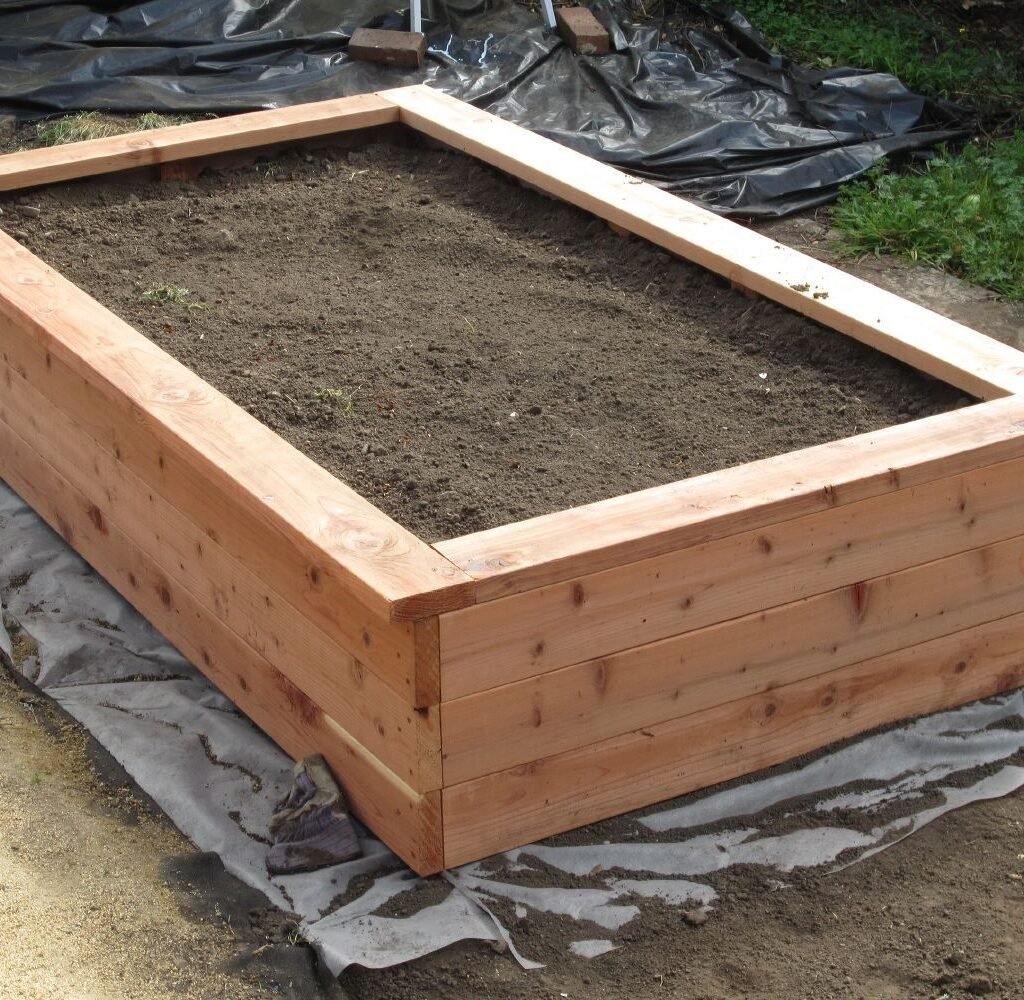
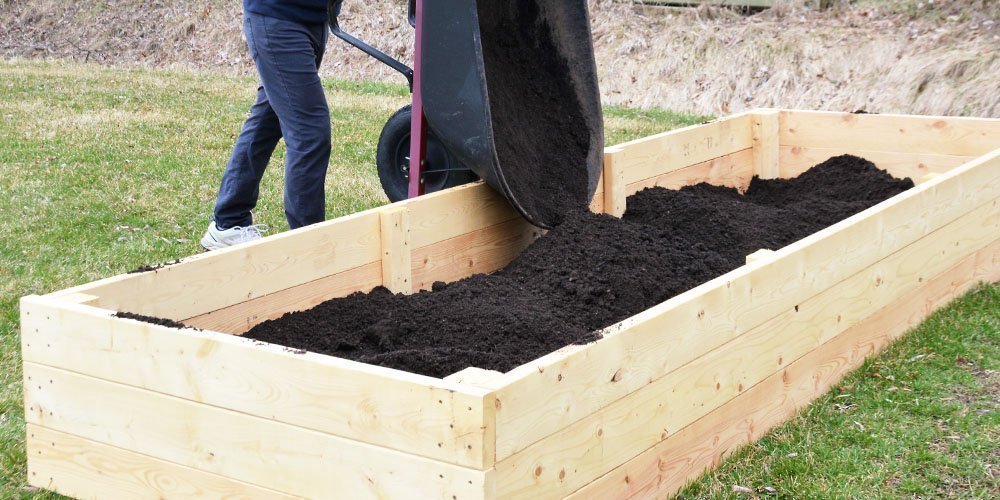
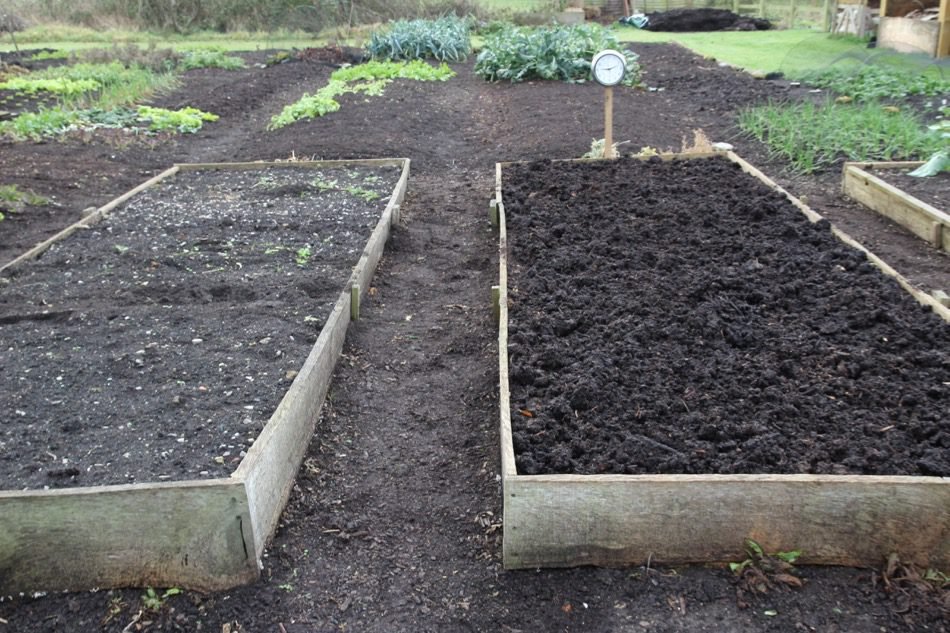
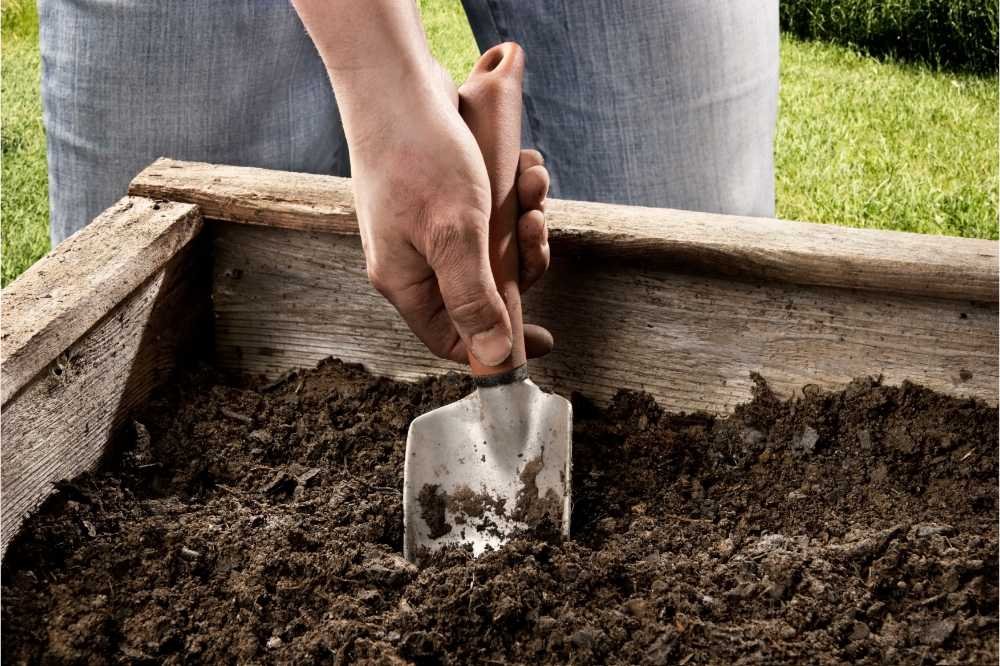
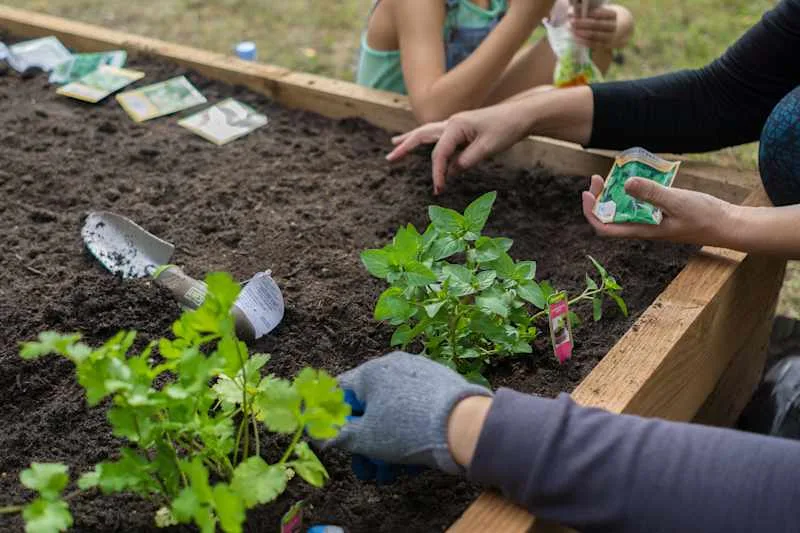
9. Plant in Raised Beds or Containers for Efficiency

While building raised beds may require some upfront effort, they pay off quickly. Raised beds improve drainage, reduce weeds, and keep soil warmer, extending your growing season. They also make weeding and harvesting easier, saving you time in the long run.

If you’re short on space, containers are an equally effective option. Repurpose old buckets, barrels, or even broken wheelbarrows as planters.

Money Saver: Better soil control in raised beds and containers means healthier plants, which leads to bigger harvests and fewer plant losses.


10. Plan and Rotate Your Crops to Maximize Yields

A little planning goes a long way in gardening. By rotating crops each season, you reduce soil-borne diseases and pests while ensuring nutrients are replenished naturally. For example, after growing nitrogen-hungry plants like tomatoes, follow with beans or peas that add nitrogen back to the soil.

Crop planning also prevents overcrowding, which wastes time and resources.

Hack: Sketch a simple garden layout before planting to avoid mistakes and optimize your space.


Final Thoughts

Gardening doesn’t have to drain your wallet or your free time. By incorporating these clever hacks—like composting, rainwater collection, DIY trellises, and seed-saving—you’ll not only reduce costs but also simplify your gardening routine. The result? A healthier, more productive garden that practically takes care of itself.

With a little creativity and planning, you can enjoy all the beauty and bounty of gardening while saving both money and precious hours. Start with just one or two of these hacks, and soon you’ll wonder how you ever managed without them.

Should You Cover Your Garden Beds in Fall? Experts Explain

Should You Cover Your Garden Beds in Fall? Experts Explain

As autumn sets in and your summer crops fade, you might wonder what to do with your garden beds before winter arrives. Should you leave them bare, or is it better to cover them? According to gardening experts, covering your garden beds in fall is one of the smartest steps you can take to protect your soil and set yourself up for success in the next growing season.

Covering your garden beds doesn’t just mean throwing on a tarp. There are several methods—mulch, cover crops, compost blankets, and protective sheeting—each with specific benefits. Understanding why covering is important, and how to do it properly, can make all the difference in the health of your soil and crops.

Here’s what the experts say about whether you should cover your beds in fall, and the best ways to do it.


Why Cover Garden Beds in Fall?

Leaving your garden beds bare during fall and winter exposes them to the elements. Rain, snow, and wind can wash away nutrients and compact the soil. Worse, weeds and pests can settle in, creating challenges come spring. Covering your beds helps to:

  1. Protect Soil from Erosion – Rain and melting snow can strip away topsoil, which is the most fertile layer. A cover helps keep it in place.
  2. Preserve Nutrients – Covering prevents nutrient leaching, especially nitrogen, which can easily wash out of unprotected soil.
  3. Suppress Weeds – Many weed seeds germinate in fall. Covering prevents light from reaching them, reducing spring weeding.
  4. Improve Soil Health – Organic covers feed soil microbes, creating rich, fertile ground.
  5. Insulate Soil – Covers act as a blanket, keeping soil temperatures more stable and protecting overwintering perennials.

The Best Ways to Cover Garden Beds in Fall

Experts recommend several options for covering beds, depending on whether you want to keep them dormant or continue growing cold-hardy crops.


1. Mulching with Organic Materials

Mulching is perhaps the easiest and most common method. Applying a thick layer of organic matter protects soil from erosion and feeds it as the material decomposes.

  • Best materials: Straw, shredded leaves, pine needles, untreated wood chips, or compost.
  • How to do it: Spread 2–4 inches of mulch over the entire bed. Avoid piling it right against plant stems to prevent rot.
  • Expert tip: Shredded leaves are especially valuable—they’re free, abundant in fall, and decompose quickly to enrich the soil.

2. Planting Cover Crops (Green Manure)

Cover crops, also called green manure, are living covers that grow through fall and sometimes into winter. They protect soil while actively improving it.

  • Best choices: Winter rye, crimson clover, hairy vetch, and winter wheat.
  • Benefits: They prevent weeds, fix nitrogen, and build organic matter. In spring, chop them down and mix them into the soil.
  • Expert tip: Plant cover crops as soon as summer crops are cleared to give them time to establish before frost.

3. Compost Blanketing

Instead of mulching with leaves or straw, some gardeners prefer to blanket beds with a layer of finished compost.

  • Benefits: Compost adds nutrients, improves soil structure, and acts as a protective cover. Over winter, worms and microbes pull it deeper into the soil.
  • How to do it: Apply 2–3 inches of compost evenly across the bed. In spring, you’ll have nutrient-rich soil ready for planting.
  • Expert tip: Combine compost with a light mulch (like shredded leaves) for insulation and nutrient benefits.

4. Plastic or Tarp Covers

Sometimes gardeners use plastic sheeting or tarps to protect soil, especially if they want to block weeds completely.

  • Clear plastic: Can warm soil slightly, allowing earlier spring planting.
  • Black plastic or tarps: Block light, killing weeds and protecting soil from erosion.
  • Expert tip: If using plastic, secure edges with rocks or boards to prevent wind from lifting it. Remove it in early spring to let the soil breathe.

5. Row Covers and Cold Frames

If you’d like to continue growing hardy greens (like spinach, kale, or lettuce) through fall and into winter, row covers or cold frames are great choices.

  • Row covers: Lightweight fabric that shields crops from frost while letting in light and water.
  • Cold frames: Mini greenhouses built with glass or plastic lids that insulate plants.
  • Expert tip: This method allows you to harvest fresh vegetables even when snow is on the ground.

Common Mistakes to Avoid

While covering garden beds is highly recommended, there are a few mistakes experts warn against:

  • Using Diseased Plant Material: Never cover beds with debris from plants that had blight, mildew, or pests. This spreads problems into the next season.
  • Over-Mulching: Too thick a mulch layer (over 6 inches) can suffocate soil and delay warming in spring.
  • Ignoring Timing: Don’t wait until the ground is frozen. Cover beds in mid to late fall while the soil is still workable.
  • Plastic Without Drainage: Solid plastic sheeting can trap excess moisture, causing waterlogging. Always check drainage or opt for breathable fabric.

When Covering Isn’t Necessary

There are a few cases where covering isn’t required:

  • Perennial Beds: If your raised beds are planted with hardy perennials (like asparagus, strawberries, or herbs), you may only need a light mulch to protect roots.
  • Winter Gardening Beds: If you’re actively growing under cold frames or tunnels, the crops themselves and their covers serve as protection.
  • Very Mild Climates: In regions without hard freezes, a light compost layer may be sufficient.

Final Thoughts

So, should you cover your garden beds in fall? Experts say the answer is almost always yes. Covering protects soil from erosion, improves fertility, and suppresses weeds, ensuring you start the next growing season with healthy, nutrient-rich soil.

The method you choose—mulching, composting, planting cover crops, or using tarps—depends on your gardening goals and climate. Whether you want to simply protect soil or extend your growing season, there’s a covering strategy that will work for you.

Think of it as tucking your garden into bed for the winter. With a little preparation in fall, your soil will rest, recharge, and be ready to reward you with vigorous growth and abundant harvests when spring returns.

The Best Way to Prepare Raised Beds for Winter

The Best Way to Prepare Raised Beds for Winter

As the gardening season comes to a close and winter approaches, many gardeners turn their attention to putting their raised beds “to sleep.” Preparing raised beds properly in fall not only protects soil and plants through the cold months but also sets the stage for a thriving, productive garden come spring. Instead of letting your beds sit neglected, taking a few steps now can improve soil health, prevent erosion, reduce pests and diseases, and make planting in spring much easier.

Here’s a detailed guide to the best way to prepare raised beds for winter:


1. Clear Out Spent Plants

At the end of the growing season, it’s important to remove dead or dying plants. Leaving them in the soil can invite pests, harbor diseases, or create unnecessary clutter.

  • Remove Diseased Material: If plants show signs of blight, mildew, or pests, dispose of them away from your compost pile to avoid spreading pathogens.
  • Chop and Drop Healthy Plants: If plants are healthy, chop them into smaller pieces and leave them on the soil surface as green mulch. This adds organic matter back to the bed as it decomposes.
  • Pull Weeds: Removing weeds in fall prevents them from setting seeds that could become a headache in spring.

2. Test and Amend the Soil

Healthy soil is the foundation of a productive raised bed. Fall is an excellent time to test your soil and add amendments.

  • Soil Testing: Check pH and nutrient levels with a simple soil test kit. This helps you understand what your soil needs before the next planting season.
  • Add Compost: Spread a 2–3 inch layer of compost over your beds. Over winter, it will break down further, enriching the soil with nutrients.
  • Amend for Structure: Mix in organic matter like aged manure, leaf mold, or shredded straw to improve drainage and aeration.

3. Plant Cover Crops (Green Manure)

Cover crops are one of the most effective ways to keep raised beds fertile and protected during winter.

  • Benefits: Cover crops prevent erosion, suppress weeds, fix nitrogen, and improve soil structure.
  • Best Choices: Rye, winter wheat, crimson clover, or hairy vetch are hardy and excellent for raised beds.
  • How to Plant: Sow seeds after clearing beds. In spring, chop them down before they set seed and mix them into the soil.

4. Mulch Generously

Mulching is one of the simplest ways to protect your raised beds during the cold months.

  • Why Mulch: Mulch insulates soil, prevents erosion, and keeps beneficial soil organisms active longer into winter.
  • Best Mulches for Winter: Straw, shredded leaves, pine needles, or untreated wood chips.
  • Application: Apply 3–4 inches of mulch across the entire bed, leaving a little space around any perennials or overwintering crops.

5. Protect Perennials and Overwintering Crops

If you grow perennial herbs or overwintering vegetables, they need extra care to survive the cold.

  • Herbs Like Thyme, Oregano, and Chives: Apply mulch around their roots to insulate them.
  • Garlic and Onions: Plant cloves in fall, then cover with mulch to protect against frost heaving.
  • Cold-Hardy Greens: Crops like kale, spinach, and mâche can survive under row covers or cold frames.

6. Use Row Covers or Cold Frames

Extending your season is possible even in winter if you provide some extra protection.

  • Row Covers: Lightweight fabric keeps frost off plants while allowing light and water through.
  • Cold Frames: Simple wooden frames with glass or clear plastic tops act like mini-greenhouses, allowing you to grow greens well into winter.
  • Low Tunnels: Made from hoops covered with plastic sheeting, they’re affordable and effective for winter gardening.

7. Prevent Soil Compaction and Erosion

Winter rains and snow can compact soil or wash it away if left unprotected.

  • Raised Bed Advantages: Because they’re elevated, raised beds drain better than in-ground gardens, but they still need protection.
  • Avoid Bare Soil: Either plant cover crops or cover with mulch—bare soil is most vulnerable to erosion.
  • Don’t Walk on Beds: Stepping into raised beds in wet weather compacts soil, reducing oxygen and root health.

8. Add a Protective Cover

For beds you don’t plan to use in winter, adding a protective cover can help.

  • Tarping: A dark tarp prevents weed growth and protects soil from heavy rains.
  • Plastic Sheeting: Clear plastic warms the soil slightly but should be removed periodically to prevent excess moisture buildup.
  • Wood or Frame Lids: Some gardeners build lightweight lids to cover raised beds, especially in snowy climates.

9. Care for the Bed Structure

Winter can be tough on the wooden or metal sides of raised beds. Take time in fall to inspect and repair them.

  • Check for Rot or Rust: Wooden beds may need resealing, while metal beds may need rust protection.
  • Tighten Screws and Bolts: Freezing and thawing cycles can loosen fasteners.
  • Re-level Beds: Make sure the soil inside hasn’t shifted unevenly.

10. Plan Ahead for Spring

Winter preparation is not just about protecting your current soil—it’s also about setting yourself up for success next season.

  • Draw Garden Maps: Note what crops grew where to help with crop rotation next year.
  • Order Seeds Early: Many popular varieties sell out fast, so winter is a great time to order.
  • Start Indoors: Some crops, like onions or brassicas, can be started indoors in late winter, ready to transplant into your prepared beds.

Final Thoughts

Winter doesn’t mean gardening has to stop—it’s simply a season of rest and renewal for your raised beds. By removing spent plants, enriching the soil, mulching, and protecting crops, you ensure your garden is well cared for through the cold months. Cover crops, protective structures, and smart soil management keep your raised beds fertile and ready to spring back to life once the weather warms.

Think of winter preparation as an investment: a little effort now pays off with healthier soil, fewer weeds, and a head start on planting when spring arrives. With these steps, your raised beds won’t just survive the winter—they’ll thrive in it.

6 Vegetables That Love Cool Spring Weather

6 Vegetables That Love Cool Spring Weather

Springtime is a season of fresh beginnings, and for gardeners, it’s the perfect opportunity to get an early start on growing vegetables. While some crops need the warmth of summer to thrive, many vegetables actually prefer the cool, crisp air of spring. These cool-weather crops grow best when daytime temperatures hover between 55–70°F (13–21°C). They establish quickly in moist spring soils, resist pests that come with heat, and reward you with harvests long before summer-loving plants like tomatoes or peppers are ready.

Here are six vegetables that love cool spring weather and how to grow them successfully in your garden:


1. Lettuce

Lettuce is one of the quintessential spring vegetables. With its tender leaves and wide variety of flavors, it’s an easy, fast-growing crop perfect for beginner and experienced gardeners alike.

  • Why it loves cool weather: Lettuce thrives in temperatures between 50–65°F (10–18°C). Heat causes it to bolt quickly, producing bitter leaves, so spring is its prime growing season.
  • Varieties to try: Butterhead (soft and sweet), Romaine (crisp and upright), and Loose-leaf (fast-growing and colorful).
  • How to plant: Sow seeds directly in the ground as soon as the soil can be worked. For continuous harvest, plant new rows every 2–3 weeks.
  • Harvesting tip: Snip outer leaves as needed for cut-and-come-again harvesting, or let heads mature fully.

2. Spinach

Spinach is a nutrient powerhouse and one of the earliest vegetables you can grow in spring. Packed with iron and vitamins, it’s as healthy as it is delicious.

  • Why it loves cool weather: Spinach germinates in soil as cool as 40°F (4°C) and grows best before daytime highs exceed 75°F (24°C). Warm weather makes spinach bolt quickly.
  • Varieties to try: Bloomsdale Longstanding (classic crinkled leaves), Baby spinach varieties (perfect for salads).
  • How to plant: Sow seeds ½ inch deep in rows or scatter them across a bed for dense planting. Thin seedlings to 3–4 inches apart.
  • Harvesting tip: Pick young leaves frequently to encourage new growth.

3. Radishes

Radishes are one of the fastest-growing vegetables, often ready to harvest in less than a month. Their peppery bite adds flavor to salads and spring dishes.

  • Why it loves cool weather: Radishes mature quickly in spring’s mild temperatures and maintain their crisp texture. Heat causes them to become pithy and overly spicy.
  • Varieties to try: Cherry Belle (classic round red), French Breakfast (elongated red with white tips), Watermelon radish (striking pink interior).
  • How to plant: Sow seeds directly into well-drained soil about ½ inch deep. They sprout within days and can be planted in succession every week for a steady harvest.
  • Harvesting tip: Harvest promptly when roots are mature—waiting too long leads to woody, tough radishes.

4. Peas

Peas are a springtime favorite, offering sweet pods and climbing vines that bring life to a garden. Whether eaten fresh or cooked, they’re a rewarding early-season crop.

  • Why it loves cool weather: Peas germinate in soil temperatures as low as 45°F (7°C) and grow best when days are mild and nights are cool. Heat makes them stop producing.
  • Varieties to try: Snap peas (crunchy and sweet), Snow peas (flat pods for stir-fries), and Shelling peas (classic garden peas).
  • How to plant: Plant seeds 1 inch deep as soon as the ground can be worked. Provide a trellis or support for climbing varieties.
  • Harvesting tip: Pick frequently to encourage continuous production. For the sweetest flavor, harvest in the morning.

5. Broccoli

Broccoli is a cool-season crop that produces nutrient-rich heads filled with vitamins C and K. It’s both versatile in the kitchen and satisfying to grow.

  • Why it loves cool weather: Broccoli prefers growing in temperatures between 55–70°F (13–21°C). Prolonged heat can cause plants to bolt or form loose heads.
  • Varieties to try: Calabrese (large central heads), De Cicco (smaller heads with side shoots), Purple sprouting broccoli (colorful and cold-hardy).
  • How to plant: Start seeds indoors 6–8 weeks before your last frost date or transplant young seedlings into the garden 2–3 weeks before the last frost.
  • Harvesting tip: Cut the central head when it’s firm and compact, leaving side shoots to continue producing smaller florets.

6. Carrots

Carrots are sweet, crunchy root vegetables that develop their best flavor in cooler weather. Early spring planting ensures a tender, tasty crop.

  • Why it loves cool weather: Carrots germinate best in cooler soil (50–75°F / 10–24°C) and develop sweeter roots when grown in mild conditions. Heat can make them tough and bitter.
  • Varieties to try: Nantes (sweet, blunt-ended), Chantenay (short and stocky—great for heavy soils), and Rainbow blends (fun mix of colors).
  • How to plant: Sow seeds directly into loose, stone-free soil about ¼ inch deep. Keep soil consistently moist until seedlings establish.
  • Harvesting tip: Pull carrots when they reach the desired size. Leaving them in cool soil can make them sweeter.

Tips for Growing Cool-Weather Vegetables Successfully

  1. Plant Early: Most of these vegetables can be sown 2–4 weeks before your last expected frost. Some, like spinach and peas, can tolerate light frosts.
  2. Use Row Covers: Lightweight fabric row covers protect against late frosts while warming soil slightly, helping seeds sprout faster.
  3. Succession Planting: For an extended harvest, stagger planting dates every couple of weeks.
  4. Moisture Matters: Cool spring winds can dry out soil quickly. Keep beds evenly moist to prevent stress on young plants.
  5. Watch for Pests: Even in cool weather, pests like aphids, flea beetles, and cabbage worms may appear. Early monitoring helps prevent damage.

Final Thoughts

Spring is a magical season for gardeners, and choosing the right vegetables makes it even more rewarding. Lettuce, spinach, radishes, peas, broccoli, and carrots are all perfectly suited for cool spring weather. They establish quickly, tolerate chilly nights, and give you fresh harvests long before summer vegetables are ready.

By taking advantage of spring’s mild conditions and using smart planting techniques, you can fill your table with crisp greens, crunchy roots, and sweet pods while other gardeners are still waiting for their warm-weather crops to grow.

So grab your seeds, prepare your soil, and let these six cool-loving vegetables kick off your gardening season in delicious style.

How to Keep Your Garden Thriving During a Heatwave

How to Keep Your Garden Thriving During a Heatwave

Heatwaves can wreak havoc on a garden. Scorching sun, dry soil, and high temperatures can quickly wilt plants, stress flowers, and even kill tender vegetables. Yet with the right strategies, your garden doesn’t just have to survive a heatwave—it can still thrive. By making adjustments in watering, soil care, plant protection, and overall garden management, you can minimize damage and keep your plants strong through the hottest days.

Here’s a detailed guide to help your garden beat the heat:


1. Water Smarter, Not Harder

The biggest mistake many gardeners make during a heatwave is watering too often, or at the wrong time. Overwatering can be just as harmful as underwatering, especially when the soil becomes waterlogged and roots suffocate.

  • Water Early in the Morning: The best time to water is before 9 a.m. This ensures the soil is moist before the sun gets intense, giving plants a reservoir to draw from during the day. Evening watering can also work, but it increases the risk of fungal diseases if leaves stay wet overnight.
  • Deep, Infrequent Watering: Instead of sprinkling lightly every day, water deeply 2–3 times a week. This encourages roots to grow deeper, where the soil stays cooler and retains moisture longer.
  • Drip Irrigation or Soaker Hoses: These methods deliver water directly to the root zone, reducing evaporation and preventing wet foliage.

2. Mulch Is Your Garden’s Best Friend

Mulching is one of the simplest yet most powerful ways to protect your garden in extreme heat. A layer of mulch shields soil from direct sun, reduces evaporation, and regulates soil temperature.

  • Best Materials: Organic mulches like shredded bark, straw, compost, or even grass clippings work well.
  • Thickness: Aim for 2–4 inches of mulch around plants, leaving a small gap around stems to prevent rot.
  • Bonus Benefit: Mulch also suppresses weeds, which compete with your plants for water and nutrients—especially critical in drought-like conditions.

3. Provide Temporary Shade

Even sun-loving plants can struggle when exposed to relentless, triple-digit heat. Providing shade during the hottest part of the day can save your crops and flowers from sunburn.

  • Use Shade Cloth: Lightweight shade cloth (30–50% density) reduces light intensity without blocking it completely. It’s perfect for vegetable gardens.
  • Repurpose Household Items: Old bedsheets, umbrellas, or even cardboard propped up on stakes can provide quick, effective shade in a pinch.
  • Container Plants: Move pots into shaded areas, under trees, or against a wall that receives afternoon shade.

4. Choose Heat-Tolerant Plants

If your region is prone to heatwaves, consider incorporating more resilient varieties into your garden. Some plants naturally handle high temperatures better than others.

  • Vegetables: Okra, eggplant, peppers, sweet potatoes, and black-eyed peas thrive in heat.
  • Flowers: Zinnias, marigolds, vinca, lantana, and blanket flowers bloom beautifully in hot conditions.
  • Perennials: Lavender, Russian sage, coneflowers, and ornamental grasses are both drought- and heat-tolerant.

By mixing in these hardy plants, your garden will look lush even when others wilt.


5. Prune and Deadhead Carefully

During heat stress, plants need all the energy they can get. Strategic pruning helps them focus on survival and new growth instead of maintaining damaged leaves or unnecessary stems.

  • Deadhead Spent Flowers: Removing faded blooms encourages plants to redirect energy into healthy foliage and root development.
  • Light Pruning Only: Avoid heavy pruning during extreme heat—it can shock plants further. Instead, trim only damaged, scorched, or dead material.
  • Thin Dense Growth: For shrubs or vegetable plants, thinning excess foliage can improve airflow, reducing humidity and disease risk in hot weather.

6. Protect the Soil With Groundcovers

If you have bare soil, it heats up quickly and loses moisture at an alarming rate. Adding groundcover plants or temporary cover crops can reduce soil stress and support overall garden health.

  • Living Mulch: Low-growing herbs like thyme or creeping oregano act as living mulch while adding beauty.
  • Cover Crops: Buckwheat or clover sown between vegetable rows protect soil while providing additional organic matter when tilled in later.

7. Adjust Feeding and Fertilization

Fertilizing during a heatwave can actually stress plants more, as it forces them to push new growth when they’re already under duress.

  • Pause Heavy Fertilization: Wait until temperatures moderate before applying strong fertilizers.
  • Use Liquid Seaweed or Compost Tea: These mild, organic solutions boost resilience without overwhelming plants.
  • Focus on Soil Health: Instead of forcing growth, enrich the soil with compost to improve water retention and long-term fertility.

8. Harvest Strategically

Vegetables can suffer in prolonged heat, so timing your harvest wisely ensures you don’t lose crops.

  • Pick Early and Often: Harvesting cucumbers, beans, zucchini, and tomatoes regularly reduces plant stress and encourages further production.
  • Protect Ripening Crops: Tomatoes, peppers, and melons can develop sunscald in high heat. Use light cloth or paper bags to shield fruits while they ripen.

9. Conserve Water With Smart Techniques

Water is often restricted during heatwaves, so conservation becomes key.

  • Group Plants by Water Needs: Keep thirsty crops (like lettuce and cucumbers) together so you can prioritize watering.
  • Use Greywater: Reuse cooled cooking water or water from rinsing vegetables for ornamental plants (avoid using it on edible crops if it contains soap).
  • Install Rain Barrels: Even in dry times, sudden summer storms can provide valuable water you can collect for later use.

10. Keep an Eye on Containers

Container plants are the first to suffer during a heatwave, as pots dry out much faster than garden beds.

  • Water Twice a Day if Needed: Early morning and late afternoon watering may be necessary for potted plants.
  • Use Larger Containers: Bigger pots hold moisture longer than small ones.
  • Double-Potting: Place a smaller pot inside a larger, insulated one to reduce heat stress on roots.

11. Look After Yourself, Too

Caring for a garden in extreme heat can be exhausting and even dangerous for you as the gardener. Don’t forget to prioritize your own well-being.

  • Garden Early or Late: Work in the garden during cooler hours.
  • Wear a Hat and Stay Hydrated: Take breaks in the shade often.
  • Spread Out Tasks: Avoid tackling too much at once; instead, handle smaller tasks over multiple days.

Final Thoughts

A heatwave can be daunting for any gardener, but with preparation and smart strategies, you can keep your plants not only alive but thriving. Focus on deep watering, shading, mulching, and choosing the right plant varieties for your climate. Don’t forget to conserve water where possible and protect vulnerable crops with simple DIY solutions.

Remember, a heatwave doesn’t last forever—but the steps you take now will have long-term benefits. Stronger roots, improved soil health, and resilient plant varieties will prepare your garden not only for the next stretch of hot weather but also for future growing seasons.

By treating your garden with a little extra care during extreme heat, you’ll ensure it bounces back quickly and continues to provide beauty, food, and joy long after the heatwave has passed.

10 Perennials You Should Plant in Fall for Spring Blooms

10 Perennials You Should Plant in Fall for Spring Blooms

If you want a garden that bursts with color and life as soon as spring arrives, the smartest time to start planning is in fall. While most people think of fall as a season of winding down, it’s actually one of the best times to plant perennials. The cooler temperatures, softer sunlight, and moist soil create ideal conditions for root establishment. By planting in fall, you’re essentially giving your perennials a head start, ensuring they’ll wake up in spring stronger, healthier, and ready to bloom.

Here are 10 perennials you should plant this fall for a show-stopping spring display:


1. Peonies

Peonies are garden classics, loved for their enormous, fragrant blooms and long lifespan. They can thrive for decades when planted in the right conditions. Fall planting allows their roots to settle in before winter dormancy, ensuring vigorous spring growth.

  • Planting tip: Choose a sunny spot with well-draining soil. Plant peony roots just 2 inches below the soil surface—too deep and they won’t bloom well.
  • Bloom time: Late spring to early summer.
  • Why plant in fall: Peonies need a period of winter chill to set buds, and fall planting gives them time to acclimate.

2. Daylilies (Hemerocallis)

Daylilies are hardy, low-maintenance perennials that reward gardeners with cheerful, trumpet-shaped flowers. They’re extremely adaptable and can survive in a wide range of soil and light conditions.

  • Planting tip: Loosen soil and enrich it with compost before planting. Space them about 18 inches apart for proper air circulation.
  • Bloom time: Late spring through summer.
  • Why plant in fall: The roots have time to establish before the heat of summer, producing healthier clumps and more blooms the following season.

3. Irises

Irises, especially bearded varieties, are prized for their intricate petals and dazzling colors. They thrive in full sun and reward gardeners with bold displays.

  • Planting tip: Plant rhizomes just beneath the soil surface with the top slightly exposed. Avoid mulching heavily over them, as this can lead to rot.
  • Bloom time: Early to mid-spring.
  • Why plant in fall: Planting in cooler months reduces stress on the rhizomes and ensures they are well-rooted before spring growth.

4. Hostas

If your garden has shady spots, hostas are a must. Their lush, leafy foliage comes in a variety of shapes and colors, adding depth and texture to the garden.

  • Planting tip: Choose partial to full shade with moist, well-drained soil. Water deeply after planting.
  • Bloom time: Late spring to summer, with bell-shaped flowers on tall stalks.
  • Why plant in fall: Cooler soil allows hostas to settle in without the stress of summer heat, ensuring fuller growth in spring.

5. Bleeding Heart (Dicentra spectabilis)

Known for their delicate, heart-shaped flowers that dangle gracefully along arching stems, bleeding hearts bring romance and charm to spring gardens.

  • Planting tip: Plant in rich, well-draining soil in a shaded or partially shaded area.
  • Bloom time: Early to late spring.
  • Why plant in fall: Gives the root system time to develop so the plant can emerge strong and ready to bloom when temperatures rise.

6. Lungwort (Pulmonaria)

Lungwort is a shade-loving perennial with spotted foliage and clusters of blue, pink, or purple flowers. It’s one of the earliest perennials to bloom, often while spring air is still cool.

  • Planting tip: Prefers partial to full shade with humus-rich soil. Keep soil consistently moist.
  • Bloom time: Early spring.
  • Why plant in fall: Allows time for roots to develop in cool, moist soil, so plants can flower robustly as soon as the frost clears.

7. Coneflowers (Echinacea)

Coneflowers are hardy, drought-tolerant perennials that attract pollinators like butterflies and bees. They produce daisy-like blooms with raised centers and are perfect for sunny borders.

  • Planting tip: Place in full sun with well-draining soil. Space plants 1 to 2 feet apart.
  • Bloom time: Late spring to fall.
  • Why plant in fall: Gives the root system a strong start, ensuring robust plants that bloom longer the following year.

8. Columbine (Aquilegia)

Columbines are delicate, airy flowers with unique spurred petals that hummingbirds adore. Their whimsical appearance makes them a favorite for cottage gardens.

  • Planting tip: Columbines thrive in well-draining soil and partial shade. Scatter seeds or plant young plants in fall for best results.
  • Bloom time: Mid-spring to early summer.
  • Why plant in fall: Seeds sown in fall benefit from natural cold stratification, and transplants root deeply in cool soil.

9. Creeping Phlox (Phlox subulata)

This low-growing ground cover creates a carpet of vibrant blooms in spring, spilling over walls and borders in waves of color.

  • Planting tip: Plant in full sun and well-drained soil. Ideal for slopes, rock gardens, and as an edging plant.
  • Bloom time: Early to mid-spring.
  • Why plant in fall: Fall planting ensures dense rooting, which results in fuller coverage and more abundant flowers.

10. Tulip-Style Perennials (such as Tulipa ‘Perennial Mix’)

While technically bulbs, many tulip varieties are bred to behave like perennials, coming back year after year with vibrant spring displays.

  • Planting tip: Plant bulbs 6–8 inches deep in well-draining soil with the pointed end facing upward. Choose a sunny site.
  • Bloom time: Early to mid-spring.
  • Why plant in fall: Tulips require a cold dormant period to trigger blooming, and fall planting ensures they experience the necessary winter chill.

Tips for Successful Fall Planting

Planting perennials in fall is straightforward, but a few best practices will maximize your success:

  1. Plant Early in Fall: Aim to plant at least 6 weeks before the ground freezes so roots can establish.
  2. Amend Soil: Mix compost or organic matter into the soil to improve drainage and fertility.
  3. Water Well: Keep soil consistently moist after planting to encourage root growth.
  4. Mulch Lightly: A thin layer of mulch helps insulate roots, but avoid smothering plants.
  5. Mark Locations: Use markers to remember where you’ve planted—many perennials go dormant in winter and can be forgotten.

Final Thoughts

Fall isn’t just a time for raking leaves and putting your garden to bed. It’s a golden opportunity to prepare for next year’s blooms. By planting perennials now, you’re setting the stage for a breathtaking spring garden that will reward you year after year. Whether you love bold peonies, delicate columbines, or cheerful creeping phlox, these perennials ensure your garden wakes up in spring with a vibrant, colorful display.

So grab your gardening gloves this fall—your spring self will thank you.

How to Use Outdoor Lighting Without Bothering Neighbors

How to Use Outdoor Lighting Without Bothering Neighbors

Outdoor lighting can transform your yard into a safe, welcoming, and beautiful space. From illuminating walkways to highlighting landscaping or creating ambiance for evening gatherings, good lighting extends the enjoyment of your outdoor areas well into the night.

But there’s a catch: if outdoor lighting isn’t installed thoughtfully, it can quickly become a source of frustration for neighbors. Glare, excessive brightness, or poorly placed fixtures may spill light into bedrooms, disrupt sleep, and even contribute to neighborhood tension.

Fortunately, with a bit of planning, you can enjoy the benefits of outdoor lighting while keeping your neighbors—and the environment—comfortable. Here’s how to strike that balance.


Why Consider Your Neighbors?

Light pollution is a growing issue in communities worldwide. Unshielded outdoor lights don’t just brighten your backyard—they can affect the entire block.

Impacts of poor outdoor lighting include:

  • Sleep disruption: Bright light shining into a neighbor’s window can interfere with circadian rhythms.
  • Glare hazards: Misplaced lights can create harsh glares that make it harder to see, not easier.
  • Environmental impact: Artificial lighting disrupts wildlife, including birds, bats, and insects.
  • Neighborhood disputes: Excessive lighting can strain otherwise good relationships with those living nearby.

Being mindful of your lighting design ensures you enjoy your space while maintaining a peaceful neighborhood.


1. Choose the Right Fixtures

The type of fixture you choose makes a huge difference in how light spreads.

  • Full cut-off fixtures: These direct light downward, preventing upward or sideways glare. They’re ideal for pathways, driveways, and patios.
  • Bollard lights: Low-profile and stylish, these softly light walkways without spilling into windows.
  • Wall sconces with shields: Perfect for entryways, they provide focused illumination instead of broadcasting in all directions.
  • Smart fixtures: Many modern designs include adjustable brightness, timers, and motion sensors for better control.

Investing in high-quality, well-shielded fixtures ensures you light only what you intend to.


2. Use Warm, Low-Intensity Bulbs

Brightness and color temperature can determine whether your lighting feels inviting—or intrusive.

  • Warm white (2700K–3000K): Creates a cozy, natural glow that blends with nighttime surroundings.
  • Cool white (4000K+): Better for task lighting but often harsh for outdoor settings.
  • Lumens, not watts: Look for lumens (brightness) instead of wattage. For pathways, 100–200 lumens is often enough.

Opting for softer, warmer lights not only reduces glare but also contributes to a calming outdoor atmosphere.


3. Position Lights Thoughtfully

Placement matters as much as the fixture itself.

  • Aim lights downward: Avoid angling lights upward, which creates skyglow and glare.
  • Focus on functional areas: Light walkways, steps, and entry points, not entire lawns.
  • Avoid window spill: Check from your neighbor’s perspective—does your light shine directly into their home? Adjust as needed.
  • Layer lighting: Instead of one bright floodlight, use multiple smaller lights to softly illuminate specific areas.

Thoughtful placement ensures your yard is well-lit without over-lighting the neighborhood.


4. Add Motion Sensors and Timers

One of the most common complaints about outdoor lighting is that it’s left on all night. Motion sensors and timers solve that problem.

  • Motion sensors: Lights turn on only when movement is detected, saving energy and reducing unnecessary brightness.
  • Timers: Set lights to turn off automatically at a certain time, such as midnight.
  • Smart systems: Connect to apps for remote control, dimming, and scheduling flexibility.

These features provide security and convenience while keeping light use efficient and considerate.


5. Highlight, Don’t Overwhelm, Your Landscape

Outdoor lighting is most effective when it enhances, not dominates.

  • Accent trees or plants: Use spotlights sparingly to highlight key features.
  • Pathway lighting: Guides movement safely without overwhelming brightness.
  • Subtle string lights: Add ambiance for seating areas without bothering neighbors.
  • Avoid “stadium effect”: Overly bright floodlights make yards harsh and unwelcoming.

Less is often more—strategic lighting creates beauty and safety without excess.


6. Respect Dark Sky Principles

The International Dark-Sky Association (IDA) promotes responsible outdoor lighting that balances safety, energy use, and environmental impact.

Dark-sky friendly practices include:

  • Using shielded fixtures that direct light downward.
  • Limiting brightness to what’s truly necessary.
  • Choosing warmer color temperatures.
  • Turning lights off when not in use.

Following these principles protects not only your neighbor’s peace but also local ecosystems.


7. Communicate With Your Neighbors

Sometimes the simplest solution is the most effective—talk to your neighbors.

  • Before installing new lights: Ask if they have preferences or concerns.
  • If issues arise: Be open to feedback and willing to adjust.
  • Collaborate: In shared spaces like driveways or fences, coordinate lighting so it works for both properties.

Proactive communication builds goodwill and helps avoid conflicts down the road.


Final Thoughts

Outdoor lighting should add safety, beauty, and enjoyment to your yard—not stress for your neighbors. By choosing the right fixtures, using warmer and lower-intensity bulbs, positioning lights thoughtfully, and embracing smart controls, you can create a well-lit outdoor space that’s both functional and neighbor-friendly.

When in doubt, remember: the best outdoor lighting is the kind that serves its purpose without drawing attention to itself. With the right approach, you can illuminate your nights while keeping the peace in your neighborhood.

6 Common Yard Disputes—and How to Solve Them Peacefully

6 Common Yard Disputes—and How to Solve Them Peacefully

A beautiful yard should be a source of pride and relaxation—but when neighbors are involved, it can sometimes become a battleground. From overhanging branches to noisy lawn equipment, yard-related disagreements are among the most common neighbor disputes. Left unchecked, they can escalate into hostility, legal issues, or long-term resentment.

The good news? Most yard disputes can be resolved peacefully with a mix of clear communication, empathy, and practical solutions. In this article, we’ll explore six of the most common yard disputes and share strategies to handle them diplomatically—so you can maintain harmony while protecting your property rights.


1. Overhanging Trees and Branches

The problem: Your neighbor’s tree is growing into your yard, dropping leaves, fruit, or sap—or worse, threatening your fence, roof, or safety.

Why it happens: Trees don’t recognize property lines, and neighbors may not realize their tree is causing inconvenience or danger.

How to solve it peacefully:

  • Start with a conversation. Politely let your neighbor know how the tree is affecting your yard. Sometimes, they may not even be aware.
  • Offer solutions. Suggest trimming back branches or sharing the cost of professional tree service.
  • Know your rights. In many areas, you’re allowed to trim branches and roots that cross into your property line—as long as you don’t harm the tree.
  • Stay cooperative. Frame the discussion around shared safety and property care, not blame.

When handled respectfully, tree issues can often be solved without conflict—and sometimes even with cost-sharing that benefits both parties.


2. Fence and Boundary Disagreements

The problem: Disputes over property lines, fence placement, or shared maintenance are among the most common neighbor conflicts.

Why it happens: Ambiguous property lines or mismatched expectations about who’s responsible for upkeep can fuel disagreements.

How to solve it peacefully:

  • Check the facts first. Review your property survey or title documents to clarify exact boundaries. If needed, hire a surveyor to confirm.
  • Communicate openly. If you’re building or repairing a fence, talk to your neighbor before work begins.
  • Discuss costs. In some states, neighbors are legally required to share fence repair costs, but it’s best to agree ahead of time.
  • Consider alternatives. If your neighbor doesn’t want to share expenses, you might install the fence entirely on your property line and cover the cost yourself.

Respect and clarity are essential—resolving fence issues diplomatically avoids long-term feuds over a few feet of land.


3. Noise from Yard Work or Gatherings

The problem: Early-morning mowing, loud leaf blowers, or late-night backyard parties disturb your peace.

Why it happens: People often underestimate how far sound travels, especially outdoors.

How to solve it peacefully:

  • Pick the right time. Approach your neighbor calmly, not in the heat of frustration.
  • Be specific. Point out when the noise is most disruptive (e.g., “The leaf blower at 6 a.m. wakes the kids”).
  • Suggest compromises. Ask if they can adjust the timing, switch to quieter equipment, or limit late-night noise.
  • Know local rules. Many communities have noise ordinances; mention them gently if needed.

A friendly reminder often solves the problem. Most neighbors don’t want to cause stress—they just need to know how their activities are affecting you.


4. Pets in the Yard

The problem: A neighbor’s dog barks constantly, digs under fences, or leaves “surprises” on your lawn.

Why it happens: Pets naturally roam, bark, and explore—but unmanaged behavior can strain neighborly relations.

How to solve it peacefully:

  • Start with empathy. Many pet owners don’t realize how disruptive their animal is to others.
  • Communicate clearly. Politely explain the problem and how it affects your yard and family.
  • Suggest fixes. Propose practical solutions such as reinforcing fences, using bark-control training, or keeping dogs indoors during quiet hours.
  • Protect your space. If issues persist, consider deterrents like pet-safe repellents or barriers on your property.

Approach pet issues with kindness—after all, people often see pets as family. Solutions are easier when handled with understanding.


5. Yard Maintenance and Appearance

The problem: Your neighbor’s yard is overgrown with weeds, clutter, or unkempt structures that reduce curb appeal or spread pests.

Why it happens: Yard neglect may stem from busy schedules, financial hardship, or health issues.

How to solve it peacefully:

  • Lead with kindness. Rather than criticizing, ask if they need help or resources.
  • Offer assistance. Suggest a shared cleanup day, lend equipment, or recommend affordable services.
  • Frame it positively. Instead of “your yard is messy,” try “we’re hoping to tidy up our shared property line—would you like to work together?”
  • Check HOA or city codes. If serious neglect becomes a hazard, local ordinances may enforce cleanup—but this should be a last resort after attempts at diplomacy.

Many neighbors appreciate a helping hand and respond better to encouragement than confrontation.


6. Water Runoff and Drainage Issues

The problem: Water from your neighbor’s yard drains into yours, causing flooding, erosion, or damage to landscaping.

Why it happens: Improper grading, new construction, or heavy landscaping changes can redirect water flow.

How to solve it peacefully:

  • Document the issue. Take photos or videos of flooding after rain.
  • Discuss calmly. Let your neighbor know how the runoff is impacting your yard. They may not be aware.
  • Propose solutions. Options include French drains, rain gardens, or redirecting downspouts—sometimes sharing costs makes sense.
  • Seek mediation if needed. If drainage issues continue, professional mediation or local code enforcement may help without escalating to court.

Solving drainage disputes early prevents bigger (and more expensive) problems later.


General Tips for Solving Yard Disputes Peacefully

  1. Choose your battles. Ask yourself: Is this issue worth a conflict? Sometimes small annoyances can be overlooked.
  2. Communicate face-to-face. Avoid angry notes or texts—personal conversations are less likely to be misinterpreted.
  3. Stay respectful. Even if your neighbor isn’t cooperative, keep calm and polite. Escalation rarely helps.
  4. Seek mediation. Many communities offer free or low-cost mediation services to resolve neighbor disputes before they turn legal.
  5. Know your legal rights—but use them wisely. Understanding local laws protects you, but lawsuits should be a last resort after diplomacy fails.

Final Thoughts

Yard disputes are common, but they don’t have to ruin relationships—or your enjoyment of your home. By approaching problems with empathy, honesty, and a willingness to compromise, most conflicts can be resolved peacefully.

Remember: your neighbor isn’t just someone who lives next door—they’re part of your daily environment. Solving yard disputes respectfully not only protects your property but also builds stronger, friendlier communities.

With patience and diplomacy, your yard can remain the peaceful retreat you intended it to be—without unnecessary drama.

Should You Spray for Mosquitoes in Your Yard?

Should You Spray for Mosquitoes in Your Yard?

Few things ruin a summer evening faster than a swarm of mosquitoes. These tiny insects are more than just annoying—they’re also potential carriers of diseases such as West Nile virus, Zika, and dengue. For many homeowners, spraying the yard with mosquito treatments seems like a quick and obvious solution. But is it really the best approach?

The answer isn’t straightforward. While spraying can reduce mosquito populations temporarily, it also comes with drawbacks for human health, beneficial insects, pets, and the environment. To decide whether spraying is right for you, it’s important to weigh the pros and cons, explore safer alternatives, and understand how mosquito control actually works.

In this article, we’ll take a deep dive into the benefits, risks, and natural options so you can make an informed decision for your yard.


Why Mosquitoes Are More Than a Nuisance

Mosquitoes are often dismissed as a seasonal irritation, but their impact goes beyond itchy bites.

Health risks associated with mosquitoes include:

  • West Nile virus: Common in many regions of the U.S., transmitted through mosquito bites.
  • Zika virus: Although less common, outbreaks have occurred and can cause severe birth defects.
  • Dengue fever and malaria: More common in tropical regions but spreading globally due to climate change.
  • Heartworm in pets: Mosquitoes transmit heartworm larvae, a serious condition for dogs and cats.

Even if disease risk is low in your area, mosquito bites can cause allergic reactions, skin infections from scratching, and significant discomfort that keeps families indoors instead of enjoying their backyards.


What Does Spraying Involve?

Mosquito spraying usually refers to applying insecticides, either through professional services or DIY products.

Two main types of spraying are common:

  1. Barrier sprays: Applied to shrubs, grass, and outdoor structures to kill mosquitoes on contact and leave a residue that repels them for weeks.
  2. Fogging or misting: Releases a fine insecticide mist into the air, killing mosquitoes currently flying. Effects are short-lived, often lasting only a few hours.

Professional companies often use pyrethroids, synthetic chemicals modeled after chrysanthemum extracts. While effective against mosquitoes, these chemicals don’t discriminate—they can harm many other insects and even affect people and pets if not used correctly.


Pros of Spraying for Mosquitoes

Spraying does provide benefits, which is why it’s so popular:

  1. Immediate Relief: Sprays can drastically reduce mosquito activity within hours, providing quick comfort for outdoor gatherings.
  2. Short-Term Protection: Barrier sprays may provide two to four weeks of reduced mosquito presence.
  3. Convenience: Hiring a professional service means homeowners don’t have to deal with applications themselves.
  4. Targeted Events: Sprays are sometimes used before weddings, parties, or outdoor celebrations to keep guests comfortable.

For homeowners facing heavy mosquito infestations, spraying can feel like the only way to reclaim their yard.


The Downsides of Spraying

However, spraying isn’t without consequences.

  1. Limited Effectiveness: Sprays only kill mosquitoes present at the time of application. New ones quickly migrate in from surrounding areas.
  2. Short Duration: Even with barrier sprays, protection rarely lasts more than a few weeks, meaning repeated treatments are needed.
  3. Impact on Pollinators: Insecticides can kill butterflies, bees, and other beneficial insects that help gardens thrive.
  4. Harm to Wildlife: Chemicals may wash into ponds or streams, affecting fish, frogs, and other aquatic life.
  5. Health Concerns: While considered generally safe when applied properly, insecticides may irritate skin, trigger allergies, or cause respiratory discomfort in sensitive individuals. Pets can also be affected if they come into contact with freshly sprayed surfaces.
  6. Cost: Professional mosquito spraying services can become expensive over the summer months, especially with repeat treatments required.

Because of these concerns, experts often recommend considering spraying only as a last resort, paired with other mosquito control methods.


Natural Alternatives to Spraying

Before resorting to chemical sprays, it’s worth exploring natural, eco-friendly approaches. These methods focus on reducing mosquito breeding grounds and making your yard less appealing to them.

1. Eliminate Standing Water
Mosquitoes lay eggs in stagnant water—even small amounts in a flowerpot saucer or clogged gutter can become breeding grounds. Regularly empty, scrub, or treat items like birdbaths, kiddie pools, and rain barrels.

2. Encourage Natural Predators

  • Birds such as purple martins and swallows feed on flying insects.
  • Bats can eat hundreds of mosquitoes per night.
  • Dragonflies and frogs are natural mosquito hunters.

By creating habitats that attract these predators (birdhouses, bat boxes, or ponds), you support natural mosquito control.

3. Plant Mosquito-Repelling Plants
While not foolproof, plants like citronella grass, lavender, basil, marigolds, and lemongrass can help repel mosquitoes when planted around seating areas.

4. Use Fans Outdoors
Mosquitoes are weak fliers. A strong oscillating fan on a patio can dramatically reduce bites by creating air movement they can’t navigate.

5. Essential Oils and Repellents
Citronella candles, eucalyptus oil, and lemon balm sprays provide localized protection. While effects are temporary, they’re safe and pleasant-smelling.

6. Mosquito Traps and Zappers
Modern traps use carbon dioxide or UV light to attract and kill mosquitoes without chemicals.

These methods don’t offer instant elimination like spraying but provide long-term, sustainable relief.


Integrated Pest Management: A Smarter Approach

Rather than choosing between spraying or not spraying, many experts recommend Integrated Pest Management (IPM). This method combines multiple strategies:

  1. Prevention: Remove breeding grounds by draining standing water.
  2. Physical Barriers: Install screens on patios, use mosquito netting, or add outdoor fans.
  3. Biological Control: Encourage predators and use larvicides like Bti (a natural bacteria that kills mosquito larvae but is safe for other wildlife).
  4. Chemical Sprays as a Last Resort: Use sparingly for special occasions or severe infestations.

This balanced approach reduces mosquito populations while minimizing harm to the environment.


When Spraying Might Make Sense

Spraying isn’t inherently bad—it just needs to be applied carefully and in the right circumstances.

You might consider spraying if:

  • Your yard is heavily infested and natural methods haven’t helped.
  • You’re hosting an outdoor event where comfort and protection are priorities.
  • You or your family members are highly sensitive to mosquito bites or at greater risk from mosquito-borne illnesses.

In such cases, hiring a licensed professional is recommended. They’ll know how to apply insecticides safely, targeting problem areas while minimizing risks to pollinators and pets.


How to Make Spraying Safer

If you decide to spray, here are steps to reduce the risks:

  • Choose a reputable company that uses EPA-approved products.
  • Ask about timing—sprays should be applied early morning or late evening when bees are less active.
  • Keep children and pets indoors until the spray has dried completely.
  • Avoid spraying flowering plants to protect pollinators.
  • Pair spraying with preventive measures like water removal for better results.

By using sprays responsibly and sparingly, you can reduce mosquitoes without unnecessary harm.


Final Thoughts

So, should you spray for mosquitoes in your yard? The answer depends on your situation. Spraying can offer quick, short-term relief, especially for special occasions or severe infestations. However, it’s not a permanent solution and carries risks to pollinators, pets, wildlife, and even people if misused.

For most households, the best approach is prevention and integrated pest management—draining standing water, encouraging natural predators, planting mosquito-repelling plants, and using physical barriers like fans and screens. Spraying should be a last resort, not the first line of defense.

By carefully weighing the pros and cons, you can make an informed decision that protects your family while preserving the health of your garden and local ecosystem. After all, the goal isn’t just a mosquito-free yard—it’s a safe, vibrant outdoor space you can enjoy all season long.

How to Keep Kids Safe Around Garden Ponds

How to Keep Kids Safe Around Garden Ponds

Garden ponds add beauty, tranquility, and biodiversity to outdoor spaces. The gentle ripple of water, the shimmer of koi fish, and the buzz of dragonflies create an atmosphere that’s hard to beat. But for families with young children, ponds can also be a source of concern. Kids are naturally curious, and water has an irresistible pull. While ponds may seem harmless, even shallow ones pose risks if not properly managed.

The good news? With thoughtful planning and the right safety measures, you can enjoy the charm of a garden pond while ensuring your children remain safe. Below, we’ll explore practical, natural, and parent-approved ways to keep kids safe around garden ponds.


Why Safety Around Garden Ponds Matters

Drowning is one of the leading causes of accidental death in children under five. Even a few inches of water can be dangerous if a child falls in and is unable to get out. Beyond drowning risks, ponds may also present slipping hazards, sharp rocks, or exposure to bacteria and insects.

For parents and caregivers, balancing the joy of having a pond with the responsibility of keeping kids safe is crucial. The goal isn’t to eliminate the pond—it’s to make sure children can enjoy the outdoors without unnecessary risks.


1. Supervision Is the First Line of Defense

No safety measure can replace active adult supervision. Children should never be left unattended near a pond, no matter how shallow it may seem.

Tips for supervision:

  • Establish clear rules that kids cannot go near the pond without an adult.
  • Place comfortable seating or a bench near the pond so adults can watch while relaxing.
  • Teach children early about the dangers of water, making them aware but not fearful.

Supervision may sound obvious, but in practice, it requires vigilance. Kids can move quickly, and accidents happen in moments. Think of supervision as the safety net that supports all other protective strategies.


2. Install Physical Barriers

A well-placed barrier can prevent accidents while still allowing the pond to enhance your garden’s beauty. Depending on your design preferences and budget, there are several options:

a. Fencing:

  • Low decorative fencing can keep toddlers at bay while blending into the landscape.
  • For stronger protection, choose a fence at least 4 feet high with self-closing, childproof gates.

b. Safety Grilles or Mesh Covers:

  • These sturdy, child-safe covers sit just below the water’s surface.
  • They allow plants, fish, and wildlife to thrive while preventing a child from falling into the water.
  • Mesh covers also protect pets from accidental slips.

c. Railings or Raised Edges:

  • Building raised pond edges at least 18–24 inches tall can deter small children from leaning over.
  • Adding railings or low walls around the perimeter increases security and gives the pond a polished look.

Barriers are particularly effective because they create a physical separation between children and the water, buying you peace of mind.


3. Design the Pond with Safety in Mind

If you’re in the planning stages of building a pond—or considering modifications—thoughtful design choices can make a big difference in safety.

Key safety-focused design ideas:

  • Shallow edges: Create gradual slopes rather than steep drop-offs. This allows kids (and wildlife) to climb out if they fall in.
  • Depth control: Avoid ponds deeper than 18–24 inches in family spaces. Deeper ponds can be added to adult-only zones of larger gardens.
  • Non-slip surfaces: Use textured stone, pavers, or decking materials around the pond to reduce the risk of slips.
  • Location: Place ponds away from play areas, swing sets, or high-traffic paths.

A pond designed with safety in mind doesn’t need to sacrifice aesthetics. Many modern pond designs seamlessly combine child-friendly features with stunning landscapes.


4. Teach Kids About Pond Safety

Children are more cooperative when they understand the “why” behind rules. By teaching kids about water safety from an early age, you empower them to respect the pond rather than fear it.

Ways to teach kids about safety:

  • Explain that ponds are for looking, not for playing in.
  • Encourage them to enjoy wildlife—frogs, fish, or plants—while staying a safe distance away.
  • Create a designated “safe zone” for watching the pond, such as a seating area or observation spot.
  • Role-play safe and unsafe pond behavior to reinforce learning.

By involving kids in the conversation, you also turn safety into an opportunity for education about nature and responsibility.


5. Add Safety Features and Accessories

Several practical products can enhance pond safety without drastically altering your design.

Recommended features:

  • Motion-sensor lights: Illuminate the pond at night, reducing tripping hazards and discouraging unsupervised nighttime exploration.
  • Cameras: Outdoor security cameras can alert parents if children wander into the pond area unexpectedly.
  • Water alarms: These devices sound an alarm if movement or a splash is detected in the pond, adding an extra layer of protection.

While these features don’t replace supervision or barriers, they offer peace of mind and extra safeguards—especially for families with adventurous kids.


6. Create a Child-Friendly Water Alternative

Sometimes, children’s curiosity about ponds stems from their natural love of water play. Providing safe alternatives can redirect their attention away from risky spots.

Kid-friendly alternatives include:

  • Water tables: Perfect for toddlers to splash and play safely under supervision.
  • Mini splash pads: Great for summer fun, with zero standing water.
  • Small container ponds: These miniature versions allow kids to observe water plants and insects without the risks of a large pond.

By giving children their own designated water space, you satisfy their curiosity while protecting them from hazards.


7. Seasonal Safety Considerations

Pond safety isn’t static—it changes with the seasons.

In summer:

  • Increased playtime outdoors means extra vigilance is needed.
  • Algae blooms can make surfaces slippery—clean regularly.

In fall:

  • Leaves can accumulate, hiding pond edges or making paths slick.
  • Netting over the pond can prevent debris buildup.

In winter:

  • Ice can be deceptive. Children may try to step on frozen ponds, not realizing the danger.
  • Always teach kids to stay away from ice-covered water features.

In spring:

  • Heavy rains may raise water levels, so check barriers and covers.

By adapting your safety strategy to seasonal changes, you maintain consistent protection year-round.


8. Balance Safety with Aesthetic Appeal

Many homeowners hesitate to add fences or covers, worried that safety features will ruin the look of their garden. However, modern landscaping solutions allow for both safety and beauty.

Design tips:

  • Incorporate safety fencing into natural plant screens with hedges or trellises.
  • Choose covers designed to be discreet and blend with the water surface.
  • Use natural stone walls or raised planters around pond edges to create barriers that double as design features.

With a little creativity, your pond can remain the centerpiece of your garden while staying family-friendly.


Final Thoughts

Garden ponds are magical spaces where families can connect with nature, observe wildlife, and enjoy peaceful moments outdoors. But for households with children, safety must always come first. By combining active supervision, physical barriers, thoughtful design, and child education, you can significantly reduce risks while preserving the beauty of your pond.

Remember: kids don’t need to be shielded entirely from ponds—they can learn to respect and appreciate them safely. With the right measures, your backyard pond can become not just a beautiful feature, but a safe and enriching part of your family’s outdoor life.

In the end, keeping kids safe around garden ponds isn’t about limiting enjoyment—it’s about creating an environment where both beauty and security flow together, allowing you to relax and let your children explore with confidence.