5 Ways to Block Noise in Your Backyard Naturally

5 Ways to Block Noise in Your Backyard Naturally

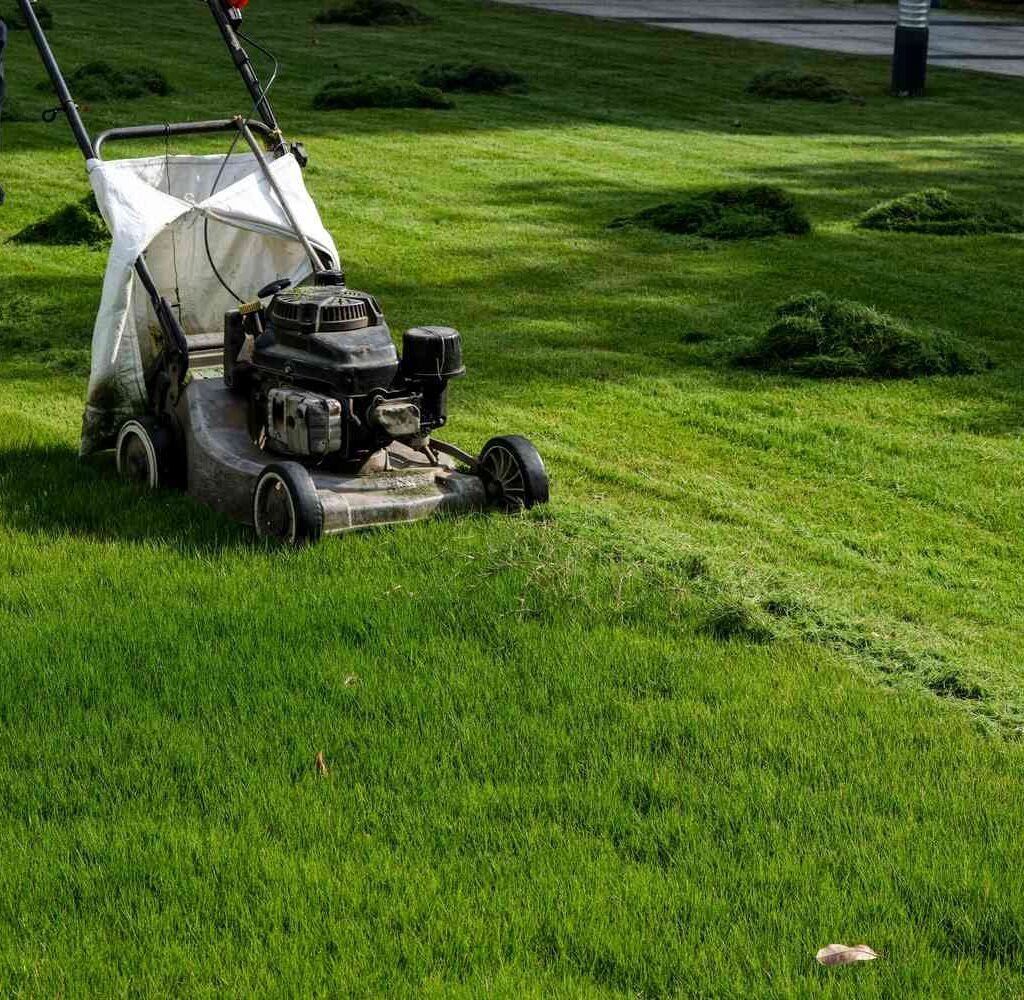
If you’ve ever dreamed of turning your backyard into a peaceful oasis, you know how disruptive outside noise can be. The hum of traffic, the drone of lawnmowers, or the chatter of neighbors can shatter the serenity you crave. While building massive fences or installing artificial soundproofing panels are options, they often feel industrial, expensive, and out of sync with the beauty of an outdoor space. Fortunately, there are natural, eco-friendly, and visually appealing ways to block noise and create a calming retreat in your own backyard.

Below are five natural methods that don’t just help reduce noise, but also enhance your landscape, attract wildlife, and boost your home’s curb appeal.


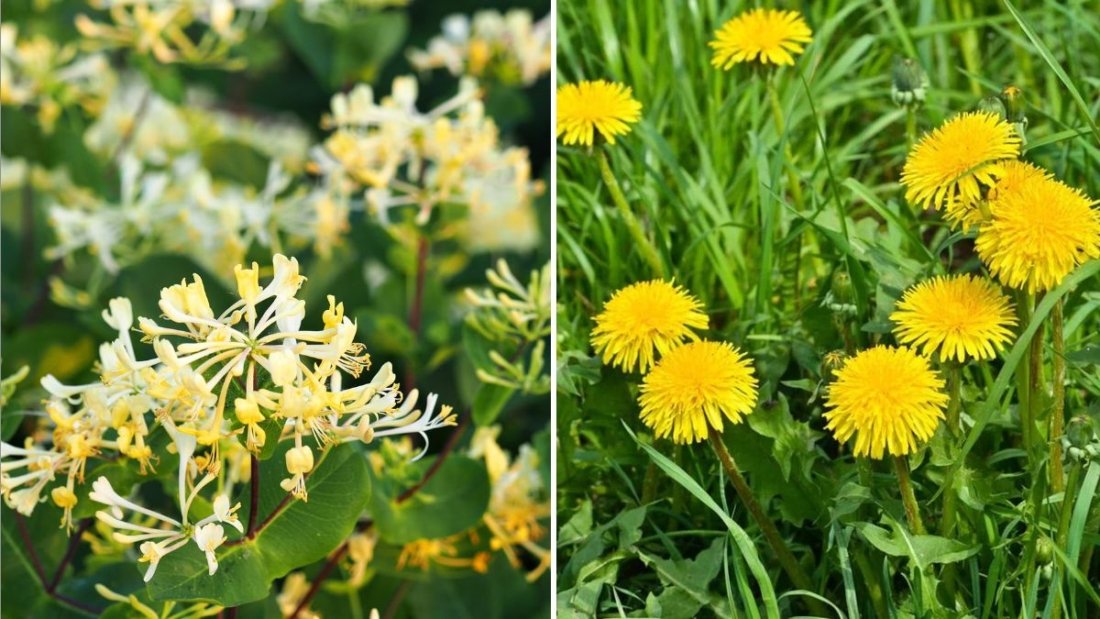
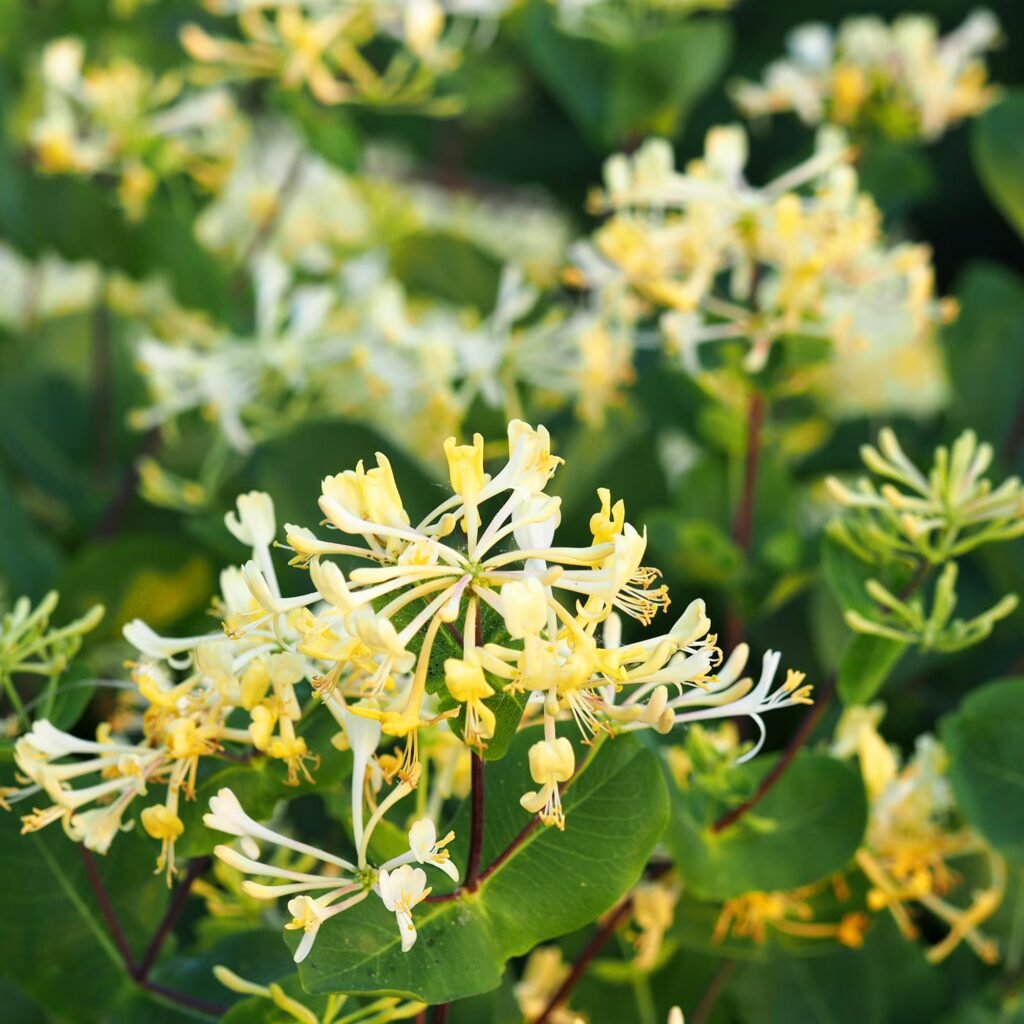
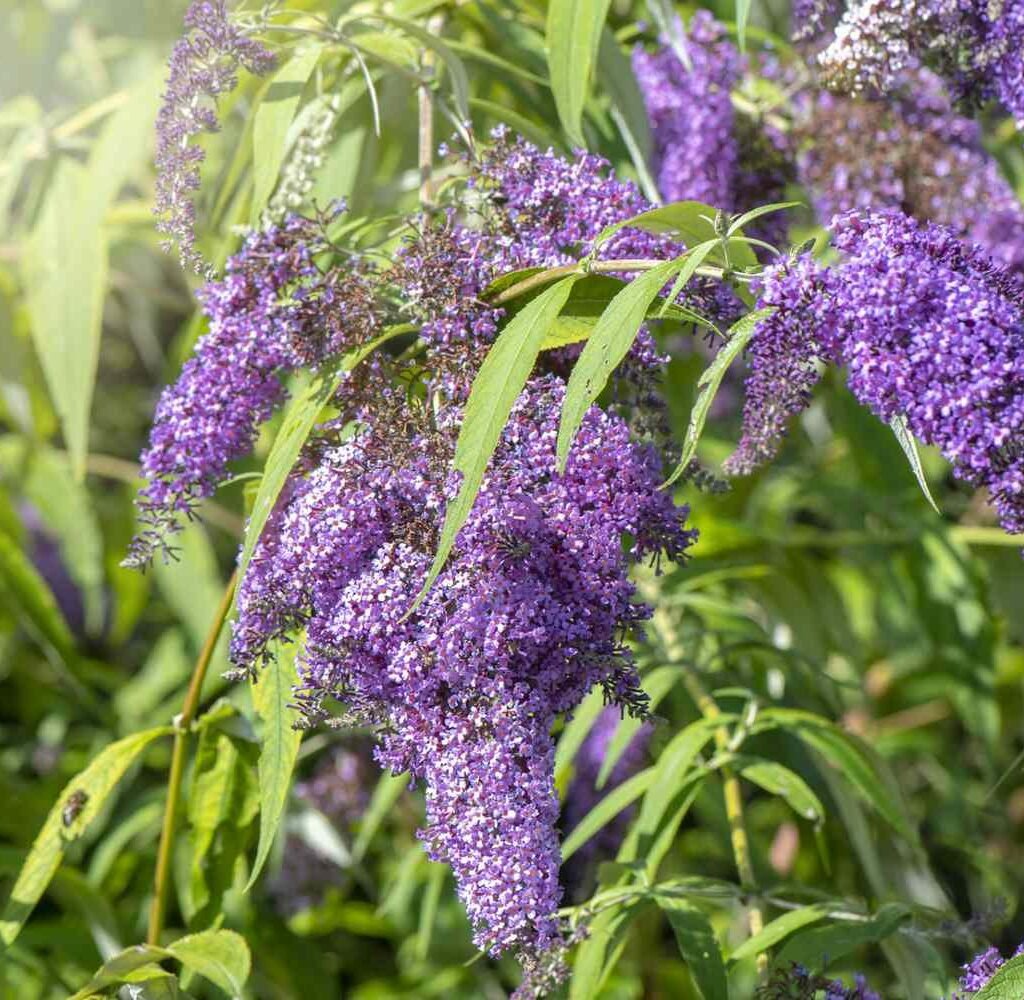
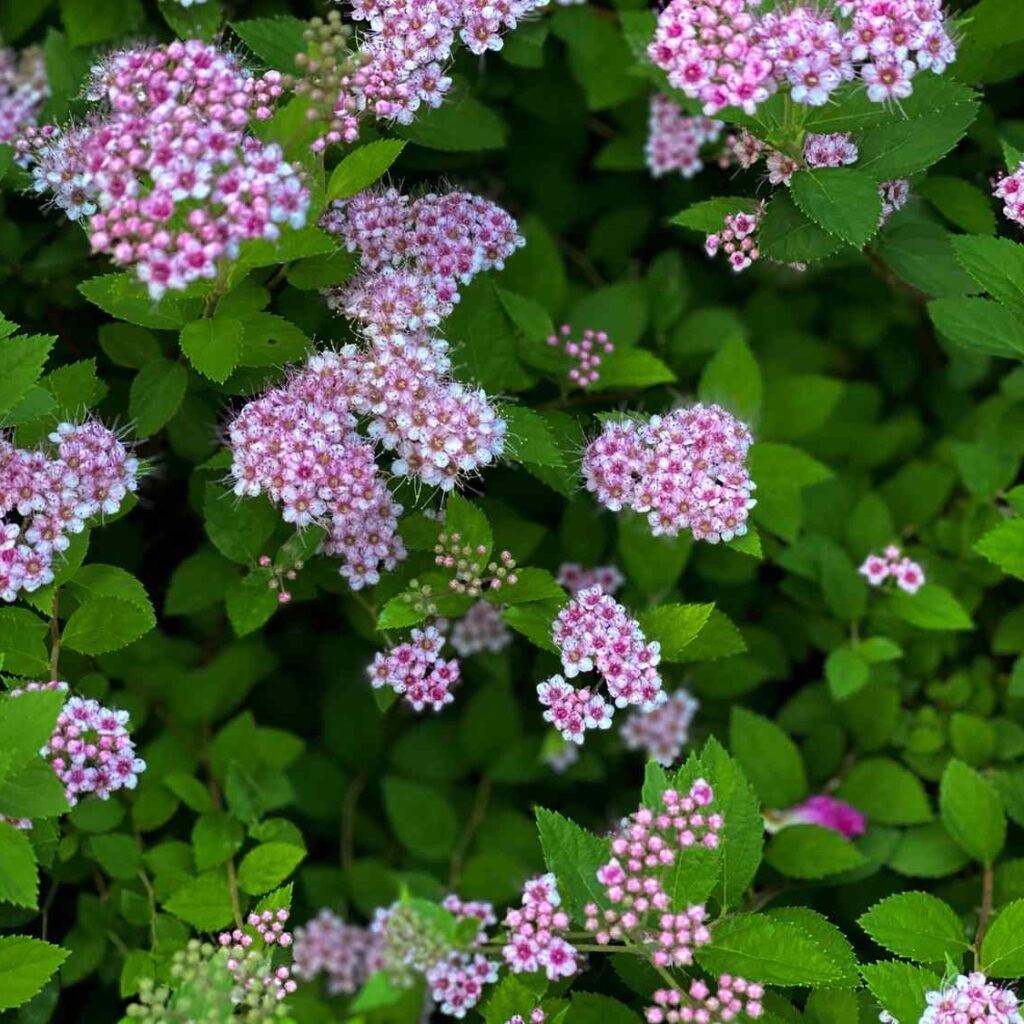
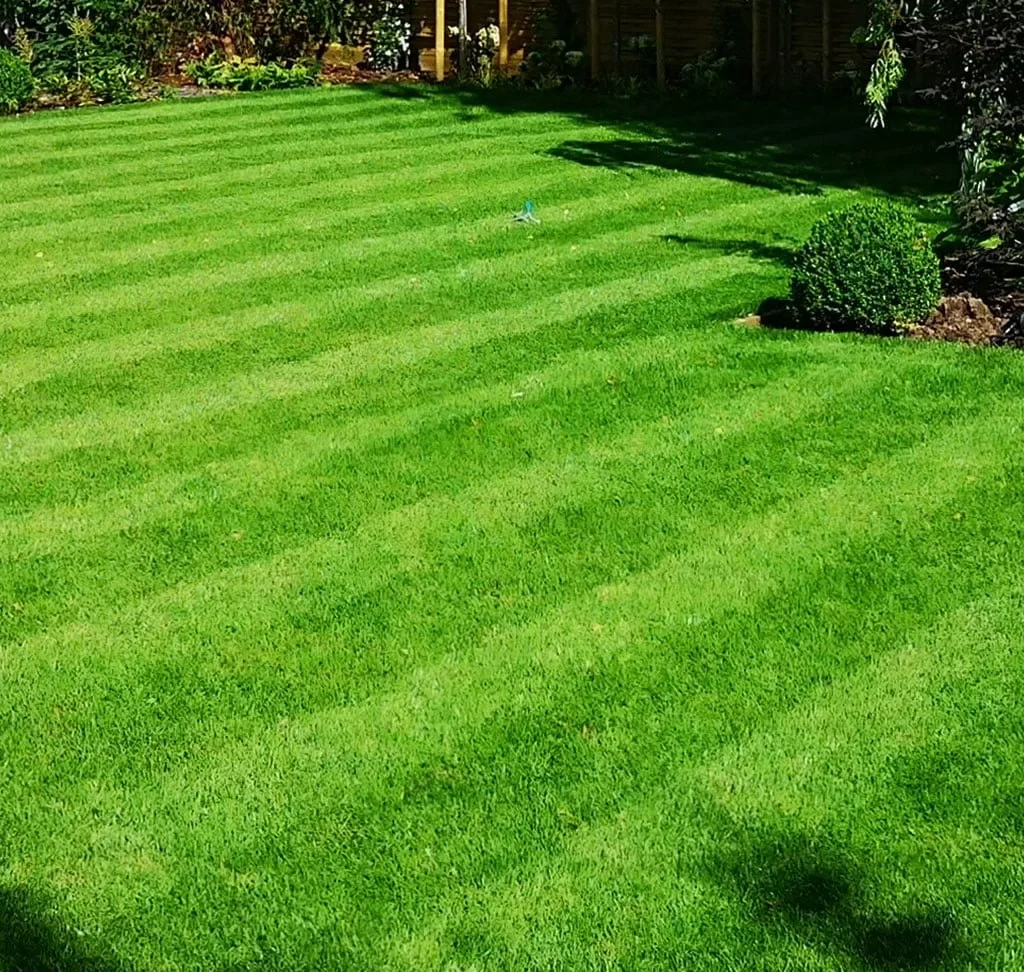
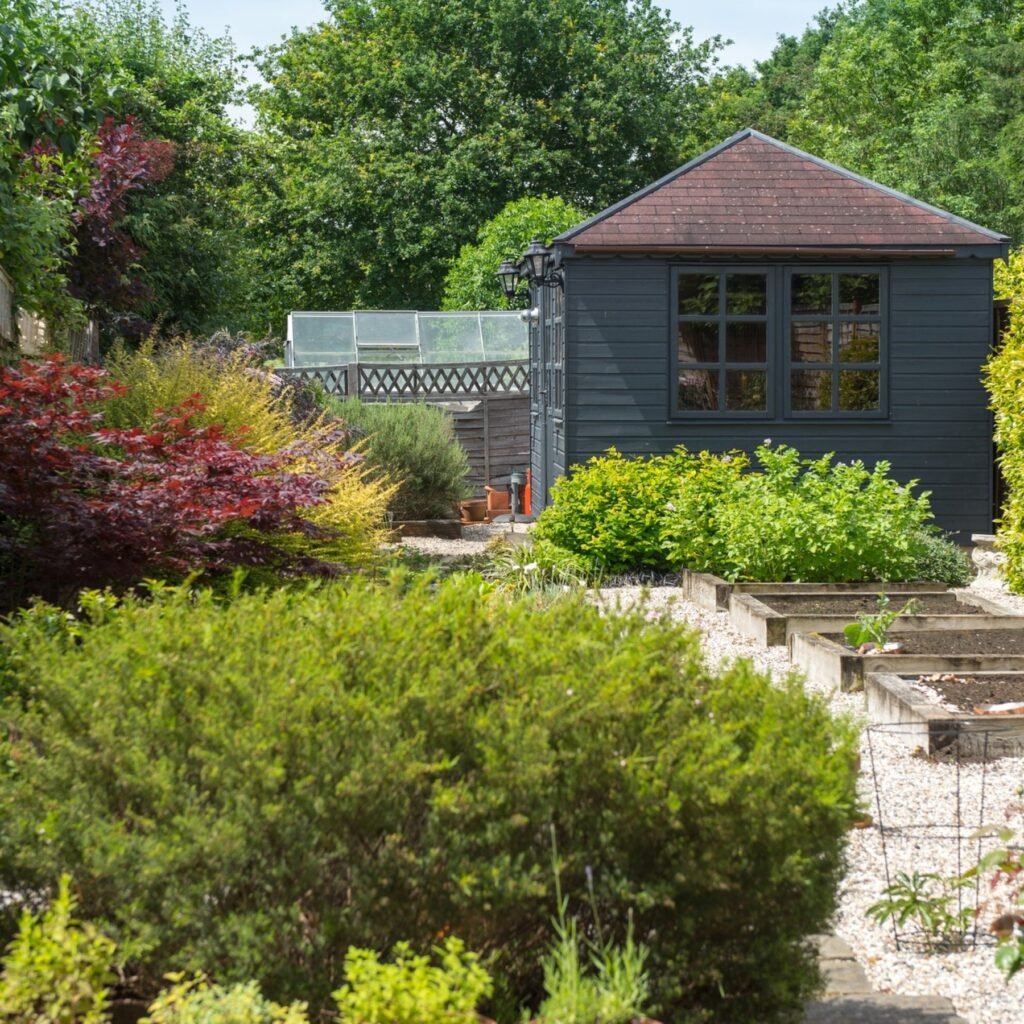
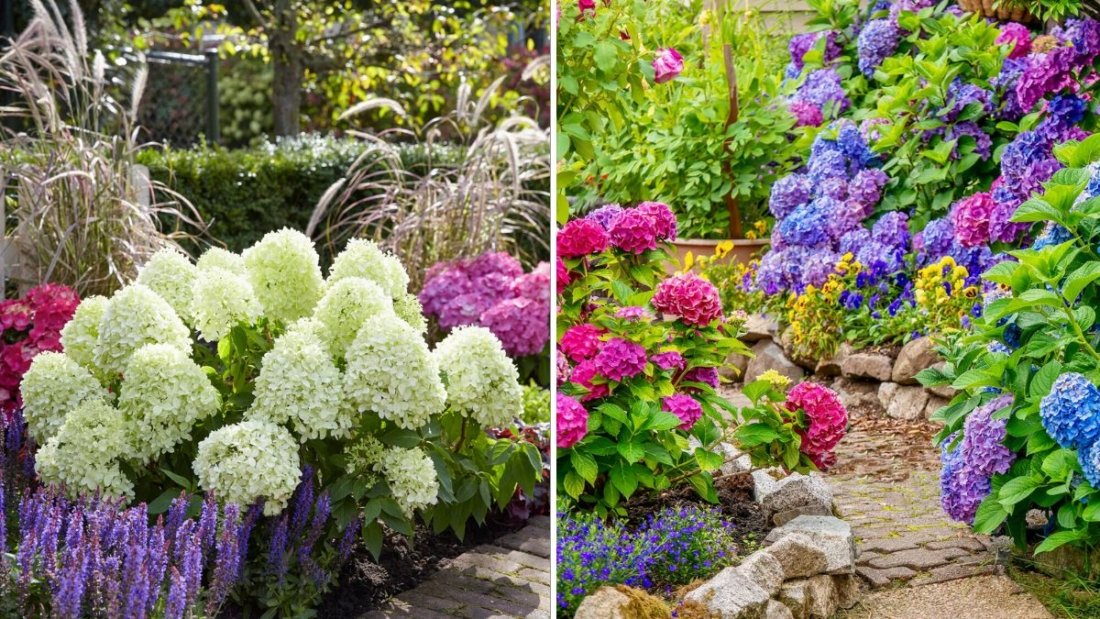
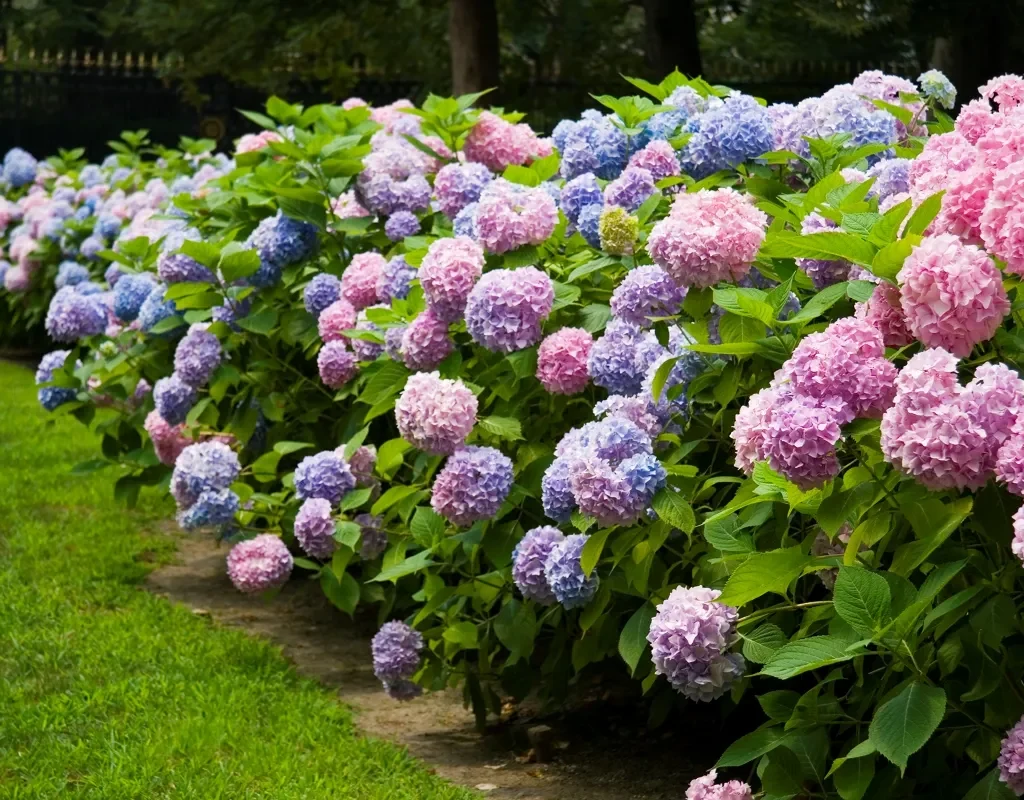
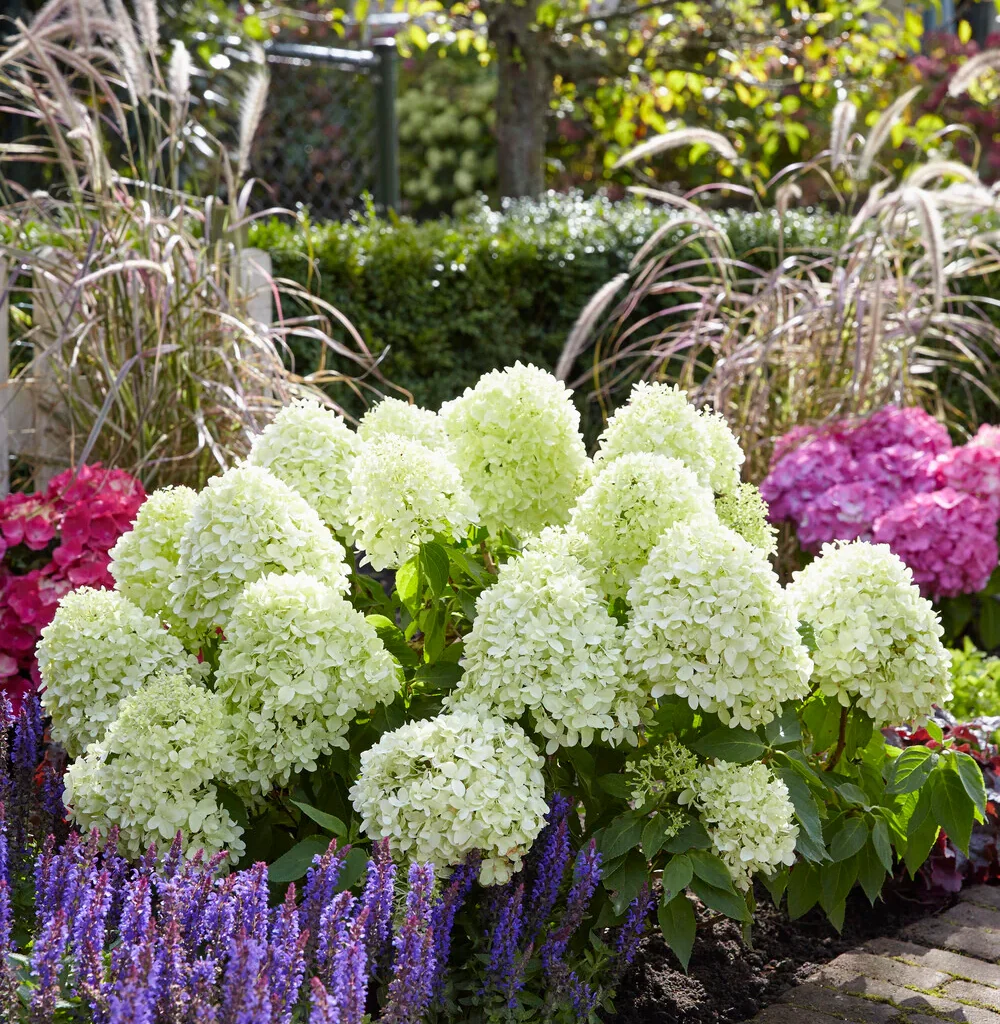
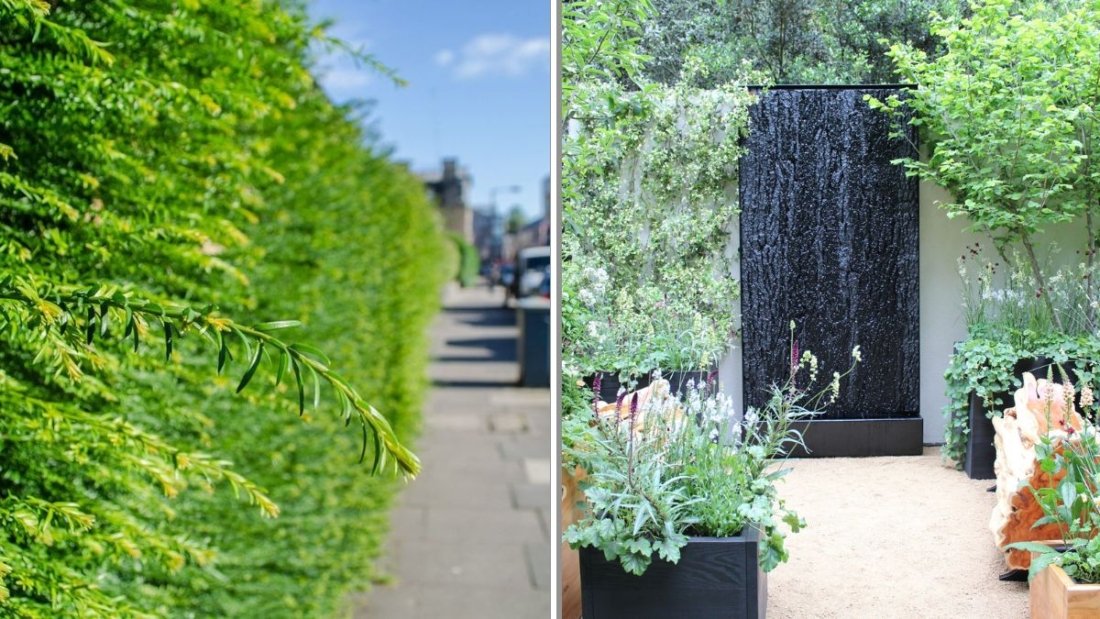
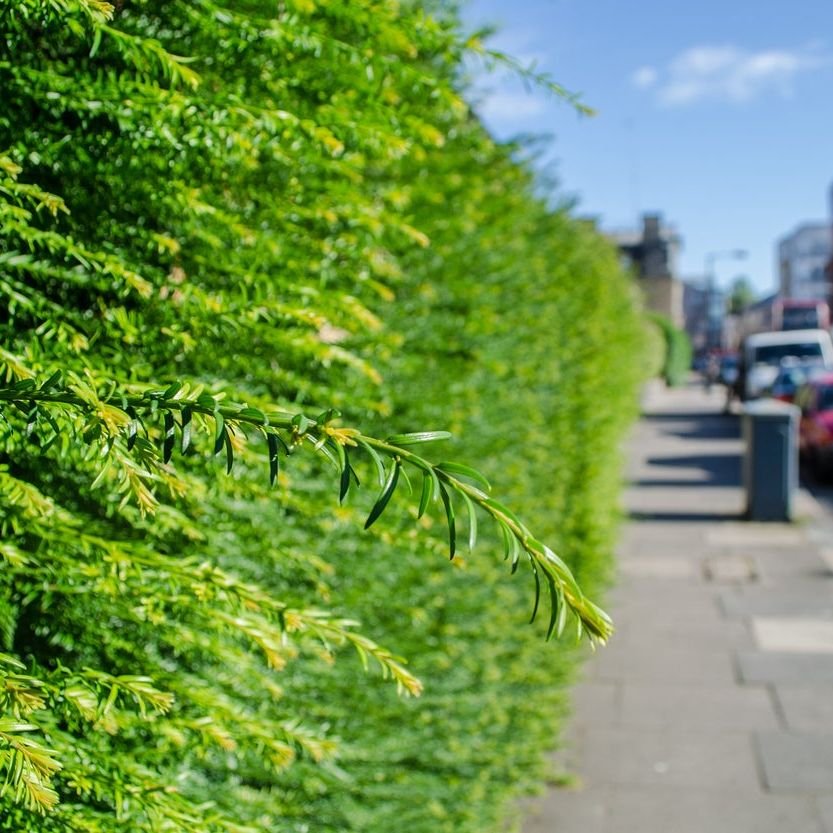
1. Plant Dense Hedges and Shrubs

One of the most effective and natural noise barriers is planting dense greenery along the perimeter of your backyard. Plants absorb sound waves, reducing noise while giving your space a lush, private look.

Best options for hedges and shrubs:

  • Arborvitae – Tall, evergreen, and fast-growing, arborvitae can form a natural wall that looks elegant and requires little maintenance.
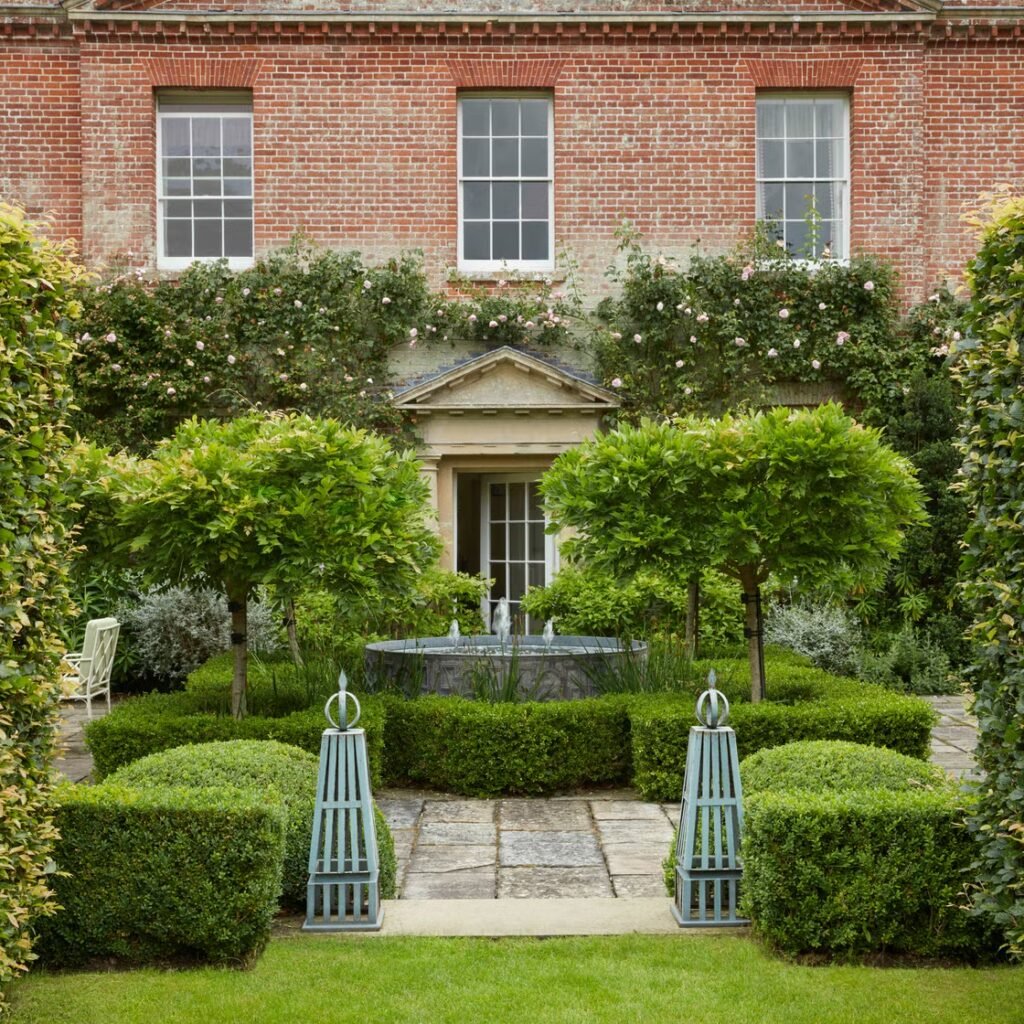
  • Boxwood – A classic choice for neat, formal hedges. While slower growing, boxwoods provide dense foliage that’s excellent at muffling sound.
  • Bamboo – When planted in containers or controlled beds, clumping bamboo varieties grow quickly, creating both a visual and sound barrier.

Tips for success:

  • Choose evergreen species to maintain noise-blocking benefits year-round.
  • Plant shrubs close together to avoid gaps in coverage.
  • Combine different plant types and heights for a layered, more effective sound barrier.

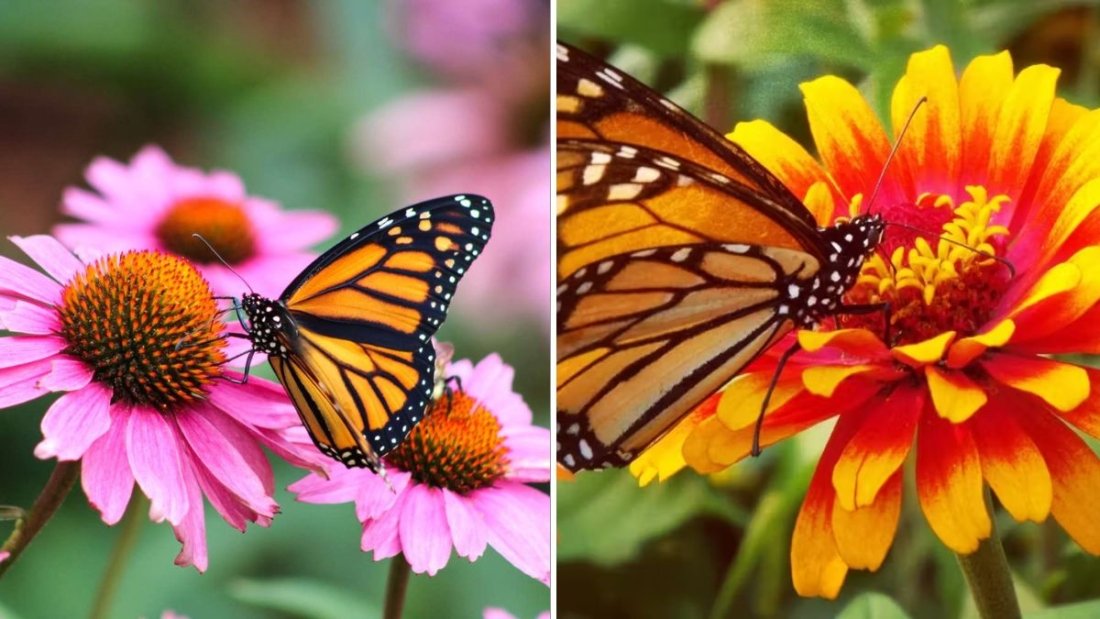
Beyond reducing noise, hedges also enhance privacy and bring in birds and pollinators, turning your backyard into a lively and relaxing environment.


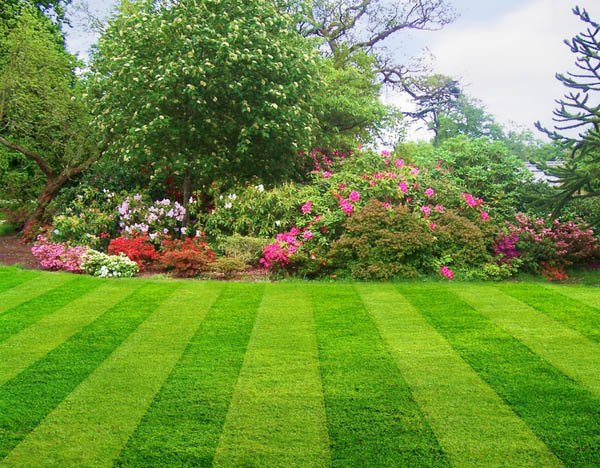
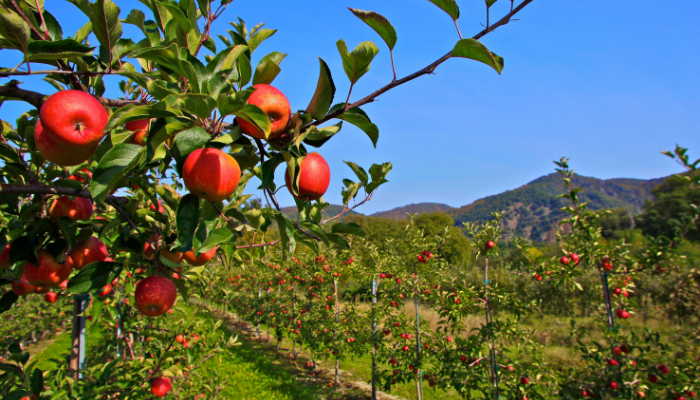
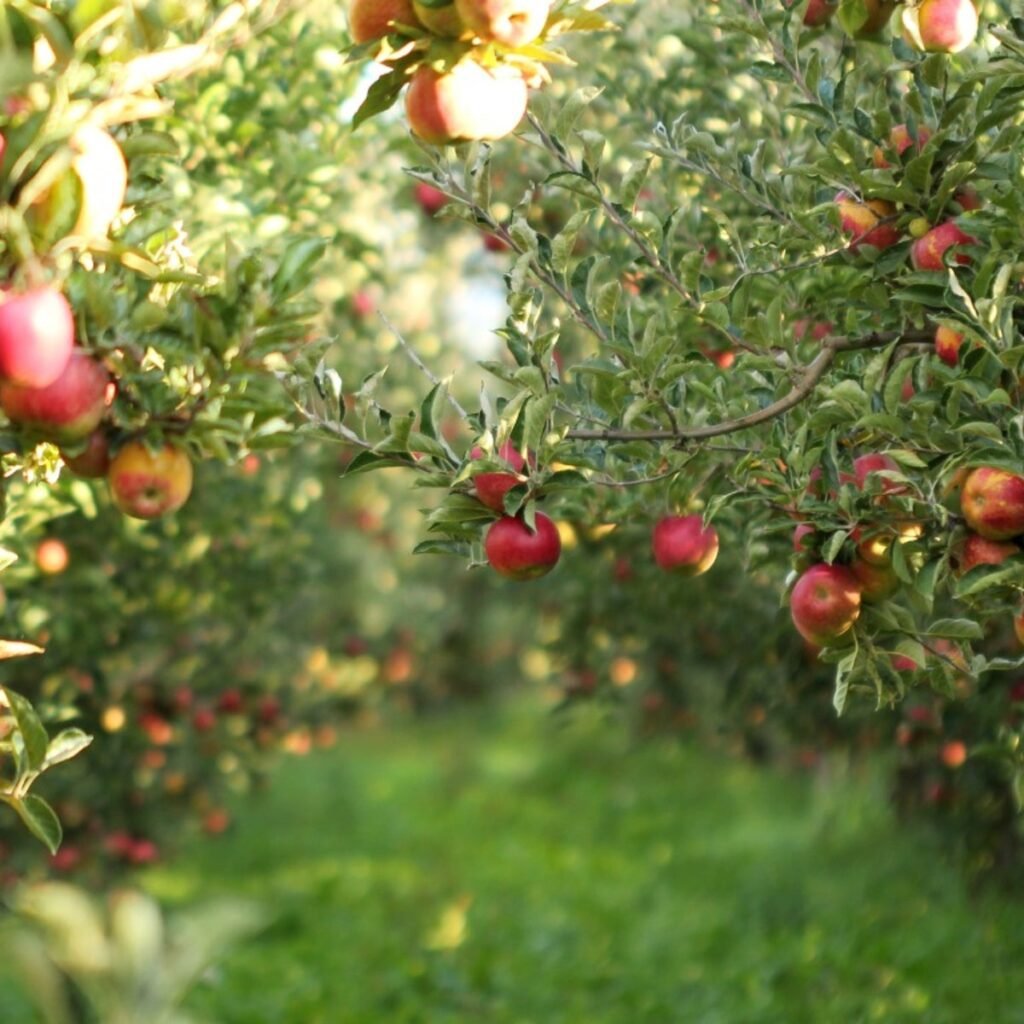
2. Use Trees Strategically

While shrubs work well at ground level, trees can help filter noise from above, particularly if your home is near a busy road or tall buildings. Trees absorb and deflect sound waves through their trunks, branches, and leaves, especially when planted in layers.

Best trees for noise reduction:

  • Evergreen trees such as spruce, pine, or fir provide year-round noise control. Their dense needles create a thick acoustic barrier.
  • Deciduous trees like oak or maple offer summer sound absorption with full foliage while adding seasonal beauty.
  • Fast-growers like hybrid poplar or Leyland cypress quickly provide coverage for new landscapes.

Design tip:
For maximum noise reduction, create a “green belt” by planting multiple rows of trees. A mix of tall trees in the back and shorter species in front helps block sound at different levels.

Besides reducing noise, trees improve air quality, offer shade, and make your backyard feel like a private woodland retreat.


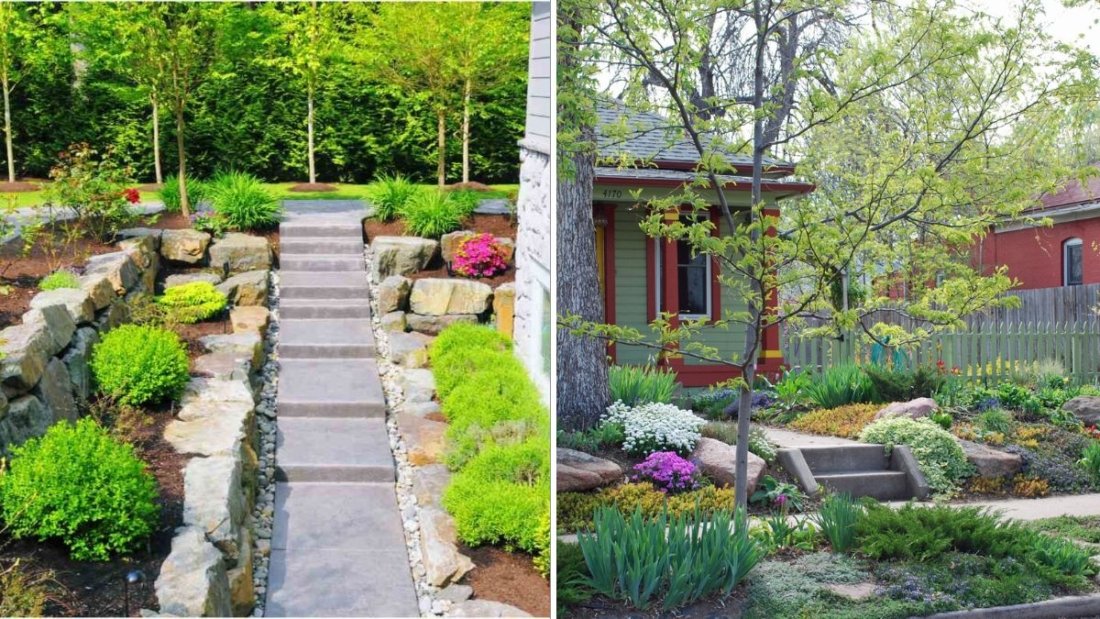
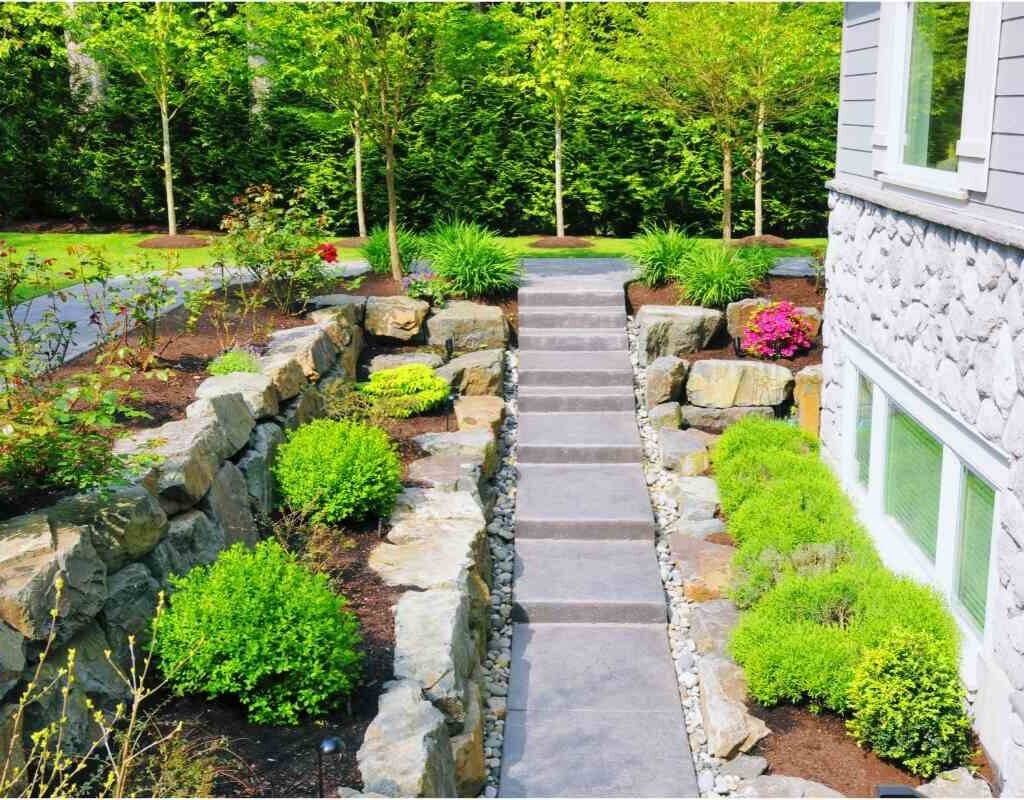
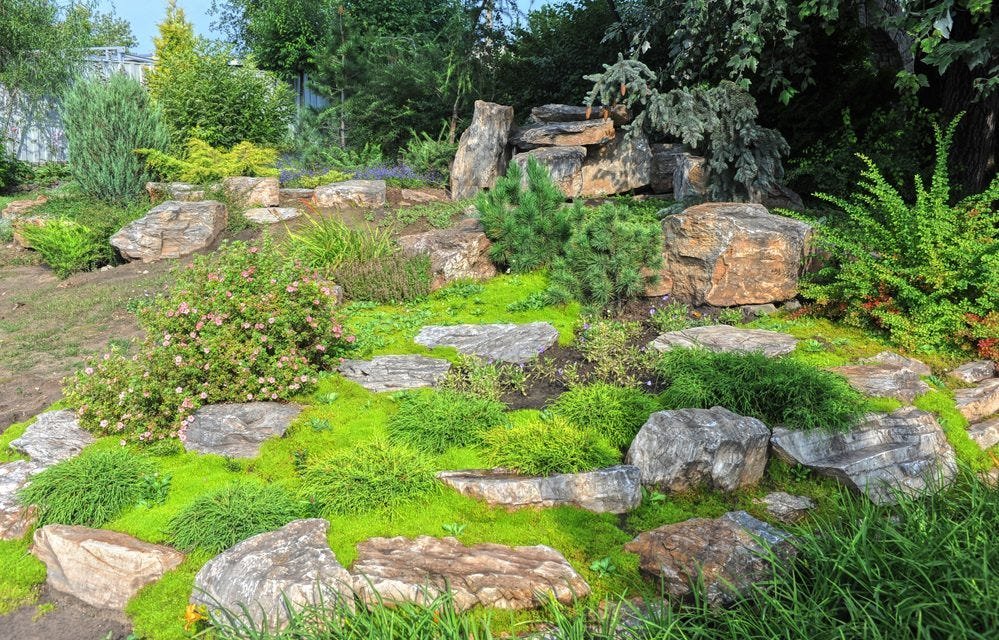
3. Build Natural Sound Barriers with Earth and Stone

Sometimes greenery alone isn’t enough. In that case, you can blend natural elements like earth and stone into your backyard design. These features can block or redirect noise while adding character to your outdoor space.

Options to consider:

  • Berms (raised earth mounds): By sculpting the land with soil, you can create natural sound barriers. Planting grass, shrubs, or flowers on the berm makes it both functional and beautiful.
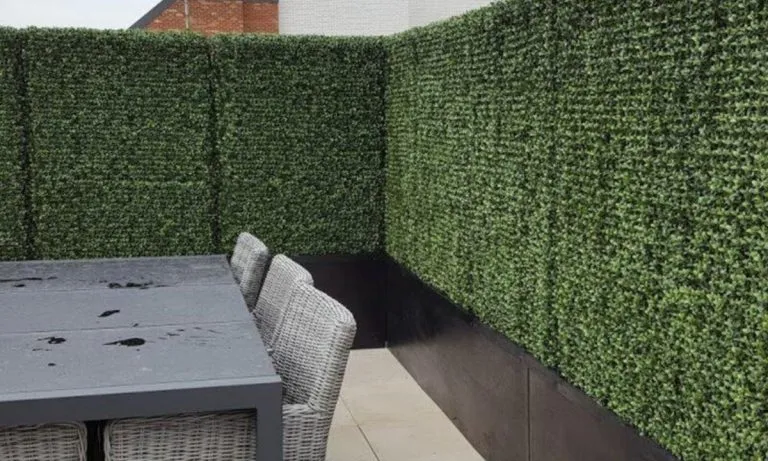
  • Rock walls: A stone or brick wall, softened with vines and climbing plants, provides excellent noise reduction. Unlike stark fences, natural stone blends into the landscape and can last for decades.
  • Living walls: Vertical garden structures filled with lush greenery absorb sound and add a stunning focal point to patios or seating areas.

When combined with plants, these barriers break up and absorb sound waves rather than letting them bounce directly into your yard.


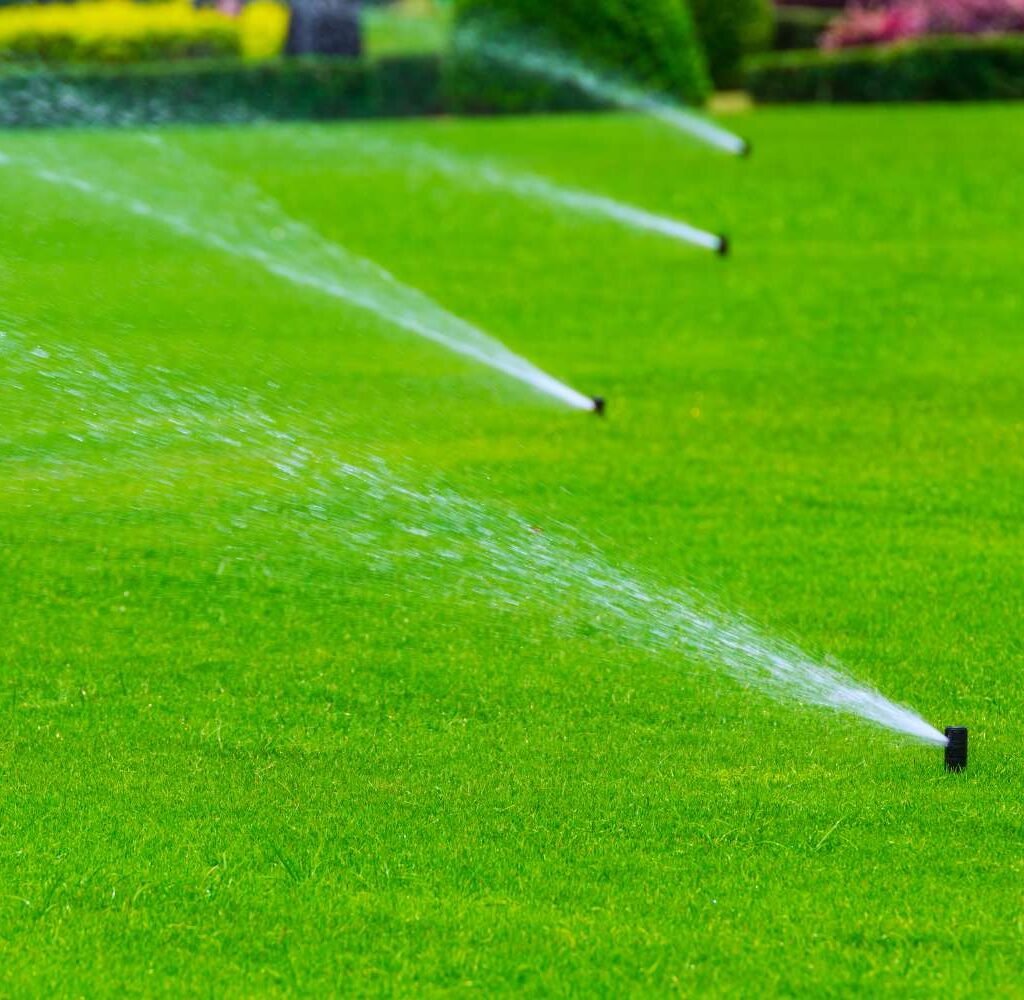
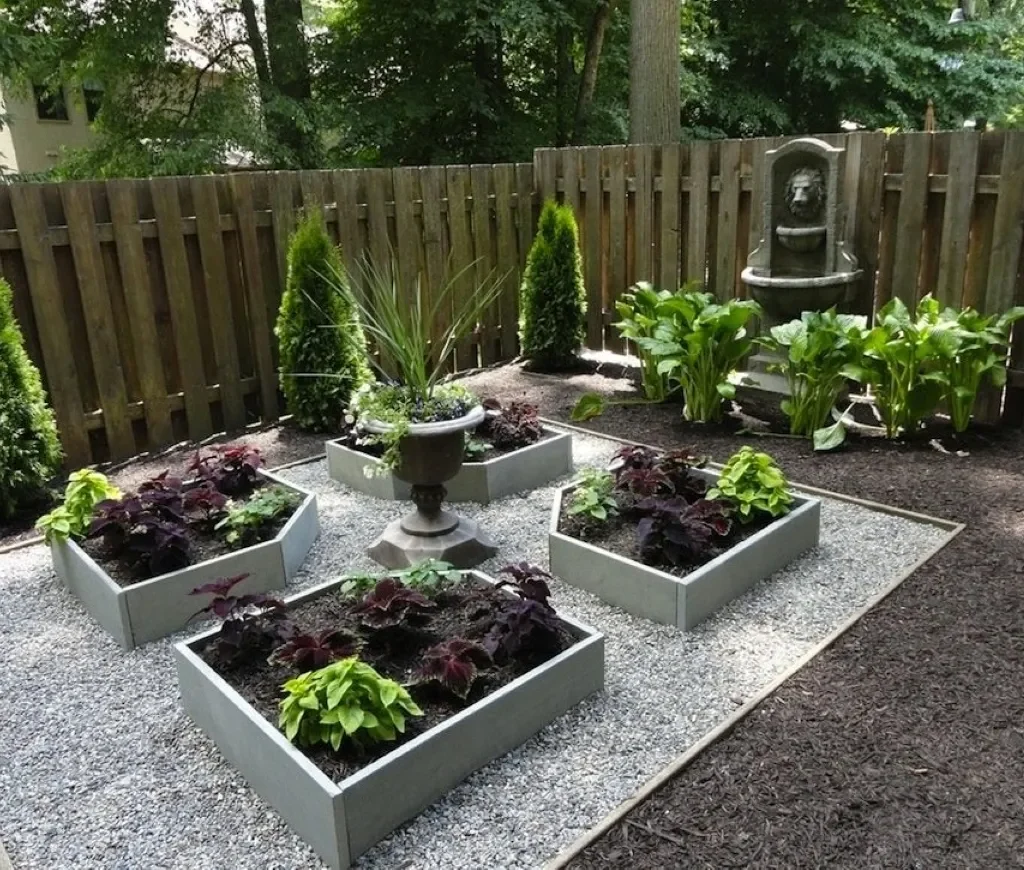
4. Incorporate Water Features

While water doesn’t block noise in the traditional sense, it masks unwanted sounds with soothing natural ones. A trickling fountain, bubbling stream, or cascading waterfall can make the background hum of traffic fade away, replacing it with calming white noise.

Great water feature ideas:

  • Fountains: Small freestanding fountains are affordable, easy to install, and can instantly transform the mood of a backyard.
  • Pond with waterfall: If you have space, a pond with a waterfall feature provides a strong, consistent masking effect against louder noises.
  • Wall-mounted water features: Perfect for smaller yards or patio areas, these can be paired with plants for a striking design.

The movement of water not only masks noise but also attracts birds, adds humidity to dry climates, and brings a sense of tranquility to any outdoor space.

Pro tip: Place your water feature near the area where you spend the most time, such as a patio or outdoor dining area, for maximum impact.


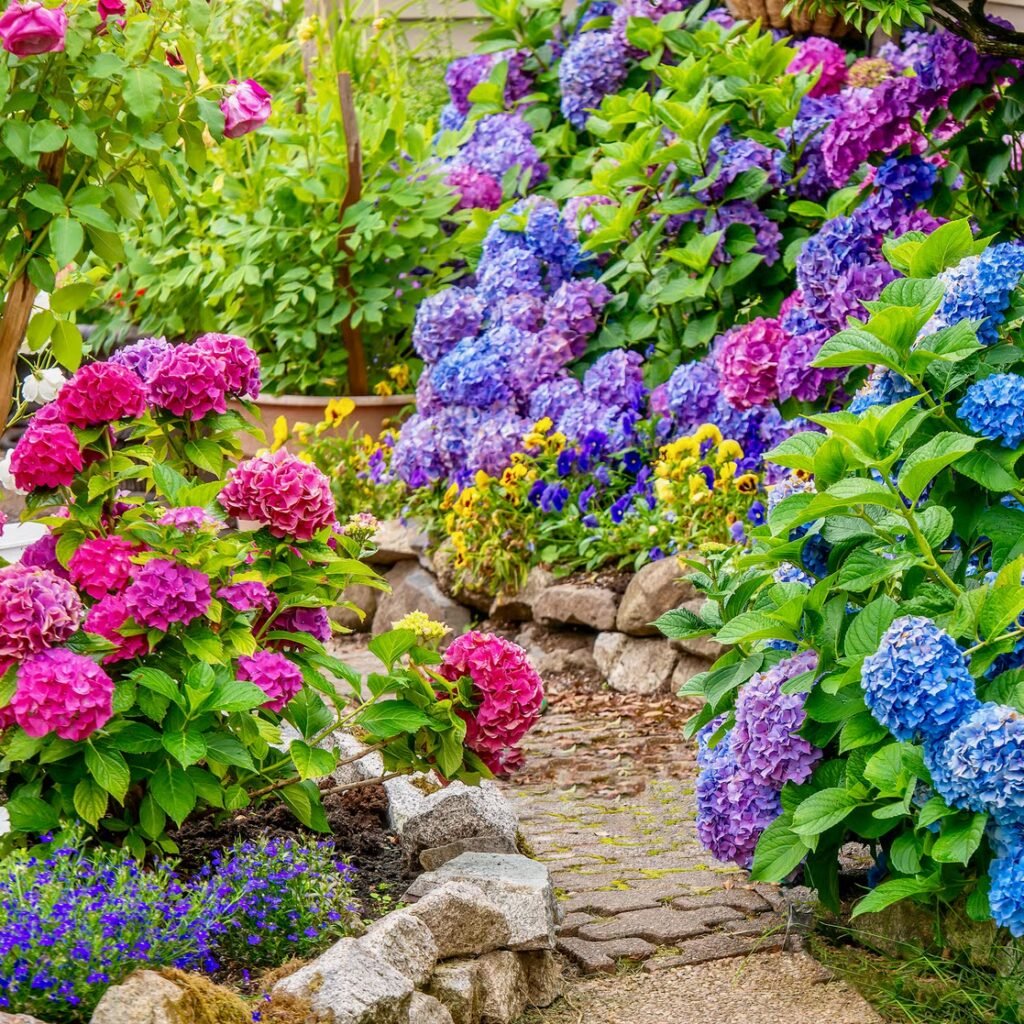
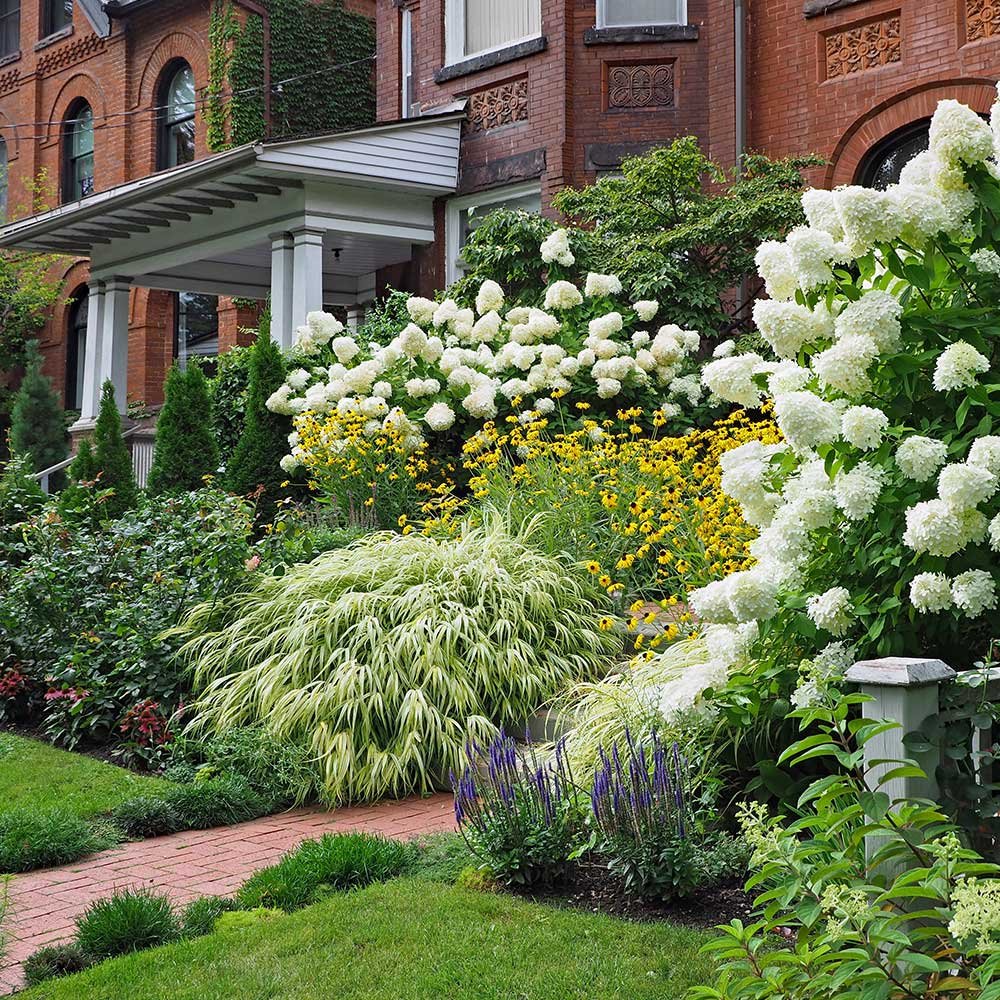
5. Create Multi-Layered Landscaping

Perhaps the most effective long-term solution is combining several natural noise-reduction methods into a cohesive landscape design. By layering plants, hardscaping, and water features, you create multiple barriers that intercept sound waves before they reach your ears.

How to design a layered approach:

  • Start with a hedge or tree line at the perimeter for primary noise reduction.
  • Add mid-level shrubs and ornamental grasses to thicken the barrier.
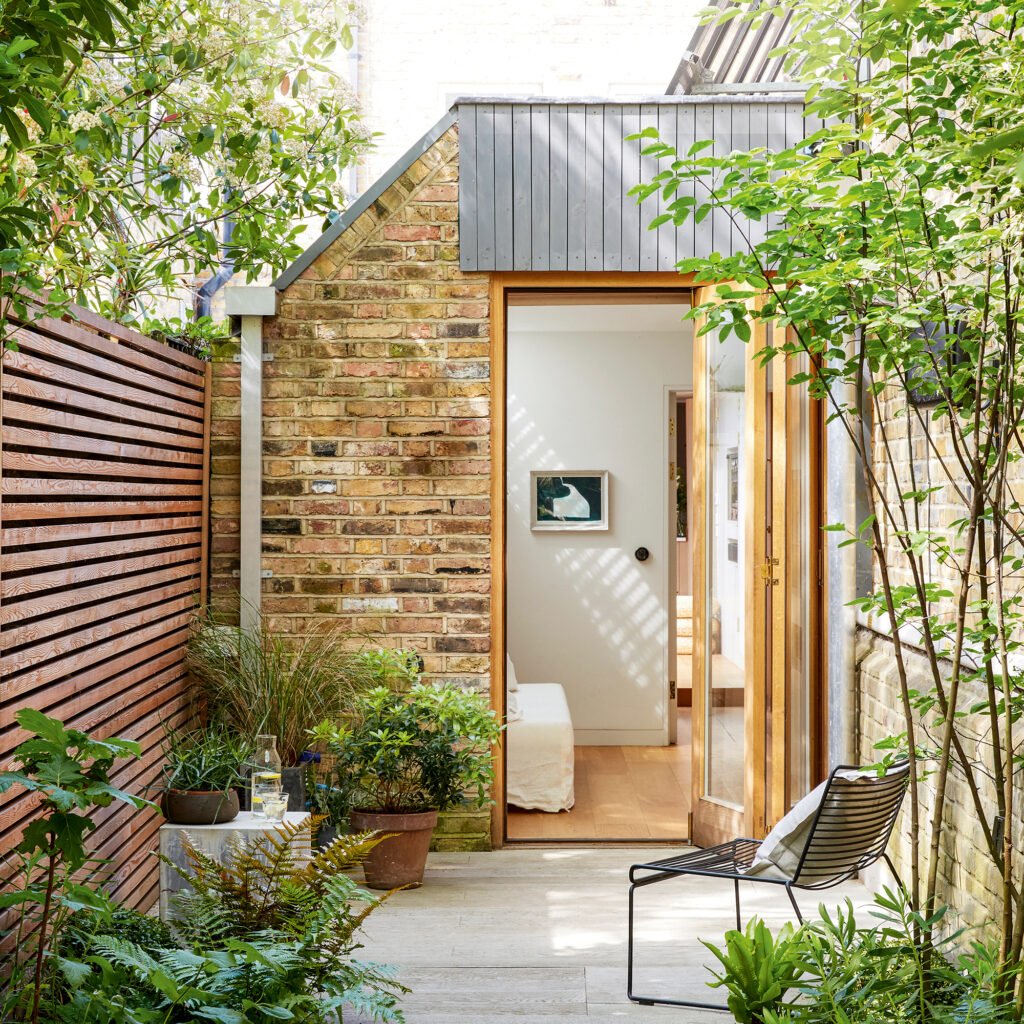
  • Introduce climbing plants on trellises or pergolas for vertical coverage and visual appeal.
  • Place a water feature near your seating area for a soothing masking effect.

This layered approach doesn’t just reduce noise—it transforms your backyard into a multi-sensory escape that looks beautiful, feels private, and sounds serene.


Final Thoughts

Creating a quieter backyard doesn’t always require expensive construction or artificial barriers. With the right combination of greenery, natural structures, and thoughtful design, you can reduce noise pollution while enhancing the beauty and function of your outdoor space.

Whether you choose dense hedges, tall trees, stone walls, or the soothing sound of water, these natural methods offer sustainable solutions that blend seamlessly into your landscape. Over time, your backyard can become a peaceful sanctuary where you can truly relax, unwind, and reconnect with nature.

If outside noise has been disrupting your outdoor enjoyment, try one—or better yet, a combination—of these five natural noise-blocking strategies. You’ll not only reduce unwanted sound but also create the tranquil retreat you’ve always wanted, right outside your door.

7 Invasive Plants You Should Remove From Your Yard Right Now

7 Invasive Plants You Should Remove From Your Yard Right Now

A well-kept yard should be a sanctuary—lush, green, and filled with thriving plants that support your local ecosystem. But lurking among the foliage in many gardens are invasive plants—species that may seem harmless or even attractive but silently wreak havoc on native plants, soil health, and biodiversity.

These botanical invaders spread aggressively, often outcompeting native flora, consuming resources, and even damaging property. While they might offer fast growth or decorative appeal, the long-term costs are substantial.

In this article, we’ll uncover seven of the most problematic invasive plants found in yards across North America (and many parts of the world). We’ll explain why they’re harmful, how to identify them, and most importantly—how to remove them effectively.


What Makes a Plant “Invasive”?

A plant is considered invasive when:

  • It is non-native to the area
  • It spreads rapidly and aggressively
  • It displaces native species
  • It disrupts ecosystems, soil, or wildlife habitat

Unlike weeds, which are simply unwanted plants, invasive species have ecological consequences. Removing them is crucial for protecting native biodiversity and maintaining a healthy garden.


1. English Ivy (Hedera helix)

Why It’s Invasive:

English Ivy is often used as a decorative groundcover or climber on walls and fences. But beneath its lush, glossy appearance lies a destructive tendency. It smothers trees, shrubs, and native plants by blocking sunlight and adding weight that weakens structures.

Harmful Effects:

  • Chokes out understory plants
  • Harbors pests and diseases
  • Can cause tree instability and death
  • Damages brick and wood structures when allowed to climb

How to Remove:

  • Manually pull vines from the ground and structures, including roots
  • Cut and treat thick vines climbing trees at the base with horticultural vinegar or an eco-safe herbicide
  • Monitor regrowth consistently, as it often returns if roots are left

Pro Tip: Never let English Ivy climb trees. It accelerates tree decay and makes them susceptible to wind damage.


2. Japanese Knotweed (Fallopia japonica)

Why It’s Invasive:

Japanese Knotweed is one of the most notoriously invasive plants in the world. Its bamboo-like stems and broad leaves grow aggressively in dense thickets. It’s capable of pushing through concrete, foundations, and asphalt.

Harmful Effects:

  • Destroys native plant communities
  • Disrupts drainage and structural integrity
  • Nearly impossible to eradicate without persistence

How to Remove:

  • Cut stems to ground level repeatedly (every 2–3 weeks during growing season)
  • Dig out as much of the rhizome system as possible
  • Cover with heavy-duty landscape fabric or tarps to suppress regrowth
  • Avoid composting—dispose of in sealed bags

Warning: This plant can regenerate from even small fragments. Extreme care is needed during removal.


3. Purple Loosestrife (Lythrum salicaria)

Why It’s Invasive:

Though visually stunning with its purple flower spikes, Purple Loosestrife is a wetland invader. It rapidly colonizes streams, ponds, and ditches, forming dense stands that choke out native aquatic plants.

Harmful Effects:

  • Destroys wetland biodiversity
  • Reduces habitat for birds, frogs, and insects
  • Alters water flow and nutrient cycles

How to Remove:

  • Hand-pull small patches before flowering
  • Cut flowering spikes before seed production (each plant produces 2 million seeds!)
  • For large infestations, consult with local authorities for removal guidelines

Did You Know? Some areas release beetles (Galerucella spp.) as a biological control for Purple Loosestrife.


4. Bamboo (Running Types – e.g., Phyllostachys spp.)

Why It’s Invasive:

Bamboo is often planted for privacy, windbreaks, or aesthetic appeal. But running varieties spread rapidly through underground rhizomes, taking over entire yards and creeping into neighboring properties.

Harmful Effects:

  • Infiltrates gardens, driveways, and foundations
  • Displaces native species
  • Extremely difficult to control once established

How to Remove:

  • Dig up rhizomes completely (a massive job)
  • Install root barriers at least 3 feet deep if retaining bamboo
  • Repeated mowing or cutting may weaken over time
  • Never plant running bamboo without proper containment

Best Alternative: Use clumping bamboo if you want a similar look without the invasive risk.


5. Chinese Privet (Ligustrum sinense)

Why It’s Invasive:

Introduced as a hedge plant, Chinese Privet is now a widespread problem in forests and suburban areas alike. It forms dense thickets that shade out native plants and reduce wildlife diversity.

Harmful Effects:

  • Competes with native shrubs and seedlings
  • Provides minimal wildlife value
  • Alters soil chemistry and forest dynamics

How to Remove:

  • Pull seedlings by hand
  • Cut larger shrubs at the base and apply natural herbicide to stumps
  • Monitor for re-sprouting and remove root suckers
  • Replace with native shrubs like spicebush, viburnum, or serviceberry

Bonus: Removing privet boosts bird and pollinator habitat.


6. Creeping Charlie (Glechoma hederacea)

Why It’s Invasive:

Also known as ground ivy, this low-growing vine creeps across lawns and flower beds, often mistaken for a harmless weed. It’s incredibly resilient and can spread by stems, seeds, and roots.

Harmful Effects:

  • Smothers turfgrass and ornamental beds
  • Thrives in shady, moist areas where native groundcovers struggle
  • Hard to eliminate without consistent control

How to Remove:

  • Hand-pull or rake out runners (easier after rain when soil is soft)
  • Keep mowed areas healthy and thick to prevent spread
  • Apply a vinegar-based spray to persistent patches (avoid overspray on wanted plants)

Prevention Tip: Maintain a healthy, dense lawn to naturally crowd out Creeping Charlie.


7. Tree-of-Heaven (Ailanthus altissima)

Why It’s Invasive:

This fast-growing tree is anything but heavenly. Originally introduced for shade and ornamental use, it now dominates disturbed areas and backyards. Tree-of-Heaven grows aggressively and emits chemicals that inhibit nearby plant growth.

Harmful Effects:

  • Displaces native trees and plants
  • Weakens soil biodiversity
  • Damages infrastructure with its strong roots
  • Produces thousands of windborne seeds each year

How to Remove:

  • Cut down tree and treat the stump immediately to prevent sprouting
  • Dig out saplings and seedlings as soon as spotted
  • Monitor surrounding areas for new growth

Note: Tree-of-Heaven is a host for the Spotted Lanternfly, a major agricultural pest.


Eco-Friendly Removal Tips

  • Never compost invasive plants: Seeds and roots can survive and spread
  • Dispose of plant waste properly: Bag and trash or check with your local extension office for guidelines
  • Replace with native plants: Use native grasses, shrubs, and perennials to fill the space and support pollinators
  • Mulch generously: Suppresses weed regrowth and improves soil health
  • Stay consistent: Most invasives require multiple efforts to fully remove

The Bigger Picture: Why You Should Care

Invasive plants don’t just make your yard harder to manage—they contribute to the global biodiversity crisis. By removing them from your yard:

  • You protect native ecosystems
  • You promote healthier soil and water systems
  • You support local birds, bees, and butterflies
  • You become part of a growing movement toward sustainable landscaping

Even if a plant was once sold at your local nursery, it could be invasive. Knowledge and action are your best tools in creating a healthier environment for future generations.


Conclusion

Your backyard is more than just a patch of green—it’s a living, breathing part of your local ecosystem. By identifying and removing invasive plants like English Ivy, Bamboo, Japanese Knotweed, and others, you help restore balance, prevent long-term damage, and open up space for beautiful, beneficial native species.

Act now. Walk your yard, identify these invaders, and begin the process of reclaiming your landscape. It’s not just about protecting your property—it’s about being a steward of the land.

The Best Time of Day to Mow Your Grass, According to Lawn Pros

The Best Time of Day to Mow Your Grass, According to Lawn Pros

Mowing the lawn is a ritual for many homeowners, often squeezed between busy schedules or chosen based on convenience. But did you know that the time of day you mow your lawn can significantly impact the health, appearance, and growth of your grass?

According to lawn care professionals and horticultural experts, choosing the right time to mow isn’t just about avoiding heat or getting it over with—it’s about optimizing your lawn’s health.

In this comprehensive guide, we’ll explore:

  • The science behind mowing times
  • Pros and cons of different times of day
  • Best practices recommended by lawn pros
  • Tips for healthier, greener grass all season long

Let’s dive into when and why timing your mow matters more than you think.


Why Timing Matters in Lawn Mowing

Grass may look tough, but it’s a living plant that responds to external stress. Mowing, at its core, is a controlled form of stress. Doing it at the wrong time can:

  • Weaken the grass blades
  • Encourage disease
  • Cause moisture loss
  • Lead to poor regrowth and browning

On the other hand, mowing at the right time of day helps the grass recover quickly, retain moisture, and grow back stronger and greener.

So, when exactly is the best time to mow your grass? Let’s look at each time period in the day and what experts have to say.


1. Early Morning (6 AM – 8 AM): Not Recommended

What Happens:

  • Dew is still on the grass
  • Blades are wet and soft
  • Soil may be moist or soggy

Why Pros Avoid It:

Most lawn care experts strongly discourage mowing early in the morning. At this time, dew or overnight moisture can cling to the grass blades. Wet grass doesn’t cut cleanly, causing:

  • Uneven trimming
  • Torn or bruised blades
  • Increased risk of fungal diseases due to open wounds

Additionally, mowing wet grass can clump and clog your mower deck, making it harder to clean and less efficient.

Verdict: Avoid early morning mowing to prevent damage and disease.


2. Mid-Morning (8 AM – 10 AM): Ideal Time

What Happens:

  • Dew has dried
  • Sun is not too intense
  • Grass is upright and dry
  • Temperatures are still moderate

Why Pros Recommend It:

According to professional landscapers, mid-morning is the best time to mow your lawn.

  • The grass is dry enough for a clean cut
  • Cooler temperatures reduce plant stress
  • Grass has time to heal before the heat of the day
  • Fewer pests and fungi are active during this time

This is also when your lawn is most photosynthetically active, meaning it’s in a natural state of growth and recovery.

Verdict: Best time to mow. Grass is dry, healthy, and easy to cut.


3. Midday or Noon (10 AM – 2 PM): Risky in Hot Weather

What Happens:

  • Sun is at its peak
  • Temperatures are highest
  • Grass and soil may be dry
  • Water loss through evaporation is significant

Why Pros Caution Against It:

Mowing during the hottest part of the day causes the most stress to your lawn. Here’s why:

  • Grass loses moisture rapidly
  • Blades may wilt or scorch
  • The mower’s heat adds to overall stress
  • Roots may be exposed to sun and dry out

Even for cool-season grasses, cutting at midday can cause shock and browning, especially during summer.

Verdict: Avoid unless it’s a cool, cloudy day.


4. Late Afternoon (4 PM – 6 PM): Second-Best Time

What Happens:

  • Sun begins to lower
  • Heat reduces
  • Grass is still dry
  • Lawn has time to recover

Why Pros Approve:

Late afternoon is a solid second-best option for mowing. The sun’s intensity is lower, and the grass still has a few hours to recover before nighttime.

Key benefits include:

  • Reduced heat stress
  • Clean cutting due to dry grass
  • Less exposure to fungal risks than evening mowing

However, you must finish mowing well before sunset so your lawn has at least 2–3 hours to begin healing before nightfall.

Verdict: Good time if you missed the morning window.


5. Evening (6 PM – 8 PM): Not Ideal

What Happens:

  • Temperatures begin to drop
  • Moisture levels rise
  • Grass starts to settle
  • Dew forms as night approaches

Why Pros Discourage It:

Mowing in the evening may seem pleasant after a long day, but it’s risky for your lawn’s health. Cutting grass just before nightfall leaves it vulnerable:

  • Freshly cut blades are more likely to develop fungal infections overnight
  • Moisture from evening dew settles in open cuts
  • Lawn doesn’t get enough recovery time before dark

Fungi such as dollar spot, brown patch, and powdery mildew thrive in dark, damp conditions—perfect for a freshly cut evening lawn.

Verdict: Avoid evening mowing whenever possible.


Summary Chart: Best and Worst Times to Mow

Time of DayMowing ConditionExpert Recommendation
6–8 AMWet, dewy, humid Avoid
8–10 AMDry, cool, active growth Best time
10 AM – 2 PMHot, dry, sunny Risky
4–6 PMCooling, dry, stable Good alternative
6–8 PMDamp, fungus-prone Avoid

Additional Tips from Lawn Pros

1. Mow with Sharp Blades

Dull mower blades tear grass instead of cutting it cleanly, leading to:

  • Frayed edges
  • Browning tips
  • Increased susceptibility to pests and disease

Sharpen mower blades at least 2–3 times per season.


2. Follow the One-Third Rule

Never remove more than one-third of the grass blade in a single mow. Cutting too much at once:

  • Stresses the plant
  • Weakens roots
  • Makes the lawn more susceptible to drought and weeds

Example: If your grass is 3 inches tall, only cut 1 inch at most.


3. Alternate Your Mowing Pattern

Repeatedly mowing in the same direction can:

  • Cause soil compaction
  • Create ruts or stripes
  • Stress certain areas of the lawn

Switch directions each time you mow—go horizontal one week, diagonal the next.


4. Don’t Mow When Grass Is Wet

Regardless of time, never mow wet grass. Besides damaging your lawn, it:

  • Leads to uneven cutting
  • Can clog or rust your mower
  • Increases the risk of slipping

Wait until the lawn is completely dry, especially after rain.


5. Leave Clippings on the Lawn

Grass clippings decompose quickly and return valuable nutrients to the soil. Known as grasscycling, this:

  • Reduces need for fertilizers
  • Helps retain moisture
  • Supports beneficial soil organisms

Just make sure the clippings aren’t too thick—spread them evenly to avoid smothering the grass.


Seasonal Considerations

Spring:

  • Best time to begin mowing as grass enters active growth
  • Mid-morning or late afternoon ideal
  • Avoid mowing too early after snowmelt—wait until soil firms up

Summer:

  • Morning is best to avoid heat stress
  • Raise mower height to prevent drought stress

Fall:

  • Continue mowing until grass stops growing
  • Remove leaves before mowing
  • Aerate and overseed after final mow for a thicker lawn next spring

Winter:

  • Don’t mow dormant grass
  • Keep lawn clear of debris, snow piles, or compacted areas

Conclusion

Mowing your lawn may feel like a routine chore, but doing it at the right time of day makes a significant difference in your grass’s health, resilience, and appearance.

According to lawn pros, the best time to mow is mid-morning (8–10 AM), when dew has dried and the grass is actively growing. Late afternoon (4–6 PM) is the next best option, especially in warmer climates.

Avoid mowing in the early morning, peak heat hours, and after sunset to prevent stress, disease, and long-term damage to your lawn.

By timing your mow right and following expert-approved best practices, you’ll enjoy a greener, thicker, and healthier lawn—naturally and effortlessly.

How to Keep Your Lawn Green Without Using Chemicals

How to Keep Your Lawn Green Without Using Chemicals

Introduction

A lush, green lawn is the dream of many homeowners. However, achieving and maintaining that vibrant look often involves chemical fertilizers, herbicides, and pesticides—many of which can harm the environment, your health, and local wildlife. Fortunately, it’s entirely possible to cultivate a beautiful, healthy lawn without using any synthetic chemicals.

This guide explores eco-friendly, natural, and sustainable methods to keep your lawn green, vibrant, and resilient. From soil care to natural weed control, we’ll break down what experts recommend and how you can create a lawn that thrives in harmony with nature.


Why Avoid Chemicals?

Chemical lawn treatments—fertilizers, herbicides, and pesticides—promise quick results, but they come with serious drawbacks:

  • Environmental impact: Runoff from chemical treatments pollutes waterways and harms aquatic life.
  • Health concerns: Many lawn chemicals contain ingredients linked to allergies, hormone disruption, and other health risks.
  • Soil degradation: Chemicals can harm beneficial soil microbes, reducing long-term soil fertility.
  • Dependency: Lawns treated with chemicals often become reliant on them for survival, weakening natural resilience.

A chemical-free lawn, on the other hand, supports biodiversity, improves soil structure, and offers a safer space for children, pets, and wildlife.


1. Start With Healthy Soil

The foundation of a green, chemical-free lawn is healthy, living soil.

Test Your Soil

Start by conducting a soil test to understand its pH, nutrient levels, and composition. You’ll know exactly what your lawn needs without guessing.

  • Ideal pH for most grass types: 6.0–7.0
  • Balance of nitrogen (N), phosphorus (P), and potassium (K) is crucial

Improve Soil Naturally

  • Compost: Add a layer of screened compost once or twice a year to enrich the soil with organic matter and microbes.
  • Organic mulch: Use grass clippings, shredded leaves, or wood mulch to retain moisture and feed the soil as they break down.
  • Topdressing: Apply a thin layer of compost or well-aged manure to improve soil texture and support microbial life.

Healthy soil retains moisture better, supports deep root growth, and reduces the need for extra inputs.


2. Choose the Right Grass Type

The best lawn is one that matches your local climate, soil, and sunlight conditions. Choosing the right type of grass means less watering, fewer pests, and lower maintenance overall.

Cool-Season Grasses (for temperate climates)

  • Fescues (fine and tall)
  • Kentucky bluegrass
  • Perennial ryegrass

Warm-Season Grasses (for hot regions)

  • Bermudagrass
  • Zoysiagrass
  • St. Augustine grass

Low-Maintenance Alternatives

  • Clover or microclover: Fixes nitrogen, requires little mowing
  • Native grasses: Adapted to local rainfall and resistant to local pests

Tip: Blend different grass types for a more resilient lawn with year-round green coverage.


3. Practice Proper Mowing Techniques

Mowing may seem simple, but how you mow dramatically affects your lawn’s health.

Mow High

Set your mower blades higher to leave grass 3–4 inches tall. Taller grass:

  • Shades out weeds naturally
  • Retains moisture better
  • Promotes deeper root systems

Don’t Bag Clippings

Leave grass clippings on the lawn. This practice, known as grasscycling, returns nitrogen to the soil and reduces the need for fertilizing.

Sharpen Your Mower Blades

Dull blades tear the grass, causing browning and making it more vulnerable to disease.


4. Water Smartly

Watering is essential, but most homeowners overwater or do it inefficiently.

Water Deeply, Not Frequently

  • Water 1–2 times a week, delivering about 1 inch per week, including rainfall.
  • Deep watering encourages roots to grow downward, making the grass drought-resistant.

Water Early

Water early in the morning (before 10 a.m.) to reduce evaporation and fungal growth.

Use Rainwater

  • Collect rainwater in barrels and use it for lawn irrigation.
  • This saves on your water bill and reduces reliance on municipal water sources.

5. Feed Your Lawn Organically

Instead of synthetic fertilizers, opt for natural, slow-release nutrients.

Organic Lawn Fertilizers

These are derived from plant or animal sources such as:

  • Compost
  • Bone meal
  • Fish emulsion
  • Seaweed extract
  • Corn gluten meal (also suppresses some weed seeds)

These products feed both the grass and the beneficial organisms in the soil.

DIY Natural Fertilizers

  • Banana peels and vegetable scraps: Compost them to feed your lawn.
  • Coffee grounds: Sprinkle lightly to add nitrogen and attract earthworms.

6. Control Weeds Naturally

Without chemicals, weed control relies on prevention, physical removal, and soil health.

Encourage a Thick Lawn

A dense, healthy lawn leaves little room for weeds to take hold.

Natural Weed Control Methods

  • Hand pulling: Especially effective for dandelions, crabgrass, and clover.
  • Boiling water or vinegar: Use cautiously on sidewalk cracks and edges.
  • Mulching bare spots: Prevents weeds from germinating in open soil.

Use Corn Gluten Meal

This natural by-product of corn milling inhibits seed germination of many common weeds. Apply it in early spring before weeds sprout.


7. Boost Soil Life With Beneficial Organisms

A living soil ecosystem can protect your lawn from pests and diseases naturally.

Add Mycorrhizal Fungi

These fungi form symbiotic relationships with grass roots, helping them absorb more water and nutrients.

Encourage Earthworms

Earthworms aerate the soil and improve nutrient cycling. Feed them with compost, and avoid disrupting their habitat with tilling or synthetic products.


8. Aerate and Dethatch

Even without chemicals, aeration and dethatching help improve root health and nutrient flow.

Aeration

Use a core aerator to remove plugs of soil, allowing air, water, and nutrients to penetrate.

  • Best done once a year in the growing season
  • Reduces compaction and promotes deeper roots

Dethatching

Thatch is a layer of dead grass and roots that can smother your lawn.

  • Remove excess thatch (more than ½ inch thick) using a dethatching rake or machine
  • Follow up with compost and overseeding

9. Reseed Bare Patches With Care

Thin or bare spots are invitations for weeds. Fix them promptly:

  • Rake the area and remove debris
  • Apply a thin layer of compost or topsoil
  • Sprinkle grass seed appropriate to your climate
  • Water gently and frequently until established

For added benefit, overseed your entire lawn in early fall or spring to keep it thick and vibrant.


10. Embrace Biodiversity and Patience

Nature-friendly lawns aren’t always perfectly uniform—but they’re healthier and more sustainable.

  • Allow some flowering plants like clover or violets—they support pollinators and fix nitrogen
  • Accept that occasional weeds or dry patches are part of the natural cycle
  • Over time, your lawn will become more self-sustaining and less needy

Remember: The goal isn’t perfection—it’s a living, thriving lawn in balance with the environment.


Conclusion

Maintaining a lush, green lawn without chemicals is not only possible—it’s practical, cost-effective, and better for your health and the planet. By focusing on soil health, proper mowing and watering, organic feeding, and natural weed control, you can cultivate a beautiful lawn that thrives naturally.

It might take a little more patience and care upfront, but the long-term rewards—lower maintenance, fewer costs, a healthier ecosystem—are worth the effort. Most importantly, you’ll be contributing to a greener, cleaner world, starting right in your own backyard.

Should You Aerate Your Lawn Every Year? Experts Answer

Should You Aerate Your Lawn Every Year? Experts Answer

Introduction

Lawn care enthusiasts and professionals alike often emphasize the importance of aeration, but the question remains: Should you aerate your lawn every year? While aeration offers multiple benefits to grass health, it’s not always necessary for every lawn or climate annually.

To clear up confusion, this article explores what lawn aeration is, how it works, when and how often to do it, and what the experts recommend. We’ll also discuss signs your lawn needs aeration, the different aeration methods, and whether annual aeration is worth your time and money.


What Is Lawn Aeration?

Lawn aeration is the process of perforating the soil with small holes to allow air, water, and nutrients to penetrate the grass roots. This helps the roots grow deeply and produce a stronger, more vigorous lawn.

There are two main types:

  1. Core (Plug) Aeration – Removes small plugs of soil and thatch from the lawn.
  2. Spike Aeration – Uses a solid tine or spike to poke holes in the ground without removing soil.

While both improve airflow and water absorption, core aeration is widely considered more effective, especially for compacted or clay-heavy soils.


Why Aeration Matters

Over time, the soil beneath your lawn becomes compacted. Factors that contribute to this include:

  • Heavy foot traffic or mowing
  • Poor soil structure (especially clay-heavy soils)
  • Thatch buildup
  • Construction or machinery movement on the lawn

Compacted soil restricts the flow of oxygen, water, and nutrients to the roots, essentially suffocating the grass. Aeration alleviates this by loosening the soil, breaking up the thatch, and encouraging healthy root development.


Benefits of Lawn Aeration

Experts agree that aeration offers numerous advantages when done correctly:

  • Improves Soil Structure: Looser soil promotes root growth and nutrient absorption.
  • Enhances Water Infiltration: Water penetrates more easily, reducing runoff and improving drought resistance.
  • Reduces Thatch Accumulation: Core aeration helps break down thatch, a layer of dead organic matter.
  • Encourages Root Growth: Deeper, healthier roots make for a thicker, greener lawn.
  • Improves Fertilizer Effectiveness: Nutrients reach roots directly instead of getting stuck in thatch or runoff.
  • Boosts Disease and Pest Resistance: Healthy lawns are more resilient to common problems.

Should You Aerate Your Lawn Every Year?

Short Answer: It depends.

While aeration is beneficial, annual aeration is not necessary for every lawn. The decision depends on several factors:

1. Soil Type

  • Clay soils: Heavy clay compacts easily and benefits from yearly or even twice-yearly aeration.
  • Sandy soils: These are naturally loose and may only need aeration every 2–3 years.
  • Loam soils: Balanced soils fall somewhere in between; aerate every 1–2 years, depending on use and health.

2. Foot Traffic

  • High traffic (kids, pets, sports, or riding mowers): Leads to compaction. Annual aeration is recommended.
  • Low traffic: Less compaction means less frequent aeration is needed.

3. Thatch Buildup

  • More than ½ inch of thatch: Aerate yearly or more to help break it up.
  • Minimal thatch: Aerate only when other signs of stress appear.

4. Lawn Age and Health

  • Older lawns or lawns with a history of neglect benefit from annual aeration.
  • Well-maintained lawns may only need it every other year.

5. Climate and Growing Season

  • Cool-season grasses (e.g., Kentucky bluegrass, fescue): Best aerated in early fall or spring.
  • Warm-season grasses (e.g., Bermuda, zoysia, St. Augustine): Aerate in late spring to early summer when actively growing.

Expert Recommendations

What Do Lawn Care Professionals Say?

Dr. John Stier, Turfgrass Specialist:

“Annual aeration is ideal for high-traffic or clay-heavy lawns. But in well-structured, sandy soils, aerating every few years is often enough.”

University Extension Services:

  • Recommend core aeration every year for lawns with compacted soil or heavy thatch.
  • Emphasize timing it with the grass’s peak growing season for best results.

Lawn Care Companies:

Most professional services include annual aeration in maintenance programs, particularly for clients wanting lush, resilient grass.


How to Know If Your Lawn Needs Aeration

Here are signs your lawn might benefit from aeration:

  • Water puddles or runs off quickly instead of soaking in
  • Grass looks thin or patchy despite watering and fertilizing
  • Hard or compacted soil that resists penetration
  • Excessive thatch layer (more than ½ inch)
  • Lawn has heavy foot or vehicle traffic
  • Discoloration or slow growth, especially in dry periods

Tip: Use a screwdriver test—if you can’t easily push a screwdriver into the soil, it’s likely too compacted.


Aeration Frequency Chart

Lawn ConditionRecommended Aeration Frequency
High traffic (sports, pets)Every year
Clay soilEvery year
Sandy soilEvery 2–3 years
Excess thatch (>½ inch)Every year
Minimal traffic and good soilEvery 2–3 years
New or neglected lawnAnnually for first few years

How to Aerate Your Lawn (DIY or Hire?)

DIY Aeration

Rent a core aerator from a hardware store or garden center. Expect to pay $60–$100 for a half-day rental.

Steps:

  1. Water lawn 1–2 days before (soft soil makes aeration easier).
  2. Make multiple passes in different directions.
  3. Leave soil plugs on the lawn to decompose naturally.
  4. Follow up with overseeding and fertilizing for optimal results.

Pros: Lower cost, flexible timing.
Cons: Labor-intensive, equipment can be bulky.

Professional Aeration Services

  • Typically cost $75–$200 depending on yard size.
  • Pros use efficient equipment and may bundle with overseeding or topdressing.

Pros: Time-saving, more consistent results.
Cons: Higher cost, dependent on appointment availability.


Best Time to Aerate

Timing is critical to ensure grass recovers quickly and takes full advantage of the loosened soil.

Cool-Season Grasses:

  • Aerate in early fall (September–October) or early spring (March–April).
  • Avoid mid-summer or deep winter when grass is dormant.

Warm-Season Grasses:

  • Late spring to early summer (May–June) when growth is active.
  • Don’t aerate in fall or winter, as it may stress the turf.

Should You Aerate Before Overseeding or Fertilizing?

Absolutely. Aeration creates ideal conditions for both:

  • Overseeding: Seeds fall into the holes, improving soil contact and germination rates.
  • Fertilizing: Nutrients are better absorbed when the soil is loose and uncompacted.

Tip: Combine aeration with overseeding and fertilizing for a full lawn renovation boost.


When You Might Skip Aeration

There are a few situations when annual aeration isn’t necessary:

  • Your lawn grows on light, sandy soil with good drainage.
  • You have low foot traffic and little or no thatch.
  • You already use other methods to prevent compaction, such as topdressing or mulching.

In such cases, aerating every 2–3 years may be perfectly sufficient.


Common Mistakes to Avoid

  • Aerating during dormancy: Can harm grass instead of helping.
  • Using spike aerators on compacted soil: May increase compaction over time.
  • Not watering before aeration: Makes it harder for tines to penetrate.
  • Skipping post-aeration care: Overseeding and fertilizing after aeration maximize benefits.

Conclusion

So, should you aerate your lawn every year? The answer depends on your lawn’s soil type, traffic level, climate, and condition. For compacted, clay-heavy, or high-use lawns, annual aeration is highly beneficial. For others, especially those with sandy soil and minimal use, aerating every 2–3 years may be enough.

Lawn aeration isn’t a one-size-fits-all solution—but when applied correctly, it’s one of the most powerful tools for building a greener, healthier lawn. Whether you choose DIY or hire a pro, understanding when and how to aerate can save you money, conserve water, and give you the thriving yard you’re aiming for.

9 Easy Lawn Alternatives That Save Water and Money

9 Easy Lawn Alternatives That Save Water and Money

Introduction

Traditional lawns are often seen as a symbol of order and pride in landscaping. However, they require significant water, fertilizers, mowing, and ongoing maintenance. As water scarcity becomes more pressing and utility costs rise, many homeowners are reconsidering their lawns. Luckily, there are numerous attractive, low-maintenance lawn alternatives that can reduce water use, cut costs, and even enhance your yard’s ecological value.

This article presents 9 easy lawn alternatives that save both water and money while maintaining beauty and usability.


Why Replace Conventional Turf?

Here are some of the main problems with traditional lawns:

  • High Water Use: Most turfgrass lawns require frequent watering—sometimes several inches per week—especially in warmer climates. Much of this water is lost through evaporation or runoff.
  • Costly Maintenance: Lawns demand regular mowing, fertilizing, weeding, and sometimes pesticide treatments, all of which can add up.
  • Environmental Stress: Excessive irrigation strains local water resources and can contribute to runoff pollution.
  • Limited Utility: Lawns are often underused but still require substantial care and cost.

Replacing or reducing lawn areas with more sustainable alternatives can lower your bills, reduce your workload, and benefit the environment.


What Makes a Good Lawn Alternative?

When selecting a replacement for a grass lawn, consider:

  1. Low Water Requirements
  2. Minimal Maintenance
  3. Aesthetic Appeal
  4. Suitability for Your Climate and Soil
  5. Foot Traffic Tolerance (if needed)
  6. Cost-Effectiveness Over Time

Let’s explore some top choices that meet most or all of these criteria.


1. Drought-Tolerant Ground Covers

Ground covers are low-growing plants that spread to form a dense mat. Many are excellent lawn substitutes:

  • Creeping Thyme: Drought-tolerant, fragrant, and blooms with small flowers.
  • Sedum (Stonecrop): A succulent that thrives in dry, rocky soils.
  • Creeping Phlox, Ajuga, or Bugleweed: Ideal for shadier or slightly moister areas.
  • Native Groundcovers: Best adapted to your climate and soil.

Pros

  • Low water needs
  • No mowing
  • Attractive year-round
  • Suppresses weeds

Cons

  • Not suitable for heavy foot traffic
  • May require time to establish

Tip: Prepare soil well before planting and group similar plants together by water needs (a technique called hydrozoning).


2. Clover or Microclover Lawn

Clover is making a comeback for good reason. It’s soft, green, and needs much less water than grass.

Advantages

  • Fixes nitrogen in the soil, reducing fertilizer needs
  • Tolerates moderate foot traffic
  • Inexpensive and easy to plant
  • Supports pollinators like bees

Drawbacks

  • Not suitable for very dry or hot climates
  • Can appear patchy if not mixed properly
  • Some people don’t like the look of its small white blooms

Tip: You can overseed microclover into existing turf or plant it as a standalone lawn.


3. Moss Lawn (for Shady or Moist Areas)

If you have a shaded or consistently moist area, moss can be an elegant and low-maintenance option.

Benefits

  • Requires almost no water once established
  • No mowing or fertilizing
  • Soft and visually calming

Limitations

  • Not suitable for sunny or dry areas
  • Doesn’t tolerate much foot traffic

Tip: Remove weeds and debris, level the ground, and mist lightly until moss is established.


4. Artificial Turf

For those wanting a consistently green lawn without watering, synthetic grass can be a viable choice.

Pros

  • No irrigation required
  • Low maintenance
  • Looks tidy year-round
  • Durable and ideal for high-traffic zones

Cons

  • High initial installation cost
  • Can become hot under the sun
  • Made of plastic, which may not be environmentally ideal

Tip: Choose high-quality turf designed for your climate, and ensure proper drainage beneath it.


5. Rock or Gravel Landscaping (Xeriscaping)

Replacing grass with gravel, decorative rocks, and drought-tolerant plants is both beautiful and eco-friendly.

Advantages

  • Zero watering for hardscape areas
  • Minimal upkeep
  • Clean, modern look

Disadvantages

  • May appear barren without proper planting
  • Can retain heat in hot climates
  • No cushion for play or pets

Tip: Combine rocks with native grasses or succulents to balance aesthetics and environmental benefits.


6. Wildflower Meadow or Native Prairie

Turn your lawn into a pollinator-friendly meadow using native grasses and flowering plants.

Pros

  • Greatly reduces water use
  • Attracts butterflies, bees, and birds
  • Seasonal color and beauty
  • Low maintenance after establishment

Cons

  • Takes time (up to 2 years) to fully establish
  • May appear untidy in formal neighborhoods
  • Limited suitability for frequent walking

Tip: Choose a mix of native wildflower seeds adapted to your local region. Mow once or twice a year to keep woody growth down.


7. Edible Landscaping

Why not grow something useful? Herbs, vegetables, and fruiting shrubs can form an attractive and productive yard.

Popular Choices

  • Herbs: Oregano, thyme, rosemary, lavender
  • Vegetables: Kale, chard, bush beans, peppers
  • Dwarf fruit trees or berry bushes

Benefits

  • Produces food
  • Supports beneficial insects
  • Reduces lawn size

Challenges

  • Slightly more maintenance (weeding, harvesting)
  • Some crops may require seasonal irrigation

Tip: Group edibles with similar water needs and use drip irrigation to minimize water use.


8. Tapestry Lawn (Mixed Groundcover Mosaic)

A tapestry lawn is a mix of various low-growing plants, forming a living patchwork with different colors and textures.

Advantages

  • Low water usage
  • Occasional mowing only
  • Rich biodiversity
  • Visually dynamic

Drawbacks

  • Requires careful plant selection
  • Initial setup is more involved
  • May need occasional weeding

Tip: Combine small groundcovers like thyme, chamomile, and clover for maximum effect. Choose plants with similar needs.


9. Drought-Tolerant Native or Ornamental Grasses

Replace traditional turf with clump-forming or spreading native grasses adapted to your local conditions.

Options Include

  • Buffalo grass
  • Blue grama
  • Red fescue
  • Various ornamental grasses

Benefits

  • Low water needs
  • Requires little mowing
  • A natural “grassy” look

Challenges

  • May go dormant (brown) in very dry conditions
  • Less soft than traditional turf

Tip: Use these grasses in combination with wildflowers or groundcovers for added texture and beauty.


Summary Table

Lawn AlternativeWater UseMaintenanceFoot TrafficAesthetic Appeal
Drought-Tolerant Ground CoversVery LowLowLightLush and flowering
Clover/Microclover LawnLowLowModerateSoft, green, pollinator-friendly
Moss LawnVery LowVery LowLowElegant, shaded areas
Artificial TurfNoneVery LowHighConsistently green
Rock/Gravel LandscapingNoneVery LowLowModern, minimalist
Wildflower MeadowLowLowLowNatural, colorful
Edible LandscapingModerateModerateModerateFunctional and varied
Tapestry LawnLowModerateModerateDiverse and vibrant
Native Ornamental GrassesLowLowModerateNatural and soft

Tips for Transitioning

  1. Start Small: Begin with a section of your yard to test a new alternative before replacing the whole lawn.
  2. Prepare the Soil: Healthy soil is key to long-term success. Remove weeds and amend the soil before planting.
  3. Use Mulch: Mulch conserves moisture, suppresses weeds, and regulates temperature.
  4. Water Wisely: Water only during establishment, then reduce or eliminate irrigation as needed.
  5. Group Plants by Water Needs: This reduces overwatering and helps optimize irrigation.
  6. Be Patient: Some alternatives take time to establish fully, especially meadows or native species.
  7. Plan for Aesthetics: Mix textures, colors, and plant heights to create an attractive and balanced design.

Conclusion

Replacing your lawn doesn’t mean sacrificing beauty or functionality. With the right alternatives, you can save thousands of gallons of water, reduce your utility bills, lower your maintenance workload, and even help restore ecological balance in your yard. Whether you go with drought-tolerant ground covers, edible plants, artificial turf, or native grasses, each option offers unique benefits.

8 Flowering Shrubs That Attract Butterflies to Your Garden

8 Flowering Shrubs That Attract Butterflies to Your Garden

A garden filled with vibrant butterflies is like a living painting—colorful, ever‑moving, full of life. To invite more of these enchanting insects into your outdoors, planting the right flowering shrubs is one of the best strategies. Butterflies are attracted to nectar, shelter, and host plants (for laying eggs), and many flowering shrubs offer combinations of these. Here are eight excellent flowering shrubs that are especially butterfly‑friendly, along with tips on planting, care, and garden design to maximize attraction.


Why Shrubs Are Great Butterfly Magnets

Before the plant list, let’s quickly understand what butterflies look for, and why shrubs are ideal:

  • Abundant flowers / nectar: Shrubs tend to produce clusters of blossoms over long periods, giving sustained food sources.
  • Shelter & structure: Shrubs provide protection from wind, perches for basking, places to rest.
  • Host plants or nearby host plants: While many shrubs aren’t themselves larval hosts, they can be planted alongside host plants or attract butterflies that use nearby plants.
  • Varied bloom times: Having shrubs that flower in different seasons ensures there’s always something in bloom, keeping butterflies coming throughout the year.

Shrubs hit that sweet spot—they’re bigger than annuals so they have longer lifespan and structure, yet many are manageable in size for most gardens.


The 8 Shrubs Butterflies Love

Here are eight shrubs that are attractive, relatively easy to grow (in many temperate and subtropical climates), and especially good for butterflies. After each, I’ll include strengths, things to watch, ideal conditions, and planting/care tips.


1. Buddleja davidii (Butterfly Bush)

Why butterflies love it:

  • Large, fragrant flower panicles, often in purple, pink, white, or other colors. High in nectar.
  • Flowers for a long season (summer into autumn in many zones).

Strengths & limitations:

  • Fast growing and showy.
  • Some cultivars can be invasive in certain climates; frequent deadheading helps control spread.
  • Needs good sun and well‑drained soil.

Ideal growing conditions & care:

  • Full sun (6+ hours per day).
  • Soil: moderately fertile, good drainage; avoid waterlogging.
  • Prune in late winter or early spring to encourage fresh growth and abundant flowering.
  • Deadhead spent blooms to prolong flowering and reduce seeding.

2. Lantana camara (Lantana Shrub)

Why butterflies love it:

  • Tiny clustered flowers that form flat or rounded heads, often multicolored. Extremely attractive to butterflies because they can land and feed easily.
  • Continuous flowering in warm weather.

Strengths & limitations:

  • Tolerates heat, drought, poor soil.
  • In colder climates, may die back in winter or need protection.
  • Some species/varieties can be invasive; tread carefully.

Ideal growing conditions & care:

  • Full sun to light shade.
  • Well‑drained soil; mulch to help with heat retention in dry periods.
  • Prune back after heavy flowering to keep shape and promote new blossoms.
  • Water regularly when young; once established, more forgiving of dryness.

3. Hibiscus rosa‑sinensis (Tropical Hibiscus Shrub)

Why butterflies love it:

  • Large showy blossoms; bright colors attract butterflies, hummingbirds, and pollinators.
  • Tropical feel; flowers almost year‑round in warm climates.

Strengths & limitations:

  • Needs warmth; frost‑sensitive.
  • Requires more water and nutrient input compared to some drought‑tolerant shrubs.

Ideal growing conditions & care:

  • Full or strong sun; some varieties tolerate partial shade.
  • Rich, well‑drained soil with good organic content.
  • Fertilize during growing season; ensure adequate water (especially in dry spells).
  • Remove spent flowers (deadhead) and prune lightly to maintain shape and encourage bushiness.

4. Abelia x grandiflora (Glossy Abelia)

Why butterflies love it:

  • Fragrant, tubular blooms often in shades of white or pink that are ideal for butterflies’ proboscis. The fragrance adds another attractant.
  • Long bloom season (late spring through autumn in many areas).

Strengths & limitations:

  • Semi‑evergreen in mild climates; may lose leaves or die back some in colder winters.
  • More tolerant of various soils, but needs good drainage.

Ideal growing conditions & care:

  • Sun to partial shade.
  • Soil: moderately fertile, well draining.
  • Prune lightly after spring or early summer bloom to shape and remove old wood.
  • Mulch to retain soil moisture and reduce weeds.

5. Salvia (Shrubby Varieties such as Salvia leucantha, Salvia greggii, etc.)

Why butterflies love it:

  • Flower spikes that are nectar rich. Butterflies appreciate tubular florets.
  • Wild, natural look; blooms over extended periods depending on variety.

Strengths & limitations:

  • Many salvias are drought tolerant; good choices for less water.
  • Some are frost sensitive; cut back damaged wood in spring.

Ideal growing conditions & care:

  • Full sun preferred; some partial shade ok.
  • Good drainage; avoid overly wet soil.
  • Prune after bloom to tidy up; sometimes cut back to prompt new growth.
  • Deadhead as needed to extend bloom.

6. Rhododendron / Azalea Shrubs

Why butterflies love it:

  • Showy spring blooms in many colors. Early season nectar helps butterflies emerging from overwintering.
  • Dense foliage provides shelter.

Strengths & limitations:

  • Prefer acidic soil.
  • Need shading from hottest sun in warm climates.
  • Some require more moisture and protection from harsh conditions.

Ideal growing conditions & care:

  • Partial shade—morning sun, afternoon shade works well.
  • Soil: rich in organic matter, well‑drained, acidic (pH around 5.5‑6.5).
  • Mulch to conserve moisture.
  • Prune after blooming to shape and remove spent flower heads.

7. Pentas lanceolata (Egyptian Starcluster) – Shrub Form or Large Perennial/Shrubby Border

Why butterflies love it:

  • Clusters of star‑shaped flowers, often vivid red, pink, purple, or white. Very attractive to many butterfly species.
  • Flowers for long periods in warm climates.

Strengths & limitations:

  • Needs warmth; may perish or be cut back in cold winters.
  • Needs regular watering and good fertility.

Ideal growing conditions & care:

  • Full to partial sun.
  • Rich, well‑drained soil.
  • Deadhead to prolong blooms.
  • Fertilize lightly during growing season.

8. Lagerstroemia indica (Crape Myrtle Shrub / Small Tree)

Why butterflies love it:

  • Long summer flowering—panicles of crape flowers in pink, red, purple, white. The blossoms attract a variety of pollinators including butterflies.
  • Attractive bark, and foliage that can turn color in autumn—adds multi‑season interest.

Strengths & limitations:

  • Needs sun to flower profusely.
  • Some varieties get larger; pick dwarf or smaller cultivars if space is limited.
  • Tolerant of heat; moderate drought once established.

Ideal growing conditions & care:

  • Full sun (strong flowering).
  • Soil: well‑drained, moderately fertile.
  • Prune in late winter or early spring to shape and remove dead wood.
  • Mulch and water to help settle young plants; once mature they are less needy.

Planting and Care Tips to Maximize Butterfly Attraction

To make the most of these shrubs, here are best practices—and design strategies—to ensure your garden becomes a butterfly haven.


Choose a Variety of Bloom Times

  • Plant shrubs that flower in spring, summer, and fall so there’s always nectar available.
  • Example combo: Rhododendron/Azalea (spring) + Buddleja / Lantana / Salvia (summer) + Abelia / Crape Myrtle (late summer into fall).

Provide Shelter & Sunlight

  • Butterflies are cold‑blooded; they need sunny spots to bask and warm themselves. So plant nectar‑rich shrubs in sunny or partly sunny areas.
  • At the same time, shrubs act as windbreaks—wind can reduce butterfly activity. Creating wind‑protected zones helps.

Avoid Pesticides, Especially Broad‑Spectrum

  • Pesticides kill more than pests; harsh sprays eliminate helpful insects, including butterflies or their caterpillars.
  • If needed, use targeted or organic pest control. Inspect leaves by hand.
  • Some shrubs, aside from feeding butterflies, can support caterpillars of certain butterfly species; leave host plants nearby if possible (e.g. milkweed, nettles, etc.).

Soil & Water Management

  • Good drainage is essential—many butterfly‑loving shrubs don’t like “wet feet.”
  • Regular watering, especially when establishing. Mulching helps maintain soil moisture and keeps roots cooler.
  • Organic matter (compost) improves soil structure and nutrients for stronger flowering.

Deadheading & Pruning

  • Deadheading (removing spent flowers) encourages more blooms and prolongs the flowering season in many shrubs (Lantana, Buddleja, Salvia, Pentas).
  • Prune for shape and health—remove dead wood, improve air circulation.
  • For shrubs that bloom on old wood (like Azaleas / Rhododendrons), prune immediately after flowering to avoid cutting off next year’s flower buds.

Plant in Clusters & Use Color Strategically

  • Butterflies are attracted to massed color; planting several of the same shrub together or grouping shrubs with similar-colored flowers magnifies visual impact.
  • Bright colors like purples, reds, oranges, pinks are especially appealing. White also helps in twilight.

Add Butterfly “Extras”

  • Water source: A shallow dish with pebbles, or a damp patch, gives butterflies a place to land and drink.
  • Sunbathing spots: Flat stones or bare ground where they can absorb heat.
  • Host plants: For caterpillars—e.g. milkweed, parsley, fennel, or specific host species depending on butterfly types in your area. Plant near your flowering shrubs so adult butterflies feel comfortable laying eggs near food for larvae.

Design Ideas: How to Lay Out these Shrubs

Here are a few layout ideas to make your butterfly garden both beautiful and functional:

  1. Nectar border: Create a sunny border along a fence or walkway using Lantana, Salvia, Buddleja. Behind or interspersed, place taller or semi‑evergreen shrubs like Crape Myrtle or Abelia.
  2. Mixed shrub/host bed: Combine one or two of the flowering shrubs with host plants for butterfly caterpillars. For example, have Lantana or Pentas flowering and nearby milkweed or citrus (depending on your butterflies).
  3. Layered planting: Use low shrubs or groundcovers in front (Pentas, Salvia), medium shrubs mid‑height (Lantana, Abelia), and taller shrubs or small trees (Crape Myrtle or tall Buddleja) at the back. This gives depth, visual interest, and vertical variety.
  4. Containers & edges: If space is limited, Lantana, Salvia, or Pentas in large pots or containers can still attract butterflies. Edges of paths or patios are good spots for fragrant or showy shrubs like Hibiscus or Abelia.

Examples for Different Climate Zones

  • Tropical / Subtropical (like many parts of India, Nagpur region): Lantana, Hibiscus, Abelia, Crape Myrtle will generally do very well. Watch for heat stress, ensure enough water in dry spells.
  • Temperate climates with cold winters: Choose hardy cultivars or shrubs that die back or are deciduous. For example, Hardy Buddleja, Salvia species suited for low temperatures; protect young plants.
  • Dry or semi‑arid gardens: Go for drought‑tolerant shrubs (Lantana, some salvias, certain varieties of Abelia). Mulch well, minimize water stress.
  • Shaded gardens: Some shrubs tolerate part shade, such as certain Abelia or Azalea, but for best butterfly attraction you’ll want at least some sun in the day.

Troubleshooting & Common Problems

  • Shrubs not flowering: Often due to too much shade, poor soil fertility, or pruning at wrong time (especially late bloomers). Ensure adequate sun, feed lightly, and prune at proper time.
  • Leaves or blooms damaged: Pests (aphids, caterpillars), fungal disease (especially in humid climates with poor air flow). Monitor regularly, prune for airflow, use organic control.
  • Shrubs getting leggy or sprawling: If a shrub is too tall or open at bottom, prune back to encourage bushier growth. Deadhead spent blooms to prevent energy waste.
  • Winter dieback: For less hardy shrubs planted outside their ideal zone, protect roots, mulch, or move containers indoors.

Summary & Encouragement

Butterflies are not only beautiful—they’re indicators of a healthy ecosystem. By planting the right shrubs, giving them good conditions, and designing your garden with butterflies in mind, you can enjoy fluttering wings, bright colors, and seasons of flowering surprise.

Here are the key takeaways:

  • Choose shrubs rich in nectar with long bloom periods.
  • Provide sun, shelter, and avoid chemicals.
  • Include variety in bloom times and color.
  • Combine flowering shrubs with host plants, water features, and basking spots.
  • Maintain soil health, prune appropriately, and monitor pests.
How to Protect Young Trees From Winter Damage

How to Protect Young Trees From Winter Damage

Young trees offer promise and beauty—but in winter, they are especially vulnerable. Without mature root systems, thick bark, or well‑developed defenses, they can suffer injury from cold, wind, sun, ice, animals, and soil heaving. But with the right precautions, you can help them survive and thrive into the next growing season.

In this article, we’ll explore:

  1. Key winter threats to young trees
  2. Principles of protection
  3. Proven methods step by step
  4. Seasonal timing and maintenance
  5. Mistakes to avoid
  6. Long-term recovery and monitoring

Let’s dig in.


1. Winter Threats Young Trees Commonly Face

Understanding what damages young trees in winter helps you pick the right protective measures. Some main risks are:

Sunscald / Frost Cracks

On sunny winter days, bark warms, expands, then at night the sudden cold causes contraction and cracking of the bark. This damage—often on the south or southwest side—is called sunscald or frost cracking. Thin-barked species are most susceptible.

Freezing & Thawing Cycles / Soil Heaving

Repeated freezing and thawing cycles can heave soil, pushing roots upward or exposing them to cold air. The repeated cycles also stress roots and can injure them. Mulch helps moderate those fluctuations.

Desiccation & Winter Drought

Even when leafless, trees lose water from stems, buds, or needles (esp. evergreens). Cold winds and dry air exacerbate the water loss, and if roots can’t supply moisture (because of frozen soil), tissues can dry out or die.

Ice, Snow, and Branch Breakage

Heavy snow or ice accumulation can bend or break young branches. Rapid removal of ice can also damage bark or twist limbs.

Animal Damage

During winter, rodents (mice, voles, rabbits) and even deer may nibble bark, chew roots, rub trunks, or break small branches in search of food. Young trees are especially vulnerable.

Salt and Chemical Injury

In cold regions using de-icing salts, runoff or salt spray can injure roots or foliage (for evergreens). Young trees near road edges are particularly exposed.

Late Pruning & Vulnerable Cuts

Fresh pruning late in the season can encourage new growth that doesn’t harden off before winter, leading to frost damage or dieback.


2. Principles of Winter Protection

To protect young trees, these guiding principles help you design a robust defense:

  • Insulate the root zone and soil from extreme temperature swings.
  • Buffer the trunk and branches from sun, wind, and mechanical damage.
  • Maintain moisture in soil (within reason) so the tree is not water-stressed before winter.
  • Prevent damage by animals using physical barriers or deterrents.
  • Provide structural support where needed (stakes, ties).
  • Remove coverings in spring to avoid trapping moisture, pests, or girdling.

Let’s transform those principles into actionable steps.


3. Step‑by‑Step: How to Protect a Young Tree in Winter

Here’s a detailed set of steps you can follow.

Step 1: Deep Watering Before Freezes

Before the ground freezes solid, give your young tree a thorough watering so its root zone is moist. Moist soil retains heat better than dry soil, and helps reduce injury to roots.

Water early in the day so the tree can absorb moisture before nightfall. Once the soil is frozen, additional watering won’t help.

Step 2: Mulching

Apply a layer of organic mulch (wood chips, shredded bark, leaf mold) around the base of the tree, about 2–4 inches thick (5–10 cm). Mulch acts as insulation to moderate soil temperature and reduce heaving.

Make sure to keep the mulch a few inches away from the trunk (do not pile it against bark) to avoid rot and rodents hiding under mulch.

The mulch radius should at least cover the root zone, ideally extending to the drip line if space allows.

Step 3: Wrapping / Trunk Protection

To prevent sunscald and frost cracks, wrap the lower trunk of trees—especially those with thin bark—with tree wrap, light-colored paper wrap, burlap or commercial trunk guards.

  • Wrap from the base up to the first branch or up to a safe height.
  • Wrap loosely (not too tight) to allow for growth.
  • Use white or light material (not dark) to reflect heat; avoid dark wraps that absorb heat.
  • Remove the wrap in spring after the last frost to avoid pest/bark damage.

Some gardeners also paint the lower trunks (south side) with a diluted white latex paint to reflect light and reduce bark heating.

Step 4: Fencing / Animal Barriers

Place a physical barrier around the tree to block rodents, rabbits, voles, or deer. Options:

  • Wire mesh / hardware cloth cylinders around the trunk (about 24–36 inches high) and bury a few inches into soil to deter burrowing.
  • Burlap wrap or shrub jackets can also help deter browsing while still allowing air to circulate.
  • Fencing in a larger area if deer pressure is high.

Periodically check these barriers to ensure they’re not girdling the trunk or trapping moisture. Remove or adjust as needed.

Step 5: Pruning & Structural Support

Resist the urge to make heavy pruning in late fall—save major structural pruning for late winter/dormant season. Only remove dead or broken limbs before heavy freeze.

If your young tree is tall and exposed to wind, provide staking or support so it isn’t torn by wind or ice. Use soft ties and ensure movement is allowed (trees need some flex). Remove stakes after 1–2 growing seasons when roots are strong.

Step 6: Remove Snow & Ice Carefully

After heavy snow, gently brush off excess snow from branches to reduce weight stress. Don’t attempt to break or chip away ice—this risks damaging bark or branches.

Be gentle: use a soft broom or brush and shake lightly, not jerkily.

Step 7: Monitor & Adjust Through Winter

  • Periodically inspect trunk wraps, fencing, mulch, and stakes.
  • If wrapping or guards begin to constrict growth, loosen or remove them.
  • After freeze-thaw cycles, check for signs of bark splitting or frost crack.
  • In early spring, remove all protective wrap or covers before new growth begins.

4. Seasonal Timing & Considerations

Here’s a rough timeline and how protection changes over the season:

Time of YearWhat to DoWhy It Matters
Late Fall, before first freezeDeep watering, mulch, wrap trunks, erect guards, stake if neededPrepares root zone, prevent early damage, get protection in place before worst cold hits
Winter (mid‑season)Monitor, snow removal, adjust as neededShield from ongoing stressors like snow, wind, animals
Late Winter / Early Spring (after last frost)Remove wraps and guards, adjust mulch, prune, inspect injuryAvoid trapping pests, allow new growth unhindered, assess damage

In some climates, full winter protection may not be necessary; in harsher climates, protective measures must be more stringent.


5. Mistakes to Avoid & Common Pitfalls

Protecting trees in winter is helpful, but avoid these missteps:

  • Wrapping too tightly or leaving wraps year-round — this can girdle the trunk, trap moisture, or harbor pests. Always remove wraps in spring.
  • Over-mulching against the trunk (“volcano mulching”) — piling mulch up onto the trunk invites rot and rodent damage. Keep mulch a few centimeters away from bark.
  • Pruning too much in fall — encourages new growth vulnerable to freeze damage.
  • Neglecting watering before freeze — dry soil offers little protection.
  • Using dark wraps or black plastic — these absorb heat during day and amplify temperature swings, increasing risk of bark damage.
  • Ignoring animal protection — many damage incidents come from rodents, rabbits, or deer in winter.
  • Delayed removal of wraps — leaving them too long increases risk of damage once growth resumes.

6. Long-Term Care & Recovery

Even with protection, young trees may still show some winter stress. Here’s how to help them recover and strengthen over time:

  • In spring, inspect for bark splits, frost cracks, or sunscald injuries. Clean dead bark edges, smooth torn bark, and allow trees to compartmentalize naturally. Avoid sealing with paints or dressings in most cases—trees often heal better without dressings.
  • Resume regular care: watering, fertilizing, soil management, and pruning of damaged limbs.
  • Monitor for pests or disease, which can take advantage of weakened tissue.
  • Gradually reduce protective measures as tree matures: wraps, guard, staking can often be removed after 2–3 seasons, depending on species and vigor.
  • Continue mulching, but keep it well managed (renew, reposition, avoid touching trunk).
  • Train good structure with pruning in dormant season, favoring strong scaffold branches, correct branching angles, and balanced form.

Example Scenario: Protecting a Young Fruit Tree in a Cold Region

Let’s walk through a hypothetical example:

  1. In late autumn, after leaf drop, give the tree a deep soak so soil around roots is moist.
  2. Spread a 3‑inch layer of wood-chip mulch outward from the trunk (but don’t heap near trunk).
  3. Wrap the lower 1 m of trunk with white tree wrap or light-colored guard.
  4. Surround the trunk with a 2 ft tall hardware cloth cylinder (buried 4–5 inches).
  5. Stake the tree with soft ties, leaving some room for movement.
  6. After heavy snowfall, gently brush snow off branches.
  7. In late winter, after threat of frost has passed, carefully remove wrapping/guards. Inspect bark for cracks and prune any broken limbs.
  8. In early spring, resume fertilizing, watering, and structural pruning.

With care, the tree should survive its first winter strong and grow well through spring.


Adaptation for Warmer / Mild Climates (e.g. Nagpur / Maharashtra)

If you are in a climate with mild winters or less freezing (Nagpur region), some of these protections may be less critical—but young trees may still face stress from:

  • Dry-season cold (chill nights)
  • Strong winds and low humidity
  • Sunscald on bright winter or transitional days
  • Rodents or pests seeking food

In such a climate:

  • Still apply mulch to help root insulation and conserve moisture.
  • Wrap trunks if species are sensitive or if bark is thin.
  • Monitor watering in dry cold spells (if soil is dry).
  • Animal guards may still be useful.
  • Snow and ice are unlikely, so that risk is lower.

Focus on convergence: root health + bark protection + pest defense.


Final Thoughts

Young trees hold enormous potential—but winter is one of their most vulnerable phases. By applying well-planned protection—watering, mulching, trunk wrapping, animal guards, support, and careful monitoring—you can significantly increase their chances of survival, reduce damage, and help them emerge vigorous in spring.

Remember:

  • Protection is about moderation and appropriateness—don’t overdo or suffocate.
  • Timing matters: install protection before harsh cold, and remove coverings early when safe.
  • Transition the tree over seasons—don’t leave protections permanently.
  • Watch the tree’s response, inspect often, and be ready to adapt.
6 Shrubs That Are Perfect for Small Front Yards

6 Shrubs That Are Perfect for Small Front Yards

Small front yards present both a challenge and opportunity. You want plants that don’t overwhelm the space, but still bring charm, structure, color, and year‑round interest. Shrubs are ideal: they provide structure, can be evergreen or flowering, and many dwarf or compact varieties are especially suited to small yards. Here are six shrubs that are well‑suited for compact front gardens, along with precise details and planning tips so they enhance your home’s curb appeal without crowding it out.


What to Look for in Shrubs for Small Front Yards

Before diving into the shrubs themselves, take note of important criteria that make or break a good shrub for a small front yard:

  • Mature size: height and spread when fully grown. Must stay modest so as not to block windows, walkways, or overwhelm the house’s facade.
  • Growth habit: rounded, compact, or columnar (narrow) forms are better than wide-spreading or partially drooping types.
  • Evergreen vs deciduous: evergreen provides year-round greenery; deciduous may give seasonal interest (flowers, color) but will leave gaps in off‑season.
  • Blooming & foliage interest: to deliver beauty beyond just shape—flowers, fragrance, berries, colorful leaves help.
  • Maintenance needs: pruning, watering, soil, pests. Low maintenance is more forgiving in small spaces.
  • Sun/shade tolerance and soil adaptability per your front yard’s conditions (sun exposure, soil type, rainfall, etc.).

6 Shrubs Perfect for Small Front Yards

Here are six excellent shrub choices. Each includes strengths, limitations, and tips for placement.


1. Boxwood (Buxus spp.)

Why it’s great:
Boxwoods are classic evergreen shrubs. Many dwarf or compact varieties stay at heights of 2‑4 feet (≈ 0.6‑1.2 m), with a similar spread. Their dense, uniform foliage makes them excellent for formal looks, hedges, edging, or as foundation plantings. They’re evergreen, so provide structure and color year‑round. They respond well to shaping and pruning to maintain neat form.

Ideal conditions & care:

  • Light: full sun to partial shade. Too much shade can lead to thinner, leggier growth.
  • Soil: well‑drained, with good fertility. Avoid waterlogged soils.
  • Water: regular watering until established; then moderate. Mulching helps retain soil moisture.
  • Pruning: light pruning in late spring or early summer to shape; trim lightly across the season if needed. Avoid heavy pruning late in growth season in frost‑prone climates.

Placement tips:

  • Use boxwoods on either side of walkways or the entrance door for symmetry.
  • Combine with low flowering border plants in front to soften the base.
  • Consider smaller cultivars (“dwarf boxwood”) if space between house/walkway is tight.

2. Lavender (Lavandula angustifolia and cultivars)

Why it’s great:
Lavender brings fragrance, color, and a Mediterranean touch. Many dwarf or compact varieties stay around 1‑3 feet tall and wide. Silvery‑green foliage, spikes of purple (or white/pink depending on cultivar) flowers, and its pollinator‑friendly blooms make lavender a wonderful accent in a small courtyard or along a front boundary.

Ideal conditions & care:

  • Light: full sun is best—needs a lot of sunlight to flower well and avoid fungal issues.
  • Soil: very well‑drained, slightly alkaline to neutral; gravelly, sandy soils are better. Heavy or compacted soil is problematic.
  • Water: moderate; once established, lavender tolerates drought well but will suffer if roots stay wet.
  • Pruning: trim spent flower spikes; after flowering, lightly shape to prevent it getting woody and leggy.

Placement tips:

  • Use lavender along pathways or the front border where you can see and smell it.
  • Plant in raised beds or well‑drained soil to prevent soggy roots.
  • Pair with grasses or low perennials to soften its more woody structure.

3. Dwarf Japanese Holly (Ilex crenata ‘Helleri’ or similar compact forms)

Why it’s great:
Japanese hollies are evergreen with fine texture. Their small, glossy leaves create a refined appearance. The ‘Helleri’ and other compact cultivars often remain around 2‑3 ft tall and wide. They work well as low hedges, foundation shrubs, or accent pieces. Because they keep their leaves through seasons, they are excellent for providing a green backdrop for seasonal flowering or foliage shrubs.

Ideal conditions & care:

  • Light: tolerates partial shade well, though flowering (if applicable) better with more light.
  • Soil: well‑drained; neutral to slightly acidic; fertility moderate.
  • Water: regular watering early; once established, fairly drought‑tolerant but should not dry out entirely.
  • Pruning: minimal; occasional shaping; remove dead or mis‑shapen branches.

Placement tips:

  • Great when planted as a border under windows or in front of porch steps.
  • Because it is low and neat, it helps maintain sightlines.
  • Mix with flowering shrubs so that during flowering seasons you have color, and Hollies provide greenery during off seasons.

4. Spirea (Spiraea japonica and compact cultivars)

Why it’s great:
Spireas are beloved for their profuse and showy flower clusters (often pink, white, red), compact growth, and changing foliage color in autumn. Many compact spireas reach around 2‑3 feet (≈ 0.6‑0.9 m) in height, with spread in similar range. They bloom in spring or early summer (some repeat bloomers exist), and their growth is forgiving and easy to maintain.

Ideal conditions & care:

  • Light: full sun to partial shade—flowers best with more sun.
  • Soil: well‑drained, fertile soil; tolerates a variety of soils.
  • Water: regular moisture until established; moderate afterward. Mulch will conserve moisture.
  • Pruning: after flowering (for spring‑blooming types) to shape; can be sheared lightly to delay woody, unproductive stems.

Placement tips:

  • Use spirea along the front bed where color is needed; as mid‑border filler.
  • Combine several for seasonal color, especially as contrast with evergreen shrubs.
  • Use smaller cultivars in narrow beds or walkways.

5. Hydrangea (compact or dwarf varieties)

Why it’s great:
Hydrangeas are stunning for their large, showy blooms and their ability to fill space visually. Compact/dwarf hydrangeas stay smaller and are ideal where you want impact without taking over. Their flowers come in shades of white, pink, blue (sometimes depending on soil pH), adding bold but soft focal points.

Ideal conditions & care:

  • Light: morning sun with afternoon shade in hotter areas; avoid scorching midday sun.
  • Soil: rich, moist, well‑drained; organic matter helps retain moisture while maintaining drainage.
  • Water: more water when flowering; mulch to reduce evaporation.
  • Pruning: varies by type—that is, whether they bloom on new or old wood. Dwarf types often are more forgiving. Deadhead spent blooms; prune lightly to shape.

Placement tips:

  • Use near entrances, corners, or where their larger blooms can be appreciated.
  • Combine with lower shrubs to frame them or with groundcovers so base is softened.
  • Be cautious about placing them where their wet foliage or heavy blooms can touch walls; leave enough space.

6. Japanese Skimmia (Skimmia japonica)

Why it’s great:
Japanese skimmia is an elegant evergreen shrub that works well in shade or part shade, which is helpful for front yards that don’t get full sun. It features glossy, dark green foliage that remains through winter, and in spring produces fragrant clusters of white or light‑pale pink flowers. Female plants may produce red berries (if male pollinator plant is nearby), adding winter interest. It generally stays around 3‑4 ft tall and similar width for many cultivars, making it manageable for small front gardens.

Ideal conditions & care:

  • Light: partial shade to full shade; avoid blazing sun especially in hot climates.
  • Soil: acidic to neutral; rich in organic matter; well‑drained but moisture‑retentive.
  • Water: regular moisture is important; drought can stress the plant. Mulching helps.
  • Pruning: minimal—light shaping and removal of weak or crossing branches in spring; avoid heavy cuts.

Placement tips:

  • Good under shady porch overhangs, small beds along shaded side walls.
  • Plant in areas where winter asters or other seasonal flowering plants can complement its evergreen foliage.
  • The berry‑producing forms are especially attractive near entryways or where birdwatching is a delight.

Design Tips: Using These Shrubs Together

To make the front yard look cohesive, balanced, and low‑maintenance, here are some planning and layout ideas:

  1. Layering & Scale
    Use low shrubs (Lavender, Spirea) in front near the sidewalk or edges. Slightly taller ones (Skimmia, compact Hydrangea) behind them. Ensure you can see house features (doors, windows) clearly—don’t block.
  2. Evergreen + Seasonal Combinations
    Mix evergreens (Boxwood, Skimmia, Japanese Holly) with flowering or seasonal color shrubs (Spirea, Hydrangea, Lavender). Evergreens give structure year round; the others give bursts of color and interest.
  3. Color, Texture & Fragrance
    Combine textures: fine foliage (Lavender) with glossy leaves (Holly), and large floret blooms (Hydrangea). Use fragrance (Lavender, Skimmia) to enhance the sensory appeal near entrances or pathways.
  4. Spacing & Airflow
    Space shrubs so air can flow and there’s room for growth without constant pruning. Crowded shrubs lead to pest/disease issues and messy appearances.
  5. Soil Improvement & Mulching
    Even in a small plot, investing in proper soil (organic matter, good drainage) will help shrubs perform better. Mulch helps retain moisture, suppress weeds, and adds neat visual polish.
  6. Seasonal Maintenance
    • Dead‑heading spent flowers (Hydrangea, Spirea) to keep a clean look.
    • Light pruning to maintain shape (Boxwood, Holly).
    • Watering carefully in establishment and during heat.
    • Fertilizing as needed (e.g. Spring) with balanced fertilizer or compost.

Potential Challenges & How to Handle Them

  • Limited sunlight: Some front yards are shaded. In that case, favor shade‑tolerant shrubs like Skimmia or small evergreen hollies, rather than sun‑loving ones like lavender.
  • Space restrictions near walls/foundations: Choose narrow or dwarf shrubs. Leave space between wall and shrub for air and maintenance.
  • Pests and fungal problems: Poor air flow, moisture buildup—combat with proper spacing, pruning, soil drainage.
  • Temperature extremes: Hot, dry summers or cold winters will affect which shrubs fare well. Choose varieties suited to your local climate.
  • Water availability: Some shrubs need more water than others (Hydrangea needs more than Lavender or Boxwood). Group shrubs with similar water needs together.

Example Planting Plan for a Small Front Yard (≈ 15‑20 ft wide bed)

Here’s a sample layout using the six shrubs above for a small front bed:

PositionShrubPurpose
Front edge / sidewalkLavenderLow, fragrant border; visual edge
Left cornerJapanese SkimmiaShade / partial shade background
Right cornerDwarf Japanese HollyEvergreen anchor
Center / focal pointDwarf HydrangeaSeasonal showy blooms
Mid borderSpireaAdds summer color, softens edges
Opposite side to SkimmiaBoxwoodStructure, contrast, evergreen

With proper spacing (say 2‑3 ft between smaller shrubs, 3‑4 ft for those that can spread), the bed stays open, balanced, and easy to maintain.


Summary: Why These Shrubs Work

  • All six are modest in mature height/spread appropriate for small front yards.
  • They offer combinations of evergreen structure + seasonal interest (flowers, fragrance, berries).
  • They tolerate a range of light conditions (from full sun to partial/shade).
  • Maintenance needs are manageable: pruning light, watering moderate once established.
  • Visually, they provide texture contrasts and focal points without overwhelming the house.
How to Prune Apple Trees in Fall for the Best Spring Harvest

How to Prune Apple Trees in Fall for the Best Spring Harvest

Pruning apple trees is one of the most important steps for ensuring a healthy, productive orchard or backyard tree. The timing, method, and care you apply will strongly affect flowering, fruit set, disease resistance, and overall vigor. Many growers prefer late winter or early spring as the ideal pruning window. However, for certain climates or under specific conditions, light pruning in fall (after leaf drop or before deep dormancy) can help shape structure, remove problem wood, and reduce the workload in spring.

This article explores how and when fall pruning can be used effectively, the risks involved, and steps to carry it out safely—so you maximize your spring harvest without harming the tree.


Should You Prune Apple Trees in Fall?

Let’s start with the big question: Is fall a good time to prune apple trees?

Pros of Fall Pruning (When Done Carefully)

  1. Clear Structure After Leaf Drop
    Once leaves have dropped, the tree’s structure is exposed. That makes it easier to see crossing branches, dead wood, or awkward limbs you’d otherwise miss.
  2. Less Sap Bleeding & Fewer Pests
    With dormancy approaching, sap flow is minimal. That reduces the chance of heavy bleeding from cuts or attracting pests to fresh wounds.
  3. Light Workload Shifted from Spring
    If you remove dead, diseased, or weak branches in fall, you lighten the pruning load in the busy spring period, letting you focus on final shaping and adjustments.
  4. Preparing for Winter
    Some lower or inward branches that may catch wind, snow, or ice can be removed to reduce breakage risk during the cold season.

However, experts emphasize that major structural pruning is best reserved for late winter / early spring. Fall pruning should be conservative, cautious, and limited in scope.

Risks & Why Many Experts Advise Against Heavy Fall Pruning

  • Delayed Wound Healing
    In fall, the tree’s ability to heal is lower since metabolic activity slows. Wounds may remain open longer, making them more vulnerable to fungal infections or decay.
  • Stimulated Late Growth
    Pruning too late may trigger the tree to sprout new growth (vigorous shoots) that won’t properly harden off before frost, making them vulnerable to winter freeze damage.
  • Winter Injury Risk
    Fresh cuts might expose the tree to structural weakness or cold damage. Cuts heal slower in cold, and frost can damage tender new wood near the cuts.
  • Reduced Fruit Spurs or Flowering Wood
    Apple fruiting occurs on spurs that are formed on 2–3-year-old wood. Overzealous pruning in fall might remove productive spurs unintentionally and reduce next year’s yield.
  • Regional Climate Variability
    In colder climates, fall pruning is more risky due to extended freeze periods. In milder climates, limited pruning may be safer—but still must be done with restraint.

Because of these factors, many authoritative guides discourage “heavy” fall pruning and instead recommend light, corrective pruning only, saving the major cuts for dormant season. (Sources from University extension, orchard guides)


When & Where (Timing & Conditions) for Fall Pruning

If you decide to prune in fall, here’s how to pick the right timing and conditions:

  1. Prune after leaf drop but before deep dormancy
    Wait until most leaves have fallen and the tree has begun to slow down for winter, but before very cold temperatures set in. This window may vary depending on your climate zone.
  2. Avoid pruning just before a hard freeze
    If a severe frost or freezing weather is expected immediately after pruning, cuts won’t heal well and new growth (if any) may be damaged.
  3. Check soil and moisture conditions
    Work only when the ground is not saturated or frozen, so your footing is stable and you don’t compact roots.
  4. Limit the scope
    In fall, stick to clean-up work: removing dead, diseased, or broken branches, and thinning minor internal limbs. Avoid large structural cuts.

If you’re in a region with very cold winters, it’s safer to hold off until late winter for heavier shaping.


How to Prune Your Apple Tree in Fall: Step‑by‑Step Guide

Here’s a stepwise guide you can follow to prune apple trees in fall carefully and effectively:

1. Gather Your Tools & Sanitize

  • Sharp bypass pruners for small branches
  • Loppers or pruning saws for larger limbs
  • Gloves, eye protection
  • Pruning sealer or cut‑dressing (if you prefer; though many guides suggest clean cuts heal naturally)
  • Disinfectant (e.g. alcohol or bleach solution) to clean tools between cuts, especially if removing diseased wood

Always make clean cuts. Avoid tearing bark or leaving stubs, which invite pathogens.

2. First Pass: Remove the “3 D’s”

Scan the tree and remove:

  • Dead wood
  • Diseased or decayed branches
  • Damaged or broken limbs

These are priorities, since leaving them poses risks to tree health. Prune them out first, cutting back to healthy wood or the branch collar.

3. Remove Crossing, Rubbing, or Inward‑Growing Branches

  • Branches that cross and rub should be thinned—remove one entirely at the base.
  • Eliminate inward-growing branches that crowd the tree’s center (they block light and airflow).
  • Shorten long inward shoots to maintain structure.

4. Thin Excess Growth / Suckers / Water Sprouts

  • Suckers arise from the base or roots—remove them.
  • Water sprouts are vigorous vertical shoots—prune them off as they are nonproductive.
  • Lightly thin crowded areas, but avoid removing more than about 10–15% of live wood in fall pruning.

5. Shape & Balance

If the current framework already is solid:

  • Do not overdo heading cuts—prefer thinning to preserve natural branch shapes.
  • Maintain or encourage a central leader (one main upright stem) with well-spaced lateral scaffold branches, not too vertical.
  • Maintain good crotch angles (aim for wide angles, e.g. 45°–60°) for branch strength.

If the structure is weak, do not force major changes in fall—reserve major restructuring for dormant season.

6. Clean Up & Sanitize Cuts

  • Clean out debris, prune clippings, leaves.
  • Optionally apply wound care if local conditions favor fungal or disease pressure.
  • Re‑sanitize tools after cutting diseased wood.

That’s a cautious fall pruning. The goal is not radical transformation but structural tidying and removal of problematic wood.


What to Do in Spring Versus Fall — Complementary Pruning Strategy

Because fall pruning is limited, you’ll still need a more comprehensive pruning in late winter or early spring (the dormant period). Here’s how the seasons’ pruning complement each other:

SeasonPruning Focus in Apple Trees
Fall (optional, light)Clean‑up, remove problem wood, minor thinning
Winter / Early SpringMajor shaping, structural pruning, thinning, spur management

In spring, you can:

  • See the full skeleton before new buds emerge
  • Make larger cuts with quicker healing
  • Shape the canopy more aggressively
  • Remove large branches without risking winter damage

Multiple sources and extension recommendations strongly endorse doing the bulk of pruning in the dormant season for best results. (E.g., University extension, orchard guides)


Tips & Best Practices for Spring Harvest Success

Even with prudent fall pruning, your spring pruning and overall orchard care will determine the ultimate yield. Keep these in mind:

  1. Don’t prune away too many fruiting spurs
    Apple fruit typically grows on spur wood 2–3 years old. Avoid cutting off large quantities of potential fruiting wood.
  2. Keep pruning moderate
    Over-pruning can stimulate excessive vegetative growth (suckers, water sprouts) and reduce fruit quality. Some guidelines suggest removing no more than 20–25% of live wood in a season.
  3. Ensure good air circulation and sunlight penetration
    The more light and airflow inside the canopy, the better fruit set, sugar development, and disease resistance.
  4. Balance growth and fruiting
    A very vigorous tree may need more thinning; a weak tree less. Always consider vigor when determining pruning intensity.
  5. Watch for disease & pests
    Early detection and removal of diseased wood helps reduce carryover pathogens into spring.
  6. Maintain tree health
    Adequate fertilization, mulching, irrigation, and soil care support recovery from pruning and boost flower and fruit production.

When Not to Prune and Common Mistakes to Avoid

  • Don’t prune in early fall or too late — don’t cut late when the tree is still too active or just before deep dormancy; you risk frost damage or unwanted growth.
  • Never remove more than a safe proportion of wood — avoid heavy cuts in fall.
  • Avoid stub cuts — always cut just outside the branch collar.
  • Don’t leave crossing branches or narrow angled limbs that can split under fruit load.
  • Avoid pruning during wet, frozen, or extremely cold conditions — cuts do not heal well and risk infection or damage.
  • Don’t skip spring pruning — rely on fall cuts only as supplemental, not primary shaping.

Should You Ever Skip Fall Pruning?

In many cases, yes. If your climate has cold winters, or your tree is already in good structural shape, skipping fall pruning entirely may be safer and simpler. Many experts recommend:

  • Do nothing in fall, then perform all structural pruning in late winter.
  • Use fall only for emergency pruning (broken/diseased limbs).
  • Focus on spring pruning, when the tree is fully dormant and wounds heal best.

That approach avoids most of the risks associated with fall pruning, while still letting you refine structure when conditions are ideal.


Sample Timeline (for a Temperate/Subtropical Region)

Here’s how you might plan pruning across the seasons if you choose to include fall pruning:

  1. Late Fall / Early Winter (after leaf drop)
    • Remove dead, diseased, broken limbs
    • Thin minimal internal wood
    • Clean up pruning debris
  2. Winter / Early Spring (before bud break)
    • Major structural pruning
    • Thinning of crowded branches
    • Spur management
    • Shape adjustment
  3. Summer (if needed)
    • Remove water sprouts or overly vigorous growth
    • Light corrective pruning

This balanced approach allows you to manage structure and workload while protecting tree health.


Final Thoughts

Pruning is a central art and science in apple tree care. While late winter / early spring remains the ideal time for most major pruning, light fall pruning, done with caution and restraint, can support structural maintenance, cleanup, and workload reduction. The primary focus in fall should be removal of dead or hazardous limbs, minimal thinning, and preparing the tree for winter.

Whatever your strategy, always use clean, well-sharpened tools, make precise cuts, and avoid overdoing it. Combine pruning with good soil care, pest/disease management, and thoughtful tree nutrition, and your apple trees will reward you with vibrant growth, healthy blossoms, and a plentiful spring harvest.

If you like, I can provide a region‑specific pruning schedule (for your climate), or a visual pruning plan for your tree. Do you want me to draft that for your area?