Winged Bean The Underrated Super Vegetable Taking Root in American Gardens and Kitchens

Winged Bean The Underrated Super Vegetable Taking Root in American Gardens and Kitchens

Move over kale and edamame—the winged bean is here to claim its spot as the next big thing in healthy eating and sustainable gardening. Native to Southeast Asia, this climbing tropical legume is now making waves in American kitchens and backyards, prized for its versatility, nutritional punch, and eco-friendly nature.

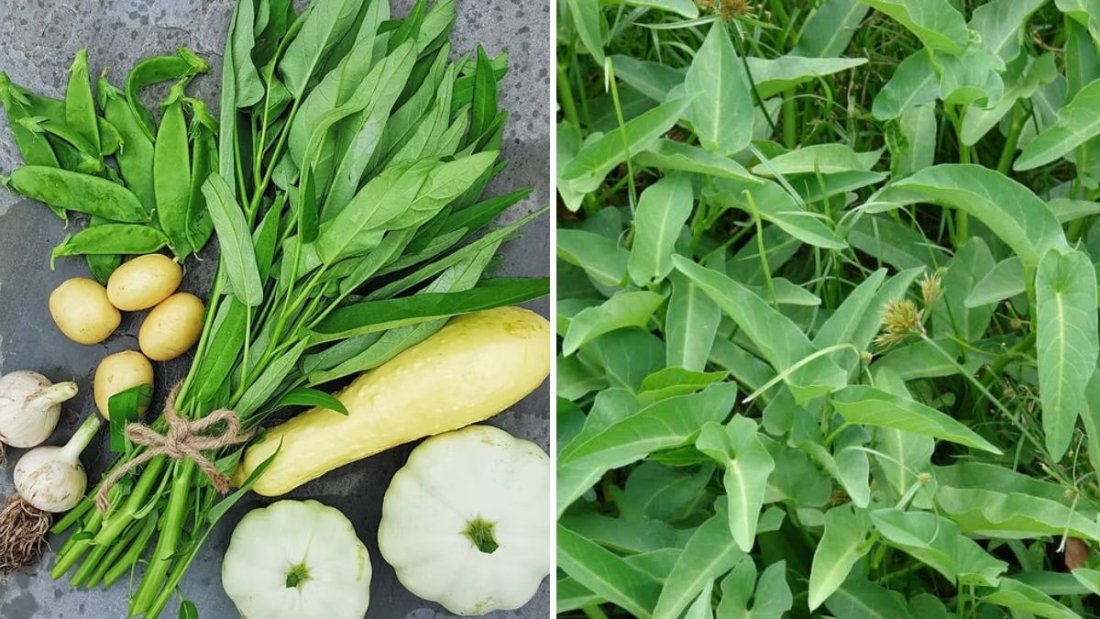
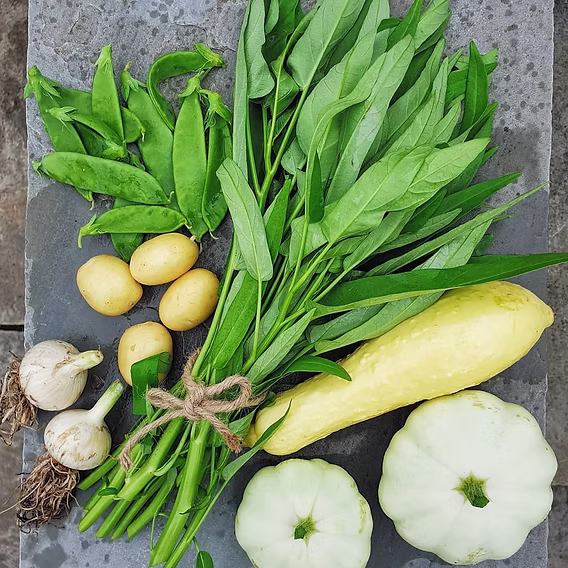
Known scientifically as Psophocarpus tetragonolobus and affectionately called the “goa bean” or “asparagus pea,” the winged bean is a true farm-to-table champion—you can eat almost every part of the plant, from its tender pods and leaves to its flowers and roots.

For Americans interested in plant-based nutrition, regenerative gardening, and global flavors, the winged bean offers a perfect balance of sustainability, taste, and nourishment. In this detailed guide, we’ll explore everything about this remarkable bean—from how to grow it in U.S. climates to its culinary uses and incredible health benefits.


1. What Is the Winged Bean?

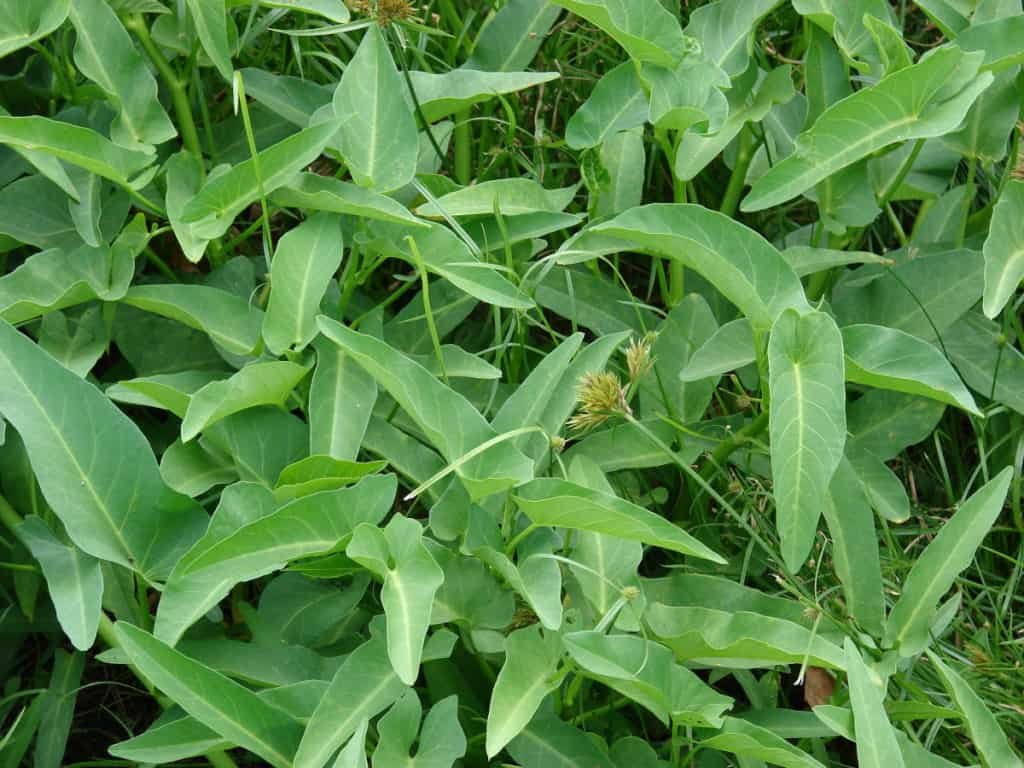
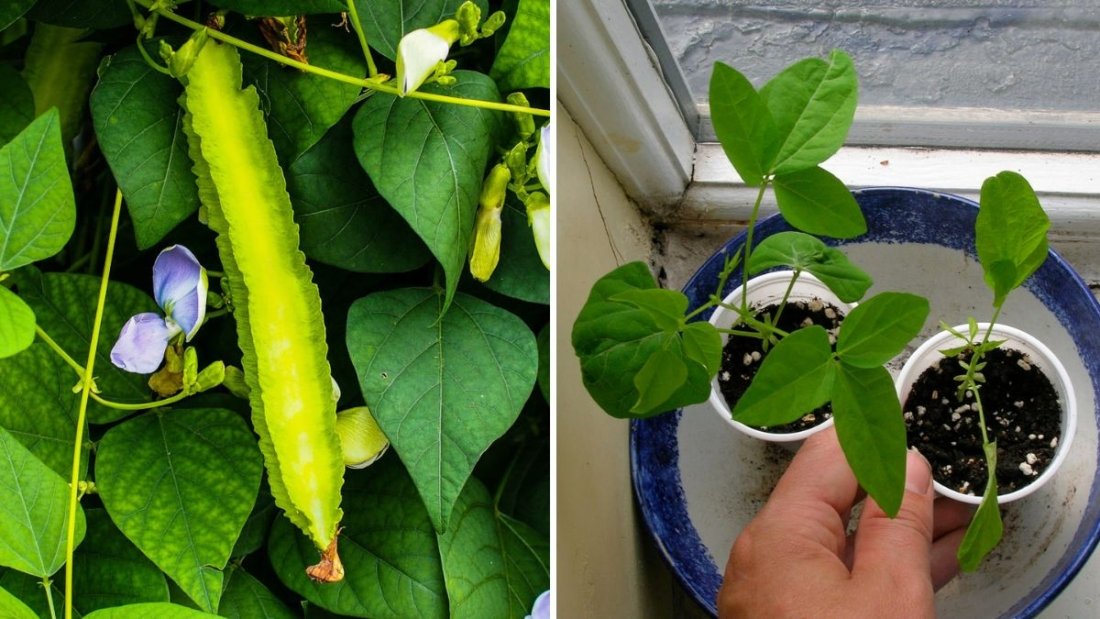
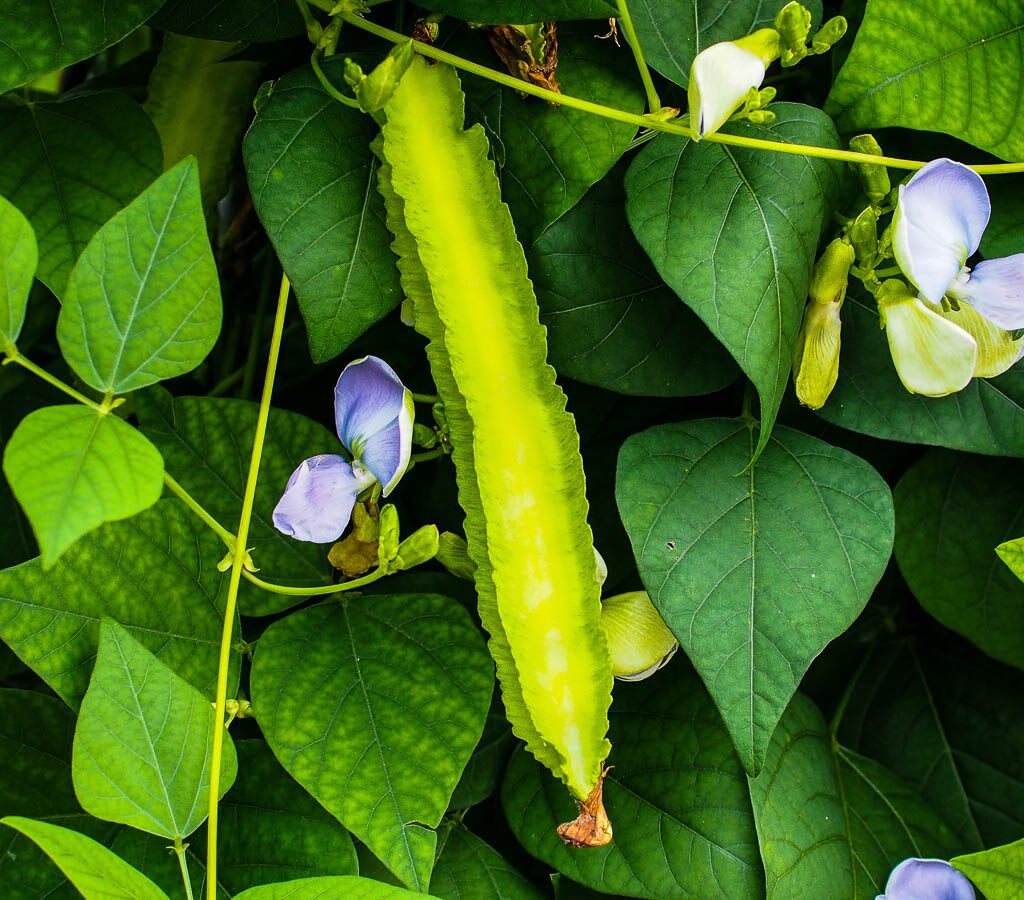
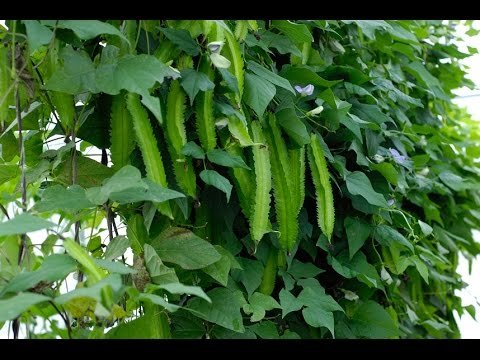
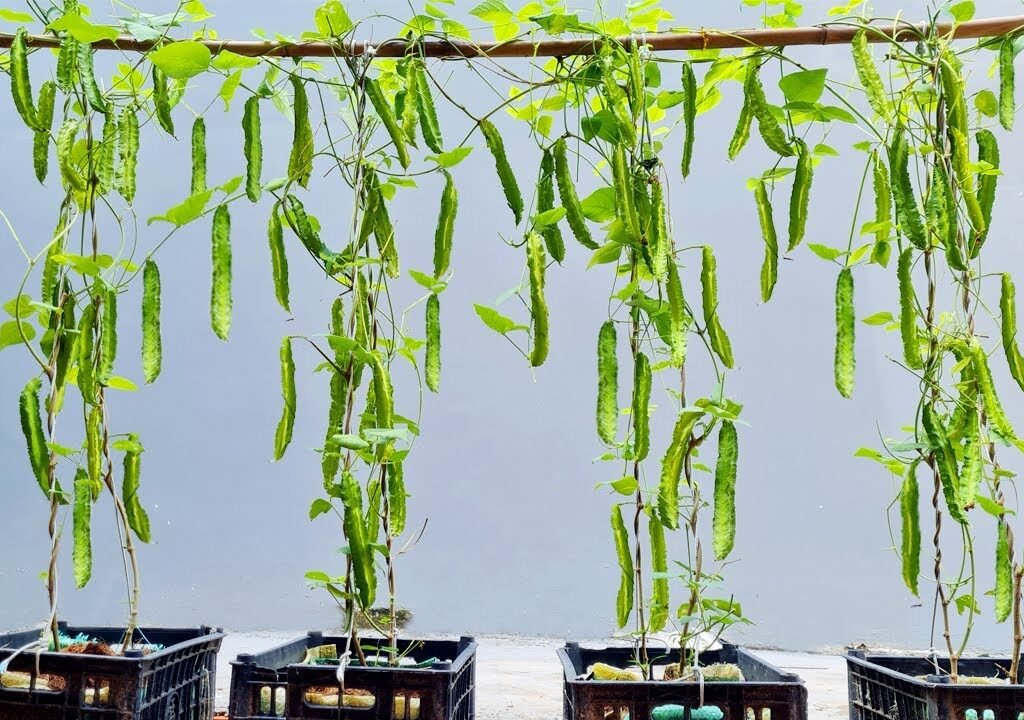
The winged bean is a climbing vine vegetable native to the humid tropics of Asia, where it’s been cultivated for centuries in countries like Thailand, Indonesia, and the Philippines. The plant produces bright green pods with distinctive wing-like edges—hence the name “winged bean.”

Each part of the plant is edible:

  • Pods: Tender and crunchy, similar to green beans or snap peas.
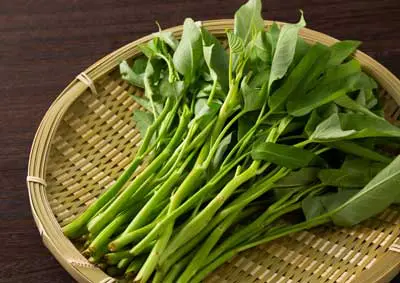
  • Leaves: Used like spinach in soups and stir-fries.
  • Flowers: Edible and mildly sweet, often added to salads.
  • Roots: Nutty and crisp, somewhat like jicama or potatoes.
  • Seeds: High in protein and oil content—comparable to soybeans.

In essence, it’s a complete plant for both nutrition and sustainability, which is why agricultural researchers call it the “one-stop vegetable.”


2. Nutritional Powerhouse: Why Winged Bean Is a Superfood

The winged bean isn’t just versatile—it’s exceptionally nutritious, earning it a growing reputation among health-conscious Americans and vegetarians.

a. High in Plant Protein

Winged bean seeds contain over 35% protein, nearly equivalent to soybeans, making it a powerful plant-based protein source. For vegans and vegetarians, it’s an excellent addition to a balanced diet.

b. Packed with Vitamins and Minerals

Winged beans are rich in:

  • Vitamin A – Essential for eye health and immunity
  • Vitamin C – Boosts collagen production and helps fight infections
  • Vitamin E – Protects cells from oxidative damage
  • Calcium, Iron, and Magnesium – Strengthen bones, blood, and muscles

c. High in Fiber

Its pods and leaves are high in dietary fiber, promoting healthy digestion and gut balance while keeping cholesterol levels in check.

d. Antioxidant and Anti-inflammatory

The bean’s natural compounds, including polyphenols and flavonoids, help reduce inflammation, improve circulation, and protect against chronic diseases.

e. Low-Calorie and Heart-Friendly

With fewer than 50 calories per cup of raw pods, the winged bean is perfect for low-carb, keto-friendly, or heart-healthy diets.

In short, it’s a nutrient-dense, low-fat, and protein-packed vegetable that fits beautifully into modern American wellness trends.


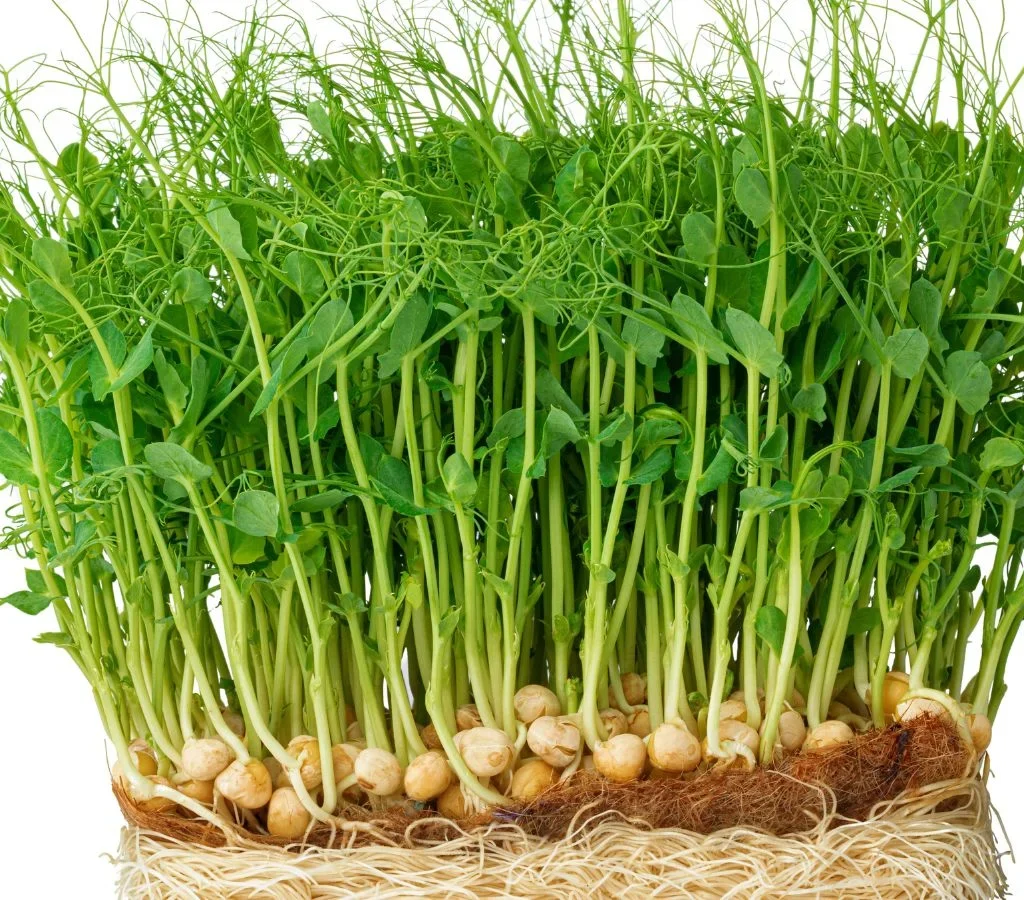
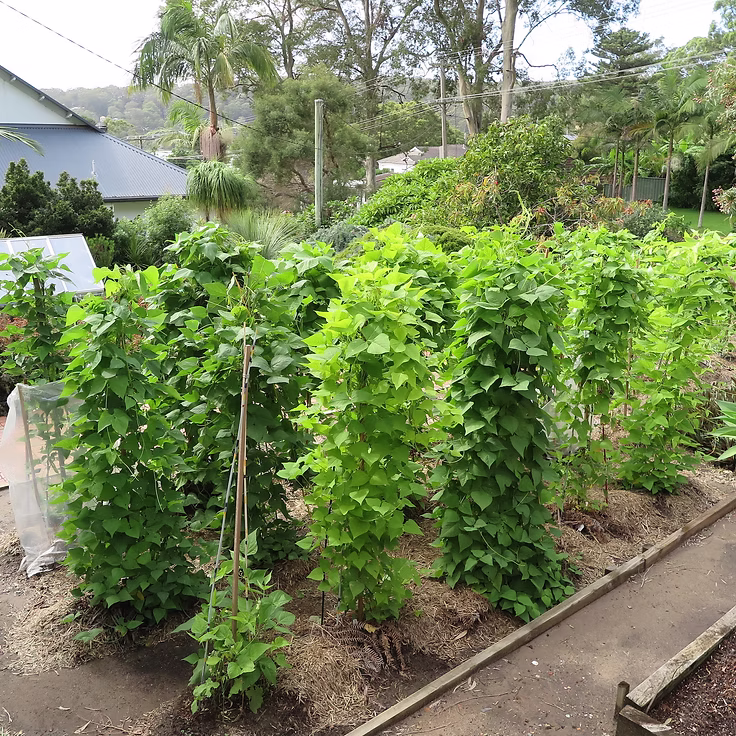
3. Growing Winged Beans in the U.S.

If you enjoy gardening, you’ll love growing winged beans—they’re beautiful, productive, and sustainable.

While native to tropical climates, winged beans can thrive in many parts of the United States with the right care.

a. Climate and Zones

Winged beans grow best in warm, humid climates with plenty of sunlight.

  • Ideal Temperature: 70°F–90°F
  • USDA Zones: 9–11 (Florida, Texas, Louisiana, Southern California, Hawaii)
  • In cooler regions, you can grow them in greenhouses or containers during summer.

b. Soil and Location

  • Prefers loamy, well-drained soil rich in organic matter.
  • Soil pH should be 6.0–7.0.
  • Plant in full sun for best results.

c. Planting

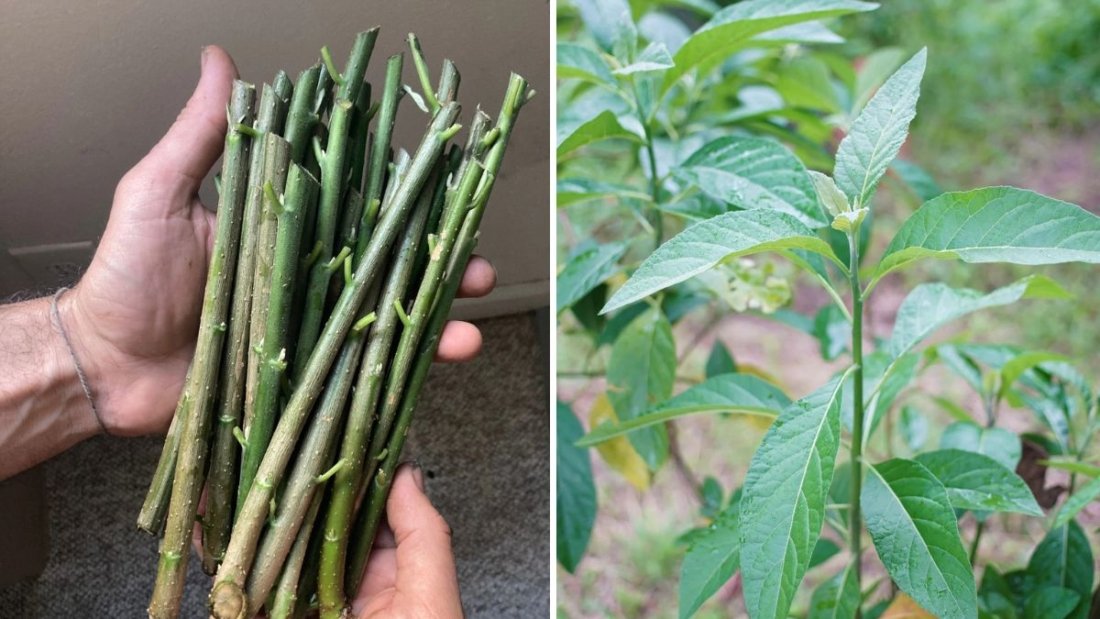
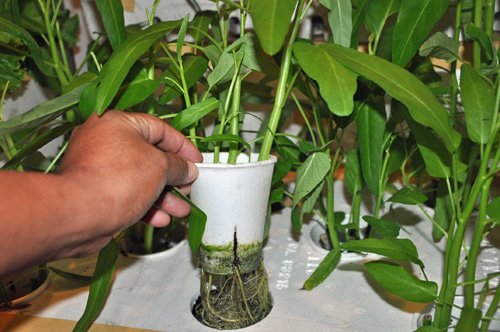
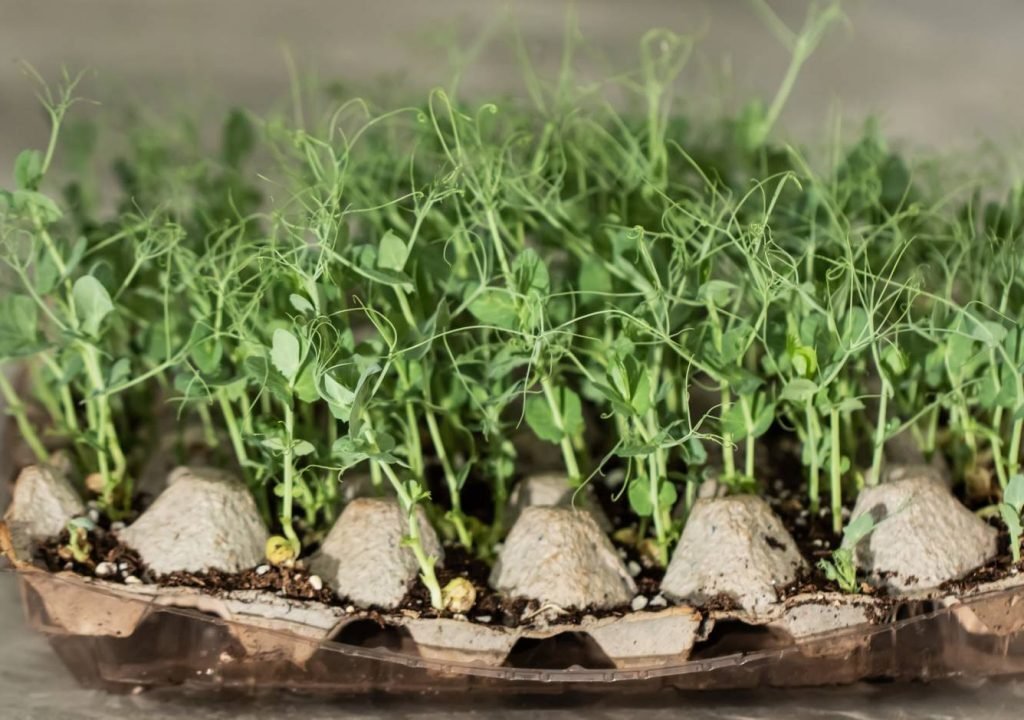
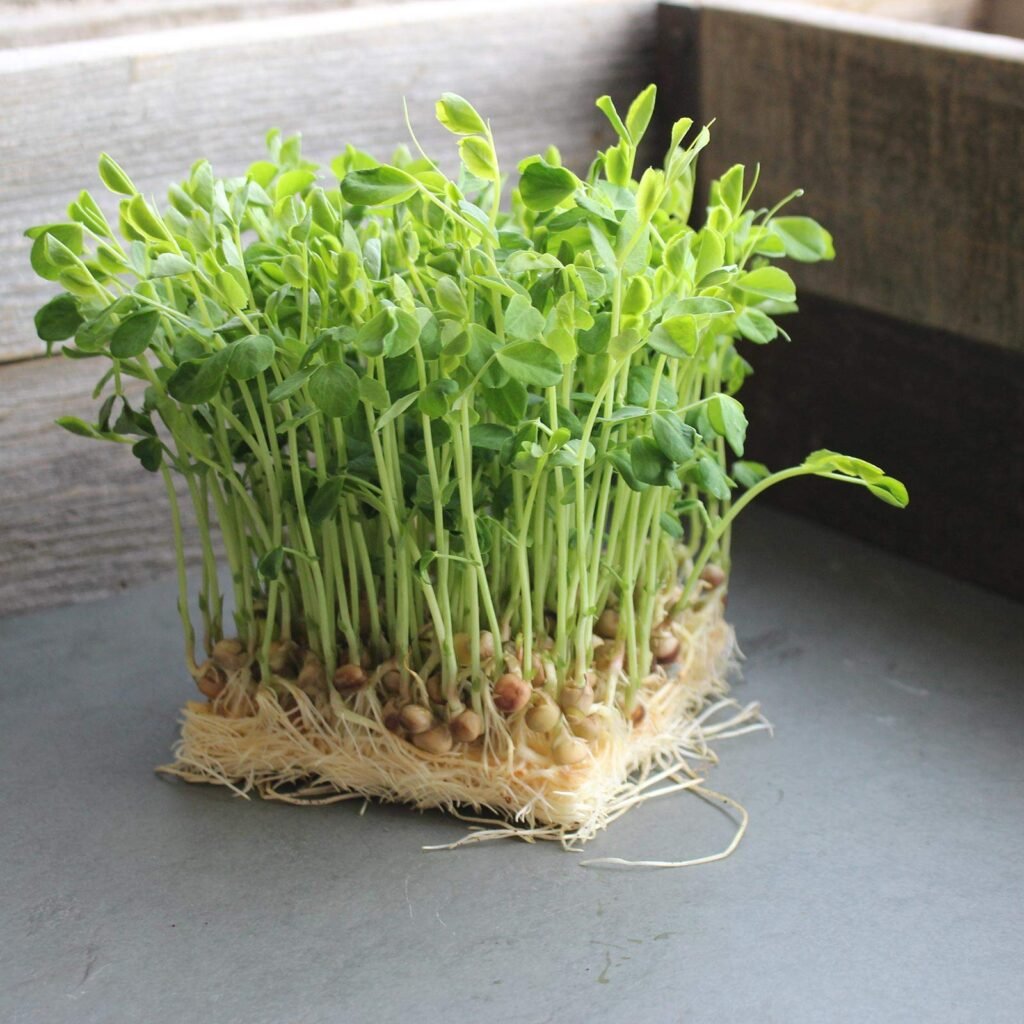
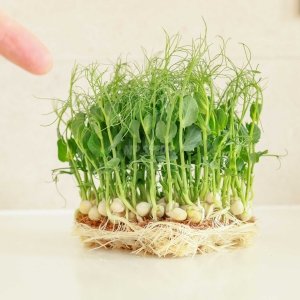
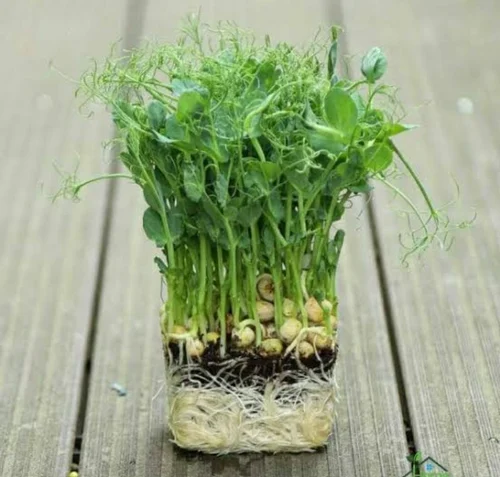
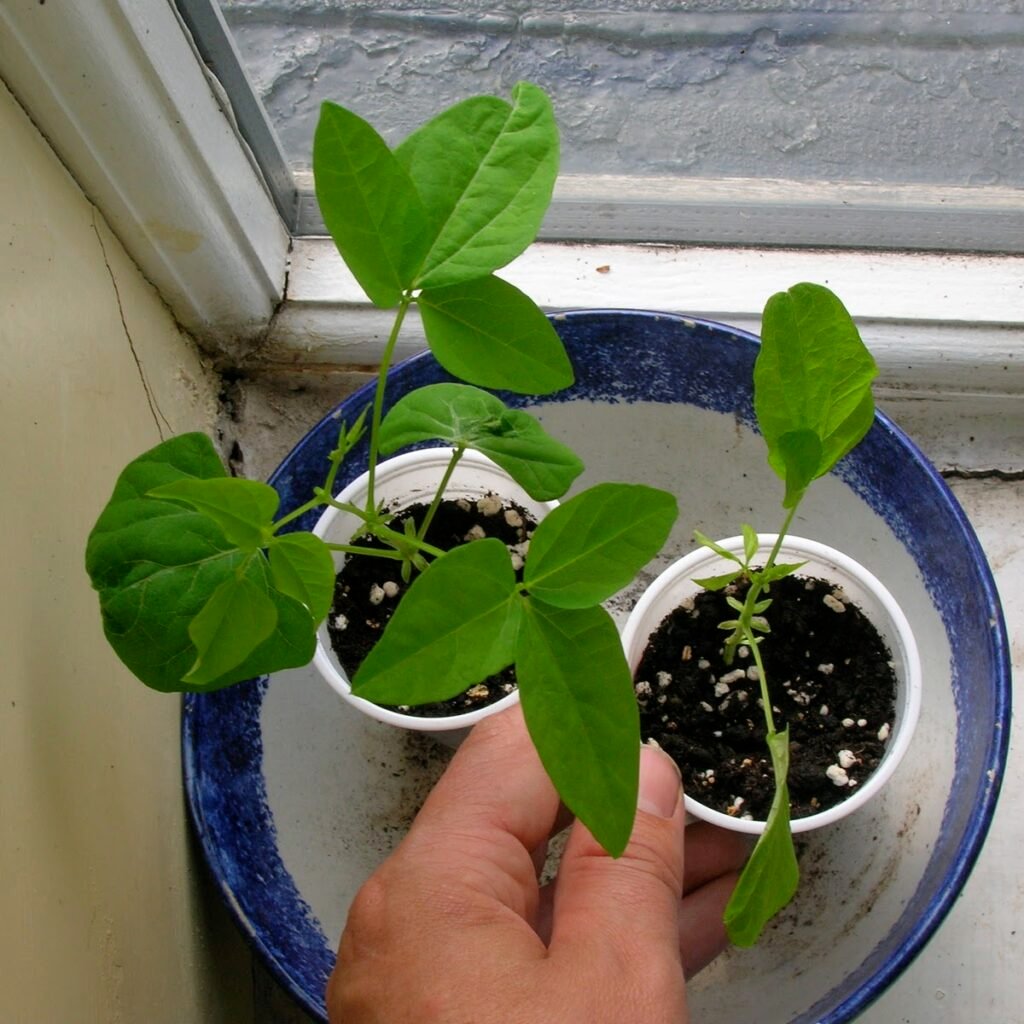
Winged beans can be grown from seeds.

  • Soak seeds in warm water for 12–24 hours before planting to speed up germination.
  • Sow seeds directly into the soil after the last frost.
  • Space seeds about 1 foot apart, and provide a sturdy trellis or support—they love to climb!

d. Watering and Maintenance

Keep the soil consistently moist, especially during flowering. Avoid waterlogging, as it may cause root rot. The plant also benefits from a balanced organic fertilizer during growth.
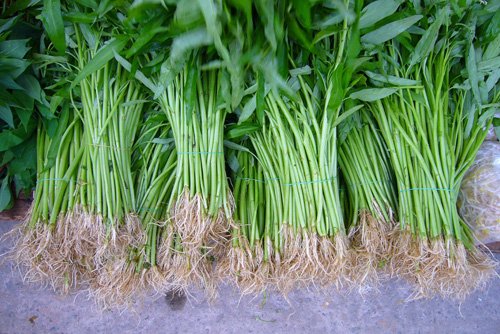
e. Harvesting

  • Pods are ready to harvest about 75–90 days after planting. Pick them while they’re still young and tender (around 6 inches long).
  • Regular harvesting encourages new pod growth.
  • The leaves and flowers can be picked as needed.

Winged beans are nitrogen-fixing plants, meaning they naturally enrich the soil, reducing the need for synthetic fertilizers—an eco-friendly bonus for home gardeners.


4. How to Cook and Enjoy Winged Beans

The winged bean’s mild, slightly nutty flavor and crunchy texture make it incredibly versatile in the kitchen. Every part of the plant can be turned into a delicious dish, giving it a unique appeal among creative American cooks and chefs.

a. Tender Pods

The young pods can be:

  • Stir-fried with garlic and soy sauce
  • Steamed or sautéed like green beans
  • Added to curries, stews, or soups
  • Used raw in salads for a crisp texture
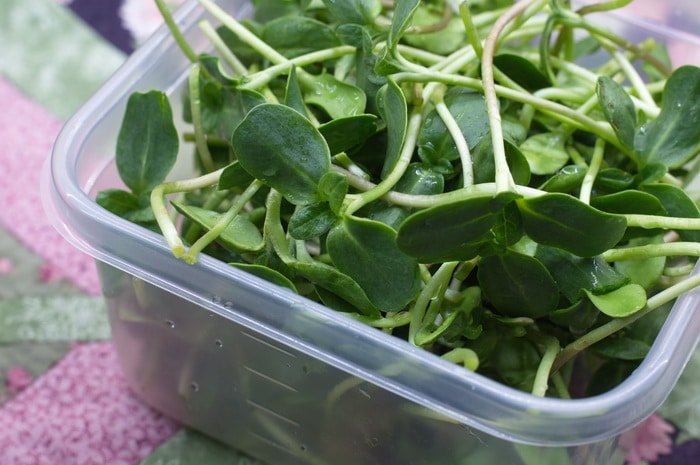
b. Leaves

Winged bean leaves are tender and nutritious—perfect for:

  • Adding to soups, omelets, or stews
  • Mixing with spinach or kale in a sauté
  • Blending into green smoothies for extra nutrients

c. Flowers

Their delicate blue blooms can:

  • Garnish salads, rice dishes, or desserts
  • Be brewed into winged bean flower tea for a floral, caffeine-free drink

d. Roots

The tuber-like roots have a pleasant crunch and slightly sweet flavor. Eat them raw, roasted, or stir-fried—similar to water chestnuts or potatoes.

e. Seeds

Once mature and dried, winged bean seeds can be:

  • Boiled or roasted like peanuts
  • Ground into flour for protein-rich baking
  • Fermented or made into milk, similar to soy products
Sample American-Inspired Recipes
  1. Garlic Butter Winged Beans – Sauté young pods with butter, garlic, and lemon for a light side dish.
  2. Winged Bean Salad with Avocado – Mix blanched pods with cherry tomatoes, avocados, and a lime vinaigrette.
  3. Spicy Coconut Curry with Winged Beans – Combine with coconut milk, ginger, and chili for a creamy vegan entrée.
  4. Grilled Winged Bean Skewers – Brush pods with olive oil and grill them for a smoky summer treat.

Its adaptability across cuisines—from Southeast Asian to Southern American—makes the winged bean an exciting ingredient for foodies and home chefs alike.


5. Health Benefits of Winged Bean

Beyond its delicious taste, the winged bean has an impressive list of science-backed health benefits that align with today’s wellness priorities.

a. Supports Muscle Growth

Thanks to its high protein and amino acid content, winged beans help support muscle repair and energy metabolism, making them ideal for athletes or fitness enthusiasts.

b. Improves Heart Health

Rich in fiber and potassium, the winged bean helps lower cholesterol levels and supports healthy blood pressure.

c. Enhances Digestion

The bean’s fiber content aids gut health, prevents constipation, and maintains digestive balance.

d. Strengthens Bones

High calcium and magnesium levels make winged beans excellent for bone density and joint support.

e. Boosts Immunity

Loaded with Vitamin C and antioxidants, the plant naturally enhances immune defense and cellular regeneration.

f. Regulates Blood Sugar

Winged beans have a low glycemic index and may help manage blood glucose levels, making them a smart choice for diabetics or those monitoring sugar intake.


6. Winged Bean and Sustainability: A Future Crop for America

In an era where climate change and soil depletion are global challenges, the winged bean stands out as a model of sustainable agriculture.

Here’s why:

  • Nitrogen Fixing: Like other legumes, it improves soil fertility naturally.
  • Low Input: Requires minimal fertilizer and pesticides.
  • Drought-Resistant: Adapts well to tropical and subtropical climates.
  • High Yield: Produces abundant edible parts with minimal space and water.

This makes it an eco-friendly crop for U.S. growers seeking sustainability, biodiversity, and resilience in their gardens or small farms.

Agricultural experts suggest that with proper promotion, the winged bean could become a future food crop in tropical U.S. states, supporting both nutrition and sustainable food production.


7. Winged Bean in American Markets and Cuisine

Thanks to rising interest in global foods and plant-based living, the winged bean is slowly appearing in:

  • Ethnic grocery stores (particularly Asian and Filipino markets)
  • Farmers’ markets in warmer regions
  • Health food stores offering exotic greens
  • Restaurants specializing in fusion or sustainable cuisine

Chefs across the U.S. are incorporating it into farm-to-table dishes, highlighting its texture and versatility. It’s also being studied as a potential source of plant-based protein flour for use in snacks, energy bars, and vegan alternatives.


8. Final Thoughts: A Hidden Gem for the Modern American Table

The winged bean is more than just a vegetable—it’s a complete plant system, offering nourishment, sustainability, and endless culinary potential. With every part of it being edible, it perfectly embodies the zero-waste, eco-conscious philosophy modern Americans value.

From its protein-packed seeds to its tender green pods, the winged bean is poised to become a superstar in home gardens and kitchens across America. Whether you’re a gardener, a nutrition enthusiast, or an adventurous cook, this tropical treasure is worth exploring.

So, next time you want to grow or cook something new, think beyond the usual greens—give the winged bean a place on your plate and in your backyard. It’s nature’s ultimate multitasker—nutritious, sustainable, and absolutely delicious.


Bitterleaf The Bold, Nutrient-Packed Green Winning Hearts in American Kitchens and Gardens

Bitterleaf The Bold, Nutrient-Packed Green Winning Hearts in American Kitchens and Gardens

Once prized across Africa for its healing properties and robust flavor, bitterleaf (Vernonia amygdalina) is now finding a home in American kitchens and gardens. This remarkable green vegetable, known for its distinct bitter taste and incredible health benefits, is emerging as one of the most exciting superfoods in America’s growing wellness and farm-to-table movement.

Whether you call it bitterleaf, ewuro, onugbu, or South African spinach, this powerhouse plant is capturing attention for its versatility, nutritional value, and cultural significance. As more Americans explore global cuisines and embrace plant-based eating, bitterleaf is becoming a must-try green—offering both medicinal power and culinary potential.

In this detailed guide, we’ll explore what makes bitterleaf so special, how to grow it in the U.S., its impressive health benefits, and how to prepare delicious dishes that celebrate its bold flavor.


1. What Is Bitterleaf?

Bitterleaf is a leafy green vegetable native to tropical Africa, particularly popular in Nigeria, Cameroon, Ghana, and Kenya. Scientifically known as Vernonia amygdalina, it gets its name from its naturally bitter flavor, which comes from beneficial plant compounds known as alkaloids and flavonoids.

In African homes, bitterleaf is much more than just food—it’s medicine, culture, and tradition. It’s used to make beloved dishes like bitterleaf soup (Ofe Onugbu) and Ndole, both celebrated for their rich, earthy taste and nourishing quality.

Today, bitterleaf is spreading across the world, with African immigrants cultivating it in America and introducing it to local farmers’ markets, health food stores, and home gardens. Gardeners in Florida, Texas, and Southern California are especially embracing it for its resilience, quick growth, and nutritional benefits.


2. The Nutritional Powerhouse: Why Bitterleaf Is a Super Green

Behind its sharp taste lies a treasure chest of nutrients. Bitterleaf is a low-calorie, high-fiber green loaded with essential vitamins and minerals. Here’s a look at what makes it a true superfood for American diets:

a. Rich in Vitamins and Minerals

Bitterleaf is packed with:

  • Vitamin A – Supports healthy eyesight and skin
  • Vitamin C – Boosts immunity and collagen production
  • Vitamin E – Fights oxidative stress and promotes cell health
  • Iron and Zinc – Support blood health and metabolism
  • Calcium and Potassium – Strengthen bones and regulate blood pressure

b. High in Antioxidants

Bitterleaf is loaded with flavonoids, saponins, and polyphenols—natural antioxidants that protect the body from free radicals and reduce inflammation.

c. Supports Healthy Blood Sugar Levels

Studies suggest bitterleaf can help regulate blood glucose and may benefit those managing diabetes when included in a balanced diet.

d. Aids Digestion and Detoxification

The plant’s mild bitterness stimulates digestive enzymes and supports liver function, helping the body naturally detoxify.

e. Boosts Immunity and Energy

Thanks to its iron and vitamin content, bitterleaf promotes blood circulation, boosts energy levels, and strengthens immune response.

Bitterleaf’s combination of taste, texture, and therapeutic value makes it one of the most underappreciated yet powerful greens Americans can add to their diet.


3. How to Grow Bitterleaf in the U.S.

Good news for green thumbs—bitterleaf is incredibly easy to grow, especially in warm American climates. It’s hardy, drought-tolerant, and thrives in tropical to subtropical conditions, making it perfect for southern states.

a. Climate and Location

  • Ideal Temperature: 70°F to 90°F
  • Sunlight: Full sun to partial shade
  • Zones: USDA Zones 8–11 (Florida, Texas, Louisiana, Southern California, Georgia)

b. Soil Requirements

Bitterleaf grows best in loamy, well-drained soil enriched with organic matter. The pH should be slightly acidic to neutral (6.0–7.0).

c. Planting

You can propagate bitterleaf using stem cuttings or seeds:

  • For cuttings: Choose a mature stem about 6–8 inches long, remove the lower leaves, and plant directly in moist soil.
  • For seeds: Sow directly in soil or start in trays indoors. Keep the soil consistently damp until germination.

d. Watering and Care

Water regularly to maintain slightly moist soil. Bitterleaf can withstand short dry spells but thrives with consistent moisture. Prune occasionally to encourage bushier growth.

e. Harvesting

Leaves can be harvested two to three months after planting. Cut the young, tender leaves for cooking. Regular pruning also stimulates continuous growth throughout the year.

Tip: Always wash and blanch the leaves before cooking to reduce bitterness (unless you enjoy it strong!).


4. How to Prepare and Cook Bitterleaf

The key to enjoying bitterleaf lies in preparation. Its natural bitterness can be reduced—or embraced—depending on your taste.

a. How to Wash Bitterleaf

Traditionally, the leaves are washed and squeezed multiple times in clean water to remove excess bitterness. You can also boil them briefly and drain the water before using them in recipes.

b. Cooking Methods

Bitterleaf can be used in soups, stews, and sautés. Its texture softens beautifully when cooked, making it a great addition to flavorful dishes. Here are some popular and creative ways to enjoy it:

1. Nigerian Bitterleaf Soup (Ofe Onugbu)

A hearty West African favorite made with bitterleaf, cocoyam paste, palm oil, and meats or fish. The blend of spices and earthy flavors makes it deeply satisfying and nutritious.

2. Cameroonian Ndole

A rich, creamy stew made from blanched bitterleaf, ground peanuts, and shrimp or beef. It’s a perfect introduction for those new to this green.

3. Bitterleaf and Spinach Stir-Fry

Mix bitterleaf with spinach, garlic, onions, and olive oil for a quick, healthy American twist. Serve it with quinoa, rice, or roasted potatoes.

4. Bitterleaf Smoothie (for the Brave!)

Blend a few blanched bitterleaf leaves with pineapple, ginger, and lemon. The sweetness of the fruit balances the bitterness and delivers a powerhouse of antioxidants.

5. Bitterleaf Soup with Lentils

A plant-based comfort meal: cook lentils with onions, tomatoes, and spices, then stir in chopped bitterleaf for a hearty, fiber-rich soup.

No matter the dish, bitterleaf adds a distinctive edge that transforms everyday meals into something bold and memorable.


5. Bitterleaf in Modern American Wellness Trends

As Americans become more conscious of natural remedies and holistic nutrition, bitterleaf is finding a special place in wellness circles. Its detoxifying and anti-inflammatory properties make it popular among those pursuing clean eating, vegan diets, and herbal medicine.

Here’s why bitterleaf is trending in the U.S.:

  • Functional Food: It’s seen as both nourishment and natural medicine.
  • Cultural Exchange: Immigrant communities are introducing bitterleaf to new audiences through pop-up markets, farm cooperatives, and restaurants.
  • Sustainability: Bitterleaf grows quickly, requires little fertilizer, and adapts easily to different environments—making it a sustainable addition to American home gardens.

In fact, small-scale farms in Florida, California, and Texas are beginning to cultivate bitterleaf commercially for specialty produce markets. It’s also being studied for its potential in herbal supplements and teas, signaling a bright future in the American health industry.


6. Health and Medicinal Uses of Bitterleaf

Beyond its culinary uses, bitterleaf has been used in traditional medicine for centuries. Modern research supports many of these applications:

  • Liver Cleanse: Bitterleaf extract supports liver detoxification and helps prevent fatty liver buildup.
  • Immune Support: Its antioxidants and vitamins strengthen the immune system.
  • Blood Sugar Regulation: May assist in lowering blood glucose and supporting insulin sensitivity.
  • Anti-inflammatory Properties: Helps relieve inflammation and joint pain naturally.
  • Digestive Health: Encourages better digestion and relieves constipation.

While more scientific research is ongoing, bitterleaf’s long history of use highlights its potential role in natural healing and preventive health.


7. Growing Popularity in American Cuisine

Chefs across the United States are incorporating bitterleaf into creative dishes—adding it to grain bowls, vegetable stews, and green juices. Its slightly bitter note is being celebrated as a “flavor enhancer” that balances rich, sweet, or spicy components.

In plant-based restaurants and African fusion eateries, you’ll find innovative takes like:

  • Bitterleaf pesto with roasted nuts
  • Bitterleaf veggie wraps
  • Bitterleaf hummus dips

Its adaptability and nutrient density make it a favorite among vegan chefs and nutrition-conscious Americans looking to expand their green repertoire beyond kale and collards.


8. Final Thoughts: Bitterleaf—A Bold Green for America’s Future

Bitterleaf may not be as well-known as spinach or kale—yet—but it’s quickly earning its place as one of America’s most promising supergreens. Its strong flavor, healing properties, and sustainability make it more than just another leafy vegetable; it’s a symbol of global connection, resilience, and natural wellness.

Whether you’re a home gardener, a health enthusiast, or a curious cook, bitterleaf offers something truly special. From its medicinal uses to its vibrant recipes, it’s a plant that nourishes body, soul, and soil alike.

So, the next time you’re looking for a new green to grow or cook, give bitterleaf a try. It’s bold, beautiful, and bursting with benefits—a true gift from nature, now thriving in American soil.


Taro Leaves The Next Big Supergreen Taking Over American Kitchens and Gardens

Taro Leaves The Next Big Supergreen Taking Over American Kitchens and Gardens

If you’ve ever tasted the creamy comfort of Hawaiian Laulau, the earthy richness of Indian Patra, or the silky smooth texture of Caribbean Callaloo, you’ve already experienced the magic of taro leaves. Known for their deep green color, tender texture, and nutritional powerhouse status, taro leaves are gaining growing attention across America as one of the most versatile and wholesome greens available.

Once a staple in tropical cuisines, taro leaves (Colocasia esculenta) are now being rediscovered by American chefs, health enthusiasts, and home gardeners. From Hawaii to Florida, this tropical beauty is thriving in U.S. soil, bringing global flavor, nutritional benefits, and sustainable appeal to the modern American diet.

In this article, we’ll explore everything you need to know about taro leaves—where they come from, their amazing health benefits, how to grow them in your backyard, and delicious ways to cook them for your next healthy, plant-based meal.


1. What Are Taro Leaves?

Taro leaves come from the taro plant—a root vegetable scientifically known as Colocasia esculenta. While the starchy corm (root) is famous for dishes like Hawaiian poi and taro chips, the leaves are equally valuable, offering a tender texture and rich, slightly nutty flavor when cooked.

They’re often compared to spinach or collard greens, but taro leaves have a distinct flavor that’s deeper and more complex. The heart-shaped leaves are large, glossy, and beautiful, earning taro the nickname “elephant ear plant.”

Across the world, taro leaves have many names and uses:

  • Lu’au leaves in Hawaii
  • Patra or Arbi ke Patte in India
  • Callaloo in the Caribbean
  • Laing in the Philippines
  • Eddoe leaves in parts of Africa

Now, taro leaves are making their way into American grocery stores and farmers’ markets—especially in regions like California, Florida, Texas, and Hawaii, where the tropical climate supports their lush growth.


2. Nutritional Benefits of Taro Leaves

Taro leaves aren’t just delicious—they’re nutrient-dense supergreens that rival kale, spinach, and Swiss chard. Let’s break down what makes them a health lover’s dream:

a. Packed with Vitamins and Minerals

Taro leaves are loaded with:

  • Vitamin A – Supports eye health and immunity
  • Vitamin C – Boosts collagen production and immune defense
  • Calcium and Magnesium – Strengthen bones and muscles
  • Iron – Prevents anemia and increases energy
  • Potassium – Regulates blood pressure

b. High in Antioxidants

Rich in polyphenols and beta-carotene, taro leaves help combat free radicals, reducing inflammation and slowing down signs of aging.

c. Excellent Source of Dietary Fiber

The high fiber content promotes healthy digestion, supports weight management, and helps maintain steady blood sugar levels—perfect for people watching their diet.

d. Supports Heart Health

Taro leaves are naturally low in fat and cholesterol but high in potassium and antioxidants, making them ideal for cardiovascular wellness.

e. A Natural Detoxifier

Their chlorophyll content supports liver function and helps the body naturally flush out toxins.

Important Tip: Always cook taro leaves before eating. Raw leaves contain calcium oxalate crystals, which can cause irritation if consumed uncooked. Boiling or steaming eliminates this completely and enhances their flavor.


3. How to Grow Taro Leaves in the U.S.

Good news for home gardeners: taro plants are easy to grow, especially if you live in a warm, humid region. Even if you don’t, you can cultivate taro in pots or greenhouses with a little care.

a. Ideal Growing Conditions

  • Climate: Prefers tropical and subtropical climates (zones 8–11).
  • Temperature: Best growth between 75°F–95°F.
  • Soil: Moist, well-drained, rich in organic matter.
  • Light: Full sun to partial shade.

b. Planting

You can start from taro corms (roots) or small cuttings. Plant them 2–3 inches deep in soil, keeping it consistently moist. Taro can even be grown in shallow water or swampy beds, similar to rice.

c. Watering

Taro loves moisture—keep the soil damp at all times but avoid standing water that causes rot. Regular watering is key, especially in dry or indoor conditions.

d. Harvesting

Taro leaves are ready to harvest in 2–3 months, long before the root matures. Snip off the outer leaves while leaving the inner ones to keep growing. Freshly picked leaves are vibrant green and tender.

e. Growing Indoors

If you live in cooler regions (like the Midwest or Northeast), taro can thrive in containers. Use large pots with nutrient-rich soil and keep them near a sunny window or under grow lights.

Growing taro at home not only gives you a steady supply of nutritious greens but also adds tropical beauty to your garden.


4. Culinary Uses: How to Cook and Enjoy Taro Leaves

Taro leaves have a deliciously earthy, slightly nutty taste that blends beautifully with coconut milk, spices, or mild seasonings. They can be used in soups, stews, wraps, or sautéed dishes. Here are some popular and creative ways to enjoy them:

a. Hawaiian Laulau

A traditional Hawaiian dish made by wrapping pork, fish, or vegetables in taro leaves and steaming them until tender. The leaves infuse the filling with a rich, savory aroma.

b. Filipino Laing

In the Philippines, taro leaves are simmered in coconut milk, chili, garlic, and ginger. This creamy, spicy dish pairs perfectly with rice and grilled fish.

c. Indian Patra (Arbi ke Patte)

Rolled taro leaves are layered with a spiced chickpea batter, steamed, and then pan-fried until crispy. It’s a delicious snack full of flavor and texture.

d. Caribbean Callaloo

A classic comfort food in Jamaica and Trinidad made by cooking taro leaves (or amaranth) with coconut milk, onion, garlic, and sometimes seafood or meats.

e. American Fusion: Taro Leaf Soup or Smoothie

Use taro leaves in a green soup blended with spinach, kale, and herbs for a nutrition boost. Or blend a small quantity of cooked taro leaves into your morning smoothie for a superfood twist.

f. Simple Sautéed Taro Leaves

For a quick and healthy side dish, sauté chopped taro leaves with olive oil, garlic, and a splash of lemon juice—great with grilled chicken or tofu.

Taro leaves’ versatility makes them a perfect addition to any diet—vegan, vegetarian, paleo, or gluten-free.


5. Taro Leaves in Modern American Cuisine

As Americans explore global culinary traditions, taro leaves are emerging as a trendy and eco-friendly green. In cities like Los Angeles, Miami, and New York, restaurants are featuring dishes like taro leaf wraps, green curries, and fusion stews on their menus.

The farm-to-table movement is also embracing taro as a sustainable, high-yield crop. Its ability to thrive in wet areas makes it an excellent option for regenerative farming, helping maintain soil health while providing nutritious greens and roots.

Even health-conscious home cooks are turning to taro leaves as a nutrient-packed alternative to spinach or kale. Their mild flavor and soft texture make them easy to incorporate into everyday meals—soups, smoothies, or salads.


6. Sustainability and Cultural Significance

Taro has been cultivated for over 5,000 years and holds deep cultural significance in Pacific Islander, Asian, and African traditions. It symbolizes life, sustenance, and community.

For modern American growers and consumers, taro leaves represent a sustainable future:

  • Low waste: Both leaves and roots are edible.
  • Eco-friendly: Grows easily without heavy chemical inputs.
  • Soil-friendly: Improves soil moisture and reduces erosion.
  • Culturally inclusive: Connects diverse American communities through shared food traditions.

In Hawaii, taro is celebrated as a sacred plant (“kalo”) and an essential part of local identity. Its spread to the U.S. mainland is a reminder that food connects people, cultures, and generations.


7. Fun Facts About Taro Leaves

  • The word “taro” originates from Polynesia, but the plant is believed to have first been cultivated in India or Southeast Asia.
  • Taro leaves are sometimes called “elephant ears” due to their size and shape.
  • Taro was one of the earliest domesticated plants, dating back thousands of years.
  • In Hawaii, taro leaves are used in ceremonial feasts and family gatherings.
  • The plant thrives in both wetland and upland conditions, making it one of the most adaptable crops on Earth.

8. Final Thoughts: Why Taro Leaves Belong in Every American Kitchen

Taro leaves are more than just another green—they’re a symbol of nourishment, culture, and sustainability. From the tropical shores of Hawaii to American backyard gardens, these versatile leaves are redefining what it means to eat healthy and globally inspired.

Whether you’re trying to add more plant-based meals to your diet, experiment with international flavors, or grow your own superfoods at home, taro leaves are a perfect choice. Their vibrant color, delicate texture, and impressive nutrition make them a delicious and sustainable addition to your plate.

So, the next time you’re at an Asian or Caribbean grocery store—or browsing your local farmers’ market—pick up a bunch of taro leaves. Steam them, stir-fry them, or simmer them in coconut milk. With every bite, you’ll enjoy a taste of tradition, health, and tropical goodness—all grown and loved right here in America.

Kang Kong (Water Spinach) America’s Next Super Green for Healthy Living and Global Flavors

Kang Kong (Water Spinach) America’s Next Super Green for Healthy Living and Global Flavors

Move over kale and spinach—there’s a new leafy green gaining attention across America’s kitchens and farmers’ markets: Kang Kong, also known as water spinach (Ipomoea aquatica). With its long, tender stems, delicate leaves, and mild flavor, Kang Kong is a culinary and nutritional powerhouse that’s long been a staple in Asian cuisine. Now, this vibrant green vegetable is making waves in the American food and wellness scene, thanks to its versatility, fast growth, and impressive health benefits.

From farm-to-table restaurants to backyard gardens, Kang Kong is fast becoming a favorite among chefs, nutritionists, and home gardeners. Whether stir-fried, sautéed, or steamed, this aquatic green adds a refreshing crunch and vibrant color to your meals while boosting your health with essential vitamins and minerals.

In this article, we’ll dive deep into the world of Kang Kong—exploring its origins, nutritional benefits, how to grow it in the U.S., and delicious ways to enjoy it in your everyday cooking.


1. What Is Kang Kong (Water Spinach)?

Kang Kong, also called water spinach, swamp spinach, or river spinach, is a tropical, semi-aquatic vegetable native to Southeast Asia. Despite its name, it’s not related to regular spinach, but rather to the morning glory family (Convolvulaceae). It thrives in warm, humid climates and grows abundantly in watery areas like ponds, ditches, and rivers.

In different cultures, Kang Kong goes by many names:

  • Kangkong or Kangkung – Philippines, Indonesia, Malaysia
  • Rau Muống – Vietnam
  • Pak Boong – Thailand
  • Ong Choy – China
  • Water Spinach – United States

The plant features hollow stems and arrow-shaped leaves, which can be eaten cooked or raw. Its mild, slightly nutty flavor makes it one of the most versatile greens for soups, stir-fries, and salads.


2. The Rising Popularity of Kang Kong in America

With America’s growing appreciation for global cuisines and plant-based diets, Kang Kong is becoming a star ingredient in Asian fusion restaurants and home gardens alike. It’s especially popular among Filipino-American, Vietnamese-American, and Thai-American communities, who have introduced its delicious recipes to new audiences.

Farmers in Florida, Hawaii, Texas, and California are now cultivating Kang Kong commercially, where the warm climate suits its growth perfectly. Local farmers’ markets and Asian grocery stores across the U.S. are beginning to showcase fresh bundles of this crisp green, often labeled “water spinach” or “Ong Choy.”

Kang Kong’s sustainability and ease of cultivation also make it attractive for urban and backyard gardeners. It grows fast, needs minimal maintenance, and yields abundant harvests—a great addition to the modern American garden.


3. Nutritional Profile: Why Kang Kong Is a Super Green

Kang Kong isn’t just delicious—it’s a nutrient-dense food that rivals kale, spinach, and Swiss chard. Here’s what makes it a true super green for American diets:

a. Rich in Vitamins and Minerals

Kang Kong is loaded with vitamin A, vitamin C, iron, calcium, magnesium, and potassium, which support eye health, bone strength, and overall vitality.

b. High in Fiber and Low in Calories

With its high fiber content and extremely low calorie count, Kang Kong is perfect for weight management and digestive health. A single cup provides a good dose of dietary fiber to keep you full and satisfied.

c. Packed with Antioxidants

Its leaves contain beta-carotene, lutein, and chlorophyll, which combat oxidative stress and promote healthy skin and aging.

d. Supports Heart Health

The potassium and magnesium in Kang Kong help regulate blood pressure, while its antioxidants improve circulation and reduce inflammation.

e. Promotes Healthy Digestion

The vegetable’s natural fiber aids digestion and helps maintain a healthy gut, making it ideal for people with sensitive stomachs or dietary restrictions.

With all these benefits, it’s no wonder that nutritionists are calling Kang Kong “the next big leafy green” in America’s health food scene.


4. How to Grow Kang Kong in the U.S.

Growing Kang Kong is surprisingly easy, especially for gardeners in warm, humid regions. Its ability to thrive in both soil and water makes it a perfect crop for eco-friendly, sustainable gardening.

a. Ideal Conditions

  • Temperature: Prefers warm climates (70°F–90°F).
  • Sunlight: Needs full sun to partial shade.
  • Soil: Moist, rich soil with good drainage.
  • Water: Kang Kong loves water—keep soil consistently damp.

b. Planting Tips

  • Start from seeds or cuttings. If using cuttings, simply place them in water until roots appear.
  • Space plants about 10–12 inches apart.
  • Water frequently to mimic a marshy environment.

c. Harvesting

Kang Kong grows rapidly—ready for harvest in just 30 to 40 days. Cut the young stems about 6–8 inches from the tip, and they’ll regrow multiple times throughout the season.

d. Indoor Growing

If you live in cooler regions like the Midwest or Northeast, grow Kang Kong in containers or hydroponic systems indoors. Place near a sunny window or under grow lights for the best results.

With minimal effort, you can enjoy a continuous supply of fresh greens right from your backyard or kitchen garden.


5. Delicious Ways to Cook and Enjoy Kang Kong

Kang Kong’s mild flavor and tender texture make it an excellent ingredient in a variety of American and Asian dishes. Here are some popular and creative ways to enjoy it:

a. Stir-Fried Kang Kong (Filipino Adobong Kangkong)

A quick and flavorful side dish made by sautéing Kang Kong with garlic, soy sauce, and vinegar. It pairs perfectly with rice or grilled meat.

b. Thai-Style Morning Glory (Pad Pak Boong Fai Daeng)

This famous Thai street food features Kang Kong stir-fried with garlic, chili, and oyster sauce—light, spicy, and full of umami flavor.

c. Water Spinach Soup

Add Kang Kong leaves to a clear broth with tofu, ginger, and mushrooms for a comforting and healthy soup.

d. Sautéed Kang Kong with Shrimp or Chicken

A simple yet satisfying dish: toss Kang Kong in olive oil with shrimp or chicken, seasoned with garlic, black pepper, and a splash of lime.

e. Kang Kong Smoothie (Yes, Really!)

Blend young Kang Kong leaves with green apple, pineapple, and a bit of honey for a refreshing, nutrient-packed green smoothie.

f. Kang Kong Salad

Toss blanched Kang Kong with tomatoes, sesame oil, and soy dressing for a fresh Asian-inspired salad that’s perfect for summer picnics.

Whether you’re cooking traditional Filipino adobo or experimenting with fusion cuisine, Kang Kong easily adapts to any flavor palette—from savory to spicy to sweet.


6. Kang Kong’s Sustainability and Role in American Gardens

In an era where Americans are embracing organic farming and sustainable living, Kang Kong fits right in. Here’s why it’s a sustainable star:

  • Fast-Growing: It can be harvested multiple times in a single season.
  • Low Maintenance: Requires minimal fertilizer and resists pests naturally.
  • Water Efficient: Though it loves moisture, it can be grown hydroponically with recycled water.
  • Zero Waste: Every part of the plant—stems and leaves—is edible.

For urban gardeners, Kang Kong is a dream plant. It can grow in pots, raised beds, or even water tubs. In community gardens and farm-to-table programs, it’s being celebrated as an easy-to-grow, nutritious, and eco-friendly green.


7. Cultural Significance and Global Appeal

Kang Kong is more than just a vegetable—it’s part of culinary heritage across Asia. In the Philippines, it’s a comfort food staple; in Thailand, a fiery street dish; in Vietnam, a light and elegant side served with rice. Now, it’s gaining recognition in the U.S. for its versatility and health profile.

American chefs are incorporating Kang Kong into modern menus, using it in ramen bowls, tacos, sandwiches, and vegan dishes. Its mild flavor allows it to complement both Western and Asian-inspired recipes, bridging global cultures through food.


8. Final Thoughts: Why Kang Kong Deserves a Spot in Your Kitchen and Garden

Kang Kong (water spinach) is the kind of vegetable that checks all the boxes—nutritious, delicious, sustainable, and easy to grow. Whether you’re a health-conscious eater, a home gardener, or an adventurous cook, this vibrant green offers endless benefits and culinary potential.

As America’s food scene continues to celebrate global diversity and plant-based living, Kang Kong is poised to become a household favorite. It’s not just an exotic import—it’s a future American staple, loved for its flavor, nutrition, and eco-friendly growth.

So, the next time you’re browsing your local farmers’ market or planning your home garden, make room for Kang Kong. It’s the green that nourishes your body, delights your taste buds, and connects your plate to cultures around the world.

Roselle (Sorrel Hibiscus) The Vibrant American Superplant for Flavor, Health, and Holiday Cheer

Roselle (Sorrel Hibiscus) The Vibrant American Superplant for Flavor, Health, and Holiday Cheer

If you’ve ever sipped a ruby-red hibiscus tea on a summer afternoon or tasted the tangy kick of Caribbean sorrel punch during the holidays, you’ve likely enjoyed Roselle, also known as sorrel hibiscus (Hibiscus sabdariffa). This stunning tropical plant isn’t just a feast for the eyes—it’s a powerhouse of health benefits, a versatile ingredient in American kitchens, and a rising star in home gardens across the U.S.

From Florida to California, more Americans are discovering the vibrant charm of Roselle. With its cranberry-like flavor, vitamin-packed calyces, and festive red hues, this plant brings together the best of nature’s bounty and culinary creativity. Whether you’re a gardener, home chef, or wellness enthusiast, Roselle has something extraordinary to offer.

In this article, we’ll explore everything about Roselle (sorrel hibiscus)—from its origin and health benefits to growing tips and delicious recipe ideas perfect for your American home.


1. What Is Roselle (Sorrel Hibiscus)?

Roselle (Hibiscus sabdariffa) is a tropical plant belonging to the Malvaceae family, the same botanical group as okra and cotton. It’s native to West Africa but has become deeply rooted in Caribbean, Asian, and Latin American cultures. In the United States, Roselle thrives in warm climates like Florida, Texas, Louisiana, and Southern California.

The part most commonly used is the calyx, the bright red, fleshy outer covering of the flower bud that develops after the flower drops. These calyces are dried or used fresh to make teas, jams, sauces, and festive beverages.

Depending on where you are, you may hear Roselle referred to as:

  • Sorrel in the Caribbean
  • Jamaican Sorrel Drink during Christmas celebrations
  • Flor de Jamaica in Mexico
  • Bissap in West Africa

No matter the name, one thing remains constant—the plant’s beautiful crimson color and tart, refreshing flavor that’s adored worldwide.


2. The Nutritional Powerhouse: Health Benefits of Roselle

Roselle isn’t just visually stunning; it’s also a superfood loaded with nutrients. Studies show it’s packed with antioxidants, vitamins, and minerals that promote overall well-being. Here are some of its most remarkable health benefits:

a. Supports Heart Health

Roselle tea has been shown to help lower blood pressure and cholesterol levels, making it a heart-healthy choice. Its rich content of anthocyanins and polyphenols supports better blood vessel function and reduces oxidative stress.

b. Boosts Immunity

A single cup of Roselle tea is bursting with vitamin C, which strengthens immunity and helps the body fight seasonal infections. This makes it a perfect wintertime beverage for American households.

c. Aids Weight Management

Low in calories and naturally diuretic, Roselle helps reduce water retention and supports healthy metabolism—ideal for anyone looking to maintain a balanced weight.

d. Improves Digestive Health

Roselle’s mild laxative properties and natural acids assist digestion and promote a healthy gut. Its fiber content also supports regular bowel movements.

e. Natural Detoxifier

The plant’s antioxidant compounds, including flavonoids and hibiscus acid, help flush out toxins and keep the liver functioning efficiently.

In short, Roselle is more than just a pretty plant—it’s a natural wellness ally that fits perfectly into the health-conscious American lifestyle.


3. How to Grow Roselle in Your American Garden

Roselle is an easy-to-grow annual plant that loves warm weather and full sunlight, making it ideal for southern U.S. states. Here’s a simple guide to growing it successfully:

a. Climate and Soil

Roselle thrives in temperatures between 70°F and 90°F. It prefers well-drained, sandy loam soil with a slightly acidic pH (around 5.5 to 6.5). Avoid waterlogged areas, as too much moisture can cause root rot.

b. Planting Time

In most U.S. regions, plant Roselle after the last frost date in spring. In tropical or subtropical areas, it can be grown year-round.

c. Propagation

Start Roselle from seeds. Soak them in warm water overnight before planting to speed up germination. Space plants about 3–4 feet apart since they can grow up to 6–8 feet tall.

d. Care and Maintenance

  • Water regularly but avoid soggy soil.
  • Use organic compost for rich nutrition.
  • Prune early to encourage bushier growth.
  • Keep an eye out for pests like aphids or whiteflies.

e. Harvesting

Roselle is ready to harvest around 5–6 months after planting. Once the flowers fade, the red calyces begin to thicken. Harvest them while they’re firm and tender—perfect for cooking or drying.

Tip: The young leaves and shoots are also edible! They add a tangy note to salads or stir-fries.


4. Delicious Ways to Use Roselle in the Kitchen

Roselle’s tart, fruity flavor makes it a culinary gem. It can be used in both sweet and savory dishes, adding color and zest to your holiday table or summer picnics. Here are some delicious ways Americans are embracing Roselle:

a. Roselle Tea (Hibiscus Tea)

The most popular use! Steep dried or fresh calyces in hot water for 10–15 minutes. Add honey or agave syrup for sweetness, and chill it with ice and mint for a refreshing summer drink.

b. Jamaican Sorrel Christmas Punch

A Caribbean holiday favorite gaining popularity in the U.S. Combine steeped Roselle with ginger, cinnamon, cloves, and a dash of rum (optional). Serve it cold during Christmas parties—it’s vibrant, spicy, and festive!

c. Roselle Jam or Jelly

Simmer Roselle calyces with sugar and lemon juice to make a tangy jam. It pairs beautifully with toast, pancakes, or cheese boards.

d. Roselle Sauce for Meat and Desserts

Make a reduction sauce using Roselle extract, sugar, and balsamic vinegar. It’s perfect drizzled over roasted chicken, turkey, or even vanilla ice cream.

e. Roselle Chutney

Mix chopped Roselle with onions, chili, and spices for a flavorful chutney. It adds a unique twist to sandwiches or grilled dishes.

f. Roselle Salad Mix

Toss tender Roselle leaves with greens, avocado, and citrus dressing for a zesty, vitamin-rich salad.

With such versatility, Roselle easily earns a spot in modern American kitchens—bridging tropical tradition with contemporary flavor.


5. Roselle in American Culture and Sustainability

As Americans become more conscious about sustainable living and plant-based diets, Roselle fits perfectly into this growing movement. It’s:

  • Eco-friendly: Requires minimal pesticides and thrives in warm climates.
  • Versatile: Grown for ornamental beauty, edible leaves, and medicinal uses.
  • Zero-waste: Almost every part of the plant is usable—from calyces and leaves to seeds.

Many urban gardeners and homesteaders in Florida, California, and Texas are now cultivating Roselle as part of their farm-to-table lifestyle. Its dual role as an ornamental plant and a nutritional ingredient makes it both practical and beautiful.

Moreover, Roselle’s deep red hues and festive flavor have made it a seasonal favorite in American holiday beverages—especially during Thanksgiving and Christmas. With the rise of artisanal teas, craft cocktails, and organic health products, this “tropical cranberry” is enjoying its well-deserved moment in the spotlight.


6. Fun Facts About Roselle

  • The red color in Roselle comes from natural anthocyanins, powerful antioxidants.
  • In the U.S. South, Roselle is sometimes called “Florida Cranberry.”
  • The seeds can be roasted and used as a caffeine-free coffee substitute.
  • Ancient Egyptians prized Roselle for its ability to cool the body in desert heat.
  • The plant is featured in traditional remedies for cough, cold, and digestion across Africa and Asia.

7. Final Thoughts: A Red Jewel for Every American Home

Roselle (sorrel hibiscus) is more than just a plant—it’s a celebration of color, flavor, and wellness. Whether you’re brewing a comforting cup of hibiscus tea, decorating your garden with its scarlet blossoms, or preparing a festive sorrel punch for Christmas, Roselle adds a burst of life to every season.

As Americans embrace natural health trends, home gardening, and global flavors, Roselle stands out as the perfect blend of tradition and modern wellness. So, the next time you’re looking for something vibrant to grow or cook, let Roselle bring its tropical charm and crimson cheer to your table—and your heart.


How to Grow Amaranth Microgreens America’s Vibrant Superfood Packed with Color, Flavor, and Nutrition

How to Grow Amaranth Microgreens America’s Vibrant Superfood Packed with Color, Flavor, and Nutrition

If you’re looking to add a pop of color, nutrition, and flavor to your meals, amaranth microgreens might just become your next favorite superfood. With their striking red, pink, or purple stems and mild, earthy taste, these tiny greens are taking over kitchens and urban gardens across America.

Packed with vitamins, minerals, and antioxidants, amaranth microgreens are not only beautiful but also incredibly nutritious and easy to grow right at home. Whether you live in a city apartment or a suburban house, you can cultivate these vibrant greens in just 10 days and enjoy a fresh, nutrient-rich harvest year-round.

In this guide, you’ll discover everything about growing, harvesting, and using amaranth microgreens, along with the health benefits that make them one of the most exciting microgreens in the U.S. wellness and gardening community.


What Are Amaranth Microgreens?

Amaranth microgreens are the young seedlings of the amaranth plant, harvested when they are about one to two inches tall. While amaranth is often known for its ancient grains, its sprouts are equally valuable for their flavor and nutrients.

These microgreens mature quickly — usually within 8 to 12 days — making them a perfect crop for home growers. Their vivid red and magenta colors make them a favorite among chefs who love adding natural beauty to salads, soups, and main dishes.

Don’t let their small size fool you — these greens are packed with powerful nutrition that supports energy, immunity, and wellness.


Nutritional Benefits of Amaranth Microgreens

Amaranth microgreens are one of the most nutrient-rich microgreens you can grow. They provide an excellent mix of vitamins, minerals, and antioxidants essential for overall health.

1. High in Vitamins A, C, and K

These vitamins strengthen your immune system, promote bone health, and help maintain glowing skin.

2. Complete Plant-Based Protein

Amaranth microgreens contain all nine essential amino acids, making them a complete source of protein — a rare trait for a plant-based food.

3. Rich in Iron and Calcium

They’re a great source of iron, which supports healthy blood, and calcium, which strengthens bones and teeth.

4. Powerful Antioxidants

Their vibrant red and purple colors come from betalains — antioxidants that help fight inflammation and oxidative stress.

5. Low-Calorie and High-Energy

These greens are light, filling, and nutrient-dense, making them a perfect addition to weight management or fitness-focused diets.


Why Amaranth Microgreens Are Trending in America

Microgreens have become a major trend in the United States as more people look for ways to eat healthy, fresh, and sustainable foods. Amaranth microgreens, in particular, stand out because they combine bright visual appeal with powerful nutrition.

Across America, from New York chefs to California gardeners, people love these microgreens for several reasons:

  • Visually stunning: Their colors add a gourmet touch to meals.
  • Fast-growing: Ready in just 8 to 12 days.
  • Space-saving: Perfect for apartments and indoor gardens.
  • Eco-friendly: Require minimal water and no chemicals.
  • Fresh all year: Can be grown indoors in any season.

Amaranth microgreens perfectly fit the modern American lifestyle — healthy, convenient, and beautiful.


How to Grow Amaranth Microgreens at Home

Growing amaranth microgreens at home is easy and rewarding. Even if you’ve never grown plants before, you can harvest your own greens in less than two weeks.

You’ll Need:

  • Amaranth seeds (for microgreens)
  • A shallow growing tray with drainage holes
  • Organic potting soil or coco coir
  • Spray bottle or watering can
  • Natural sunlight or a grow light

Step-by-Step Growing Instructions

1. Prepare the Tray

Fill the tray with about one to two inches of moist soil or coco coir. Level the surface gently but do not pack it tightly.

2. Sow the Seeds

Sprinkle amaranth seeds evenly across the soil surface. Since they’re small, a light dusting is enough. Press them gently to ensure contact with the soil but don’t bury them.

3. Mist and Cover

Mist the seeds lightly with water and cover the tray with another tray or lid to create a warm, dark environment for germination.

4. Germination (Days 1–3)

Keep the tray in a warm location at about 70–75°F. Mist daily to keep the soil slightly moist but not soggy.

5. Provide Light (Days 4–10)

Once the seeds sprout, remove the cover and place the tray in bright, indirect sunlight or under a grow light. The greens will start developing their bright color and sturdy stems.

6. Water Carefully

Continue misting once or twice daily. Make sure there’s no standing water, as that can lead to mold.

7. Harvest (Days 8–12)

When your amaranth microgreens reach 2–3 inches tall and have developed a rich color, use clean scissors to cut them just above the soil.

8. Rinse and Store

Rinse the greens gently with cold water, pat dry, and store them in a sealed container in the refrigerator for up to five days.


What Do Amaranth Microgreens Taste Like?

Amaranth microgreens have a mild, earthy, and slightly sweet flavor. Their taste is more delicate than spicy varieties like mustard or arugula microgreens, making them a perfect complement to both savory and sweet dishes.

Their tender texture and striking color make them ideal for garnishing salads, soups, sandwiches, and even desserts.


How to Use Amaranth Microgreens in Your Meals

These microgreens aren’t just nutritious — they’re incredibly versatile. Here are some creative ways to add them to your daily meals:

1. Fresh Salads

Mix amaranth microgreens with spinach, cherry tomatoes, and cucumber. Add a light lemon or olive oil dressing for a refreshing, nutrient-rich salad.

2. Sandwiches and Wraps

Use them instead of lettuce for a burst of color and nutrition. They pair beautifully with avocado, hummus, and grilled vegetables.

3. Pasta and Grain Bowls

Sprinkle the greens over warm pasta, quinoa, or rice bowls just before serving for a pop of color and mild flavor.

4. Smoothies and Juices

Blend a handful of amaranth microgreens into your morning smoothie for a natural energy boost and added nutrients.

5. Garnishes and Platters

Use them as an elegant garnish for soups, pizza, or desserts. Their vivid hue makes any dish look gourmet.


Tips for Successful Growth

To ensure a healthy and colorful harvest, keep these key tips in mind:

  • Always use clean trays and tools to prevent mold.
  • Avoid overwatering; mist lightly once or twice daily.
  • Ensure good air circulation around your tray.
  • Rotate the tray daily for even light exposure.
  • Harvest on time — younger greens are more tender and flavorful.

Common Issues and Solutions

ProblemCauseSolution
Mold growthToo much moistureReduce watering and improve airflow
Pale colorLack of lightMove to a sunnier spot or use a grow light
Weak stemsPoor light or too much moistureIncrease light exposure and reduce misting
Uneven growthDense seedingSpread seeds more evenly next time

Sustainability and Cost Benefits

Growing amaranth microgreens at home supports both your health and the planet.

  • Eco-friendly: They require minimal water and zero chemicals.
  • Budget-conscious: A few seeds produce multiple trays of greens.
  • Low waste: Grow exactly what you need, when you need it.
  • Reusable supplies: Most trays and tools can be used again and again.

For Americans embracing sustainable living, microgreens are an easy way to eat locally, cut grocery costs, and reduce food waste.


Health and Culinary Value

Amaranth microgreens blend health benefits with gourmet appeal. Their brilliant colors indicate strong antioxidant content, while their mild flavor enhances countless recipes. From upscale restaurants to home kitchens, these greens are redefining what fresh and nutritious eating looks like.

They fit perfectly into the growing trend of homegrown, organic food — ideal for anyone who values clean eating and fresh ingredients.


Conclusion: Small Greens, Big Benefits

Amaranth microgreens are proof that small things can make a big difference. They’re colorful, nutritious, and surprisingly easy to grow. Within days, you can have a harvest that boosts your meals with natural vitamins, minerals, and protein.

Whether you’re a chef looking to impress, a health-conscious eater, or a home gardener seeking a quick win, amaranth microgreens offer the perfect combination of beauty and nourishment.

Start your microgreen journey today — grow your own vibrant, flavorful, and nutrient-packed amaranth microgreens right from your windowsill, and enjoy a fresh touch of wellness every day.

How to Grow and Enjoy Arugula Microgreens America’s Zesty Supergreen for Fresh Flavor and Nutrition

How to Grow and Enjoy Arugula Microgreens America’s Zesty Supergreen for Fresh Flavor and Nutrition

If you love the fresh, peppery bite of arugula in your salads, you’ll be thrilled to discover arugula microgreens — the younger, bolder, and more nutrient-dense version of the beloved leafy green. These tiny greens are packed with flavor and loaded with vitamins, making them a rising star in America’s health and gardening scene.

Arugula microgreens, also known as rocket microgreens, deliver a zesty, mustard-like kick that elevates any dish — from omelets and sandwiches to pasta and smoothies. Best of all, they’re incredibly easy to grow at home, even if you live in a small apartment or have never gardened before.

In this complete guide, we’ll explore the nutritional benefits, growing techniques, and delicious ways to use arugula microgreens, helping you embrace one of the most flavorful superfoods sweeping across American kitchens.


What Are Arugula Microgreens?

Arugula microgreens are the young seedlings of the arugula plant (Eruca vesicaria), harvested when they’re just 7–12 days old — right after they sprout their first true leaves. At this stage, they’re small, delicate, and bursting with intense, spicy flavor reminiscent of mature arugula but even more concentrated.

They’re often grown in shallow trays indoors and require minimal effort. With just a little soil, water, and light, you can grow fresh arugula microgreens year-round — perfect for anyone who wants farm-to-table freshness without leaving home.

Because of their sharp, tangy taste, they’re a favorite among American chefs, health enthusiasts, and home gardeners who crave a touch of boldness in their meals.


Nutritional Benefits of Arugula Microgreens

Arugula microgreens aren’t just flavorful — they’re one of the most nutrient-dense microgreens you can grow. Studies have shown that microgreens can contain up to 40 times more vitamins and antioxidants than their mature counterparts.

Here’s why arugula microgreens deserve a permanent place in your kitchen:

1. Packed with Vitamins and Minerals

These greens are rich in vitamins A, C, K, and E, as well as calcium, potassium, and magnesium — all essential for strong bones, glowing skin, and a healthy immune system.

2. High in Antioxidants

Arugula microgreens are loaded with glucosinolates and flavonoids, natural antioxidants that help combat free radicals, reduce inflammation, and support overall wellness.

3. Supports Heart Health

The potassium and fiber in arugula microgreens promote healthy blood pressure levels and reduce the risk of heart disease.

4. Great for Digestion and Detoxification

The chlorophyll and fiber in these greens support digestion, detoxify the liver, and help keep your gut healthy.

5. Perfect for Weight Management

Low in calories but high in nutrients, arugula microgreens add bulk and flavor to your meals without adding extra calories — an excellent option for anyone looking to maintain a balanced diet.


Why Arugula Microgreens Are a Favorite in American Homes

The growing trend of microgreen gardening has swept across the U.S. in recent years. Americans are embracing these tiny greens for their convenience, flavor, and sustainability. Arugula microgreens stand out because they combine speedy growth, bold taste, and powerful nutrition.

Here’s why they’re perfect for home gardeners:

  • Fast-growing: Ready to harvest in 7–10 days.
  • Space-saving: Grow on a windowsill, countertop, or under a grow light.
  • Year-round harvest: Perfect for any season.
  • Budget-friendly: A small pack of seeds can yield multiple trays.
  • Eco-conscious: No packaging waste or food miles — just pure freshness.

Whether you’re in a New York apartment or a California home, arugula microgreens make healthy eating easy and exciting.


How to Grow Arugula Microgreens at Home

Growing arugula microgreens is quick, simple, and incredibly satisfying. You don’t need fancy tools or a big garden — just a few minutes of daily care.

What You’ll Need:

  • Arugula seeds (labeled for microgreens or sprouting)
  • Shallow tray or container (with drainage holes)
  • Organic potting soil or coco coir
  • Spray bottle or gentle watering can
  • Sunlight or LED grow light

Step-by-Step Growing Guide

1. Prepare Your Tray

Fill your tray with about 1.5–2 inches of moist potting soil or coco coir. Smooth the surface without compacting it.

2. Sow the Seeds

Sprinkle arugula seeds evenly across the surface. You can plant them densely, as microgreens don’t require much space to grow.

3. Mist and Cover

Lightly mist the seeds with water using a spray bottle. Then cover the tray with a lid or another tray to create a dark, humid environment for germination.

4. Germination Stage

Keep the tray in a warm, dark place (around 65–75°F) for 2–3 days. Mist daily to keep the soil slightly moist.

5. Give Them Light

Once you see small green shoots emerging, remove the cover and place the tray under bright sunlight or a grow light. Arugula microgreens love light — it helps them develop a vibrant green color and strong flavor.

6. Water Regularly

Continue misting daily to maintain moisture. Avoid overwatering, as soggy soil can cause mold or root rot.

7. Harvest Time!

Your arugula microgreens will be ready to harvest in 7–10 days, when they’re about 2–3 inches tall. Use clean scissors to cut them just above the soil line.

8. Rinse and Store

Rinse your fresh greens gently with cool water, pat dry, and store them in an airtight container in the fridge. They’ll stay crisp and flavorful for up to 5–7 days.


Flavor Profile: What Arugula Microgreens Taste Like

Arugula microgreens have a distinct peppery flavor that’s slightly tangy and earthy, often compared to mustard or radish greens. Their sharp, zesty bite makes them an excellent addition to both raw and cooked dishes.

The flavor intensifies as the greens mature, so if you prefer a milder taste, harvest them earlier.


Delicious Ways to Enjoy Arugula Microgreens

These greens are not only nutritious but also incredibly versatile. Their peppery kick complements both light and hearty dishes. Try these delicious ideas:

1. Toss into Fresh Salads

Mix arugula microgreens with baby spinach, cherry tomatoes, and goat cheese for a quick and flavorful salad. Drizzle with balsamic vinaigrette for a restaurant-style finish.

2. Top Your Breakfast Favorites

Sprinkle microgreens over avocado toast, omelets, or scrambled eggs for a spicy, nutritious boost.

3. Add to Pasta or Grain Bowls

Toss arugula microgreens into warm pasta, quinoa, or rice bowls right before serving. The heat slightly wilts the greens, mellowing their flavor.

4. Use as a Sandwich or Burger Layer

Replace lettuce with arugula microgreens for a more sophisticated twist. They add crunch, flavor, and a gourmet touch to any sandwich.

5. Blend into Smoothies or Juices

Add a handful to your green smoothie for an extra vitamin kick. They pair perfectly with apples, spinach, and citrus fruits.

6. Garnish Soups and Pizzas

Use arugula microgreens as a garnish for pizza, soups, or roasted vegetables. Their peppery flavor balances rich, savory dishes beautifully.


Tips for Growing Healthy Arugula Microgreens

For lush, flavorful greens, keep these pro tips in mind:

  • Use fresh, untreated seeds: Choose high-quality seeds labeled for microgreens.
  • Avoid overwatering: Keep soil moist, not wet, to prevent mold.
  • Ensure good airflow: A small fan can help prevent dampness.
  • Rotate your tray daily: Promotes even light exposure.
  • Harvest young: The younger the greens, the milder the flavor.

Troubleshooting Common Problems

ProblemCauseSolution
Mold growthOverwatering or poor ventilationWater less and increase air circulation
Yellow leavesLack of sunlightMove to a brighter area
Bitter tasteLate harvestHarvest earlier (7–9 days)
Weak stemsInsufficient lightProvide at least 6–8 hours of light daily

Environmental and Economic Benefits

Growing arugula microgreens at home supports both your health and the planet.

  • Eco-friendly: No plastic packaging or transport emissions.
  • Cost-effective: A few tablespoons of seeds yield several trays of greens.
  • Sustainable: You can regrow trays year-round with minimal resources.
  • Fresh and chemical-free: Control every step of the process for pure, organic greens.

For Americans focused on sustainability and self-sufficiency, microgreens are a simple yet impactful step toward greener living.


Conclusion: Fresh, Fast, and Flavorful

Arugula microgreens prove that the smallest plants can make the biggest impact — in flavor, nutrition, and sustainability. With their peppery zest, vibrant color, and health-boosting properties, these microgreens are a perfect fit for modern American kitchens.

They’re easy to grow, quick to harvest, and endlessly versatile. Whether you sprinkle them over your morning eggs, layer them into sandwiches, or use them as a finishing touch for your favorite dishes, arugula microgreens bring a gourmet touch and a healthy boost to every meal.

So grab a tray, plant your seeds, and start growing your own zesty supergreens — because nothing tastes better than fresh, homegrown goodness straight from your windowsill.

How to Grow and Enjoy Mustard Microgreens The Spicy, Nutrient-Packed Supergreen America Loves

How to Grow and Enjoy Mustard Microgreens The Spicy, Nutrient-Packed Supergreen America Loves

If you’re looking to add bold flavor and serious nutrition to your meals, mustard microgreens are your new best friend. These vibrant, peppery greens pack a punch — both in taste and in health benefits. Loved for their distinctive spicy flavor, they’re quickly becoming a favorite among home gardeners, chefs, and health enthusiasts across the United States.

Whether sprinkled on sandwiches, tossed into salads, or blended into smoothies, mustard microgreens bring a burst of freshness and zest to every bite. Even better? They’re incredibly easy to grow right on your kitchen counter — no backyard or green thumb required!

In this comprehensive guide, we’ll cover everything you need to know about mustard microgreens: their nutritional benefits, how to grow them at home, and delicious ways to enjoy them in your daily diet.


What Are Mustard Microgreens?

Mustard microgreens are the young, tender shoots of the mustard plant (Brassica juncea), harvested just 7–10 days after sprouting. At this early stage, the greens are packed with flavor — offering a tangy, spicy kick similar to wasabi or horseradish — and are loaded with nutrients.

You’ll find mustard microgreens in several colorful varieties, including:

  • Green mustard – mild and peppery
  • Red or purple mustard – vibrant color and stronger bite
  • Mizuna and Osaka mustard – slightly sweet with a tangy twist

Because they grow fast and require little space, mustard microgreens are perfect for urban gardeners and American households looking to eat healthier, fresher, and more sustainably.


Nutritional Powerhouse: Why Mustard Microgreens Deserve a Spot on Your Plate

These little greens may be small, but their nutrient density is off the charts. Studies show that microgreens can contain 4–40 times more nutrients than mature plants.

Here’s what makes mustard microgreens stand out:

1. Packed with Vitamins and Minerals

Mustard microgreens are rich in vitamins A, C, E, and K, along with calcium, potassium, iron, and magnesium. These nutrients support strong immunity, glowing skin, and healthy bones.

2. High in Antioxidants

They contain powerful antioxidants like beta-carotene and lutein, which protect your cells from free radical damage and help reduce inflammation.

3. Supports Heart and Digestive Health

Thanks to their natural compounds like glucosinolates, mustard microgreens may help lower cholesterol levels and support gut health.

4. Boosts Immunity and Detoxification

The spicy compounds that give mustard its kick — such as allyl isothiocyanate — also help detoxify the liver and strengthen immune defenses.

5. Great for Weight Loss and Energy

Low in calories but high in nutrients, these greens keep you energized and satisfied without adding extra weight — a perfect fit for busy, health-conscious Americans.


How to Grow Mustard Microgreens at Home

One of the best things about mustard microgreens is how fast and easy they are to grow. Whether you have a sunny window or a small grow light, you can enjoy fresh greens in less than two weeks.

What You’ll Need:

  • Mustard seeds (yellow, brown, or red)
  • Shallow tray or container (with drainage holes)
  • Organic potting soil or coco coir
  • Spray bottle or watering can
  • Sunlight or LED grow light

Step-by-Step Growing Guide

1. Prepare the Seeds

No need to soak mustard seeds — they germinate quickly. Just make sure they’re clean and labeled for microgreen growing (no treated seeds).

2. Fill the Tray

Add about 1.5–2 inches of moist soil or coco coir to your tray. Gently press the surface flat.

3. Sow the Seeds

Sprinkle the mustard seeds evenly across the soil. You can scatter them densely since microgreens don’t need much room.

4. Mist and Cover

Use a spray bottle to mist the seeds with water, then cover the tray with a lid or another tray to block light. Keep them in a dark, warm spot (around 70°F) for 2–3 days.

5. Light Exposure

When the seeds sprout, remove the cover and place the tray near a sunny window or under a grow light. Mustard microgreens love bright light — it helps them develop that vibrant green or purple hue.

6. Water Regularly

Mist daily to keep the soil moist but not waterlogged. Overwatering can cause mold, so aim for a balance.

7. Harvest Time!

Your mustard microgreens will be ready to harvest when they’re 2–3 inches tall, usually around 7–10 days after planting. Use clean scissors to snip them just above the soil line.

8. Rinse and Store

Rinse your freshly cut greens gently, dry them, and store them in an airtight container in the fridge. They’ll stay crisp and flavorful for up to a week.


Mustard Microgreen Varieties to Try

There are several exciting mustard varieties to grow, each with its own flavor and look:

VarietyFlavor ProfileColorSpice Level
Yellow MustardMild and tangyBright greenLow
Red Giant MustardPeppery, boldDeep red-purpleMedium-High
Osaka PurpleSweet and spicyDark green with purple veinsHigh
MizunaLight, freshGreenMild

Each variety offers a slightly different taste experience, making mustard microgreens a fun crop to experiment with.


Delicious Ways to Enjoy Mustard Microgreens

These zesty greens are as versatile as they are nutritious. Here are some delicious ways to use mustard microgreens in everyday meals:

1. Brighten Up Salads

Add a handful of mustard microgreens to your salads for a tangy, peppery flavor. They pair beautifully with avocado, roasted nuts, and citrus dressings.

2. Layer on Sandwiches and Burgers

Swap out lettuce for mustard microgreens to give your sandwiches or burgers a gourmet, spicy edge. They add a satisfying crunch and a pop of freshness.

3. Top Your Eggs or Avocado Toast

Sprinkle microgreens over scrambled eggs, omelets, or avocado toast for a colorful, nutrient-rich breakfast.

4. Blend into Smoothies or Juices

Add a handful to your green smoothie for a subtle spicy boost that complements fruit and leafy greens.

5. Mix into Pasta or Grain Bowls

Toss them into pasta, quinoa, or rice bowls just before serving. The residual heat will lightly wilt the greens and mellow their spice.

6. Use as a Garnish

Top soups, tacos, or roasted vegetables with mustard microgreens to add vibrant color and flavor.


Tips for Perfect Mustard Microgreens

Even though mustard microgreens are easy to grow, these tips will ensure the best results:

  • Use quality seeds: Always choose seeds labeled for sprouting or microgreens.
  • Avoid overwatering: Too much moisture encourages mold.
  • Ensure air circulation: A small fan nearby can prevent dampness.
  • Rotate the tray: Turn it daily for even light exposure.
  • Harvest early: For the best flavor, harvest when the first true leaves appear.

Common Growing Problems and Solutions

ProblemCauseSolution
Mold or fungusExcess moisture, poor ventilationWater less and increase airflow
Yellow leavesLack of lightMove tray to a sunnier spot
Bitter tasteLate harvestHarvest earlier, around 7–10 days
Uneven growthOvercrowded seedsSpace seeds evenly across the tray

Why Mustard Microgreens Are Perfect for American Homes

With the growing demand for homegrown, organic, and sustainable food, mustard microgreens fit perfectly into the modern American lifestyle.

  • Eco-friendly: Grown locally — zero transport, zero packaging waste.
  • Space-saving: Perfect for apartments or small kitchens.
  • Fast-growing: Harvest-ready in under two weeks.
  • Budget-friendly: A handful of seeds can yield several trays.
  • Healthy eating made simple: Fresh greens whenever you want them.

Whether you’re living in a high-rise in New York or a farmhouse in Texas, growing your own mustard microgreens means fresher food, better nutrition, and a more sustainable way to eat.


Conclusion: Spice Up Your Life with Mustard Microgreens

Mustard microgreens bring more than flavor — they bring life, color, and vitality to your kitchen. With their signature spicy taste, vibrant hues, and incredible nutrient content, they’re the perfect microgreen for anyone looking to take their health and home gardening to the next level.

Easy to grow, quick to harvest, and endlessly versatile, mustard microgreens embody everything Americans love about homegrown food — convenience, sustainability, and great taste.

So grab some seeds, plant your tray, and get ready to add a little spice to your life. Because with mustard microgreens, every meal becomes a fresh, flavorful celebration of health and homegrown goodness.


How to Grow and Enjoy Pea Shoots The Fresh, Crunchy Supergreen Taking Over American Kitchens

How to Grow and Enjoy Pea Shoots The Fresh, Crunchy Supergreen Taking Over American Kitchens

If you’re searching for a way to add fresh crunch and powerful nutrition to your meals, look no further than pea shoots. These tender, vibrant greens — the young leaves and stems of the pea plant — are taking over home gardens and health-conscious kitchens across the U.S. With their crisp texture and mildly sweet, earthy flavor, pea shoots are one of the easiest and most rewarding microgreens to grow indoors or outdoors.

Packed with vitamins, minerals, and plant-based protein, these bright greens are a true superfood. Whether tossed into salads, layered on sandwiches, or sautéed into a stir-fry, pea shoots deliver both flavor and nourishment in every bite.

In this article, you’ll learn everything about pea shoots — their health benefits, simple growing techniques, and creative ways to use them in your favorite American dishes.


What Are Pea Shoots?

Pea shoots are the young tendrils and leaves of the pea plant (Pisum sativum), harvested when they’re just a few inches tall. Unlike full-grown peas, which require weeks to mature, these tender greens are ready to eat within 10–14 days after planting.

They taste like fresh green peas — slightly sweet, grassy, and refreshing — but with a more delicate, crunchy texture. Because of their versatility and short growth cycle, pea shoots are a top choice for urban gardeners, home chefs, and health enthusiasts who want fresh produce year-round.

You can grow them from a variety of pea seeds, including:

  • Sugar snap peas
  • Snow peas
  • Green peas (garden peas)

The Nutritional Power of Pea Shoots

Don’t be fooled by their small size — pea shoots are loaded with nutrients. They pack a remarkable punch of vitamins, minerals, and antioxidants that support a healthy lifestyle.

1. Rich in Vitamins and Minerals

Pea shoots are high in vitamins A, C, and K, as well as folate and iron — essential for immune strength, blood health, and energy metabolism.

2. Excellent Source of Plant-Based Protein

They contain around 3–4 grams of protein per cup, making them one of the best protein sources among leafy greens — perfect for vegan and vegetarian diets.

3. High in Antioxidants

Pea shoots contain powerful antioxidants such as beta-carotene and polyphenols, which help protect against cell damage and support youthful skin and overall vitality.

4. Supports Heart and Bone Health

Thanks to vitamin K and folate, pea shoots promote healthy blood clotting and strengthen bones — ideal for anyone looking to maintain long-term wellness.

5. Great for Weight Management

Low in calories and high in fiber, pea shoots keep you feeling full while boosting your metabolism. A single handful adds volume and nutrition to meals without the extra calories.


Why Americans Are Growing Pea Shoots at Home

In recent years, homegrown microgreens have become a major trend across the United States — and for good reason. Pea shoots are perfect for busy households and small spaces.

Here’s why they’re a favorite:

  • Quick to grow: Ready to harvest in less than two weeks.
  • Minimal space needed: Ideal for windowsills or countertops.
  • Easy to care for: Just light, water, and a bit of patience.
  • Affordable and sustainable: Grow fresh greens for pennies per tray.
  • Year-round supply: Even during cold American winters.

Whether you live in a city apartment or a suburban home, growing your own pea shoots is one of the most satisfying ways to add homegrown goodness to your meals.


How to Grow Pea Shoots at Home

Here’s your step-by-step guide to growing delicious pea shoots indoors or outdoors.

What You’ll Need:

  • Pea seeds (snow peas or sugar snap peas work best)
  • Seed tray or shallow container (with drainage holes)
  • Organic potting soil or coco coir
  • Spray bottle or watering can
  • Sunlight or a grow light

Step-by-Step Growing Process:

1. Soak the Seeds
Start by soaking your pea seeds in cool water for 8–12 hours or overnight. This helps soften the seed coat and promotes faster germination.

2. Prepare the Tray
Fill your tray with about 1.5 to 2 inches of moist soil. Flatten the surface evenly, but don’t compact it.

3. Sow the Seeds
Spread the soaked seeds evenly over the soil surface. It’s okay if they’re close together — pea shoots don’t need much space.

4. Cover and Wait
Cover the tray with a thin layer of soil or a damp paper towel. Keep the tray in a dark, warm spot for 2–3 days until the seeds begin to sprout.

5. Water Regularly
Mist the seeds gently with water once or twice a day to keep the soil moist but not soggy.

6. Provide Light
Once the sprouts appear, move the tray to a bright windowsill or under a grow light. Pea shoots love sunlight — aim for at least 6–8 hours of light per day.

7. Harvest
When the shoots are 4–6 inches tall (usually around day 10–14), they’re ready to harvest. Use clean scissors to cut them just above the soil line.

8. Rinse and Store
Rinse your pea shoots with cool water and store them in an airtight container in the refrigerator. They’ll stay fresh for up to a week.


Creative Ways to Use Pea Shoots

Pea shoots are one of the most versatile greens in the kitchen. Their bright, pea-like flavor makes them an easy addition to many dishes. Here are some tasty ways to use them:

1. Toss into Fresh Salads

Combine pea shoots with baby spinach, radishes, and avocado for a crunchy, refreshing salad. Top with lemon vinaigrette for a burst of flavor.

2. Add to Stir-Fries

Toss pea shoots into your favorite Asian-style stir-fry during the last minute of cooking. Their tender leaves wilt beautifully and soak up sauces like soy or sesame.

3. Use as a Sandwich Filler

Replace lettuce with pea shoots for a fresh, sweet crunch in sandwiches, wraps, or burgers. They pair perfectly with grilled chicken or roasted veggies.

4. Mix into Soups and Noodles

Add pea shoots to hot soups or ramen just before serving. The heat softens them slightly without losing their color or nutrients.

5. Blend into Smoothies or Juices

For a green smoothie boost, blend pea shoots with pineapple, banana, and almond milk. They add mild sweetness and an extra kick of vitamins.

6. Make Pea Shoot Pesto

Blend pea shoots, olive oil, garlic, lemon, and walnuts for a bright green pesto that’s perfect for pasta, chicken, or roasted vegetables.


Tips for Success

Growing pea shoots is easy, but a few simple tricks will help you get the best harvest every time:

  • Choose untreated seeds: Always buy seeds labeled for sprouting or microgreens.
  • Keep them moist, not wet: Overwatering can cause mold.
  • Ensure good airflow: Use a small fan if needed to prevent dampness.
  • Rotate your tray daily: Ensures even sunlight and growth.
  • Harvest before tendrils harden: Young shoots are the sweetest and most tender.

Troubleshooting Common Problems

ProblemPossible CauseSolution
Mold growthToo much water or poor air flowWater less and improve ventilation
Yellow shootsLack of sunlightMove tray to a brighter location
Weak stemsInsufficient light or overcrowdingSpace seeds evenly and provide direct light
Bitter tasteLate harvestHarvest earlier, around 4–6 inches tall

Environmental and Economic Benefits

Growing pea shoots at home isn’t just great for your health — it’s also a sustainable and budget-friendly choice.

  • Eco-friendly: No plastic packaging or long-distance transport.
  • Cost-effective: A handful of seeds can produce multiple trays of greens.
  • Year-round greens: Fresh harvest even in winter months.
  • Zero waste: Compost the leftover roots and soil after harvest.

With grocery prices rising across America, homegrown microgreens like pea shoots help reduce food costs while offering a constant supply of nutrient-rich produce.


Conclusion: Small Shoots, Big Nutrition

Pea shoots are the perfect example of how simple gardening can lead to extraordinary results. From seed to plate in less than two weeks, these tiny greens bring freshness, nutrition, and a touch of homegrown joy to your kitchen.

Their sweet flavor and crisp texture make them a favorite among chefs and home cooks alike, while their easy-growing nature makes them ideal for beginners. Whether you live in New York, California, or anywhere in between, pea shoots are your ticket to fresher, healthier, and greener eating.

So grab a tray, sprinkle some seeds, and watch your mini garden come to life — one delicious pea shoot at a time.

How to Grow and Enjoy Sunflower Shoots America’s New Favorite Superfood for Health and Flavor

How to Grow and Enjoy Sunflower Shoots America’s New Favorite Superfood for Health and Flavor

Sunflowers are a symbol of warmth, optimism, and the golden days of summer. But did you know that their young shoots — often called sunflower microgreens or sunflower sprouts — are one of the most nutritious and delicious greens you can grow right at home?

Packed with vitamins, minerals, and plant-based protein, sunflower shoots are quickly becoming a go-to favorite for American gardeners, home chefs, and wellness enthusiasts alike. Whether you’re cultivating them on a sunny windowsill or adding them to your next smoothie or salad, these vibrant greens bring both nutrition and joy to your plate.

This detailed guide covers everything you need to know about growing sunflower shoots, their powerful health benefits, and creative ways to use them in everyday meals.


What Are Sunflower Shoots?

Sunflower shoots are the tender, young seedlings of the common sunflower (Helianthus annuus). Harvested just before they develop true leaves, these shoots are crisp, nutty, and full of life.

They’re often grown indoors in trays, just like pea shoots or wheatgrass, and are typically ready to harvest within 7 to 10 days. Because they grow so quickly and require minimal effort, sunflower shoots are perfect for urban gardeners, apartment dwellers, or anyone who wants fresh greens year-round.


The Nutritional Benefits of Sunflower Shoots

Sunflower shoots are a nutritional powerhouse — a true superfood in a small package. Here’s what makes them stand out:

1. Protein-Rich Plant Power

Few microgreens compare to sunflower shoots when it comes to protein. They contain up to 25–30% protein by weight, making them an excellent addition to vegetarian, vegan, or fitness-focused diets.

2. Packed with Vitamins and Minerals

They’re loaded with:

  • Vitamin E (for healthy skin and immunity)
  • Vitamin C (to support collagen production)
  • B-complex vitamins (to boost energy)
  • Magnesium and potassium (to aid muscle function and heart health)
  • Zinc and selenium (to strengthen immunity and fertility)

3. Rich in Chlorophyll and Antioxidant

Sunflower microgreens are vibrant green because of chlorophyll — a natural detoxifier that helps your body cleanse toxins, improve oxygen flow, and support liver health.

4. Boosts Heart and Digestive Health

With fiber, healthy fats, and antioxidants, sunflower shoots support digestion, reduce cholesterol levels, and promote cardiovascular wellness.

5. Excellent for Weight Management and Energy

Because they’re low in calories but high in nutrients, sunflower shoots keep you feeling full while fueling your body with clean, plant-based energy.


How to Grow Sunflower Shoots at Home

Growing sunflower shoots is one of the easiest and most rewarding gardening projects you can try — even in the middle of winter! Here’s a simple, step-by-step guide.

What You’ll Need:

  • Sunflower seeds (choose black oil sunflower seeds for best results)
  • Seed tray or shallow container (with drainage holes)
  • Organic potting soil or coco coir
  • Spray bottle or watering can
  • Sunlight or grow light

Step-by-Step Growing Process:

1. Soak the Seeds
Soak your sunflower seeds in room-temperature water for 8–12 hours. This helps soften the seed coat and speeds up germination.

2. Prepare the Soil
Fill your tray with about 1.5 to 2 inches of moist soil or growing medium. Flatten the surface gently without compacting it.

3. Spread the Seeds
Evenly scatter the soaked seeds over the soil surface. You can place them close together, but avoid overlapping.

4. Cover and Wait
Lightly cover the seeds with a thin layer of soil or another tray to keep them dark and humid. Keep them covered for 2–3 days while they sprout.

5. Water Gently
Mist the seeds daily using a spray bottle to keep the soil moist but not soggy.

6. Give Them Light
Once the shoots begin to push through, remove the cover and place the tray in bright sunlight or under a grow light.

7. Harvest Time
After about 7–10 days, your sunflower shoots should be 3–4 inches tall with plump green leaves. Cut them just above the soil line using clean scissors.

8. Rinse and Store
Rinse the shoots gently, pat dry, and store them in the refrigerator. They stay fresh for up to 5–7 days.


Creative Ways to Enjoy Sunflower Shoots

Sunflower shoots aren’t just healthy — they’re incredibly versatile. Their nutty, crunchy texture pairs beautifully with both sweet and savory dishes. Try these delicious ideas:

1. Add to Salads

Mix sunflower shoots with baby spinach, arugula, and cherry tomatoes. Drizzle with olive oil and lemon juice for a refreshing salad packed with flavor and nutrients.

2. Use as a Sandwich Topping

Replace lettuce with sunflower shoots for a fresher crunch. They pair wonderfully with avocado toast, turkey sandwiches, or veggie wraps.

3. Blend into Smoothies

Add a handful of shoots to your morning smoothie for a green, protein-packed energy boost. Combine with banana, almond milk, and peanut butter for a creamy blend.

4. Toss into Stir-Fries and Omelets

Lightly sauté the shoots with garlic and sesame oil, or toss them into omelets just before serving for extra color and nutrition.

5. Make a Sunflower Shoot Pesto

Blend sunflower shoots with olive oil, garlic, lemon, and almonds for a vibrant pesto that tastes amazing on pasta, fish, or roasted vegetables.


Why Sunflower Shoots Are Perfect for American Homes

In the U.S., more people than ever are turning to microgreens gardening as a sustainable, affordable way to enjoy fresh food. Sunflower shoots fit perfectly into this trend:

  • They grow fast — ready in just over a week.
  • They require minimal space — ideal for apartments and condos.
  • They don’t need fancy tools — just light, water, and love.
  • They offer year-round harvests, even in winter.

For eco-conscious households, sunflower shoots are a step toward self-sufficiency and reduced grocery waste. Plus, kids love watching them grow — making them a fun educational project for families.


Tips for Success

  • Use fresh, untreated seeds: Only use seeds labeled for sprouting or microgreens to avoid chemicals.
  • Keep them hydrated: Dry soil can stunt growth; mist daily.
  • Avoid overwatering: Too much moisture can cause mold.
  • Rotate the tray: Turn it every day to ensure even sunlight exposure.
  • Harvest on time: Don’t wait too long — older shoots can turn bitter.

Common Problems and How to Fix Them

IssueCauseSolution
Mold on soilOverwatering or poor ventilationReduce moisture, improve air circulation
Yellow leavesLack of lightMove to a sunnier spot
Weak stemsToo little light or overcrowdingProvide bright light and space out seeds
Bitter tasteLate harvestHarvest shoots earlier

Environmental and Economic Benefits

Growing your own sunflower shoots isn’t just healthy — it’s sustainable and budget-friendly.

  • Less packaging waste: No need for store-bought greens in plastic.
  • Zero transport footprint: Homegrown means zero food miles.
  • Lower grocery bills: A handful of seeds can produce several trays of greens.

Plus, sunflower microgreens can be composted after harvesting, creating a zero-waste cycle that’s kind to the planet.


Conclusion: Small Shoots, Big Impact

Sunflower shoots are proof that good things come in small packages. These bright, nutrient-rich greens bring vitality, flavor, and sustainability to American kitchens and gardens. Whether you’re growing them on a sunny balcony or blending them into your morning smoothie, sunflower shoots are a joyful reminder that health and happiness often begin with a single seed.

So grab some seeds, plant your tray, and let your home bloom with the golden power of sunflower shoots — the next big thing in fresh, homegrown nutrition.