5 Vegetables To Plant In Early Spring

5 Vegetables To Plant In Early Spring

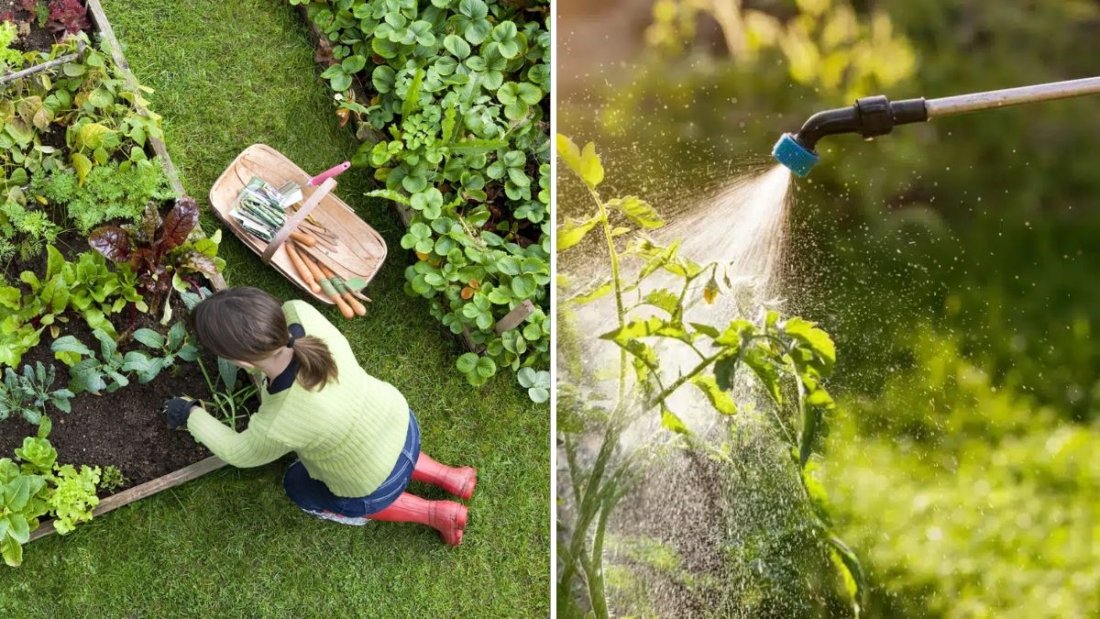
After a long winter, few things are as satisfying as digging your hands into the soil again and planting fresh vegetables. Early spring — when the days start to warm but nights are still cool — is one of the best times to start your garden.

Many vegetables thrive in these mild, moist conditions and even prefer the chill of early spring over the intense heat of summer. If you plan your planting right, you can enjoy the first homegrown harvests long before your neighbors’ gardens even wake up.

In this article, we’ll look at five of the best vegetables to plant in early spring, with detailed growing tips to help you get a strong, healthy start.


Why Early Spring Planting Matters

Early spring planting sets the foundation for a productive garden year. Cool-season vegetables grow best when temperatures hover between 10°C and 20°C (50°F to 68°F).

Planting early has several benefits:

  • Beat the heat: These crops mature before summer heat stunts growth or causes bolting.
  • Maximize your season: Early crops give you space for a second summer harvest later.
  • Save water: Spring’s natural rains keep soil moist with less watering.
  • Fewer pests: Many harmful insects haven’t emerged yet.

The trick is choosing the right vegetables — those that don’t mind a little frost and grow well in cool, moist soil.

Let’s look at the five best candidates.


1. Lettuce — The Fastest Early Green

Lettuce is one of the easiest and most rewarding vegetables to plant in early spring. It grows quickly, tolerates light frost, and gives you tender, fresh greens within weeks.

When To Plant

Sow lettuce seeds as soon as the soil can be worked, usually 2–3 weeks before your last expected frost.

How To Plant

  • Soil: Loose, rich, and well-drained with plenty of compost.
  • Sowing: Scatter seeds thinly or plant ¼ inch deep in rows about 12 inches apart.
  • Water: Keep the soil consistently moist but not soggy.

Light & Temperature

Lettuce prefers cool temperatures (10–18°C) and partial sun. Too much heat makes it bitter or causes it to bolt (flower prematurely).

Harvest Tips

Cut outer leaves when they reach 4–5 inches long for a “cut-and-come-again” harvest, or pull the entire head once it matures.

Pro tip: Grow several varieties (like butterhead, romaine, and leaf lettuce) for continuous harvests and diverse flavors.


2. Carrots — Sweet Roots That Love Cool Soil

Carrots are another classic early spring crop. Their seeds germinate in cool soil, and the roots grow sweetest when matured in mild weatherWhen To Plant

Direct sow carrots 2–4 weeks before the last frost date, once the soil temperature reaches about 7°C (45°F).

How To Plant

  • Soil: Loose, sandy, and stone-free soil about 10–12 inches deep.
  • Sowing: Plant seeds ¼ inch deep, spaced 1 inch apart. Thin seedlings to 2 inches once they sprout.
  • Water: Keep soil evenly moist — dry spells cause tough, split roots.

Light & Temperature

Carrots grow best in full sun but tolerate light shade.

Harvest Tips

Pull carrots once the tops are about ¾ inch in diameter. Gently loosen the soil before harvesting to avoid breaking them.

Pro tip: Mix carrot seeds with radish seeds when sowing. The radishes sprout quickly, marking your rows and breaking the soil for slower-growing carrots.


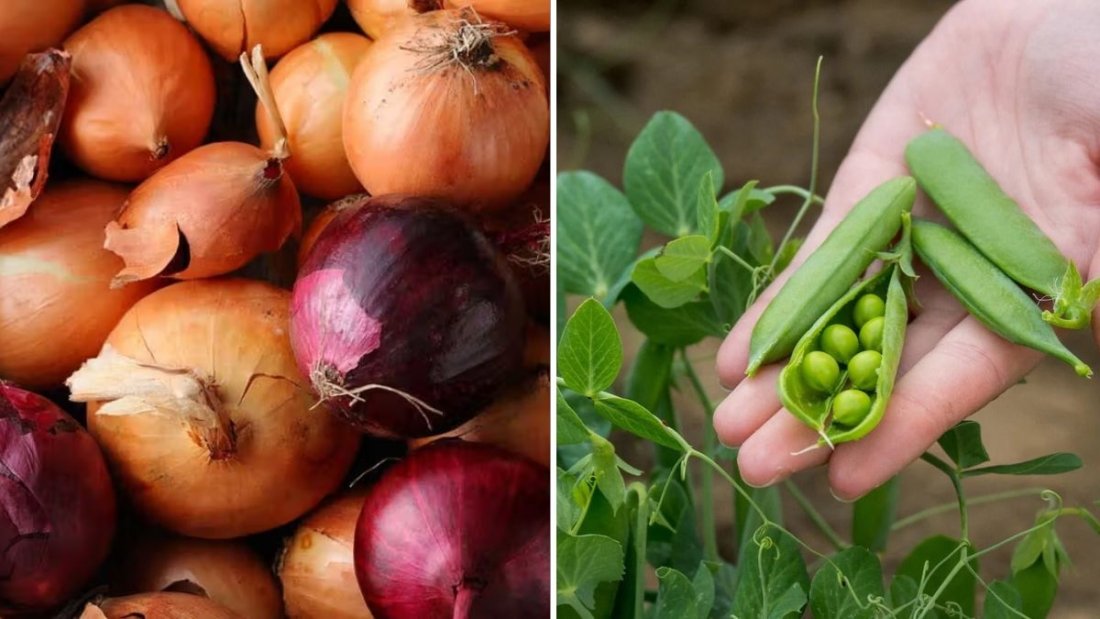
3. Onions — The Cool-Weather Staple

Onions are a garden essential — versatile, easy to grow, and ideal for early planting. They love cool conditions to establish strong roots before summer.

When To Plant

Start onions from sets (small bulbs) or transplants 4–6 weeks before the last frost date.

How To Plant

  • Soil: Loose, fertile soil enriched with compost.
  • Sowing depth: Plant onion sets 1 inch deep, spaced 4 inches apart, with rows 12 inches apart.
  • Water: Keep the soil moist during early growth.

Light & Temperature

Onions need full sunlight (6+ hours daily) to develop large bulbs.

Harvest Tips

You’ll know onions are ready when the tops yellow and fall over. Gently pull them and let them cure in a warm, dry spot for a few days before storing.

Pro tip: If you prefer fresh green onions, start harvesting when stalks reach pencil thickness — you don’t have to wait for full bulbs!


4. Broccoli — A Cold-Loving Powerhouse

Broccoli is a superstar of the early garden — packed with nutrients, easy to grow, and happiest in cool weather. It’s one of the few crops that thrives in temperatures most plants dislike.

When To Plant

Start seeds indoors 6–8 weeks before the last frost, or transplant seedlings into the garden 2–3 weeks before the last frost.

How To Plant

  • Soil: Rich, well-draining, and slightly acidic (pH 6–6.8). Add compost before planting.
  • Spacing: 18 inches apart with 24 inches between rows.
  • Water: Deeply once a week, keeping soil evenly moist.

Light & Temperature

Broccoli grows best in cool weather (12–20°C) and full sun. Too much heat can cause small or bitter heads.

Harvest Tips

Harvest when the central head is fully formed but before flower buds open. After cutting, side shoots will continue to produce smaller heads for weeks.

Pro tip: Protect young plants with row covers to shield them from cabbage worms and flea beetles.


5. Peas — The Perfect Early Spring Climber

Peas are practically made for spring gardening. They love cool temperatures, enrich the soil with nitrogen, and reward you with sweet, tender pods.

When To Plant

Sow peas directly into the ground as soon as the soil can be worked — even if there’s still a chance of light frost. Peas prefer soil temperatures around 7–13°C (45–55°F).

How To Plant

  • Soil: Well-draining, enriched with compost but not heavy in nitrogen.
  • Sowing depth: 1 inch deep, spaced 2 inches apart.
  • Support: Use a trellis or fence early — pea vines love to climb.

Light & Temperature

Peas need full sun but grow fine in partial shade during early spring.

Harvest Tips

Pick peas regularly when pods are plump but still tender. Continuous harvesting encourages new growth and more pods.

Pro tip: Try growing both snap peas (edible pods) and shelling peas (for sweet green peas) for variety.


Bonus: Early Spring Planting Tips for Success

Planting early can be rewarding — but spring weather can be unpredictable. Here’s how to protect your plants and get the best yields:

1. Warm Up the Soil

Cover garden beds with black plastic or fabric a week before planting to trap warmth and speed up germination.

2. Watch for Frost

Keep lightweight row covers or old bedsheets handy to protect seedlings on cold nights.
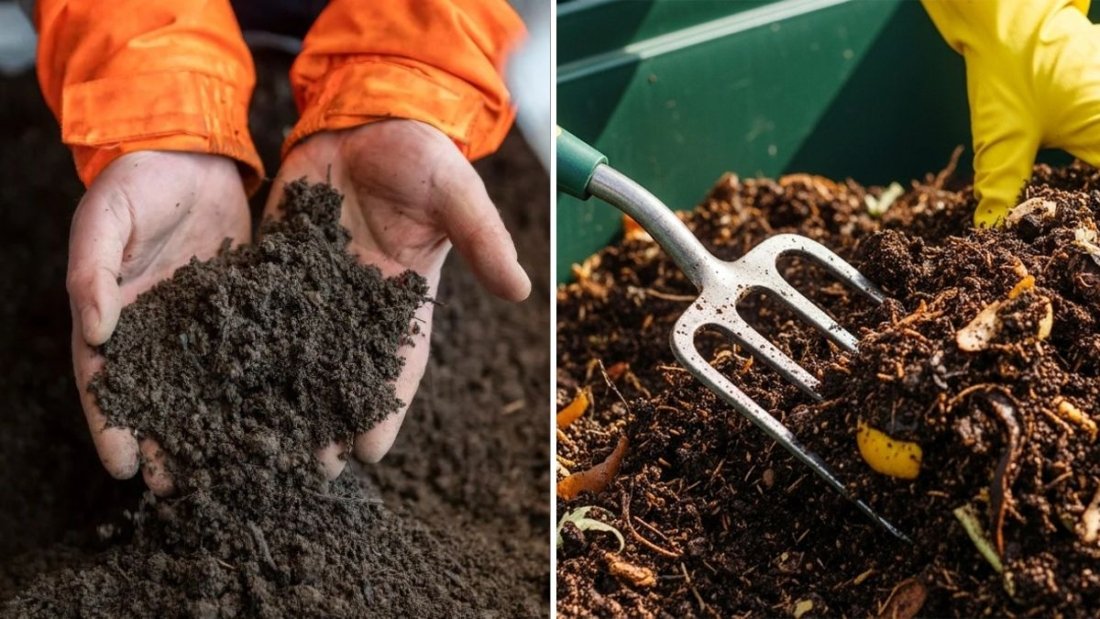
3. Improve Drainage

Spring rains can leave soil soggy. Raised beds or adding compost improves drainage and prevents root rot.

4. Stagger Plantings

Plant small batches every two weeks to enjoy a steady harvest instead of one big crop.

5. Keep an Eye on Pests

Even in early spring, slugs, aphids, and cutworms can appear. Use crushed eggshells, neem oil, or companion plants like marigolds to keep them away.


The Beauty of an Early Spring Garden

Planting early doesn’t just give you a head start — it brings your garden to life when everything else is still waking up. The bright greens of lettuce, the promise of carrots pushing through the soil, and the first pea tendrils reaching for sunlight — it’s the pure joy of gardening at its best.

By starting with these five resilient vegetables — lettuce, carrots, onions, broccoli, and peas — you’ll set yourself up for a rewarding, healthy harvest long before summer begins.

So, sharpen your tools, grab your seeds, and head outside. The soil is waiting — and so is your first taste of spring.


The Easiest Way To Keep Your Garden Pest-Free

The Easiest Way To Keep Your Garden Pest-Free

Few things are more frustrating for gardeners than watching healthy, green plants suddenly turn into a buffet for bugs. Whether it’s aphids on your roses, caterpillars chewing your cabbage, or whiteflies clouding your tomato patch — pests can undo weeks of hard work overnight.

But here’s the good news: keeping your garden pest-free doesn’t have to mean spraying harsh chemicals. The easiest and most effective pest control methods are often natural, simple, and completely safe for both your plants and the environment.

In this article, we’ll explore the easiest ways to keep your garden pest-free, including natural repellents, beneficial insects, soil health practices, and clever companion planting techniques.

Let’s dig in!


Understanding the Real Problem: Why Pests Attack

Before you reach for a spray bottle, it’s important to understand why pests show up in the first place.

Pests are attracted to stressed, weak, or imbalanced plants. If your garden is struggling with poor soil, overcrowding, or irregular watering, it becomes a magnet for insects and diseases.

Healthy plants, on the other hand, can resist pests naturally. Their leaves produce defensive oils, their roots grow stronger, and their immune systems become more resilient.

So the first step in pest prevention isn’t killing insects — it’s building plant health.


Step 1: Start with Healthy Soil

Healthy soil is the foundation of a pest-free garden. When soil is rich in nutrients and teeming with beneficial microbes, plants grow stronger and resist attacks naturally.

Here’s how to build pest-resistant soil:

  • Add compost regularly. Compost improves soil structure and boosts beneficial microorganisms that fight harmful bacteria and fungi.
  • Rotate your crops. Changing what you grow each season helps break pest and disease cycles.
  • Use mulch. Mulching with straw, dry leaves, or grass clippings retains moisture and prevents soil-borne pests from reaching plants.
  • Avoid over-fertilizing. Too much nitrogen (especially from chemical fertilizers) encourages soft, tender growth that pests love to chew.

Tip: A good compost-mulch combination does more for pest control than most store-bought insecticides.


Step 2: Choose Pest-Resistant Plants

Not all plants are equal in their pest resistance. Some varieties have natural defenses against common insects.

When planning your garden, select pest-tolerant or disease-resistant varieties.

Examples:

  • Tomatoes: ‘Celebrity’ and ‘Better Boy’ resist nematodes and wilt.
  • Cabbage: ‘Early Jersey Wakefield’ withstands aphids and worms.
  • Roses: Look for “disease-resistant” labels like Knock Out® or Rugosa.
  • Basil, Lavender, and Rosemary: Naturally repel many flying insects.

Local nurseries often carry native or climate-suited plants that pests are less likely to attack. Native plants have evolved alongside local insects — meaning they can withstand minor pest pressure without constant care.


Step 3: Encourage Beneficial Insects

Here’s a surprising truth: not all insects are enemies. Some are your garden’s best friends.

Ladybugs, lacewings, hoverflies, and predatory wasps feed on common garden pests like aphids, mites, and caterpillars.

To attract these natural defenders, you need to create a welcoming environment for them.

Plant “insectary” flowers that attract beneficial bugs:

  • Marigold
  • Dill
  • Alyssum
  • Yarrow
  • Fennel
  • Sunflower

Avoid using chemical pesticides, as they kill both bad and good insects. A balanced ecosystem is your best long-term defense.

Tip: You can even buy live ladybugs or beneficial nematodes online to release into your garden — nature’s pest patrol!


Step 4: Use Companion Planting to Repel Pests

Companion planting is one of the easiest and most effective organic pest control methods. Certain plants release natural chemicals or scents that repel insects or protect nearby crops.

Top Companion Planting Combos:

  • Tomatoes + Basil: Basil deters flies, mosquitoes, and whiteflies.
  • Carrots + Onions: The smell of onions confuses carrot flies.
  • Cabbage + Dill: Dill attracts wasps that prey on cabbage worms.
  • Cucumbers + Nasturtiums: Nasturtiums trap aphids and beetles.
  • Marigolds + Everything: Marigolds release compounds that repel nematodes and aphids.

You can use companion planting even in small terrace gardens or pots — simply pair pest-repelling herbs and flowers with vegetables.


Step 5: Practice Smart Garden Hygiene

Just like a clean kitchen discourages ants, a clean garden discourages pests.

Neglected areas with fallen leaves, weeds, or debris can harbor insects, eggs, and fungi.

Keep your garden tidy with these simple habits:

  • Remove yellowed or damaged leaves promptly.
  • Pull out weeds, which compete for nutrients and shelter pests.
  • Clear fallen fruits and vegetables immediately — they attract flies and beetles.
  • Disinfect garden tools before reusing them, especially after pruning diseased plants.

Bonus tip: Rotate your mulch or turn it occasionally. Some pests (like slugs) hide under thick, wet layers of mulch.


Step 6: Use Natural Pest Sprays (When Needed)

Even the best-maintained gardens sometimes need a little extra help. But you don’t need to resort to harsh chemicals — homemade natural sprays work wonders.

Try these gentle, effective options:

  1. Neem Oil Spray
    • Mix 2 tsp neem oil + 1 tsp mild soap + 1 liter of water.
    • Spray weekly on leaves (top and underside).
    • Works against aphids, whiteflies, mites, and mealybugs.
  2. Garlic-Chili Spray
    • Blend 10 garlic cloves + 2 chili peppers + 1 liter of water.
    • Strain, then add a few drops of dish soap.
    • Spray in the evening to avoid sunburning leaves.
  3. Soap-Water Solution
    • Mix 1 tablespoon of mild liquid soap in 1 liter of water.
    • Use for soft-bodied pests like aphids or spider mites.
  4. Vinegar Trap for Fruit Flies
    • Fill a bowl with apple cider vinegar + a drop of dish soap.
    • Leave it near infested plants to attract and trap fruit flies.

These remedies are safe, biodegradable, and easy to make at home. Always test on a few leaves before spraying the entire plant.


Step 7: Protect Plants with Physical Barriers

Sometimes, the simplest solution is a physical one.

Use barriers and traps to keep pests from reaching your plants without any sprays at all.

Smart Barrier Ideas:

  • Fine mesh nets: Keep out cabbage moths and fruit flies.
  • Row covers: Protect seedlings from beetles and leaf miners.
  • Copper tape: Deters snails and slugs around pots or raised beds.
  • Sticky traps: Catch flying insects like whiteflies or gnats.

If you grow leafy greens or strawberries, these barriers can prevent up to 90% of pest attacks — especially during the rainy season.


Step 8: Water Wisely

Believe it or not, watering habits influence pest populations.

Overwatering creates a damp environment that invites snails, fungus gnats, and root rot. Underwatering stresses plants, making them weak and prone to attack.

Follow these watering rules:

  • Water early in the morning, not late evening.
  • Focus on the base of plants, not the leaves.
  • Let the top inch of soil dry before watering again.
  • Use drip irrigation or a watering can for precision.

Proper watering builds stronger roots — your plants’ first line of defense.


Step 9: Observe Daily and Act Early

The easiest pest control is early detection. A few minutes of daily observation can save you hours of work later.

Check the undersides of leaves, stems, and buds for:

  • Tiny holes or chewed edges
  • Sticky residue (honeydew from aphids)
  • Webbing (spider mites)
  • Discoloration or curling leaves

Catch pests before they multiply. Handpick caterpillars or beetles and drop them in soapy water. Prune infected leaves right away to stop the spread.


Step 10: Create Balance, Not a Battlefield

A perfect, pest-free garden doesn’t mean zero insects. It means a balanced ecosystem where pests exist in small, controlled numbers.

When your soil is rich, plants are healthy, and beneficial insects thrive, the garden takes care of itself. Instead of constant fighting, you’ll be maintaining harmony.

Think of it this way: you’re not killing pests — you’re outsmarting them by making your garden a place where they simply can’t thrive.


Final Thoughts: A Peaceful, Pest-Free Garden Is Possible

Keeping your garden pest-free doesn’t require harsh sprays, endless maintenance, or expensive products.

It’s about prevention, balance, and observation — building an environment where plants are healthy and nature does most of the work for you.

To recap, here’s the easiest way:

  1. Start with healthy soil.
  2. Choose resistant plants.
  3. Attract beneficial insects.
  4. Use companion planting wisely.
  5. Keep the garden clean and balanced.
  6. Use natural sprays and barriers only when needed.

Follow these steps, and you’ll enjoy a lush, thriving garden that’s buzzing with life — but blissfully free of harmful pests.

How To Rotate Crops To Prevent Soil Depletion

How To Rotate Crops To Prevent Soil Depletion

If your vegetable garden doesn’t seem as productive as it used to be — plants growing slower, leaves turning yellow, or harvests shrinking — your soil might be exhausted. Just like people, soil needs rest and balance to stay healthy.

That’s where crop rotation comes in. This time-tested gardening technique keeps your soil fertile, reduces pests and diseases, and ensures steady harvests year after year.

Whether you’re growing vegetables on your terrace, in raised beds, or in a backyard plot, learning how to rotate crops properly can transform your garden into a thriving, sustainable ecosystem.

Let’s explore how to rotate crops to prevent soil depletion, step-by-step.


What Is Crop Rotation?

Crop rotation is the practice of growing different types of crops in the same area in a specific sequence over several seasons or years.

Instead of planting tomatoes in the same spot every year, you might grow beans there next season and leafy greens after that. Each type of plant affects the soil differently — some take certain nutrients, others add them back. By rotating crops, you help the soil recover naturally.

This method has been used for centuries by farmers and home gardeners alike to:

  • Maintain soil fertility
  • Reduce pest and disease buildup
  • Improve soil structure
  • Maximize yield sustainably

In short, crop rotation helps you work with nature, not against it.


Why Crop Rotation Matters

When you plant the same vegetable in the same place year after year, you create problems like:

  1. Nutrient Depletion:
    Each crop draws specific nutrients from the soil. For example, tomatoes and peppers are heavy feeders that use up a lot of nitrogen and phosphorus. Over time, the soil becomes imbalanced and less fertile.
  2. Pest & Disease Buildup:
    Pests and soil-borne diseases that attack a certain plant (like tomato blight or cabbage worms) can survive in the soil and come back stronger the next year.
  3. Poor Soil Structure:
    Some plants have deep roots that loosen the soil, while others have shallow roots. Growing the same crop repeatedly can compact or dry out certain soil layers.

Crop rotation prevents these issues by restoring nutrients, breaking pest cycles, and balancing soil health naturally — no chemicals required.


The Science Behind Crop Rotation

To understand how rotation helps, let’s look at how different crops interact with the soil:

Legumes (Beans, Peas)

  • Add nitrogen to the soil through bacteria in their root nodules.
  • Perfect for replenishing nutrient-hungry soil after heavy feeders.

Leafy Vegetables (Spinach, Lettuce, Cabbage)

  • Use moderate amounts of nitrogen and benefit from rich soil.
  • Should follow legumes to use the nitrogen they leave behind.

Fruiting Vegetables (Tomatoes, Peppers, Eggplants, Cucumbers)

  • Heavy feeders that require lots of nutrients to produce fruits.
  • Should be followed by lighter feeders or nitrogen-fixers.

Root Crops (Carrots, Beets, Onions, Garlic, Potatoes)

  • Help aerate the soil and improve texture.
  • Should follow crops that enrich the topsoil, like leafy greens.

When you plan your garden around these groups, each crop helps prepare the soil for the next — creating a self-sustaining cycle.


Step-by-Step Guide To Crop Rotation

Here’s how to rotate crops efficiently, whether you have a small garden or multiple raised beds.


Step 1: Group Your Vegetables by Family

Plants from the same botanical family often share similar nutrient needs and pests. Rotating entire plant families — not just individual crops — is more effective.

Here are common plant families to remember:

Plant FamilyCommon CropsSoil Impact
Solanaceae (Nightshades)Tomato, Pepper, Eggplant, PotatoHeavy feeders, deplete nitrogen
Fabaceae (Legumes)Beans, PeasAdd nitrogen
Brassicaceae (Cabbage Family)Cabbage, Cauliflower, Broccoli, KaleModerate feeders, attract similar pests
Amaranthaceae (Leafy Greens)Spinach, Beetroot, ChardModerate feeders
Apiaceae (Root Veggies)Carrot, Parsley, CeleryLight feeders
Cucurbitaceae (Vine Crops)Cucumber, Zucchini, Melon, PumpkinHeavy feeders, need rich soil
Alliaceae (Onion Family)Onion, Garlic, LeekHelp deter pests, light feeders

Once you’ve grouped them, plan rotations by family, not by individual plants.


Step 2: Divide Your Garden Into Sections

Divide your garden into three or four sections (or beds). Each year, plant a different crop family in each section.

For example, in a four-year rotation plan:

YearBed 1Bed 2Bed 3Bed 4
1NightshadesLegumesRoot CropsLeafy Vegetables
2LegumesRoot CropsLeafy VegetablesNightshades
3Root CropsLeafy VegetablesNightshadesLegumes
4Leafy VegetablesNightshadesLegumesRoot Crops

Then, repeat the cycle every four years.

This system ensures no crop grows in the same bed two years in a row — breaking pest cycles and balancing nutrients.


Step 3: Follow the “Feeding Order” Rule

To make rotation simpler, remember this easy sequence:

Heavy Feeders → Light Feeders → Soil Builders

  1. Heavy feeders (tomatoes, corn, peppers, cabbage) use up nutrients.
  2. Light feeders (carrots, onions, herbs) use what’s left.
  3. Soil builders (beans, peas, clover) restore nitrogen.

After soil builders, start again with heavy feeders.

Example:
Year 1: Tomatoes → Year 2: Carrots → Year 3: Beans → Year 4: Tomatoes again.


Step 4: Include Cover Crops or Green Manure

Between planting seasons, you can sow cover crops such as:

  • Clover
  • Alfalfa
  • Mustard
  • Rye grass

These crops prevent erosion, suppress weeds, and add organic matter when turned into the soil. They act as “green manure,” replenishing nutrients naturally.


Step 5: Keep a Garden Journal

It’s easy to lose track of which crop went where, especially after a couple of years. Keep a notebook or diagram of your beds each season. Note:

  • What crops you planted
  • How they performed
  • Any pest or disease issues

This helps refine your rotation plan and avoid accidental repeats.


Real-Life Example: A Simple 3-Year Rotation Plan

If you have three raised beds or garden zones, try this simple rotation:

YearBed 1Bed 2Bed 3
1Tomatoes, PeppersCarrots, OnionsBeans, Peas
2Beans, PeasTomatoes, PeppersCarrots, Onions
3Carrots, OnionsBeans, PeasTomatoes, Peppers

This rotation balances nutrients, reduces soil fatigue, and minimizes pests like nematodes and aphids.


Extra Tips For Successful Crop Rotation

1. Don’t Forget the Soil Amendments

Even with rotation, soil still needs organic matter. Add compost or aged manure at the start of each planting season to keep it fertile.

2. Combine Rotation with Companion Planting

Some plants help each other grow when planted together:

  • Tomatoes + Basil: Repels pests and enhances flavor.
  • Beans + Corn: Beans fix nitrogen for the corn.
  • Carrots + Onions: Onions repel carrot flies.

Using both techniques multiplies your garden’s health benefits.

3. Avoid Repeating the Same Crop Family

For example, don’t plant tomatoes after peppers — both belong to the nightshade family and attract similar diseases like blight.

4. Observe Your Soil and Plants

If leaves start yellowing or plants weaken, it may be time to adjust your rotation schedule or replenish nutrients.

5. Rotate Even in Containers

If you’re gardening on a terrace or balcony, change what you grow in each pot every season. For instance, follow tomatoes with beans or lettuce in the same container.


Benefits You’ll Notice Over Time

Once you start rotating crops consistently, you’ll notice clear, lasting improvements:

Healthier Soil: Balanced nutrients and better texture.
Fewer Pests: Reduced buildup of soil-borne insects and fungi.
Bigger Yields: Plants thrive with fresh, nutrient-rich soil.
Sustainable Gardening: Less need for chemical fertilizers or pesticides.
Better Water Retention: Improved soil structure means less watering.

Crop rotation may take planning, but it saves you endless frustration in the long run.


Final Thoughts: Let the Soil Rest and Renew

Your soil is a living, breathing ecosystem — not an endless resource. When you grow the same crop in the same spot, you’re asking the soil to give without giving back.

Crop rotation is nature’s way of balance. It lets one crop rest while another rejuvenates the ground beneath it. With a little planning and patience, you’ll create a self-renewing garden that thrives year after year.

So before your next planting season, grab a notebook, sketch your garden layout, and start planning your rotation. It’s one of the smartest, simplest, and most rewarding steps toward a truly sustainable vegetable garden.


5 Mistakes That Can Ruin Your Vegetable Garden (And How to Avoid Them)

5 Mistakes That Can Ruin Your Vegetable Garden (And How to Avoid Them)

Starting a vegetable garden is one of life’s simplest joys. Watching tiny seeds transform into fresh tomatoes, crisp lettuce, and vibrant peppers feels magical — until things start going wrong. Maybe your plants wilt mysteriously, your harvest is disappointingly small, or pests seem to be feasting before you do.

Don’t worry — you’re not alone. Every gardener, beginner or expert, makes mistakes. The secret to success is recognizing what went wrong and learning how to fix it.

Here are five common mistakes that can ruin your vegetable garden, plus smart, practical solutions to help your plants thrive all season long.


Mistake #1: Planting in the Wrong Spot

The most common gardening mistake starts before you even put a seed in the ground — plant placement.

Vegetables are sun lovers. Most need at least 6 to 8 hours of direct sunlight daily. If your garden sits in partial shade or under tree cover, your plants will struggle.

Without enough sunlight:

  • Leaves turn pale or yellow.
  • Plants grow tall and leggy but don’t produce fruit.
  • Soil stays damp, inviting rot and mildew.

How to Fix It:

  1. Track sunlight: Spend a day observing your garden space. Note where the sun hits in the morning and afternoon.
  2. Choose wisely:
    • Sun-loving crops: tomatoes, peppers, cucumbers, eggplants, okra, beans.
    • Partial shade crops: spinach, lettuce, kale, radish, beets.
  3. Use containers if needed: If your yard is shaded, grow veggies in pots and move them to sunnier areas.
  4. Prune nearby trees: A little trimming can open up valuable sunlight.

Pro tip: Morning sun is especially valuable—it dries dew and helps prevent fungal diseases.


Mistake #2: Ignoring the Soil

Soil isn’t just “dirt” — it’s the foundation of your garden. Yet many gardeners skip testing or improving it before planting. Poor soil can ruin even the best seeds.

If your soil is too compacted, lacks nutrients, or drains poorly, your vegetables won’t grow strong roots or get the food they need.

Common Signs of Unhealthy Soil:

  • Water pools on the surface instead of soaking in.
  • Plants grow slowly or unevenly.
  • Yellowing leaves despite regular watering.

How to Fix It:

  1. Test your soil: You can buy a home test kit or send a sample to your local agricultural extension. This reveals pH level and nutrient balance.
    • Ideal pH for most vegetables: 6.0–7.0.
  2. Amend the soil:
    • Add compost or well-rotted manure for nutrients.
    • Mix in coco peat or sand if the soil is heavy and clay-like.
    • Add organic matter regularly to maintain soil health.
  3. Don’t walk on planting beds: Compaction reduces airflow and root growth. Use stepping stones or designated paths.

Pro tip: Start a compost pile. Homemade compost is free, eco-friendly, and improves soil structure naturally.


Mistake #3: Overwatering or Underwatering

Water is essential — but too much or too little can quickly destroy your garden.

Overwatering suffocates roots and causes rot, while underwatering leads to wilting and poor fruit development. Both conditions stress plants and make them more vulnerable to pests and diseases.

Signs of Watering Mistakes:

  • Overwatering: Yellow leaves, soggy soil, moldy smell.
  • Underwatering: Drooping plants, dry soil, crispy leaf edges.

How to Fix It:

  1. Check soil moisture: Stick your finger 2 inches deep into the soil.
    • Feels dry? Water.
    • Feels damp? Wait.
  2. Water deeply, not often: Shallow watering encourages weak roots. Instead, water thoroughly once or twice a week.
  3. Morning watering: Water early so leaves dry before nightfall, preventing fungus.
  4. Mulch: Add a 2–3 inch layer of straw, dried leaves, or compost around plants to retain moisture and reduce evaporation.
  5. Use drip irrigation or a soaker hose: These systems provide slow, steady water directly to roots — no waste, no splash.

Pro tip: In hot weather, a deep watering twice a week is better than daily light watering. The goal is moist, not muddy soil.


Mistake #4: Ignoring Pests and Diseases Until It’s Too Late

One day your plants look great; the next, leaves are full of holes or covered in white powder. Many gardeners overlook early signs of trouble, letting pests and diseases spread before taking action.

Common vegetable garden culprits include:

  • Aphids: Tiny green or black insects sucking sap from leaves.
  • Whiteflies: Small winged bugs under leaves causing yellowing.
  • Caterpillars: Munching holes in leaves.
  • Powdery mildew: White, powdery coating on leaves in humid weather.
  • Blight: Brown or black spots on tomato or potato leaves.

How to Fix It:

  1. Inspect plants regularly: Check the underside of leaves and stems at least twice a week.
  2. Encourage beneficial insects: Ladybugs, lacewings, and bees help control pests naturally.
  3. Use natural pest control:
    • Spray a mix of neem oil + water + mild soap weekly.
    • Use garlic spray or chili spray to repel pests.
  4. Remove infected leaves immediately: Dispose of them (don’t compost diseased material).
  5. Rotate crops: Planting the same crop in the same spot year after year encourages soil-borne pests.

Pro tip: Diversity is your best defense. Mix herbs and flowers (like marigolds, basil, or mint) among vegetables to deter pests naturally.


Mistake #5: Overcrowding Your Plants

It’s tempting to plant too many seeds close together — after all, more plants mean more food, right? Unfortunately, the opposite is true. Crowded plants compete for sunlight, water, and nutrients, leading to weak growth and smaller yields.

Signs of Overcrowding:

  • Stunted plants with small leaves.
  • Increased humidity and poor airflow (leading to mold and fungus).
  • Fewer flowers and fruits.

How to Fix It:

  1. Follow spacing instructions: Every seed packet includes spacing guidelines — and they matter!
    • Tomatoes: 18–24 inches apart.
    • Peppers: 12–18 inches apart.
    • Lettuce: 6–8 inches apart.
    • Carrots: 2–3 inches apart.
  2. Thin seedlings: Once they sprout, gently remove weaker plants to give stronger ones room to grow.
  3. Prune regularly: Trim excess leaves and branches to improve air circulation.
  4. Use vertical gardening: For vines like cucumbers, beans, or peas, use trellises or netting to save space and boost airflow.

Pro tip: Think of spacing as “room to breathe.” A few healthy, well-spaced plants will always outperform a crowded bed.


Bonus Mistake: Forgetting to Feed Your Plants

Even if your soil is good, heavy-feeding crops like tomatoes, corn, and peppers quickly deplete nutrients. Many gardeners forget to replenish them during the growing season.

How to Fix It:

  • Use organic compost or worm castings every 3–4 weeks.
  • Apply liquid seaweed or compost tea for a quick nutrient boost.
  • Avoid over-fertilizing: Too much nitrogen causes leafy growth but fewer fruits.

Pro tip: Regular, light feeding keeps plants healthy without overwhelming them. Think “steady nutrition,” not feast or famine.


The Secret to a Thriving Garden: Observation and Balance

Gardening isn’t just about soil and seeds — it’s about observation and timing. The most successful gardeners pay attention to small changes. Wilting leaves, slow growth, or unusual spots are signals from your plants. When you learn to “listen” to them, you can correct issues before they become disasters.

Here’s a quick recap:

MistakeFix
Planting in the wrong spotChoose a sunny location or use containers
Ignoring soil healthTest and amend with compost
Over/underwateringCheck moisture; water deeply and mulch
Ignoring pestsInspect regularly and use organic sprays
Overcrowding plantsSpace correctly and prune

Final Thoughts: Learn, Adjust, and Grow

Every gardener makes mistakes — even experts with decades of experience. The key is not to fear them, but to learn from them.

A failed crop doesn’t mean you have a “black thumb.” It means you’ve gained knowledge about your soil, weather, or timing. Gardening is a living experiment — and every season teaches you something new.

By avoiding these five common mistakes and applying a little patience, you’ll create a thriving, productive vegetable garden that rewards you with crisp greens, juicy tomatoes, and endless satisfaction.

So, roll up your sleeves, grab your watering can, and remember: the best gardens grow from experience — not perfection.

How To Use Epsom Salt In The Garden The Right Way

How To Use Epsom Salt In The Garden The Right Way

Every gardener dreams of lush green leaves, vibrant blooms, and thriving vegetables. While fertilizers and compost are essential, there’s a simple and inexpensive ingredient sitting quietly in your bathroom cabinet that can make a surprising difference — Epsom salt.

Used wisely, Epsom salt can enhance your garden’s health, boost flower color, and even improve vegetable yields. But here’s the key: it must be used the right way. Overuse or misuse can do more harm than good.

In this article, you’ll learn what Epsom salt really does for plants, when to use it, and the best ways to apply it — all backed by science and practical gardening experience.


What Exactly Is Epsom Salt?

Epsom salt isn’t actually “salt” — it’s a naturally occurring mineral compound called magnesium sulfate (MgSO₄·7H₂O).

It contains two essential nutrients that plants rely on:

  • Magnesium (Mg): Helps plants produce chlorophyll for photosynthesis and gives leaves their deep green color.
  • Sulfur (S): Aids in protein formation, root development, and disease resistance.

Both are micronutrients, meaning plants need them in smaller amounts than nitrogen, phosphorus, or potassium — but they’re still vital for plant growth and health.


Why Use Epsom Salt in the Garden?

Many gardeners swear by Epsom salt for its multiple benefits. When used correctly, it can:

1. Promote Greener, Healthier Leaves

Magnesium boosts chlorophyll production, making leaves appear greener and more vibrant. This is especially beneficial for leafy plants like spinach, basil, and roses.

2. Improve Flowering and Fruit Production

Plants like tomatoes, peppers, and roses often benefit from a magnesium boost during flowering and fruiting, resulting in more blooms and better fruit quality.

3. Prevent Magnesium Deficiency

If your plants have yellowing leaves between green veins (called interveinal chlorosis), they might be magnesium-deficient — Epsom salt can correct that quickly.

4. Enhance Seed Germination

Soaking seeds in a mild Epsom salt solution before planting can help with stronger seedling development.

5. Help with Nutrient Absorption

Magnesium improves a plant’s ability to take in key nutrients like nitrogen and phosphorus from the soil.


A Word of Caution

Before you start sprinkling Epsom salt everywhere, remember this: not every plant or soil needs it.

Epsom salt doesn’t replace balanced fertilizer or compost. If your soil already has sufficient magnesium, adding more can actually disrupt nutrient balance and harm soil health over time.

Pro tip: The best way to know if your garden needs Epsom salt is to get your soil tested. If magnesium levels are low (below 25–50 ppm), then Epsom salt can be a beneficial supplement.


How To Use Epsom Salt The Right Way

Now let’s dive into the best and safest ways to apply Epsom salt for different gardening needs.


1. For General Plant Health

To maintain overall health and vigor:

  • Mixing Ratio: 1 tablespoon of Epsom salt per gallon (3.8 liters) of water.
  • How To Apply: Water your plants with this solution once every 4–6 weeks during the growing season.
  • Best For: Houseplants, herbs, and ornamental flowers.

This method helps keep leaves lush and green while improving nutrient absorption naturally.


2. For Tomatoes and Peppers

Tomatoes and peppers are heavy feeders and often show magnesium deficiency symptoms, like yellowing leaves and poor fruit set.

  • Before Planting: Add 1 tablespoon of Epsom salt to the planting hole and mix well with the soil.
  • During Growth: Dissolve 1 tablespoon of Epsom salt in 1 gallon of water and apply as a foliar spray or soil drench every 2–3 weeks.
  • Result: Stronger stems, more blossoms, and tastier fruits.

Pro tip: Avoid overuse — too much magnesium can compete with calcium absorption, leading to blossom-end rot.


3. For Roses

Gardeners have used Epsom salt for generations to produce spectacular roses with deep color and abundant blooms.

  • At Planting Time: Mix 1 tablespoon of Epsom salt into the soil at the base of each plant.
  • For Established Roses: Dissolve 1 tablespoon per gallon of water and drench the base every 4–6 weeks.
  • Foliar Spray: Mix 1 tablespoon per gallon of water and spray leaves once a month.

Tip: Applying Epsom salt in early spring encourages new cane growth and lush foliage.


4. For Vegetables (Carrots, Potatoes, Leafy Greens)

Epsom salt can improve both flavor and yield in some vegetables.

  • Root Crops (Carrots, Potatoes): Sprinkle 1 teaspoon per foot of plant row before watering once a month.
  • Leafy Greens (Spinach, Kale, Lettuce): Use a mild foliar spray of 1 tablespoon per gallon of water every 3–4 weeks for darker, crisper leaves.

Note: Use sparingly, especially if your soil is already fertile.


5. For Flowering Plants and Annuals

Annuals like petunias, marigolds, and geraniums respond beautifully to magnesium boosts.

  • Application: Dissolve 1 tablespoon of Epsom salt per gallon of water and apply as a drench once a month.
  • Result: Brighter blooms and stronger root systems.

Bonus: Epsom salt reduces transplant shock when you move seedlings to pots or beds.


6. For Trees and Shrubs

Even large plants can benefit from magnesium-rich soil.

  • For Trees: Apply 2 tablespoons of Epsom salt per 9 square feet of soil around the base once in early spring and again in late summer.
  • For Shrubs: Use 1 tablespoon per foot of height monthly during growing season.

This supports healthy leaf growth and improved root development.


7. As a Foliar Spray

Foliar feeding allows plants to absorb magnesium directly through their leaves — an excellent method for quick results.

  • Mix: 1 tablespoon of Epsom salt in 1 gallon of water.
  • Spray: Lightly mist the leaves early in the morning or late evening every 2–3 weeks.
  • Best For: Peppers, roses, citrus, and potted herbs.

Tip: Avoid spraying during midday sunlight to prevent leaf burn.


8. For Lawns

If your grass looks dull or patchy, magnesium may be lacking.

  • Application: Dissolve 3 pounds of Epsom salt in 1,250 square feet of lawn area using a hose-end sprayer or watering can.
  • Frequency: Once in early spring and again in midsummer.
  • Benefit: Greener grass and deeper roots without harsh chemicals.

How NOT To Use Epsom Salt

While Epsom salt is natural and inexpensive, overusing it can upset your garden’s delicate nutrient balance. Keep these cautions in mind:

  1. Don’t use it as a universal fertilizer.
    It lacks nitrogen, phosphorus, and potassium — the main nutrients plants need. Always combine it with compost or organic fertilizer.
  2. Avoid frequent use without testing soil.
    Excess magnesium can block calcium uptake, causing stunted growth or blossom-end rot.
  3. Don’t use on alkaline soils.
    Magnesium absorption is already low in acidic soils, but unnecessary in alkaline ones.
  4. Avoid applying to succulents and cacti.
    They thrive in lean soil and don’t require additional magnesium.

Signs Your Plants Might Need Epsom Salt

If you’re unsure whether to use Epsom salt, look for these early warning signs of magnesium deficiency:

  • Pale, yellowing leaves between green veins
  • Slower growth despite regular feeding
  • Drooping or curling leaves
  • Reduced flowering or small fruits

Remember — test the soil before applying to confirm magnesium deficiency. Blindly adding supplements can backfire.


Combining Epsom Salt With Organic Gardening Practices

Epsom salt works best when integrated into a balanced garden routine. Use it as part of a natural care system:

  • Compost: Improves overall soil structure and microbial activity.
  • Mulch: Retains moisture and moderates temperature.
  • Organic fertilizers: Supply the macronutrients Epsom salt lacks.

This combination ensures your garden remains nutrient-rich, healthy, and sustainable.


Final Thoughts: A Little Goes a Long Way

Epsom salt is one of gardening’s most affordable and versatile allies — when used correctly. It can make your flowers bloom brighter, your vegetables taste sweeter, and your plants look greener.

However, the key to success lies in moderation and balance. Think of Epsom salt as a gentle tonic, not a cure-all. Always observe your plants, listen to the soil, and adjust accordingly.

When you apply it wisely, you’ll unlock one of nature’s simplest secrets for a more vibrant, thriving garden.


The Best Composting Tips For Beginners

The Best Composting Tips For Beginners

If you’ve ever wanted to turn your kitchen scraps and garden waste into rich, dark, crumbly “black gold” for your plants, composting is your answer. It’s nature’s recycling system—simple, sustainable, and incredibly rewarding. But if you’re new to composting, it can feel a little intimidating: What can you compost? What can’t you? How long does it take?

Don’t worry—this beginner-friendly guide will walk you through everything you need to know to get started. From choosing the right compost bin to balancing the ingredients and speeding up decomposition, here are the best composting tips for beginners to help you create nutrient-rich compost for your garden or terrace plants.


What Is Composting, and Why Does It Matter?

Composting is the natural process of breaking down organic materials—like food scraps, leaves, and garden trimmings—into a nutrient-rich soil conditioner. Microorganisms, worms, and fungi work together to decompose these materials, turning waste into a valuable soil amendment.

Why composting matters:

  • Reduces landfill waste: Up to 30% of household waste can be composted, keeping it out of landfills.
  • Improves soil health: Compost adds organic matter, improves texture, and enhances water retention.
  • Saves money: You’ll need fewer fertilizers and soil conditioners.
  • Eco-friendly: It reduces methane emissions from organic waste in landfills.

In short, composting is one of the easiest and most impactful ways to live sustainably.


Step 1: Choose the Right Composting Method

Before you toss your first banana peel, decide how and where you’ll compost. Your choice depends on your available space, lifestyle, and patience level.

1. Outdoor Compost Bin or Pile

Perfect for backyards or terrace corners. You can build a simple compost pile or use a store-bought bin.

  • Pros: Handles large amounts of waste, natural aeration.
  • Cons: Needs outdoor space, may attract pests if not managed.

2. Compost Tumbler

A sealed barrel on a stand that you can rotate.

  • Pros: Speeds up decomposition and keeps pests out.
  • Cons: Limited capacity, more expensive.

3. Indoor Compost Bin (Bokashi or Vermicomposting)

Ideal for apartments or small spaces.

  • Bokashi: Uses fermentation and beneficial microbes.
  • Vermicomposting: Uses worms to break down food waste.
  • Pros: Odor-free, compact, quick.
  • Cons: Requires maintenance and balance.

If you’re just starting, a small compost bin or tumbler is a great choice—it’s manageable and helps you learn the basics.


Step 2: Understand the Composting Ingredients

The secret to good compost lies in balancing two key types of materials:

“Greens” – Nitrogen-rich Materials

These are moist, fast-decaying items that provide protein for microbes:

  • Fruit and vegetable scraps
  • Coffee grounds and tea bags
  • Fresh grass clippings
  • Plant trimmings

“Browns” – Carbon-rich Materials

These are dry, fibrous materials that provide energy and structure:

  • Dry leaves
  • Shredded newspaper or cardboard
  • Sawdust (untreated)
  • Straw or dried stems

Ideal Ratio:
A good rule of thumb is 3 parts brown to 1 part green. Too much green causes odor and sogginess; too much brown slows down decomposition.


Step 3: Balance Moisture and Air

Compost needs the right amount of moisture and oxygen to break down effectively.

  • Moisture: The pile should feel like a damp sponge—moist but not dripping.
    • If it’s too dry, sprinkle water or add more green materials.
    • If it’s too wet, add shredded paper or dry leaves.
  • Aeration: Microbes need oxygen to do their work.
    • Turn your compost pile every 7–10 days with a pitchfork or by spinning your tumbler.
    • Aeration prevents foul odors and speeds up decomposition.

Step 4: Know What to Compost (and What Not To)

Knowing what belongs in your compost is essential for keeping it healthy and odor-free.

Compostable Items

  • Fruit and vegetable scraps
  • Coffee grounds and filters
  • Tea leaves (without plastic bags)
  • Eggshells (crushed)
  • Grass clippings
  • Dead flowers and leaves
  • Shredded paper or cardboard
  • Small amounts of plant-based kitchen waste

Avoid Composting

  • Meat, fish, and dairy (attract pests and smell)
  • Oily or greasy foods
  • Pet waste
  • Diseased plants
  • Glossy paper or magazines
  • Plastic or synthetic fibers

Keeping your compost clean and plant-safe ensures a high-quality final product.


Step 5: Speed Up the Composting Process

Composting can take anywhere from 2 months to 8 months, depending on conditions. But you can speed it up with a few tricks:

  1. Chop or shred materials: Smaller pieces decompose faster.
  2. Maintain warmth: Composting works best at 50–70°C (122–158°F). Keep your pile in a sunny spot.
  3. Turn it often: Regular mixing boosts oxygen and microbial activity.
  4. Add compost activators: Items like old compost, garden soil, or commercial activators introduce beneficial microbes.
  5. Avoid neglect: If your compost cools down or smells sour, check for moisture or nitrogen imbalance.

Step 6: Recognize When Your Compost Is Ready

Finished compost looks, smells, and feels like rich, dark soil. It should:

  • Have a pleasant, earthy scent
  • Be crumbly and uniform in texture
  • Contain no recognizable food scraps or leaves

If it’s still chunky or smells ammonia-like, give it a few more weeks to mature. You can sift finished compost through a mesh to remove large pieces, which can go back into your next batch.


Step 7: Use Your Compost Effectively

Now for the fun part—using your homemade compost!

In the Garden

  • Mix it into garden beds to enrich soil structure.
  • Use it as a mulch layer around plants to retain moisture.
  • Blend with potting soil for seed starting or container gardening.

For Terrace and Potted Plants

  • Add a handful to each pot monthly.
  • Mix one part compost with two parts soil for a nutrient boost.
  • Sprinkle compost tea (soaked compost in water) for liquid fertilization.

For Lawns

  • Spread a thin layer of compost over your lawn to improve soil aeration and grass health.

Compost is gentle, organic, and safe—it won’t burn your plants like chemical fertilizers might.


Common Composting Problems (And How To Fix Them)

Even seasoned composters face a few hiccups. Here’s how to handle the most common ones:

ProblemLikely CauseSimple Fix
Bad odorToo wet or too much greenAdd dry leaves or paper; turn the pile
Pile not heatingNot enough nitrogen or moistureAdd kitchen scraps or sprinkle water
Attracts pestsMeat, dairy, or uncovered scrapsBury new waste or use a closed bin
Pile too dryLack of moistureAdd water or more green material
Slow decompositionNot enough air or wrong balanceTurn more often; adjust ratio

Troubleshooting is part of the learning process—don’t get discouraged!


Step 8: Embrace the Composting Mindset

Composting isn’t just about reducing waste—it’s about reconnecting with nature’s cycles. Each time you toss a banana peel or wilted flower into your bin, you’re participating in a regenerative process that gives back to the Earth.

Start small, observe the changes, and adjust as you go. In a few months, you’ll be amazed at how your scraps transform into something life-giving.


Final Thoughts: Turn Waste Into Wealth

Composting is one of the most empowering habits you can adopt for your home and the planet. It turns everyday waste into a treasure trove of nutrients, reduces your environmental footprint, and helps your plants thrive naturally.

So, grab a bin, start collecting your scraps, and watch the magic happen. Within a season or two, you’ll be harvesting your very own “black gold”—a gift from nature that keeps on giving.


In short: Composting doesn’t need to be complicated. All you need are the right ingredients, a little patience, and a curious heart. Once you start, you’ll wonder why you didn’t do it sooner.

How To Grow a Lemon Tree Indoors Successfully

How To Grow a Lemon Tree Indoors Successfully

There’s something magical about plucking a fresh lemon from your very own tree — especially when that tree is thriving inside your home. The glossy green leaves, fragrant blossoms, and bright yellow fruit add instant cheer to any indoor space. But growing a lemon tree indoors successfully takes more than just putting it in a pot and hoping for the best.

With the right care, environment, and a little patience, you can enjoy homegrown lemons year-round — even if you live miles away from a sunny orchard. Here’s your complete step-by-step guide to growing a healthy, productive indoor lemon tree.


Why Grow a Lemon Tree Indoors?

Lemon trees don’t just produce fruit — they bring beauty, fragrance, and a sense of freshness to your living space. Indoors, they can thrive as both ornamental plants and fruit-bearing trees.

Top benefits of growing lemons indoors:

  • Enjoy fresh, organic lemons all year long.
  • Fill your home with the sweet, floral scent of lemon blossoms.
  • Add vibrant greenery that brightens any room.
  • Control growing conditions more easily (especially in cooler climates).
  • Experience the joy of cultivating your own fruit — even in an apartment!

Step 1: Choose the Right Lemon Variety

Not all lemon trees adapt well to indoor life. Some grow too tall or require intense heat. The key is to pick a compact, dwarf variety that stays manageable in a container while still producing flavorful fruit.

Best lemon varieties for indoor growing:

  • ‘Improved Meyer Lemon’ – A hybrid between a lemon and a mandarin orange. It’s small, sweet, and ideal for pots. The Meyer lemon is also more cold-tolerant and blooms multiple times per year.
  • ‘Ponderosa Lemon’ – Produces large fruit and adapts well to container life, though it can grow tall if not pruned.
  • ‘Eureka Lemon’ – Classic supermarket-style lemon with bright acidity and strong fragrance.
  • ‘Lisbon Lemon’ – Vigorous and productive, perfect for sunny indoor spots.

Pro Tip: The ‘Meyer Lemon’ is by far the easiest and most reliable choice for beginners.


Step 2: Choose the Right Container and Soil

Lemon trees need space for their roots to grow, but the pot shouldn’t be so large that water collects and causes rot.

Ideal pot size:
Start with a 12–14-inch-wide pot with drainage holes. As your tree grows, repot every 2–3 years into a container 2 inches wider than the last.

Best soil mix:
Lemons need well-draining, slightly acidic soil (pH 5.5–6.5). Avoid heavy garden soil. Instead, use a blend such as:

  • 2 parts high-quality potting mix
  • 1 part perlite or coarse sand
  • 1 part compost or coconut coir

Pro Tip: Add small pebbles or broken terracotta pieces to the bottom of the pot for extra drainage.


Step 3: Give Your Tree Enough Light

Light is the most crucial factor for indoor lemon trees. Without enough sunlight, leaves yellow, growth stalls, and fruiting becomes unlikely.

Sunlight requirements:

  • 8–12 hours of bright light daily is ideal.
  • Place near a south- or southwest-facing window for maximum sun exposure.
  • If natural light is limited, use a full-spectrum grow light placed about 6–12 inches above the tree for 12–14 hours a day.

Pro Tip: Rotate the pot weekly so all sides of the tree receive equal light, encouraging even growth.


Step 4: Watering and Humidity

Lemon trees like moisture, but their roots can’t tolerate soggy soil. The key is to water deeply but infrequently.

Watering tips:

  • Check the top 2 inches of soil — if dry, it’s time to water.
  • Water until it drains from the bottom of the pot, then empty the saucer.
  • In winter, reduce watering frequency since growth slows down.

Humidity:
Indoor air, especially with heating or air conditioning, can be too dry for citrus trees. Low humidity leads to leaf drop and poor flowering.

To increase humidity:

  • Mist the leaves daily with room-temperature water.
  • Place the pot on a humidity tray (a shallow dish filled with pebbles and water).
  • Use a humidifier nearby to maintain 40–60% humidity.

Step 5: Temperature and Air Circulation

Lemon trees are tropical by nature, so they love warmth and consistent conditions.

Ideal temperature range:

  • Daytime: 70–85°F (21–29°C)
  • Nighttime: 55–65°F (13–18°C)

Avoid sudden temperature drops or drafts from open windows, heaters, or air conditioners.

Air circulation:
A gentle breeze helps prevent fungal diseases and keeps leaves healthy. Occasionally open windows (weather permitting) or run a small fan near the tree.


Step 6: Feeding and Fertilizing

Lemon trees are heavy feeders — they need a steady supply of nutrients to grow and fruit indoors.

Best fertilizer:
Use a citrus-specific fertilizer or one labeled for acid-loving plants. Look for a balanced ratio like 10-10-10 or 20-20-20, with added micronutrients such as magnesium, iron, and zinc.

Feeding schedule:

  • Spring to early fall: Fertilize every 2–4 weeks.
  • Winter: Fertilize once every 6–8 weeks or pause if the tree is dormant.

Pro Tip: Pale leaves may signal a nutrient deficiency — especially nitrogen or iron. A foliar spray (liquid fertilizer applied to the leaves) can provide a quick boost.


Step 7: Pollination Indoors

Unlike outdoor trees, indoor lemon trees don’t have bees or wind to help them pollinate. But don’t worry — you can easily play pollinator yourself!

How to hand-pollinate:

  1. When blossoms open, use a small, soft paintbrush or cotton swab.
  2. Gently transfer pollen from one flower’s stamen (the yellow part) to another flower’s stigma (the central sticky part).
  3. Repeat every few days while flowers are open.

This simple step can significantly increase your chances of getting fruit indoors.


Step 8: Pruning and Maintenance

Pruning keeps your lemon tree compact, encourages air circulation, and promotes fruiting.

When to prune:

  • Early spring or after the main fruiting season.
  • Remove dead, damaged, or crossing branches.
  • Trim leggy growth to maintain a balanced, bushy shape.

Pro Tip: Always use clean, sharp pruning shears to avoid spreading disease.

Additional care tips:

  • Wipe leaves with a damp cloth occasionally to remove dust.
  • Check regularly for pests like spider mites, aphids, or scale insects. Treat with neem oil or insecticidal soap if needed.

Step 9: Encouraging Flowers and Fruit

It can take 1–2 years for a young indoor lemon tree to start producing fruit. To encourage blooms and fruiting:

  • Provide consistent light and warmth.
  • Avoid moving the tree once buds appear — shifting locations can cause buds to drop.
  • Continue moderate feeding during the flowering stage.

Pro Tip: When the small green lemons appear, thin them out if the tree is overloaded. This ensures better fruit quality and prevents branch strain.


Step 10: Seasonal Care and Outdoor Time

If you live in a mild climate, your lemon tree will love a summer vacation outdoors.

How to transition outdoors:

  • Wait until temperatures stay above 60°F (15°C) day and night.
  • Gradually acclimate the plant by placing it outdoors in partial shade for a week before moving it into full sun.
  • Bring it back inside before night temperatures drop below 50°F (10°C).

Pro Tip: This seasonal sun exposure can boost flowering and fruiting in the following months.


Troubleshooting Common Problems

Yellow leaves: Usually caused by overwatering or nutrient deficiency. Check drainage and fertilize with a citrus mix.

Leaf drop: Often due to sudden temperature changes, low humidity, or moving the tree too frequently.

No flowers or fruit: Ensure the tree gets enough light and nutrients, and hand-pollinate blossoms.

Sticky residue or pests: Likely aphids or scale insects — wipe leaves with neem oil or mild soap spray.


Final Thoughts: A Slice of Sunshine, Right at Home

Growing a lemon tree indoors is more than a gardening project — it’s an experience that fills your home with life, fragrance, and satisfaction. With the right variety, steady light, and consistent care, you can enjoy glossy leaves, delicate blossoms, and even homegrown lemons all year round.

So set your pot by the sunniest window, breathe in that sweet citrus scent, and let your indoor lemon tree remind you that even the smallest space can hold a touch of tropical paradise.

How To Revive a Dying Hydrangea

How To Revive a Dying Hydrangea

Hydrangeas are among the most beloved flowering shrubs, famous for their lush, cloud-like blooms in shades of pink, blue, and white. But even the most devoted gardener can face a heartbreaking sight — drooping leaves, brittle stems, and flowers fading before their time. If your hydrangea looks like it’s on its last leg, don’t panic just yet. These plants are resilient, and with the right care, you can often bring them back from the brink.

In this comprehensive guide, you’ll learn how to diagnose the problem, revive your hydrangea, and restore it to full, blooming glory.


Step 1: Understand Why Your Hydrangea Is Dying

Before you can fix the problem, you have to understand what’s causing it. A “dying” hydrangea usually shows one or more of the following symptoms:

  • Wilting or drooping leaves even when the soil is moist.
  • Brown or crispy leaf edges.
  • Yellowing leaves that drop prematurely.
  • No blooms or small, weak flowers.
  • Blackened stems or soft, rotting areas.

Each of these signs points to a different issue, so the first step is identifying what’s really going on.

Here are the most common causes of hydrangea decline:

1. Water Stress (Overwatering or Underwatering)

Hydrangeas love moisture — but too much or too little can both spell disaster.

  • Underwatering: The leaves wilt, curl, and dry out.
  • Overwatering: Leaves turn yellow, and roots begin to rot.

Hydrangeas need consistently moist soil that drains well — not soggy or bone-dry.

2. Too Much Sun or Heat

Most hydrangeas prefer morning sun and afternoon shade. When exposed to full, scorching sun all day, their leaves can scorch and their flowers fade quickly.

3. Poor Soil or Nutrient Deficiency

If your soil is too compacted, alkaline, or nutrient-poor, hydrangeas struggle to absorb what they need to grow.

4. Frost or Cold Damage

Late spring frosts can kill tender new shoots, especially on bigleaf (Hydrangea macrophylla) or oakleaf (Hydrangea quercifolia) varieties.

5. Pests or Disease

Common culprits include aphids, spider mites, powdery mildew, and root rot — all of which can cause decline if left unchecked.


Step 2: Diagnose the Root Cause

Now that you know the possible reasons, let’s pinpoint the exact cause by observing your plant closely.

SymptomLikely CauseWhat To Do
Wilting even with wet soilRoot rot or poor drainageImprove drainage, remove affected roots
Crispy, dry leavesUnderwatering or too much sunWater deeply, provide partial shade
Yellowing leavesOverwatering or poor soilCheck soil moisture, aerate, and adjust watering
Blackened stemsFungal rot or frost damagePrune damaged stems and disinfect shears
Leaves with powdery coatingPowdery mildewImprove air circulation, apply fungicide
No bloomsOver-pruning or lack of nutrientsFeed with balanced fertilizer and prune correctly

Once you’ve identified the cause, you can move on to the rescue phase.


Step 3: Fix Watering Problems

Water management is the #1 factor in hydrangea health. These plants crave consistent moisture, but they can’t tolerate sitting in waterlogged soil.

How To Fix Underwatering:

  • Deeply water your hydrangea 2–3 times per week.
  • Soak the soil thoroughly, ensuring water penetrates 8–12 inches deep.
  • Mulch around the base with compost or bark to retain moisture.
  • Water in the morning so the leaves can dry before evening.

How To Fix Overwatering:

  • Check for soggy soil — if it smells foul or feels heavy, your roots may be suffocating.
  • Gently dig around the roots to inspect them. Healthy roots are firm and white; rotted ones are brown and mushy.
  • Prune away rotted roots and replant in fresh, well-draining soil.
  • Elevate your plant slightly or amend the soil with sand and compost to improve drainage.

Pro Tip: Hydrangeas in pots dry out faster, so monitor them more often than those planted in the ground.


Step 4: Adjust Sunlight and Temperature

Hydrangeas prefer bright, indirect light or morning sun with afternoon shade. Too much sun scorches leaves; too little causes weak growth and poor blooms.

Ideal Light Conditions by Variety:

  • Bigleaf & Mountain Hydrangeas: Morning sun, afternoon shade.
  • Panicle & Smooth Hydrangeas: Can handle more sun, especially in cooler climates.
  • Oakleaf Hydrangeas: Prefer dappled light or partial shade.

If your plant is wilting under harsh sun, provide temporary shade using a patio umbrella, shade cloth, or nearby taller plants.

In winter or early spring, if frost threatens new shoots, cover your hydrangea with a breathable frost cloth overnight to prevent damage.


Step 5: Improve Soil and Feeding

Hydrangeas thrive in rich, well-drained, slightly acidic soil (pH 5.5–6.5). Poor soil can lead to weak roots, pale leaves, and few blooms.

How To Improve Poor Soil:

  • Work compost or organic matter into the top 12 inches of soil.
  • For clay soil, add coarse sand or fine bark to loosen it.
  • For sandy soil, add compost or leaf mold to retain moisture.

Fertilizing:

Use a balanced, slow-release fertilizer (like 10-10-10) in early spring and again in mid-summer. Avoid overfertilizing — too much nitrogen promotes leafy growth but reduces flowering.

Optional Tip:

  • For blue blooms, acidify the soil using aluminum sulfate or coffee grounds.
  • For pink blooms, add lime to raise soil pH.

Step 6: Prune Correctly

Improper pruning is one of the most common reasons hydrangeas look “dead.” Different hydrangea types bloom on either old wood (last year’s stems) or new wood (this year’s growth). Prune at the wrong time, and you might cut off future blooms.

Pruning by Type:

  • Bigleaf (H. macrophylla) – Prune immediately after flowering (late summer).
  • Oakleaf (H. quercifolia) – Prune after flowering; blooms on old wood.
  • Panicle (H. paniculata) – Prune in late winter or early spring; blooms on new wood.
  • Smooth (H. arborescens) – Cut back to about 6 inches above the ground in early spring.

General Pruning Tips:

  • Remove dead or weak stems anytime.
  • Sterilize pruning shears before and after cutting.
  • Don’t prune in fall or early spring unless you’re sure which variety you have.

Step 7: Combat Pests and Diseases

Even healthy hydrangeas can fall prey to pests or fungal diseases if stressed.

Common Pests:

  • Aphids: Cause distorted leaves and sticky residue.
    • Solution: Spray with neem oil or insecticidal soap.
  • Spider Mites: Create fine webs under leaves.
    • Solution: Mist leaves regularly and use a miticide.
  • Scale Insects: Look like small bumps on stems.
    • Solution: Wipe with alcohol-dipped cotton swabs or apply horticultural oil.

Common Diseases:

  • Powdery Mildew: White coating on leaves; thrives in humidity.
    • Solution: Improve air circulation, prune dense growth, and apply a fungicide.
  • Leaf Spot: Brown spots caused by fungus or bacteria.
    • Solution: Remove affected leaves and avoid overhead watering.
  • Root Rot: Due to poor drainage.
    • Solution: Replant in fresh soil and water carefully.

Step 8: Encourage Recovery and Regrowth

After you’ve addressed the problem, help your hydrangea recover fully.

1. Mulch Generously:
Apply a 2–3 inch layer of mulch to conserve moisture, regulate soil temperature, and reduce weed competition.

2. Water Wisely:
Water deeply once or twice a week, depending on weather and soil. Avoid frequent shallow watering.

3. Feed Lightly:
Give your hydrangea time to recover before applying fertilizer. After 4–6 weeks of stability, resume gentle feeding.

4. Be Patient:
It can take several weeks — even months — for your hydrangea to show signs of revival. New buds or green shoots at the base are a good sign of recovery.


Step 9: Prevent Future Problems

Once your hydrangea recovers, keep it thriving with a few proactive measures:

  • Water consistently — avoid both extremes of dryness and sogginess.
  • Mulch annually to maintain moisture and temperature.
  • Feed twice a year with a balanced or hydrangea-specific fertilizer.
  • Monitor for pests and diseases regularly.
  • Adjust pruning timing based on your variety.

A little consistent care goes a long way in keeping your hydrangea lush, green, and full of blooms year after year.


Final Thoughts: Hydrangeas Are Survivors

Don’t be too quick to give up on a hydrangea that looks lifeless. Beneath those dry leaves and brittle stems often lies a living root system waiting for a second chance.

With proper watering, sunlight, pruning, and soil care, most hydrangeas bounce back beautifully — sometimes even stronger than before.

So before you replace that struggling shrub, give it the attention it deserves. Because with a little patience and care, your “dying” hydrangea could soon be bursting with color again — a living reminder that even the most faded blooms can flourish once more.


6 Shrubs That Thrive in Poor Soil

6 Shrubs That Thrive in Poor Soil

When your garden soil is sandy, rocky, or stubbornly infertile, it can feel like nothing will grow no matter how much compost or fertilizer you add. But don’t give up just yet — there are plenty of shrubs that don’t just tolerate poor soil, they thrive in it.

These tough, low-maintenance plants have evolved to survive in less-than-ideal conditions, making them perfect for gardeners who want beauty without constant fuss. Whether you’re working with dry slopes, compacted clay, or a patch of gritty sand, these six shrubs can transform your landscape into a lush, thriving haven.

Let’s take a closer look at the 6 best shrubs that thrive in poor soil, along with care tips to help them reach their full potential.


1. Butterfly Bush (Buddleja davidii)

Best for: Pollinator gardens, sunny borders, dry soil

If you want color, fragrance, and pollinator activity — even in poor soil — the Butterfly Bush is your go-to shrub. Native to Asia, this hardy plant flourishes in dry, nutrient-poor soil where many other flowering shrubs fail.

Why It Thrives in Poor Soil:
Butterfly bush has deep roots that seek out moisture and nutrients from lower soil layers. It’s drought-tolerant and even prefers slightly neglected conditions — overfertilizing can actually reduce flowering.

Key Features:

  • Produces long, fragrant flower spikes in purple, pink, or white.
  • Blooms from summer into fall.
  • Attracts butterflies, bees, and hummingbirds.

Growing Tips:

  • Plant in full sun (at least 6 hours of direct light).
  • Prune back hard in late winter to encourage vigorous new growth.
  • Avoid overly rich soil; well-drained and slightly sandy soil is ideal.

Pro Tip: Choose newer, non-invasive varieties like ‘Miss Molly’ or ‘Blue Chip’ that don’t spread uncontrollably.


2. Russian Sage (Perovskia atriplicifolia)

Best for: Hot, dry, poor, or sandy soil

Few shrubs embody resilience like Russian Sage. With silvery stems, lacy foliage, and airy spikes of lavender-blue flowers, this plant adds elegance and texture to any garden — even when the soil is far from perfect.

Why It Thrives in Poor Soil:
Russian Sage actually performs best in lean, well-drained soils. In rich or moist conditions, it can become floppy or overgrown. Its woody stems and drought-tolerant nature make it ideal for challenging locations.

Key Features:

  • Long blooming season (mid-summer to early fall).
  • Silver-gray foliage provides year-round interest.
  • Deer-resistant and drought-hardy.

Growing Tips:

  • Requires full sun and excellent drainage.
  • Cut back to about 6–8 inches in early spring to maintain shape.
  • Avoid heavy clay or overly wet soil.

Pro Tip: Plant Russian Sage alongside ornamental grasses or coneflowers for a stunning, low-maintenance combination.


3. Potentilla (Potentilla fruticosa)

Best for: Poor, rocky, or sandy soils; cold climates

Also known as Cinquefoil, this cheerful shrub is a favorite among gardeners who want consistent blooms without rich soil or heavy feeding. Native to northern regions, it’s extremely cold-hardy and thrives in lean conditions.

Why It Thrives in Poor Soil:
Potentilla’s fibrous root system is designed to grow in rocky or low-fertility soils. It tolerates drought once established and resists most common pests and diseases.

Key Features:

  • Compact size (2–4 feet tall).
  • Covered in bright yellow, white, or pink flowers from late spring through fall.
  • Attracts pollinators but resists deer.

Growing Tips:

  • Prefers full sun but tolerates light shade.
  • Prune lightly in early spring to encourage fresh growth.
  • Excellent for borders, slopes, or mixed shrub beds.

Pro Tip: For continuous blooms, choose long-flowering varieties like ‘Goldfinger’ or ‘Abbotswood’.


4. Spirea (Spiraea japonica and Spiraea x bumalda)

Best for: Clay or compacted soil, foundation plantings

When your soil feels dense and lifeless, Spirea steps in to save the day. This versatile shrub not only tolerates poor soil but also thrives in urban and roadside conditions where other plants struggle.

Why It Thrives in Poor Soil:
Spirea is remarkably adaptable, with strong, fibrous roots that can penetrate heavy clay or compacted earth. It’s also drought-tolerant once established, needing minimal care.

Key Features:

  • Produces clusters of pink, white, or red blooms in summer.
  • Fine-textured foliage turns vibrant orange or gold in fall.
  • Attracts bees and butterflies.

Growing Tips:

  • Best in full sun to partial shade.
  • Prune after flowering to maintain a compact shape.
  • Mulch lightly to retain moisture, but avoid soggy soil.

Pro Tip: Try low-growing varieties like ‘Goldmound’ for colorful foliage or ‘Anthony Waterer’ for striking pink blooms.


5. Rose of Sharon (Hibiscus syriacus)

Best for: Poor, sandy, or alkaline soils; hot climates

This showy shrub adds tropical flair to even the toughest soils. The Rose of Sharon (also called Hardy Hibiscus) is a late-summer bloomer that brightens the garden when most other plants are fading.

Why It Thrives in Poor Soil:
Native to parts of Asia, it’s adapted to dry, low-nutrient soils and can handle both heat and mild drought. Unlike many ornamental plants, it tolerates poor or even slightly alkaline soil with ease.

Key Features:

  • Blooms with large, colorful flowers from July through September.
  • Available in shades of pink, white, purple, and blue.
  • Attracts hummingbirds and butterflies.

Growing Tips:

  • Full sun is essential for best blooms.
  • Prune in early spring before new growth emerges.
  • Avoid excessive fertilizer; too much nitrogen reduces flowering.

Pro Tip: Use ‘Blue Chiffon’ or ‘Lavender Chiffon’ cultivars for elegant, ruffled blooms that hold up beautifully in the heat.


6. Japanese Barberry (Berberis thunbergii)

Best for: Poor, dry, or rocky soil; deer-prone areas

If you’re after a hardy, colorful shrub that truly doesn’t mind neglect, look no further than Japanese Barberry. With its bright foliage and thorny stems, this plant provides year-round interest and natural protection against deer.

Why It Thrives in Poor Soil:
Barberry is incredibly tolerant of poor, sandy, or rocky soils. It also withstands drought, air pollution, and compacted urban conditions.

Key Features:

  • Small, rounded shrub (2–5 feet tall).
  • Foliage in vibrant shades of green, gold, orange, or deep red.
  • Small yellow flowers in spring, followed by red berries in fall.

Growing Tips:

  • Full sun enhances leaf color, but partial shade is fine.
  • Prune after flowering to shape.
  • Water sparingly; overwatering can cause root rot.

Pro Tip: Choose sterile or non-invasive varieties like ‘Crimson Pygmy’ or ‘Sunjoy Tangelo’ to avoid unwanted spreading.


Bonus Tips for Growing Shrubs in Poor Soil

Even though these shrubs are tough, a little extra care can help them thrive and look their best.

1. Improve Drainage (If Needed):
Add sand, gravel, or compost to improve airflow around the roots — especially in clay-heavy areas.

2. Mulch Wisely:
Apply a 2–3 inch layer of organic mulch to retain moisture and moderate soil temperature. Keep mulch a few inches away from the trunk to prevent rot.

3. Water Smartly:
Deep, infrequent watering helps roots grow downwards. Avoid shallow, frequent watering that encourages weak surface roots.

4. Don’t Over-Fertilize:
Resist the urge to feed poor soil shrubs heavily. Many of these species bloom and thrive best with minimal nutrients.

5. Prune for Health:
Light pruning encourages bushier growth and removes dead or damaged branches that could stress the plant.


Final Thoughts: Beauty Can Grow Anywhere

Poor soil doesn’t have to mean a poor garden. The secret lies in choosing plants that naturally adapt to tough conditions rather than fighting against your environment.

From the airy elegance of Russian Sage to the vibrant blooms of Rose of Sharon, these six shrubs prove that even the most challenging soil can host a stunning, low-maintenance landscape. With a little planning and minimal care, you’ll enjoy a garden full of color, texture, and life — no rich soil required.

Because sometimes, the most beautiful gardens are born from the hardest ground.

How To Protect Young Trees From Deer Damage

How To Protect Young Trees From Deer Damage

Few things are more discouraging for gardeners and homeowners than seeing a young tree, once healthy and full of promise, stripped bare overnight by hungry deer. Whether you live in a wooded area or on the edge of town, deer can be relentless in their search for tender shoots, bark, and buds — especially during fall and winter when food is scarce.

The good news? With the right combination of strategies, you can successfully protect your young trees and help them grow into strong, mature specimens. This comprehensive guide will walk you through everything you need to know about preventing deer damage, from understanding their behavior to installing the most effective barriers and repellents.


Why Deer Target Young Trees

Deer are beautiful creatures, but they can wreak havoc on young trees. Their damage usually comes in two forms: browsing and rubbing.

1. Browsing (Feeding Damage)

Deer love to eat soft, tender plant material — young leaves, buds, and shoots. In spring and summer, these parts are full of nutrients, making your young trees a perfect snack. This feeding can:

  • Strip away the foliage needed for photosynthesis.
  • Distort or stunt new growth.
  • Severely weaken or even kill a sapling if browsing continues.

2. Rubbing (Antler Damage)

In late summer and fall, male deer (bucks) rub their antlers against tree trunks to remove velvet or mark their territory. This rubbing can:

  • Strip bark and damage the cambium layer beneath.
  • Girdle the tree (cut off nutrient flow), killing it entirely.
  • Break or bend the trunk, especially in young trees.

Understanding these habits helps you design the right kind of protection for each season.


Step 1: Choose Deer-Resistant Tree Varieties

Before you even plant, start with prevention in mind. Some tree species are far less attractive to deer than others. While no tree is completely “deer-proof,” many are deer-resistant, meaning deer will only eat them when food is scarce.

Deer-resistant options include:

  • Conifers: Spruce, fir, and juniper (avoid arborvitae — deer love it!)
  • Hardwoods: Ginkgo, birch, beech, and honey locust
  • Fruit Trees: Persimmon, pawpaw, and mulberry are less appealing
  • Ornamentals: Dogwood, magnolia, and redbud

If you must plant favorites like apple, cherry, or maple, be prepared to protect them with extra care.


Step 2: Physical Barriers — The Most Reliable Defense

When it comes to keeping deer out, physical barriers are the gold standard. They provide direct, visible protection that doesn’t rely on chemicals or scents.

1. Tree Guards

These are protective wraps or tubes that fit snugly around the trunk.

Best for: Preventing antler rubbing and small browsing damage.
How to use:

  • Choose plastic spiral guards, mesh tubes, or perforated wraps.
  • Install them from the ground up to about 4 feet high.
  • Ensure proper airflow to avoid rot or insect buildup.
  • Remove or adjust them as the tree grows to avoid girdling.

Pro Tip: Use white or light-colored guards to prevent heat damage from the sun.


2. Wire Mesh Cages

For complete protection, surround each tree with a sturdy wire cage.

Best for: Individual young trees in open yards or gardens.
How to make one:

  • Use welded wire fencing (2×4 inch openings).
  • Form a cylinder about 4–6 feet in diameter and 5–6 feet tall.
  • Anchor it with metal stakes.
  • Leave room for the tree to grow inside without touching the wire.

This method is extremely effective and long-lasting, especially against rubbing and browsing.


3. Deer Fencing (Full Yard or Orchard Protection)

If you have multiple trees or a large property, consider installing deer fencing around the entire area.

Key requirements:

  • Minimum height: 8 feet (deer can easily jump lower fences).
  • Use heavy-duty polypropylene mesh or galvanized wire.
  • Bury the bottom a few inches to prevent deer from pushing under.

Alternative: For smaller gardens, you can use angled fences or double-row fences (two fences spaced 3–5 feet apart). Deer dislike jumping into tight or uncertain spaces.


Step 3: Use Deer Repellents for Extra Protection

If fencing isn’t practical, repellents can help discourage deer from browsing. While not 100% foolproof, they work well when used in rotation and combined with other methods.

1. Scent-Based Repellents

These mimic predator odors or contain smells deer dislike, such as garlic, sulfur, or rotten eggs.

Examples:

  • Commercial sprays (like Liquid Fence or Deer Out)
  • Homemade mixtures (e.g., eggs, water, and cayenne pepper)

How to use:

  • Apply every 2–3 weeks, and reapply after rain.
  • Alternate products occasionally so deer don’t get used to one smell.

2. Taste-Based Repellents

These make the leaves and bark taste bitter.

Examples:

  • Hot pepper sprays
  • Bitrex-based solutions

How to use:

  • Spray directly on foliage and twigs.
  • Best for early-season protection when deer are feeding most actively.

Step 4: Landscape Strategically

Your landscape layout can make a big difference in how often deer visit your property.

1. Create “Deer-Resistant Zones.”

  • Plant highly fragrant or textured shrubs (like lavender, boxwood, or barberry) around more vulnerable trees.
  • These act as natural deterrents — deer dislike strong scents and prickly textures.

2. Add Visual and Physical Deterrents.

  • Hanging reflective ribbons, wind chimes, or motion-activated sprinklers can scare deer away.
  • Use garden statues or motion lights — deer tend to avoid unpredictable environments.

3. Maintain Open Spaces.

Deer prefer areas where they can feed and quickly retreat into cover.

  • Keep the area around trees mowed and clear of tall weeds or shrubs.
  • This reduces their sense of safety and discourages browsing.

Step 5: Seasonal Protection Strategies

Deer behavior changes with the seasons — so should your defense.

Spring:

  • Watch for browsing on new shoots.
  • Refresh repellents regularly.
  • Install guards early before deer form feeding patterns.

Summer:

  • Keep up watering; stressed trees attract more pests and browsing.
  • Inspect cages or guards for damage and adjust for growth.

Fall:

  • Antler rubbing season! Ensure trunk guards are secure.
  • Check fences for weak spots.
  • Consider extra deterrents like motion-activated lights.

Winter:

  • Deer are hungrier when food is scarce — reinforce barriers.
  • Use burlap wraps on particularly vulnerable species.
  • Keep snow from piling against fences (deer can use it to jump over).

Step 6: Combining Methods for Long-Term Success

No single method is perfect on its own. The most effective deer protection plan combines multiple strategies:

  1. Start with deer-resistant species when possible.
  2. Physically protect young trunks and canopies.
  3. Add repellents for scent and taste deterrence.
  4. Use landscape design to discourage deer traffic.

By layering these defenses, you create a strong barrier that adapts to deer behavior and your local conditions.


Step 7: When Damage Already Occurred

If deer have already damaged your trees, don’t panic — many can recover with care.

For browsing damage:

  • Prune broken or shredded branches cleanly.
  • Apply organic mulch to conserve moisture and promote regrowth.
  • Water deeply and regularly to support recovery.

For bark rubbing:

  • If only part of the bark is removed, wrap it with a breathable tree bandage to prevent infection.
  • If the tree is completely girdled (bark stripped all around), grafting or bridge grafting may save it — though severe damage often means replanting.

Final Thoughts: Protecting Your Trees Is Protecting Your Future

Young trees represent the future of your landscape — providing shade, fruit, beauty, and ecological value for decades to come. But until they grow strong enough to withstand nature’s challenges, they depend on your protection.

By combining barriers, repellents, and smart landscape design, you can keep deer damage under control and give your trees the chance to thrive.

In time, those fragile saplings will grow into sturdy trunks and leafy canopies — a living reward for your patience and care.