The Best Time To Plant Fruit Trees In Your Climate

The Best Time To Plant Fruit Trees In Your Climate

Planting fruit trees is one of the most rewarding things you can do for your garden. Whether you dream of harvesting crisp apples, juicy peaches, or sweet mangoes, timing your planting right is the key to long-term success. While enthusiasm often drives gardeners to rush into planting, understanding when to plant fruit trees in your specific climate can mean the difference between thriving growth and slow, stressed development.

In this comprehensive guide, we’ll explore the best time to plant fruit trees in different climates, why timing matters, and how to ensure strong root establishment for years of fruitful harvests.


Why Timing Matters for Fruit Tree Planting

Fruit trees are living investments that need the right conditions to establish themselves before they face temperature extremes. The goal of proper planting timing is simple:

  • Give roots time to grow before drought, frost, or extreme heat sets in.
  • Minimize transplant shock from sudden temperature changes.
  • Encourage strong spring growth with a healthy foundation below ground.

When you plant at the wrong time—say, during a scorching summer or freezing winter—the tree struggles to adapt. Its roots can’t anchor deeply enough to absorb moisture and nutrients, leading to stunted growth or even death.


The Two Main Planting Seasons: Spring and Fall

While you can technically plant a fruit tree at any time of year (as long as the ground isn’t frozen), experts generally recommend spring or fall for best results.

1. Spring Planting

Spring planting is ideal for gardeners in colder regions where winters are harsh and the ground stays frozen for months.

Benefits:

  • The soil is warming, which stimulates root growth.
  • Rainfall is usually plentiful.
  • Trees have the entire growing season to establish roots before winter.

Best For:

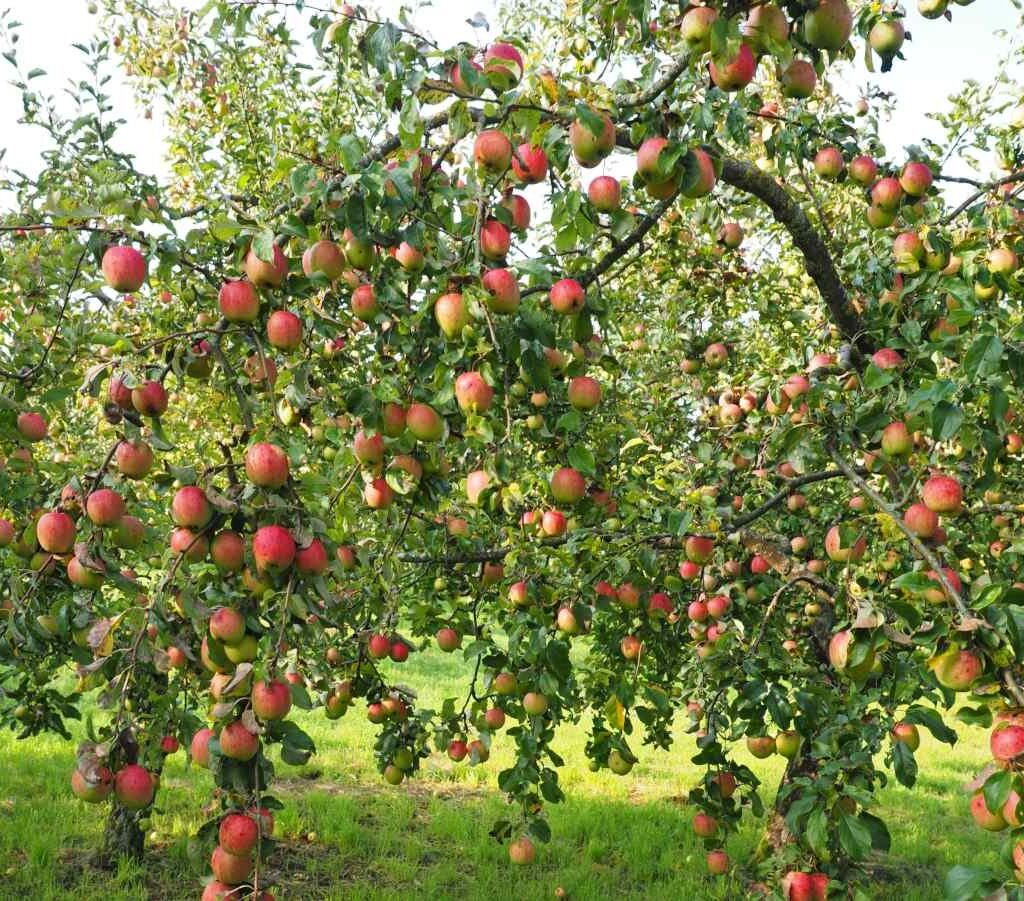
  • Cold and temperate climates (USDA zones 3–7).
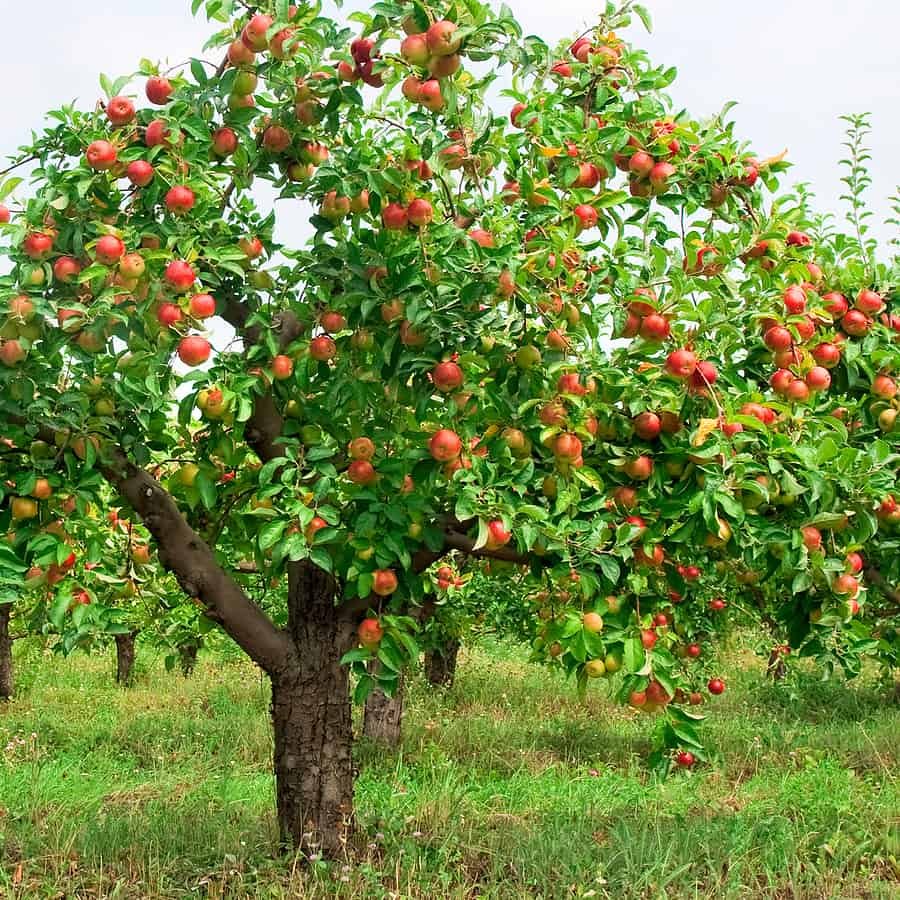
  • Fruit trees like apple, cherry, plum, and pear.

Tips for Spring Planting:

  • Wait until the soil is workable—moist but not soggy.
  • Avoid planting too early when late frosts are still a threat.
  • Mulch around the base to conserve moisture and prevent weeds.

2. Fall Planting

Fall planting is preferred in warmer climates where the soil stays warm even after the air cools.

Benefits:

  • Cooler weather reduces transplant stress.
  • Warm soil promotes root development all winter long.
  • Trees are ready to burst into growth by spring.

Best For:

  • Mild or Mediterranean climates (USDA zones 8–11).
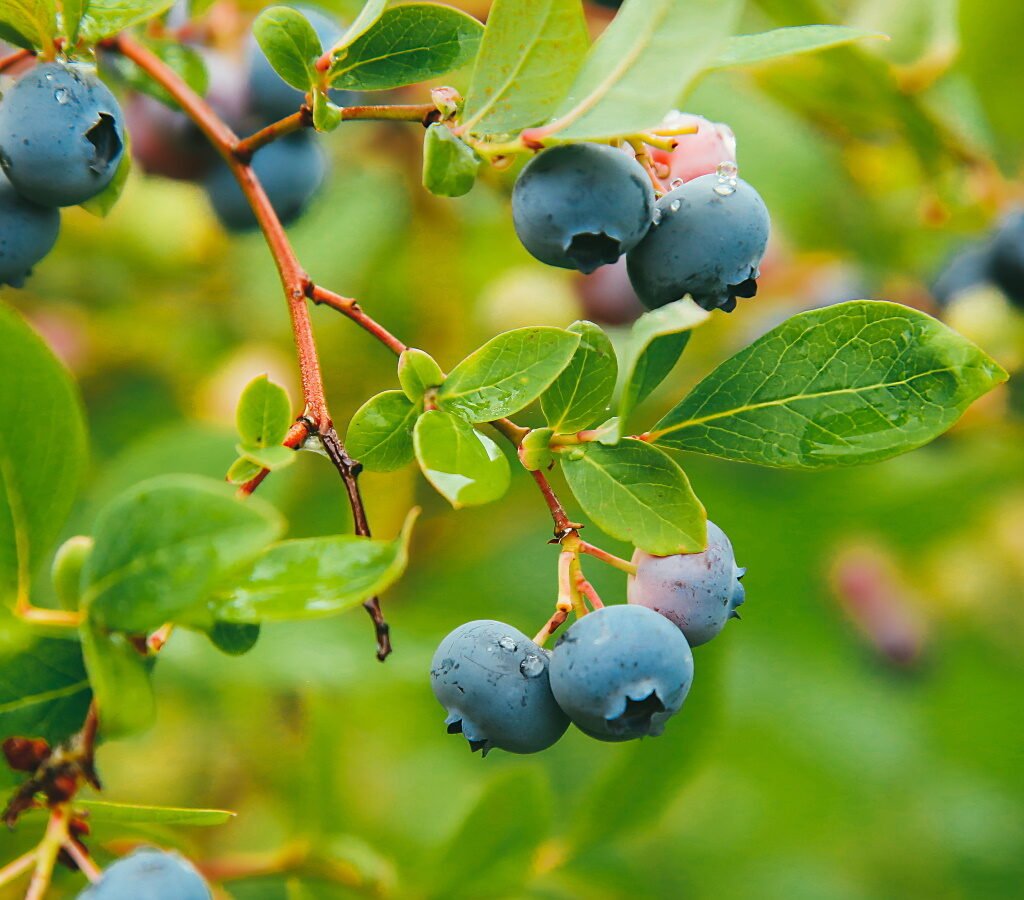
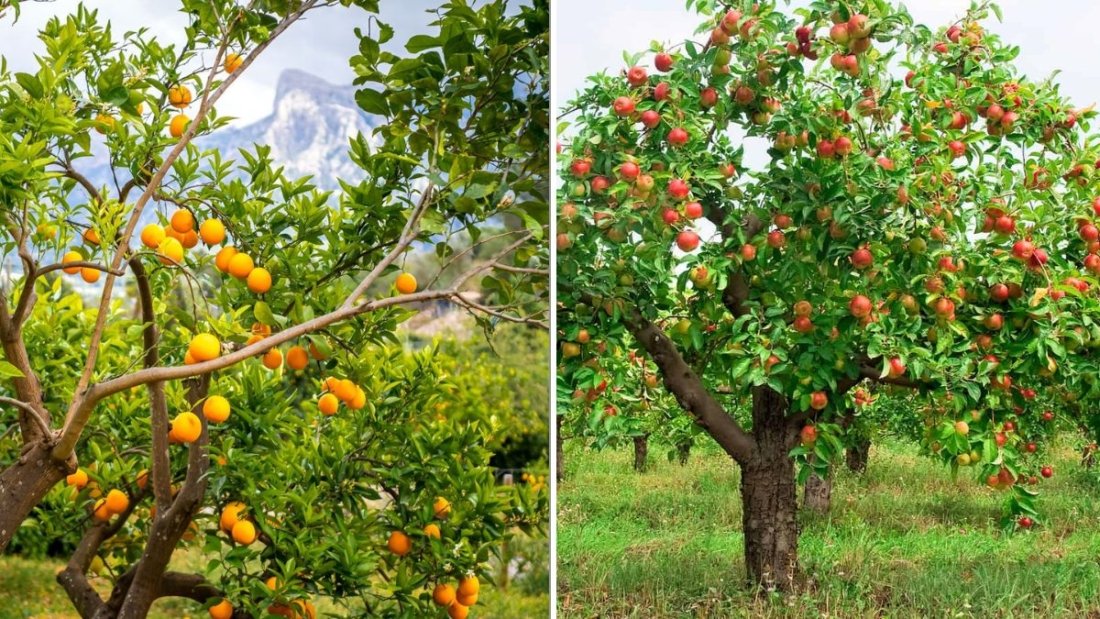
  • Fruit trees like peach, fig, citrus, and pomegranate.

Tips for Fall Planting:

  • Plant at least 6–8 weeks before the first frost.
  • Water regularly until the tree enters dormancy.
  • Protect young trunks from sudden cold snaps using burlap or tree wraps.

Region-by-Region Guide

Let’s break down the best planting times based on climate zones and common fruit tree types.


1. Cold and Mountain Climates (USDA Zones 3–5)

Think of northern states, high-altitude regions, or anywhere winters are long and snowy.

Best Time to Plant:

  • Spring, as soon as the soil thaws and can be worked.

Recommended Trees:

  • Apples, pears, cherries, plums, and hardy apricots.

Extra Tips:

  • Avoid planting late in fall—frost will kill young roots.
  • Choose cold-hardy rootstocks.
  • Mulch heavily before winter to insulate the roots.

2. Temperate Climates (USDA Zones 6–7)

These regions enjoy four distinct seasons, making both spring and fall planting possible.

Best Time to Plant:

  • Early spring or early fall (before frost).

Recommended Trees:

  • Apples, peaches, nectarines, pears, and plums.

Extra Tips:

  • If planting in fall, aim for at least 4–6 weeks before the first hard frost.
  • Water deeply through dry autumns to help roots expand.

3. Warm and Coastal Climates (USDA Zones 8–9)

Here, winters are mild, and summers can be hot and dry.

Best Time to Plant:

  • Late fall through early winter, when the soil remains warm but the air has cooled.
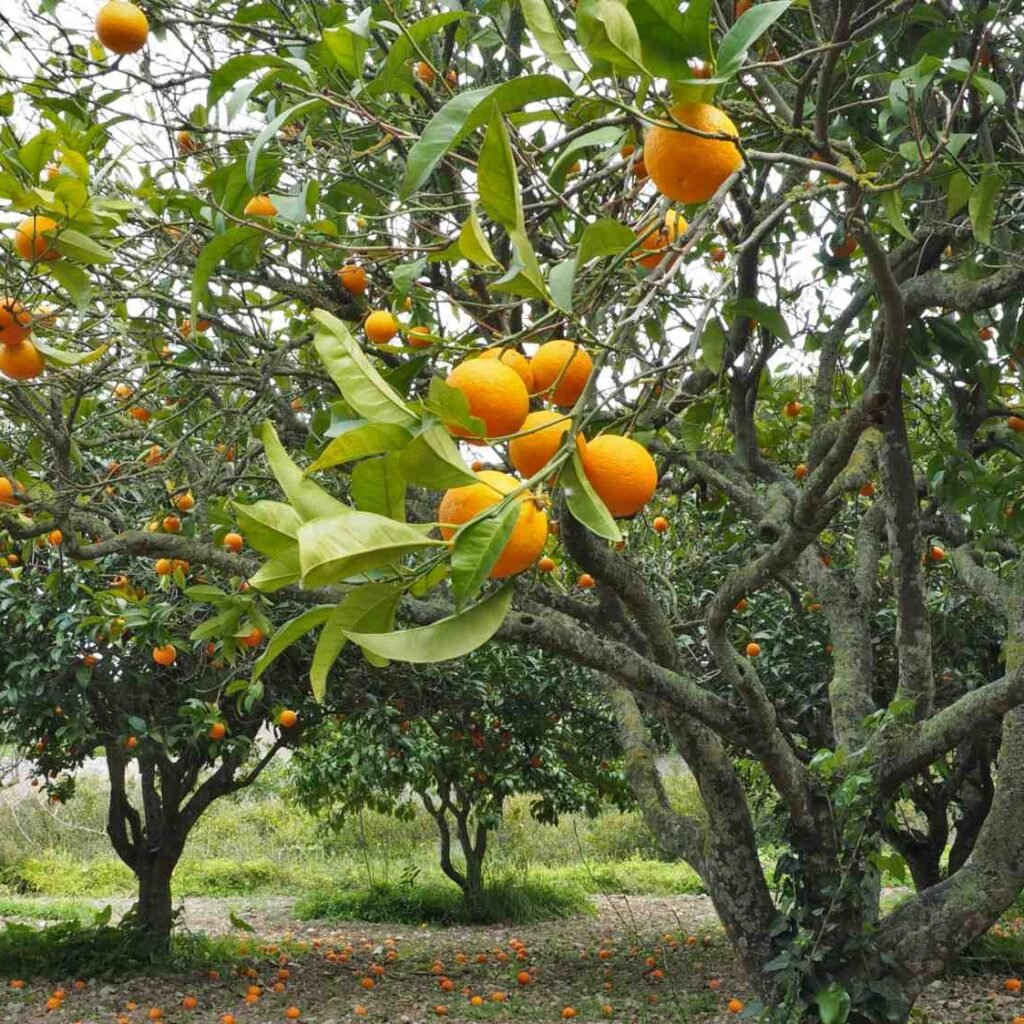
Recommended Trees:

  • Citrus, figs, avocados, olives, and pomegranates.

Extra Tips:

  • Provide afternoon shade for young trees during the first summer.
  • Use organic mulch to retain soil moisture.
  • Avoid midsummer planting—it’s too stressful.

4. Tropical and Subtropical Climates (USDA Zones 10–11)

In these areas, frost is rare, and growing seasons are nearly year-round.

Best Time to Plant:

  • End of the dry season, just before consistent rains begin.
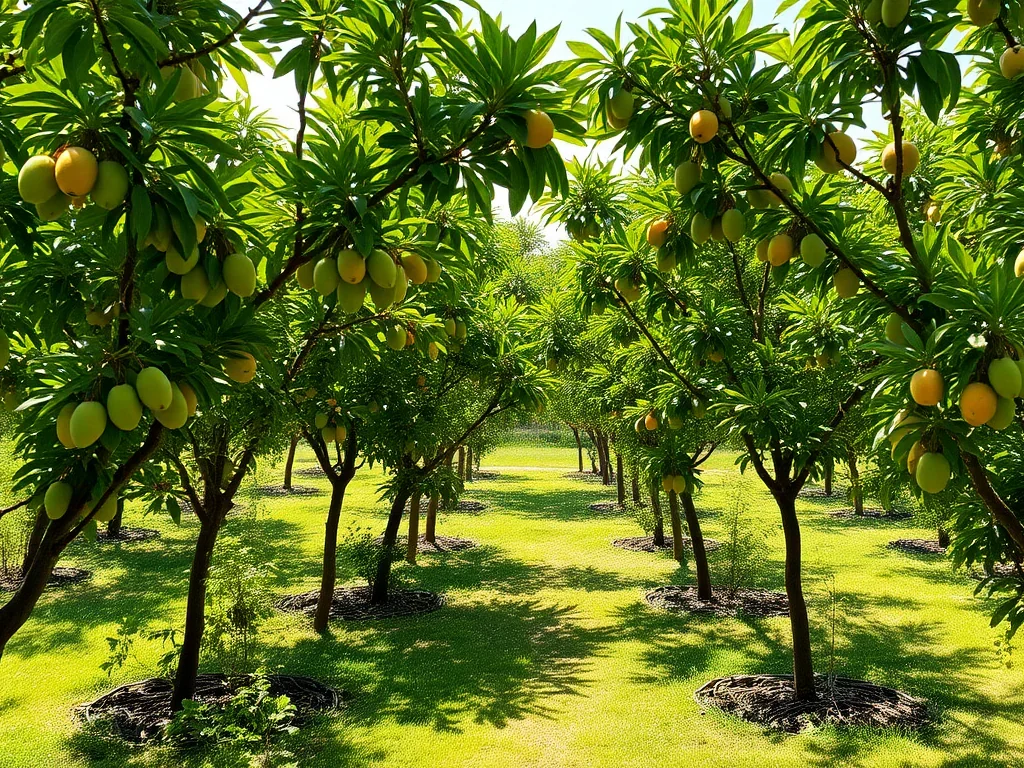
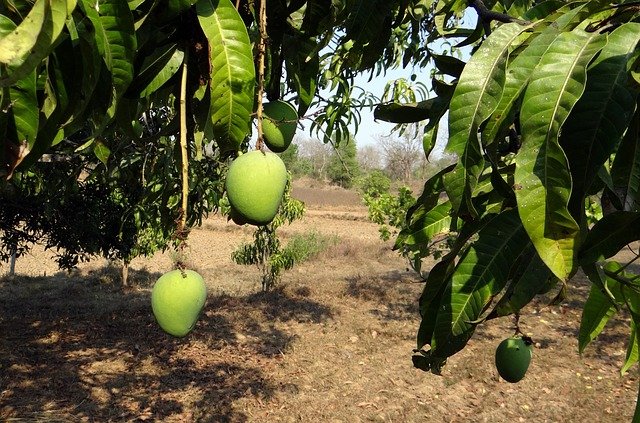
Recommended Trees:

  • Mango, banana, papaya, guava, lychee, and jackfruit.

Extra Tips:

  • Ensure good drainage; tropical rains can waterlog roots.
  • Provide partial shade for saplings until they’re established.
  • Fertilize lightly with organic compost after the first flush of growth.

How to Know Your Local Planting Window

If you’re unsure when to plant, use this simple method:

  1. Check your USDA zone (or local equivalent).
  2. Note your region’s frost dates.
    • In cold regions: plant after the last frost.
    • In warm regions: plant 6–8 weeks before the first frost.
  3. Observe soil temperature.
    • Ideal range for most fruit trees: 50–65°F (10–18°C).
  4. Watch local nurseries.
    • When they start selling fruit trees, it’s usually the right time.

Bare-Root vs. Potted Trees: Timing Differences

The type of fruit tree you buy also affects the ideal planting time.

  • Bare-root trees (sold without soil) should be planted while dormant, typically in late winter or early spring.
  • Container-grown trees (in pots) offer flexibility—you can plant them almost any time, as long as the soil isn’t frozen or waterlogged.

Preparing the Perfect Planting Spot

No matter the season or region, successful planting starts with preparation.

Step 1: Choose a sunny location.
Most fruit trees need at least 6–8 hours of direct sunlight daily.

Step 2: Test and amend your soil.
Fruit trees prefer well-draining, loamy soil with a pH between 6.0–7.0. Mix in compost for fertility and texture.

Step 3: Dig the right hole.
Twice as wide as the root ball, but no deeper than the roots themselves. Planting too deep can suffocate the tree.

Step 4: Water deeply and mulch.
Give the tree a long drink right after planting. Then spread 2–3 inches of mulch (like wood chips) around the base—just not touching the trunk.


Caring for Young Fruit Trees After Planting

Planting is only half the job—aftercare ensures survival.

  • Water regularly for the first year, especially in dry spells.
  • Stake if needed to protect against wind until roots are firm.
  • Prune lightly to remove weak or crossing branches.
  • Fertilize sparingly—too much early nitrogen can cause weak, sappy growth.

By the second year, your tree should show strong new growth and begin shaping into a productive form.


Final Thoughts: Timing Is Everything

Planting a fruit tree at the right time for your climate isn’t just about getting it in the ground—it’s about setting it up for a lifetime of healthy growth and abundant harvests. When you align planting with your local weather patterns and soil conditions, you give your tree the best possible start.


How To Protect Basil From Pests Naturally

How To Protect Basil From Pests Naturally

Few things compare to the joy of snipping fresh basil from your garden to top a pasta dish or craft the perfect pesto. But if you’ve ever walked outside to find your basil leaves chewed, hole-ridden, or mysteriously discolored, you’re not alone. Basil—despite its strong aroma and essential oils—is a magnet for pests.

Aphids, whiteflies, slugs, spider mites, and Japanese beetles are just a few of the unwelcome guests that love basil as much as we do. The good news? You don’t need chemical sprays to keep them away. Nature provides plenty of safe, effective, and eco-friendly ways to protect your basil from pests naturally—and ensure your plants stay lush, green, and flavorful all season long.

Here’s your complete, detailed guide on how to do it.


Why Basil Attracts Pests

Basil’s rich aroma and tender leaves make it irresistible not just to humans but to insects as well. The plant’s essential oils contain compounds that, while fragrant to us, actually act as feeding stimulants for certain pests.

Common culprits include:

  • Aphids: Tiny green, black, or white bugs that suck sap and leave behind sticky residue.
  • Whiteflies: Small, moth-like insects that gather on the undersides of leaves.
  • Spider mites: Almost invisible red or brown dots that create fine webbing.
  • Slugs and snails: Chew irregular holes in leaves, especially in damp conditions.
  • Japanese beetles: Metallic beetles that skeletonize leaves quickly.
  • Thrips: Tiny insects that leave silvery streaks on basil leaves.

Knowing which pest you’re dealing with helps you choose the right natural control method.


Step 1: Start With Healthy Soil

Healthy plants are naturally more resistant to pests. The first line of defense starts underground—with strong roots and balanced soil.

How to do it:

  • Use rich, well-draining potting soil mixed with compost or worm castings.
  • Maintain soil moisture but avoid overwatering—wet soil attracts fungus gnats and slugs.
  • Add organic matter (like compost tea or fish emulsion) every few weeks to strengthen plant immunity.
  • Ensure good air circulation between plants; overcrowding encourages pest buildup.

Healthy soil supports robust growth, making it harder for insects to damage your basil significantly.


Step 2: Practice Smart Planting and Spacing

Certain plants naturally repel pests that target basil. Planting them nearby is an age-old, chemical-free trick called companion planting.

Best basil companions:

  • Marigolds: Their scent repels aphids and whiteflies.
  • Chives and garlic: Naturally deter spider mites and beetles.
  • Oregano and thyme: Their strong aroma confuses pests.
  • Mint: Keeps away aphids—but keep it in a separate pot (mint spreads aggressively).

Avoid planting basil near:

  • Rue or sage, which can stunt basil’s growth.

Spacing tip:
Plant basil at least 12 inches apart to allow airflow. Stagnant, humid air invites spider mites and fungal pests.


Step 3: Inspect Regularly

A daily or every-other-day glance at your basil can save the plant before an infestation gets out of control.

What to look for:

  • Discolored, curled, or sticky leaves (signs of aphids or whiteflies).
  • Tiny webs or specks under leaves (spider mites).
  • Holes or slime trails (slugs or snails).

What to do immediately:

  • Remove affected leaves and discard them.
  • Rinse the plant gently with water to knock off visible insects.
  • For severe cases, prune heavily infested stems to prevent spread.

Early action is your best natural pest control.


Step 4: Use Natural Sprays

You can make effective pest repellents right in your kitchen using safe, non-toxic ingredients. These homemade sprays protect basil without harming beneficial insects like bees or ladybugs.

1. Garlic Spray

Ingredients:

  • 2 whole garlic bulbs
  • 1 tablespoon mild liquid soap
  • 1 quart (1 liter) of water

Instructions:

  1. Blend garlic and water.
  2. Let it sit overnight, then strain.
  3. Add soap and pour into a spray bottle.
  4. Spray both sides of the leaves every few days.

Effect: Repels aphids, beetles, and spider mites.


2. Chili Pepper Spray

Ingredients:

  • 1 tablespoon red pepper flakes or fresh chili
  • 1 quart water
  • A few drops of dish soap

Instructions:
Boil pepper in water for 10 minutes, cool, strain, add soap, and spray on basil.

Effect: Keeps away chewing insects like beetles and caterpillars.


3. Neem Oil Spray

Ingredients:

  • 1 teaspoon cold-pressed neem oil
  • 1 teaspoon mild soap
  • 1 quart water

Instructions:
Mix all ingredients and spray directly onto leaves once a week.

Effect: Works as a natural insecticide and antifungal treatment. Safe for organic gardening.


4. Lemon Spray

Ingredients:

  • Peels from 2 lemons
  • 1 pint boiling water

Instructions:
Steep peels overnight, strain, pour into a spray bottle, and mist over basil.

Effect: Repels aphids and whiteflies while leaving a fresh scent.


Step 5: Attract Beneficial Insects

Not all insects are enemies. Ladybugs, lacewings, and parasitic wasps feed on the very pests that attack basil. Encouraging them naturally keeps the balance in your garden.

How to attract beneficial insects:

  • Plant dill, fennel, or yarrow nearby—they produce nectar that attracts ladybugs.
  • Avoid broad-spectrum pesticides (even organic ones) that kill helpful insects.
  • Keep a small water source or shallow dish nearby for insects to drink from.

A single ladybug can eat up to 50 aphids a day, making it one of nature’s best pest control agents.


Step 6: Control Slugs and Snails Naturally

Slugs and snails are nocturnal leaf-chewers that love basil’s tender growth.

Natural ways to control them:

  • Copper tape: Place around pots—slugs avoid crossing it due to a mild electric reaction.
  • Beer traps: Bury shallow dishes filled with beer near plants. The yeast attracts slugs, and they drown in it.
  • Diatomaceous earth: Sprinkle a ring around basil plants. The fine powder dehydrates soft-bodied pests.
  • Hand-pick: Go slug-hunting at dusk or dawn with gloves and remove them manually.

Step 7: Maintain Proper Watering Habits

Basil thrives in moist but well-drained soil. Overwatering invites fungus and pests like fungus gnats, while underwatering stresses plants, making them more vulnerable.

Watering tips:

  • Water early in the morning to allow leaves to dry during the day.
  • Avoid wetting the foliage; aim for the soil base instead.
  • Check the soil’s top inch—if it’s dry, it’s time to water.

Balanced moisture discourages pests and promotes stronger, pest-resistant growth.


Step 8: Prune and Harvest Frequently

Regular pruning not only keeps basil bushy and productive—it also prevents pest buildup. Pests tend to gather on old or overcrowded leaves.

How to prune correctly:

  • Pinch off stems just above a leaf node (where two leaves meet the stem).
  • Remove any flowers immediately—they divert energy from leaf production.
  • Dispose of trimmings away from the garden if they show pest damage.

This keeps your basil healthy, encourages constant growth, and makes it less attractive to invaders.


Step 9: Rotate and Refresh

If you grow basil year after year in the same soil, pests and fungal spores can accumulate.

To prevent this:

  • Rotate basil pots or plant in a different area each season.
  • Refresh potting soil every few months with compost.
  • Disinfect containers with mild vinegar or soapy water before replanting.

Rotation breaks the pest life cycle and reduces long-term infestations naturally.


Step 10: Use Physical Barriers

Sometimes the simplest methods are the most effective.

Protective measures:

  • Fine mesh netting or floating row covers keep beetles and flies away without chemicals.
  • Mulching with straw or bark helps deter crawling pests and maintains moisture.
  • For potted basil, bring plants indoors during pest-heavy months or at night.

Barriers are especially useful for small, container-grown basil plants where prevention is easier than cure.


Bonus Tip: Choose Pest-Resistant Basil Varieties

Some basil cultivars naturally repel pests better than others thanks to higher concentrations of essential oils.

Try these varieties:

  • Lemon basil: High in limonene, deterring aphids.
  • Cinnamon basil: Naturally resists mites.
  • Thai basil: Tougher leaves less appealing to chewing insects.

A little variety goes a long way in creating a pest-resistant basil garden.


Final Thoughts

Protecting your basil from pests doesn’t have to mean reaching for harsh chemicals. Nature offers everything you need to defend your plants—garlic, neem oil, helpful insects, smart planting techniques, and good old-fashioned vigilance.

When you build a thriving ecosystem rather than fight against it, your basil rewards you with lush growth, vibrant flavor, and an endless harvest all season long.

So next time you spot a hole in your basil leaf, don’t panic—reach for your homemade garlic spray, invite some ladybugs to the party, and let nature do what it does best: restore balance.

7 Herbs You Can Grow Together In One Pot

7 Herbs You Can Grow Together In One Pot

There’s something magical about stepping out to your balcony or kitchen windowsill and snipping fresh herbs straight from your own little garden. But what if you don’t have space for multiple pots or a large backyard? The good news is—you don’t need it. Many herbs thrive beautifully when planted together in a single pot, creating not only a lush mini-garden but also an endless source of fresh flavor right at your fingertips.

Growing compatible herbs side by side saves space, conserves water, and even enhances each plant’s growth when chosen wisely. The trick lies in pairing herbs that share similar sunlight, watering, and soil preferences.

Here’s your complete guide to the seven best herbs you can grow together in one pot—and how to make sure they flourish all year long.


Why Grow Herbs Together

Before we dive into the list, let’s look at why companion planting works so well for herbs:

  1. Space-saving: Perfect for small apartments, balconies, or kitchen windows.
  2. Moisture management: Herbs with similar needs can be watered at once without over- or under-watering.
  3. Pest control: Certain combinations naturally deter insects and pests.
  4. Enhanced flavor: Some herbs release compounds that can subtly boost the aroma and vigor of nearby plants.
  5. Aesthetic appeal: A mix of green textures, heights, and even blossoms can make one pot look like a mini herb forest.

The secret? Group herbs that thrive under the same growing conditions.


General Rules for Mixing Herbs

To successfully grow multiple herbs in one pot, remember these key points:

  • Light: Most culinary herbs love full sun—around 6 to 8 hours of sunlight daily.
  • Soil: Use well-draining, nutrient-rich potting mix (not garden soil).
  • Water: Mediterranean herbs like rosemary, oregano, and thyme prefer drier soil; soft herbs like basil and parsley like it slightly moist.
  • Pot size: Choose a wide container (12–18 inches in diameter) with drainage holes so each herb has room to spread.

Now, let’s explore the best herb combinations that play well together.


1. Basil, Parsley, and Cilantro — The Classic Trio

If you cook often, this trio will cover most of your recipes—from Italian to Indian to Mediterranean.

Why They Work Together:
Basil, parsley, and cilantro all enjoy rich, moist soil and regular watering. They thrive in partial to full sunlight and prefer moderate temperatures—not too dry, not too hot.

Tips for Growing:

  • Place basil near the center—it grows bushier.
  • Keep parsley at the edge; it grows lower and spreads beautifully.
  • Plant cilantro where it gets a bit more shade since it can bolt (flower too soon) in strong sunlight.
  • Keep soil evenly moist but never soggy.

Bonus tip: Pinch off basil flowers as soon as they appear to keep leaves flavorful longer.


2. Rosemary, Thyme, and Oregano — The Mediterranean Mix

These sun-loving herbs thrive in dry, rocky Mediterranean soil and are ideal partners. They practically take care of themselves once established.

Why They Work Together:
They all prefer well-draining soil, lots of sunlight, and less frequent watering. Grouping them prevents the overwatering that kills these drought-tolerant herbs.

Tips for Growing:

  • Use a terracotta pot—it absorbs excess moisture.
  • Mix sand or perlite into the soil to improve drainage.
  • Water only when the top inch of soil feels dry.
  • Prune regularly to prevent woody growth.

Flavor Bonus:
These three herbs form the base of many Mediterranean dishes—from roasted vegetables and grilled meats to soups and stews. Having them together makes cooking seamless and flavorful.


3. Mint and Lemon Balm — The Fragrant Duo

For a refreshing pot that smells as good as it looks, pair mint with lemon balm. Both belong to the mint family (Lamiaceae) and love similar conditions.

Why They Work Together:
They both thrive in moist soil and partial sunlight. Lemon balm adds a sweet citrus fragrance, while mint adds a cooling freshness—perfect for teas, salads, and desserts.

Tips for Growing:

  • Use a deep pot—both plants spread quickly via underground runners.
  • Keep them well-watered but not soggy.
  • Trim regularly to control growth and encourage new leaves.
  • Place in a spot that gets morning sun and afternoon shade.

Pro Tip:
If you’re growing different mint varieties (like peppermint and spearmint), keep them in separate sections or containers to prevent cross-flavoring.


4. Chives, Dill, and Parsley — The Delicate Herb Mix

If you prefer softer herbs that complement soups, dips, and salads, this gentle trio is perfect.

Why They Work Together:
They all appreciate rich, moist soil, regular watering, and partial to full sunlight. They’re also fast growers, so you’ll have constant harvests through the season.

Tips for Growing:

  • Keep chives at the back—they grow taller.
  • Dill should be at the center, supported if it gets leggy.
  • Parsley works beautifully around the edges as a ground cover.
  • Snip regularly to prevent flowering, which reduces flavor.

Flavor Bonus:
This combination provides a light, refreshing balance of oniony, grassy, and citrusy flavors—great for potato salads, yogurt dips, or scrambled eggs.


5. Sage, Oregano, and Thyme — The Savory Herb Trio

This combination is a powerhouse for cooks who love savory, earthy flavors.

Why They Work Together:
All three herbs are Mediterranean natives, preferring full sun, sandy soil, and minimal watering. They tolerate dry conditions beautifully and even enhance each other’s growth by deterring pests naturally.

Tips for Growing:

  • Choose a wide, shallow pot for airflow.
  • Use a mix of potting soil and coarse sand.
  • Water sparingly—only when soil is dry.
  • Remove old woody stems to encourage new growth.

Best For:
This trio pairs beautifully with roasted potatoes, grilled vegetables, poultry, and bread seasoning blends.


6. Basil and Chives — The Flavor Boost Pair

If you love Italian or Asian dishes, this dynamic duo is all you need.

Why They Work Together:
Both enjoy moist, fertile soil and consistent watering. Basil’s broad leaves provide partial shade for chives, which can dry out in intense sun.

Tips for Growing:

  • Keep soil slightly damp; never let it fully dry.
  • Pinch off basil flowers early to keep leaves tender.
  • Harvest frequently to promote bushy growth.

Pro Tip:
Basil’s aromatic oils can even help repel aphids and spider mites, protecting nearby herbs naturally.


7. Lavender, Rosemary, and Sage — The Aromatic Sun Lovers

If you want a pot that’s as ornamental as it is useful, this trio creates a stunning and fragrant display.

Why They Work Together:
These herbs all thrive in sunny, dry environments with excellent drainage. They share a love for less frequent watering and poor-to-moderate soil fertility, which prevents fungal issues.

Tips for Growing:

  • Place in a sun-drenched location (6–8 hours of sunlight).
  • Water sparingly—these herbs prefer to stay dry.
  • Trim lavender after flowering to keep it neat.
  • Avoid over-fertilizing—it reduces fragrance and essential oils.

Bonus:
This trio attracts pollinators like bees and butterflies while filling your space with calming scents.


Potting and Layout Tips

When planting multiple herbs in one pot:

  1. Start with quality potting soil—add compost for nutrients and perlite for drainage.
  2. Group herbs with similar water needs. (Never mix mint with rosemary—it’s a recipe for one dying!)
  3. Space plants adequately. Leave 4–6 inches between each to prevent overcrowding.
  4. Water deeply but infrequently. Let soil dry slightly before watering again.
  5. Harvest often. Regular trimming encourages new shoots and prevents legginess.

For an extra touch of beauty, add decorative stones or pebbles on top to retain moisture and give your pot a polished look.


Bonus Tip: Rotate Your Pot

If your herbs are indoors or on a balcony, rotate the pot every few days to ensure even sunlight exposure. Herbs that lean toward the sun can become lopsided or weak.


Final Thoughts

A single pot of mixed herbs is more than just a gardening project—it’s a fragrant, flavorful work of art. By pairing herbs that naturally complement each other, you can create a thriving mini-garden that’s both practical and beautiful.

Whether you love the sweet scent of basil and parsley, the rustic charm of rosemary and thyme, or the refreshing burst of mint and lemon balm, there’s a perfect combination waiting for your windowsill or patio.

So grab a wide pot, some rich soil, and your favorite seedlings—and watch as your one-pot herb garden becomes the freshest, most rewarding part of your home.

The Best Time Of Day To Harvest Fresh Herbs

The Best Time Of Day To Harvest Fresh Herbs

If you’ve ever plucked a handful of basil for dinner or snipped some rosemary for roasting, you already know how satisfying it is to cook with herbs straight from the garden. But here’s something many home gardeners don’t realize—when you harvest herbs can make a big difference in their flavor, fragrance, and shelf life.

Whether you grow mint on your balcony, parsley in a kitchen pot, or a full outdoor herb garden, timing your harvest correctly can mean the difference between mildly fragrant leaves and ones bursting with aromatic oils.

So, what’s the best time of day to harvest herbs—and why does it matter so much? Let’s explore the science and secrets behind the perfect harvest.


Why Timing Matters

Herbs are rich in essential oils, the natural compounds that give them their characteristic aroma and taste. These oils are stored in tiny glands within the leaves, stems, and flowers.

Throughout the day, these oil levels fluctuate depending on sunlight, temperature, and plant activity. Harvesting at the right time means you’re capturing the leaves when they contain the highest concentration of essential oils, ensuring stronger flavor and longer-lasting freshness.

In simple terms:

  • Harvest too early → moisture-heavy, diluted flavor
  • Harvest too late → oils may evaporate, reducing aroma

The goal is to catch your herbs at their peak potency.


The Golden Hour: Early Morning

The best time of day to harvest fresh herbs is early in the morning—just after the dew has dried, but before the sun gets hot.

Here’s why morning is ideal:

  1. Maximum Essential Oils: Overnight, herbs rest and replenish their natural oils. These oils reach their highest levels just before the sun begins to evaporate them.
  2. Cooler Temperatures: The leaves are firm, crisp, and less likely to wilt when picked in cooler air.
  3. Balanced Moisture: Waiting until the morning dew has evaporated prevents excess moisture, which can encourage mold or mildew during storage.

Perfect window: Usually between 7:00 AM and 9:00 AM, depending on your climate.

This is when basil smells its strongest, rosemary feels slightly resinous, and mint gives off its signature cool aroma—proof that essential oils are at their peak.


Why You Should Avoid Midday Harvesting

When the sun is high and the temperature climbs, herbs naturally begin to transpire—they release moisture and oils through their leaves to stay cool.

If you harvest during this time:

  • The essential oils start evaporating, dulling flavor.
  • The leaves may wilt quickly from the heat.
  • You’ll need to work harder to keep herbs fresh after cutting.

Unless it’s absolutely necessary, avoid harvesting between 11 AM and 4 PM, especially on hot or dry days.

If you must harvest during the day, immediately place the herbs in a bowl of cool water to rehydrate and preserve freshness.


Can You Harvest in the Evening?

Evening harvesting can be a decent alternative—especially if you missed the morning window.

In the evening:

  • The sun is low, so plants are cooler and less stressed.
  • Essential oil levels rise again slightly, though not as high as in the morning.

However, nighttime moisture can encourage fungal issues, so if you harvest late in the day, make sure the leaves are dry before storing or using them.

Pro tip: Early evening (around 5 PM to 6:30 PM) on a mild day is best, particularly for herbs like oregano, thyme, or rosemary, which are more resilient.


Harvesting by Herb Type: Specific Tips

Different herbs have different oil patterns, so while the general rule (morning) applies broadly, here’s how to fine-tune your timing for the most popular varieties:

1. Basil

  • Best time: Early morning, after dew dries.
  • Why: Basil’s essential oils (especially eugenol and linalool) are most concentrated before exposure to strong sunlight.
  • Extra tip: Pinch off stems just above a leaf pair to encourage bushy regrowth.

2. Mint

  • Best time: Morning before heat builds up.
  • Why: Mint’s menthol-rich oils evaporate quickly in sun.
  • Extra tip: Harvest right before flowering for the boldest flavor.

3. Rosemary

  • Best time: Mid-morning (around 9–10 AM).
  • Why: Its resinous oils develop early but continue strengthening in mild sun.
  • Extra tip: Snip sprigs from new growth for tender, aromatic leaves.

4. Parsley

  • Best time: Early morning or early evening.
  • Why: It holds moisture longer than most herbs but still benefits from cooler temps.
  • Extra tip: Cut outer stems first, allowing new ones to grow from the center.

5. Thyme & Oregano

  • Best time: Late morning, once dew evaporates but before strong sunlight.
  • Why: These Mediterranean herbs handle a bit of warmth but lose oils under intense sun.
  • Extra tip: Harvest right before flowering for maximum flavor.

6. Cilantro (Coriander)

  • Best time: Early morning.
  • Why: Cilantro bolts (flowers) easily in heat, and flavor fades quickly.
  • Extra tip: Frequent cutting helps delay bolting.

How Often To Harvest

Herbs love to be harvested—regular cutting actually encourages more growth. The key is to never take too much at once.

  • For young plants: Harvest lightly (no more than ⅓ of the plant at a time).
  • For mature herbs: You can cut back up to half the plant safely.

Always leave enough leaves behind for photosynthesis so the plant can recover quickly.

If you’re growing herbs for continuous use, snip small amounts every few days. If you’re preparing for drying or preserving, time your big harvests for early morning on a dry day.


Preparing Herbs for Storage After Harvest

Once you’ve harvested your herbs at the right time, the next step is to preserve their freshness.

Here’s how:

  1. Shake off dirt or bugs. Avoid washing herbs unless necessary; if you do, pat them dry completely.
  2. Keep them cool. Place in a damp paper towel and store in a perforated plastic bag in the refrigerator.
  3. Use quickly. Fresh herbs are best within 3–5 days.

For drying or freezing:

  • Dry herbs immediately after morning harvest, when oils are most potent.
  • Hang them upside down in a cool, shaded, well-ventilated space.
  • For freezing, chop and store in ice cube trays with olive oil or water.

By preserving herbs at their peak, you’ll enjoy vibrant flavors long after the growing season ends.


Weather and Seasonal Considerations

Even the best time of day can vary slightly depending on weather and climate:

  • Cool, cloudy mornings: Wait until the air warms slightly; damp leaves can rot easily.
  • Hot, dry days: Harvest earlier—right after sunrise—to prevent wilting.
  • Rainy periods: Avoid harvesting right after rain. Wait at least a day for oils to replenish and leaves to dry.

If you garden in a humid area, focus on airflow and quick drying after harvest to prevent mold.


Bonus Tip: Harvest Before Flowering

The stage of growth is just as important as the time of day. For most herbs, the best flavor comes right before they flower. Once an herb blooms, it directs energy into seed production, and the leaves often turn bitter or lose their aroma.

If you see flower buds forming, snip them off immediately or do a full harvest of the plant. This encourages fresh, flavorful regrowth.

Exception: If you enjoy edible blossoms (like chive or basil flowers), let some plants bloom—but harvest leaves from non-flowering shoots for better taste.


The Perfect Harvest Routine

Here’s a quick routine you can follow for consistently flavorful herbs:

  1. Early morning: Wait for dew to dry.
  2. Inspect: Choose mature, healthy leaves.
  3. Cut cleanly: Use sharp scissors to prevent bruising.
  4. Cool and dry: Keep in shade while harvesting to prevent oil loss.
  5. Use or store promptly.

By following this rhythm, you’ll notice a clear difference—more aroma, more taste, and longer-lasting herbs in your kitchen.


Final Thoughts

The best time of day to harvest herbs isn’t just a gardener’s superstition—it’s a science-backed practice that makes a world of difference.

Morning, with its calm air and gentle light, captures herbs at their peak of perfection—when they’re brimming with essential oils and natural vitality.

So, the next time you step into your garden, take a moment to enjoy that quiet morning freshness, scissors in hand. Snip a few sprigs of basil or mint, inhale their fragrance, and know you’ve harvested them at the perfect moment—nature’s own golden hour for flavor.

How To Divide Overgrown Chive Plants For More Harvest

How To Divide Overgrown Chive Plants For More Harvest

If you’ve been growing chives for a few seasons, you’ve probably noticed how quickly they can fill up their pot or garden space. What starts as a small, neat clump of slender green stalks can turn into a thick, tangled mass that produces fewer leaves each year. Don’t worry—this isn’t a sign your chives are dying. It simply means they’re overgrown and ready to be divided.

Dividing chive plants is one of the easiest and most rewarding tasks for home gardeners. Not only does it rejuvenate the mother plant, but it also gives you new, healthy clumps to grow elsewhere or share with friends. With just a few tools and about 15 minutes, you can double—or even triple—your future harvests.

Here’s everything you need to know about how to divide overgrown chive plants, when to do it, and how to care for them afterward for the best results.


Why You Should Divide Chive Plants

Chives (Allium schoenoprasum) are hardy perennials belonging to the onion family. They’re known for their mild onion flavor and their ability to come back year after year with minimal effort. However, like all perennials, they benefit from occasional rejuvenation.

Over time, chive clumps become:

  • Crowded: Roots compete for nutrients, leading to thinner stalks and slower growth.
  • Woodier at the center: The middle of the plant often dies back while new shoots appear around the edges.
  • Less productive: Leaves may yellow early or stop growing as thick and flavorful.

By dividing the plant, you’re essentially resetting its growth cycle. Freshly separated clumps have more space to spread their roots, absorb nutrients, and produce lush, tender leaves.

Bonus: Each divided clump becomes a brand-new plant. So from one overgrown chive clump, you can easily get 4–6 new ones!


When To Divide Chives

Timing matters when it comes to division. Chives recover best during their active growing seasons—spring and early fall—when the weather is mild.

  • Best time: Early spring, just as new shoots start to emerge (March–April in most regions).
  • Alternative: Early fall (September–October), allowing plants to establish before winter dormancy.

Avoid dividing during hot midsummer or freezing winter conditions, as stress can delay recovery or kill tender new roots.

If you’re growing chives indoors, you can divide any time the plant looks overcrowded, as long as you provide consistent moisture and light.


What You’ll Need

Before you start, gather these simple tools and supplies:

  • Garden spade or trowel
  • Sharp knife or pruning shears (for cutting clumps)
  • Garden gloves
  • Watering can or hose
  • Compost or organic fertilizer
  • Pots or a prepared garden bed (for replanting divisions)

Tip: Water your chive plant well a day before dividing. Moist soil makes it easier to lift and separate the roots without damaging them.


Step-by-Step: How To Divide Overgrown Chive Plants

Step 1: Dig Up the Whole Clump

Start by loosening the soil around the base of the chive clump using a spade or garden fork. Be gentle—chive roots are fine and fibrous. Dig at least 3–4 inches away from the base to avoid cutting into the root system.

Carefully lift the entire plant out of the ground (or remove it from the pot) and shake off excess soil so you can see the roots clearly.


Step 2: Examine the Roots and Stems

Once out of the soil, take a close look at your chive plant. You’ll notice:

  • The outer edges are full of fresh, green shoots.
  • The center might be brown, woody, or even hollow.

This center portion is old growth that you can discard. Focus on the healthy outer clumps—these are the sections you’ll divide and replant.


Step 3: Separate the Clump Into Smaller Sections

Use your hands to gently pull apart the root ball. Chive roots are flexible and usually separate easily. If they’re densely tangled, use a sharp knife or pruning shears to cut through the mass.

Ideal division size: Each new section should have at least 8–10 shoots and a good amount of roots attached. Smaller divisions may take longer to establish, while larger ones rebound faster.

From a mature clump, you can typically create 4 to 6 new plants.


Step 4: Replant Immediately

Chives don’t like their roots drying out, so replant the divisions as soon as possible.

For garden planting:

  • Choose a sunny location with well-draining, fertile soil.
  • Enrich the soil with compost or aged manure.
  • Plant each division 6–8 inches apart in rows or clusters.
  • Water thoroughly to settle the soil around the roots.

For container planting:

  • Select pots that are at least 6 inches deep with drainage holes.
  • Use a high-quality potting mix with a bit of compost mixed in.
  • Keep one or two divisions per pot to allow for growth.
  • Place the pot in a bright spot with at least 5–6 hours of sunlight daily.

Step 5: Water and Mulch

After replanting, give the new divisions a deep watering. Chives prefer evenly moist (not soggy) soil. To help retain moisture and regulate temperature, spread a thin layer of straw, shredded leaves, or compost mulch around the base.

This also prevents weeds from competing with your young plants.


Aftercare: Helping Divided Chives Thrive

Newly divided chives need a little extra care while they re-establish.

For the first few weeks:

  • Water consistently: Keep soil lightly moist until you see new growth.
  • Avoid heavy harvesting: Let the plants rest and root. Wait at least 4–6 weeks before cutting leaves again.
  • Feed lightly: Once the plants show new shoots, apply a diluted liquid fertilizer or compost tea every two weeks.

Once established:
Chives are low-maintenance. Just water when the top inch of soil feels dry, and trim regularly to encourage fresh, tender growth.


Harvesting After Division

The great thing about dividing chives is that it doesn’t just rejuvenate them—it boosts your yield. Within a month or two of replanting, you’ll start seeing new, lush growth ready for harvest.

How to harvest properly:

  • Cut leaves from the outer part of the clump, about 1 inch above the soil.
  • Always use clean scissors or shears to prevent disease.
  • Regular harvesting (every 2–3 weeks) encourages the plant to produce more shoots.

By midsummer, your divided plants will be thick and productive again—perfect for topping salads, omelets, soups, and baked potatoes.


Bonus: Divide Flowering Chives Too

Chives are known not just for their flavorful leaves but also for their beautiful purple blooms that appear in late spring or early summer. These flowers are edible and attract pollinators like bees and butterflies.

If your chives are flowering heavily, don’t worry—you can still divide them!

  • Trim off the flower stalks before dividing to help the plant focus on root establishment.
  • You can also dry or freeze the blossoms to use in flavored vinegars or garnishes.

Extra Tips for Success

  • Rotate your planting spot: If you’re replanting in the garden, move divided chives to a new area to reduce soil fatigue and pest buildup.
  • Share the extras: Chive divisions make wonderful gifts for gardening friends—wrap the roots in damp paper and place them in small pots.
  • Divide every 2–3 years: This keeps your plants young, healthy, and productive.
  • Don’t skip pruning: Even after division, regular trimming prevents the plant from getting leggy or overcrowded again.

The Reward: More Harvests, Healthier Plants

Dividing overgrown chive plants isn’t just maintenance—it’s rejuvenation. In one simple afternoon, you can breathe new life into tired clumps and multiply your harvest for seasons to come. The process ensures stronger roots, fresher leaves, and an endless supply of that signature oniony flavor for your kitchen.

Whether you grow them in garden beds, window boxes, or patio pots, chives are one of the most forgiving herbs you’ll ever grow. And once you’ve mastered the art of division, you’ll never run out of chives again—no matter how often you snip them for your favorite dishes.

Why Your Mint Keeps Wilting—And How To Revive It

Why Your Mint Keeps Wilting—And How To Revive It

There’s nothing quite as frustrating as watching your once-lush mint plant go from vibrant green to droopy, lifeless stems. Mint is supposed to be one of the easiest herbs to grow—so why does it keep wilting on you? Whether it’s in a garden bed, on your kitchen windowsill, or in a small pot on your balcony, mint can be surprisingly sensitive to its environment. Luckily, reviving a wilted mint plant isn’t just possible—it’s often quite simple once you understand what’s going wrong.

Here’s a complete guide to why your mint keeps wilting and the steps you can take to bring it back to life (and keep it thriving year-round).


Understanding Mint: A Hardy Herb With a Few Demands

Mint belongs to the Mentha family, which includes popular varieties like spearmint, peppermint, and chocolate mint. It’s known for being a vigorous grower—so much so that it can easily take over a garden bed if not contained. But while it’s hardy, mint has one non-negotiable requirement: the right balance of moisture, light, and air circulation.

When these needs aren’t met, your mint plant starts sending distress signals in the form of wilting, yellowing leaves, or stunted growth.


1. The Most Common Cause: Inconsistent Watering

If your mint looks droopy, the first thing to check is water. Both underwatering and overwatering can cause wilting.

  • Underwatering:
    Mint thrives in evenly moist soil. If the top inch of the soil feels dry, your plant is thirsty. Drought stress causes the stems to droop and the leaves to lose their firmness.
  • Overwatering:
    Surprisingly, too much water can do just as much damage. Constantly soggy soil suffocates the roots and invites fungal diseases like root rot, making it impossible for the plant to absorb nutrients.

Fix it:

  1. Stick your finger into the soil—if it’s dry more than 1 inch down, water deeply.
  2. If the soil feels soggy, stop watering and allow it to dry out.
  3. Ensure your pot or garden bed has proper drainage holes. Mint hates sitting in waterlogged soil.
  4. For potted plants, use a light, well-draining potting mix rather than heavy garden soil.

Revival Tip:
If you suspect root rot, gently remove the plant from its pot, trim off black or mushy roots, and replant in fresh, dry soil.


2. Too Much (or Too Little) Sunlight

Mint loves sunlight, but too much direct heat can cause wilting—especially during hot afternoons. On the other hand, not enough light can lead to thin, weak stems.

Ideal conditions:

  • Mint prefers 4–6 hours of bright, indirect sunlight each day.
  • Morning sun with afternoon shade is perfect, especially in warmer climates.

Signs of light issues:

  • Scorched leaves: Too much sun exposure.
  • Leggy growth: Not enough light.
  • Drooping or curling: Heat stress or dehydration.

Fix it:
Move your plant to a spot with filtered light—like a windowsill that gets morning light or a shaded patio. If indoors, rotate the pot every few days to ensure even light exposure.


3. Poor Air Circulation or Crowding

Mint grows fast—and that can lead to overcrowding. When plants are too close together, air circulation decreases, creating a humid environment where fungal issues thrive.

Fix it:

  1. Thin out crowded stems every few weeks.
  2. Trim back the top growth regularly to encourage bushier growth.
  3. If you’re growing multiple herbs, give each one space to breathe—about 8–12 inches apart.

Pro Tip:
Frequent pruning not only prevents disease but also helps the plant channel energy into new growth. Plus, you get a steady supply of fresh leaves!


4. Nutrient Imbalance or Old Soil

Even hardy herbs need nutrients. Over time, the soil’s nutrient levels deplete, leaving your mint starved. On the other hand, too much fertilizer can burn roots and cause wilting.

Signs of nutrient problems:

  • Pale or yellowing leaves (nitrogen deficiency)
  • Weak stems or small leaves
  • Wilting despite proper watering

Fix it:

  1. Feed your mint with a balanced, water-soluble fertilizer (like 10-10-10) every 4–6 weeks during the growing season.
  2. Avoid heavy fertilization—it can lead to excessive, floppy growth with weak flavor.
  3. Repot container mint every spring with fresh potting soil to restore nutrients and improve drainage.

5. Container Issues: Root Bound or Poor Drainage

If your mint lives in a pot, the container itself might be the culprit. Mint’s roots expand rapidly, and when they outgrow their space, they become root-bound—tightly circling the pot and competing for water.

How to tell:

  • Water drains straight through without moistening the soil.
  • Roots are visible through the drainage holes.
  • The plant wilts quickly after watering.

Fix it:

  1. Remove the mint from the pot and inspect the roots.
  2. If they’re tangled or spiraled, gently tease them apart.
  3. Replant into a larger pot (at least 2 inches wider than the old one).
  4. Use fresh potting mix and water well.

Mint responds quickly to repotting—within a week or two, you’ll see new, vibrant growth.


6. Pests and Fungal Diseases

Even healthy mint can fall victim to pests like aphids, spider mites, or whiteflies, all of which suck the sap from leaves and cause wilting. Fungal issues such as powdery mildew or rust can also weaken the plant.

What to look for:

  • Sticky residue or small insects on leaves
  • White powdery coating (powdery mildew)
  • Orange or brown spots on the underside of leaves (rust)

Fix it naturally:

  1. Rinse the leaves gently with water to dislodge pests.
  2. Spray the plant with a mix of neem oil and water once a week.
  3. Trim away heavily infested or diseased leaves.
  4. Improve air circulation and avoid overhead watering.

For organic gardeners, neem oil is a safe and effective solution that won’t harm your edible leaves.


7. Environmental Stress: Sudden Changes in Temperature or Humidity

Mint plants dislike abrupt changes. Moving them from indoors to outdoors (or vice versa) without acclimating them can lead to wilting due to shock.

Fix it:

  • Gradually transition plants by placing them outdoors for a few hours each day over a week.
  • Keep indoor mint away from air conditioners or heat vents.
  • Mist the leaves occasionally in dry indoor environments.

Maintaining stable conditions helps your mint adjust without stress.


How To Revive a Wilting Mint Plant (Step-by-Step Guide)

If your mint is already drooping, don’t panic. Here’s a simple rescue plan:

  1. Trim the damage:
    Cut away any yellow, brown, or wilted leaves. Pruning encourages the plant to focus on new growth.
  2. Check the soil:
    Adjust watering—hydrate dry soil or let soggy soil dry out.
  3. Repot if necessary:
    Move the mint to a larger pot with fresh, well-draining soil if roots are cramped or diseased.
  4. Adjust light and temperature:
    Place the plant where it gets bright but gentle light and stays between 60–75°F (15–24°C).
  5. Feed lightly:
    After recovery, apply a mild fertilizer or compost tea to restore nutrients.
  6. Stay patient:
    Within 1–2 weeks, new shoots should begin to emerge. Mint is resilient—once the roots recover, it bounces back quickly.

Keeping Your Mint Thriving Long-Term

Once your mint is revived, focus on preventive care:

  • Water regularly, but don’t drown it. Keep soil moist, not soggy.
  • Prune weekly to encourage new shoots and prevent legginess.
  • Harvest often—frequent picking promotes healthy regrowth.
  • Divide your plants every spring to prevent root crowding.
  • Refresh the soil annually with compost or organic fertilizer.

A happy mint plant rewards you with lush, fragrant leaves perfect for tea, desserts, and summer cocktails.


Final Thoughts

A wilting mint plant doesn’t mean failure—it’s simply your plant’s way of communicating. Most often, a quick adjustment to watering, sunlight, or soil can make all the difference. Think of mint as a gentle teacher in the garden: once you learn its rhythms, it becomes nearly unstoppable.

With the right care, your once-droopy mint can return to its lively, aromatic glory—ready to perfume your garden and brighten your kitchen once again.

How To Grow Pineapples Indoors For A Tropical Touch

How To Grow Pineapples Indoors For A Tropical Touch

Imagine stepping into your living room and seeing a spiky, green pineapple plant soaking up sunlight from the window—its tropical leaves adding instant warmth and charm to your home. Even better? After some patience, you might harvest your very own golden pineapple right from your indoor garden.

It may sound ambitious, but growing pineapples indoors is entirely possible. Pineapple plants are surprisingly resilient, low-maintenance, and adaptable to container life. All you need is a sunny spot, a bit of care, and some tropical patience. Here’s your complete guide to growing pineapples indoors—from selecting the right fruit to enjoying your homegrown harvest.


Why Grow Pineapples Indoors?

Before you dive in, here’s why indoor pineapple gardening is worth your time:

  1. Tropical Beauty Year-Round: The pineapple’s sword-like leaves bring a touch of the tropics to any space.
  2. Low Maintenance: Pineapples are drought-tolerant and don’t need constant attention.
  3. Fun Project: Regrowing a plant from a store-bought pineapple top feels like magic.
  4. Fresh Fruit Reward: With patience, your plant can produce a small but delicious pineapple right in your home.

Even if you live in a cooler climate, pineapples can thrive indoors with the right care.


Step 1: Choose a Healthy Pineapple

Your journey starts at the grocery store or local market.

What to look for:

  • Pick a pineapple with healthy, green leaves—no brown tips or rot.
  • The fruit should be ripe but firm, with a golden-yellow skin and sweet aroma.
  • Avoid pineapples that are overripe or have soft spots.

Step 2: Prepare the Pineapple Top

Once you’ve enjoyed the fruit, it’s time to turn the crown into a new plant.

Here’s how:

  1. Twist off or cut the top crown about an inch below the leaves.
  2. Remove the lower leaves (about 1 inch from the base) to expose the stem.
  3. Check for any brown, soft, or moldy spots—trim them off.
  4. Allow the crown to dry for 2–3 days in a warm, airy spot.
    • This helps the cut end heal and prevents rotting when planted.

Step 3: Rooting the Pineapple Crown

Before planting, it’s best to root your pineapple crown in water.

Steps for rooting:

  1. Fill a glass or jar with water—just enough to cover the stem, not the leaves.
  2. Place the crown in the jar, using toothpicks to keep the leaves above water.
  3. Set the jar in a bright, warm spot (like a sunny windowsill).
  4. Change the water every 2–3 days to keep it fresh.

In 2–3 weeks, you’ll start to see roots forming—thin, white strands extending from the base. When the roots reach about 2–3 inches long, your pineapple is ready to plant.


Step 4: Plant Your Pineapple

Pineapples love well-draining soil—they’re tropical plants that hate soggy roots.

Here’s what you’ll need:

  • A 6–8 inch pot with drainage holes.
  • A light, airy mix such as cactus or succulent potting soil.
  • Optional: Add a handful of sand or perlite for extra drainage.

Planting process:

  1. Fill the pot with soil, leaving room for the crown.
  2. Plant the rooted crown so that the base is just below the soil surface.
  3. Gently press the soil around the plant to hold it upright.
  4. Water lightly until the soil is evenly moist (not wet).

Step 5: Find the Perfect Spot

Pineapples crave sunlight and warmth, mimicking their tropical origins.

Light:

  • Place your plant in a south- or west-facing window that receives at least 6–8 hours of direct sunlight daily.
  • If natural light is limited, use a grow light to supplement—especially during winter months.

Temperature:

  • Ideal range: 65°F–85°F (18°C–29°C).
  • Avoid cold drafts and temperatures below 60°F (15°C), which can stunt growth.

Step 6: Watering and Feeding

Pineapples are drought-tolerant, but consistent care helps them thrive.

Watering tips:

  • Water only when the top 2 inches of soil feel dry.
  • Pour water directly into the soil and the center rosette (leaf cup).
  • Always ensure the pot drains well—standing water causes root rot.

Fertilizing tips:

  • Feed every 2–3 weeks during spring and summer using a balanced liquid fertilizer (10-10-10) diluted to half strength.
  • Stop fertilizing in fall and winter when growth slows.

Step 7: Caring Through the Seasons

Growing pineapples indoors is mostly about patience. Here’s what to expect:

First Year:

  • Your plant focuses on growing strong leaves and roots.
  • Keep it warm, well-lit, and slightly dry between waterings.

Second Year:

  • You might notice a central flower stalk forming—it’s the beginning of your fruit!
  • The small purple flowers will eventually form a tiny pineapple at the center.

Fruit Development:

  • The pineapple takes 6–8 months to mature fully.
  • You’ll know it’s ripe when it turns golden and gives off a sweet aroma.

Step 8: Encouraging Your Pineapple to Fruit

Some plants take longer to flower indoors. If yours seems reluctant after two years, try this gentle trick used by tropical gardeners:

The Ethylene Gas Method

  1. Place your pineapple plant in a clear plastic bag.
  2. Add a ripe apple or banana inside the bag.
  3. Seal it loosely and leave it for a week.
  4. Ethylene gas from the fruit triggers flowering naturally.

After a few weeks, you may spot a tiny red or pink bud forming—it’s the start of your pineapple!


Step 9: Harvesting Your Indoor Pineapple

When your pineapple turns golden and fragrant, it’s ready.

How to harvest:

  • Twist the fruit gently from the stalk—it should come off easily.
  • Allow it to ripen for a day or two at room temperature for peak sweetness.

Step 10: After the Harvest

Don’t toss your plant—it can grow again!

After fruiting, the mother plant will slowly die back but produce “pups” or side shoots at its base.

Here’s what to do:

  1. Once pups are about 6 inches tall, cut them off gently.
  2. Replant them in new pots with fresh soil.
  3. Treat them like new pineapple crowns—your next generation of plants.

Common Indoor Pineapple Growing Problems

Even though pineapples are hardy, a few issues may pop up:

ProblemLikely CauseSolution
Brown leaf tipsDry air or low humidityMist leaves occasionally
Soft base or rotOverwateringLet soil dry between waterings
Slow growthNot enough lightMove closer to a window or use grow light
No fruit after 2 yearsLack of ethylene or nutrientsTry apple bag method & fertilize regularly

Keep an eye on your plant’s health, and adjust your routine accordingly.


Decorating with Indoor Pineapples

Beyond fruit, indoor pineapples make beautiful tropical accents. Try these ideas:

  • Decorate with style: Use woven baskets or ceramic pots for a coastal vibe.
  • Cluster with other tropicals: Pair with peace lilies, bird-of-paradise, or ferns.
  • Seasonal flair: Add fairy lights or small pebbles around the base for a festive look.

Your pineapple plant becomes not just a fruit source—but a living piece of home décor.


Final Thoughts

Growing pineapples indoors brings a bit of paradise to your everyday life. With a sunny window, well-draining soil, and a splash of patience, you can transform a grocery-store fruit into a lush tropical plant—and eventually, a sweet reward.

Whether or not your plant fruits, its bold leaves and exotic charm will brighten any room. And when it finally does produce that golden pineapple, you’ll taste the satisfaction of nurturing a tiny piece of the tropics right at home.

So next time you pick up a pineapple, don’t throw away the top—plant it, nurture it, and let it remind you that paradise can grow anywhere, even on your windowsill.

How To Protect Berry Plants From Birds: Keep Your Harvest Safe and Sweet

How To Protect Berry Plants From Birds: Keep Your Harvest Safe and Sweet

There’s nothing quite like the satisfaction of growing your own juicy strawberries, blueberries, raspberries, or blackberries—until you step into the garden one morning and realize the birds have beaten you to them. A few missing berries might seem harmless at first, but if you’ve ever watched a flock of starlings or robins descend on your berry patch, you know how quickly a full harvest can vanish.

Birds love berries just as much as humans do, and they’re smart, persistent, and quick to adapt. The good news? You don’t have to choose between feeding the wildlife and protecting your crop. With the right combination of physical barriers, deterrents, and smart garden design, you can enjoy your harvest without harming your feathered visitors.

Here’s your complete guide on how to protect berry plants from birds—safely, effectively, and beautifully.


Why Birds Love Berry Plants

Before diving into solutions, it helps to understand why your garden is such an irresistible buffet.

  1. Bright Colors: Ripe berries are nature’s candy—vibrant, shiny, and easy to spot from above.
  2. High Sugar Content: During breeding season, birds crave high-energy foods like ripe fruit to fuel their activity.
  3. Accessibility: Open patches, low-growing plants, or uncovered shrubs make for easy snacking.
  4. Water Source: Many berry patches are near moist soil or birdbaths—bonus hydration for visitors.

Understanding their motivations helps you outsmart them with humane, clever defenses.


Step 1: Start with Physical Barriers

When it comes to protecting berries, physical barriers are the most reliable and long-lasting solution. Birds can’t eat what they can’t reach.


1. Bird Netting (Your First Line of Defense)

How it works:
Bird netting creates a fine, flexible mesh barrier over your plants, preventing birds from pecking at your fruit while still allowing sunlight, air, and rain to pass through.

What to use:

  • Choose UV-resistant polyethylene netting with small holes (¼-inch or smaller).
  • For blueberries, a hoop frame or cage works best to keep netting elevated.
  • For strawberries, you can drape netting directly over the plants and secure the edges with garden staples or rocks.

Tips for success:

  • Keep netting taut and elevated—loose netting can trap birds.
  • Leave enough room inside for pollinators before fruit sets, then cover once berries begin to color.
  • Remove after harvest to allow plants to breathe freely.

2. Berry Cages or Enclosures

For larger plantings, a permanent cage or tunnel can save time and frustration.

What to build:

  • Construct a simple frame using wood, PVC pipe, or metal poles.
  • Cover with bird netting, chicken wire, or hardware cloth.
  • Add a hinged door or flap for easy harvesting.

These structures are ideal for perennial berry bushes like blueberries or raspberries. They blend neatly into the garden and can last for years.


3. Floating Row Covers or Garden Fabric

If you’re growing low-lying berries (like strawberries), lightweight garden fabric or floating row covers can work wonders.

Advantages:

  • Protects from birds, insects, and harsh weather.
  • Lets in sunlight and moisture.
  • Easy to remove for pollination.

Secure the fabric’s edges with stones or pins and lift it occasionally to check ripening progress.


Step 2: Use Visual Bird Deterrents

Birds are intelligent but cautious creatures. They avoid unfamiliar or “threatening” movements and reflections. Visual deterrents take advantage of this behavior.


1. Reflective Tape and Streamers

Shiny, moving objects create light flashes that confuse and scare birds.

How to use:

  • Hang reflective bird scare tape, old CDs, or aluminum foil strips around your garden.
  • Place them near berry clusters where sunlight will hit them directly.
  • Replace or reposition occasionally—birds can get used to them over time.

2. Fake Predators (Owls, Hawks, Snakes)

Plastic predator decoys can deter birds temporarily, especially when moved regularly.

Tips for effectiveness:

  • Use owl or hawk decoys with moving heads or reflective eyes.
  • Move them to new spots every few days to maintain the illusion of danger.
  • Mix in rubber snakes among plants for extra realism.

3. Garden Spinners and Pinwheels

Wind-powered movement adds both beauty and function. Brightly colored or metallic spinners reflect light and move unpredictably, keeping birds on edge.


Step 3: Add Sound-Based Deterrents

While less visually appealing, sound deterrents can be very effective when used sparingly.

Options include:

  • Wind chimes: Gentle, random noise keeps skittish birds away.
  • Ultrasonic bird repellents: Emit high-frequency sounds unpleasant to birds but inaudible to humans.
  • Motion-activated devices: Some play predator calls or emit bursts of air when birds approach.

Step 4: Make Your Garden Less Inviting

Sometimes the best protection is simple prevention. By modifying your garden environment, you can reduce its appeal to feathered visitors.

1. Remove Nearby Perches:
Cut back overhanging tree limbs or tall shrubs where birds rest before swooping in for berries.

2. Harvest Frequently:
Pick berries as soon as they ripen—birds are drawn to bright, fully colored fruit.

3. Avoid Leaving Fallen Fruit:
Rotting or leftover berries attract birds (and other pests). Keep your patch clean.

4. Plant Distraction Crops:
Grow sacrificial berry bushes (like mulberries or elderberries) away from your main patch. Birds will often feast there instead.


Step 5: Try Taste and Smell Repellents

If physical and visual barriers aren’t enough, natural repellents can add a protective layer.

1. Bird-Safe Repellent Sprays:

  • Use non-toxic sprays made from garlic, peppermint oil, or chili pepper.
  • They alter the flavor and scent of berries (harmlessly) to discourage feeding.
  • Reapply after rain for best results.

2. Homemade Options:
Mix water with crushed chili peppers or vinegar and spray lightly over leaves—not directly on ripening fruit to avoid flavor changes.


Step 6: Create a Balanced Ecosystem

While it’s frustrating to lose berries to birds, remember they also play a valuable role in the garden. Many eat insects, slugs, and other pests. Instead of waging war, aim for balance.

  • Plant decoy zones: Grow wild berry bushes like serviceberries or elderberries at the far end of your yard.
  • Offer alternative food sources: A simple bird feeder filled with seeds can divert attention away from your fruit.
  • Provide water elsewhere: A birdbath away from your patch reduces berry pecking for hydration.

This approach lets you coexist with wildlife while still enjoying a full harvest.


Step 7: Combine Methods for Best Results

The most effective bird protection strategy uses layers of defense.

Try combining:

  • Netting or cages (physical barrier)
  • Reflective tape and motion decoys (visual deterrents)
  • Wind chimes or ultrasonic devices (sound deterrents)
  • Frequent harvesting and garden hygiene

This multi-sensory approach confuses birds and prevents them from adapting.


Step 8: When to Install Bird Protection

Timing matters just as much as technique.

  • For strawberries: Install netting when flowers begin forming fruit.
  • For blueberries and raspberries: Protect bushes when berries first show color.
  • For blackberries: Cover before the first fruits turn deep red or purple.

Keeping deterrents in place for the few critical weeks of ripening can save nearly your entire crop.


Final Thoughts

Birds are part of the natural rhythm of a thriving garden—but that doesn’t mean you have to share every berry. With smart planning, humane deterrents, and consistent maintenance, you can protect your plants without harming wildlife or compromising aesthetics.

Start by covering your berry patch with netting or a cage, then add reflective, motion, or sound-based deterrents for extra protection. Harvest regularly, keep your garden tidy, and consider planting distraction crops if you have space.

By combining these techniques, you’ll enjoy baskets of fresh, unpecked berries while still welcoming the cheerful songs of your feathered friends.

Your garden can be both bird-friendly and berry-full—and with these tips, you’ll never lose another harvest to a hungry flock again.

The Best Fertilizer for Strawberry Plants: A Complete Guide to Juicy, Abundant Harvests

The Best Fertilizer for Strawberry Plants: A Complete Guide to Juicy, Abundant Harvests

Few garden rewards are sweeter than the sight of plump, ruby-red strawberries glistening under the sun. Whether you grow them in containers, raised beds, or hanging baskets, one secret determines your harvest success more than any other: fertilizer.

Strawberries are relatively low-maintenance plants, but they are heavy feeders during the growing season. Give them the right nutrients, and you’ll enjoy vigorous plants that produce large, sweet, and flavorful fruit. Give them the wrong fertilizer—or none at all—and you’ll end up with weak growth, pale leaves, and disappointing yields.

In this guide, we’ll explore everything you need to know about choosing the best fertilizer for strawberry plants—from understanding nutrient needs to timing applications for maximum fruiting.


Why Fertilizing Strawberries Is So Important

Strawberries are perennial plants, which means they live for several years. Over time, they deplete the soil of nutrients, especially nitrogen, phosphorus, and potassium—the three macronutrients essential for plant health.

Without enough of these, you’ll notice:

  • Small or fewer berries
  • Pale, yellowing leaves
  • Weak runners or slow growth
  • Poor resistance to disease

Proper fertilization replenishes what the plants use up and keeps them productive season after season. But it’s not just about dumping any fertilizer into the soil—you need to match your feeding routine to your plant’s growth stages.


Understanding Strawberry Nutrient Needs

Before picking a fertilizer, let’s break down what your strawberry plants actually crave:

1. Nitrogen (N):

  • Promotes leafy, green growth.
  • Crucial early in the season, but too much can lead to excess foliage and few fruits.

2. Phosphorus (P):

  • Encourages strong roots and abundant flowering.
  • Essential for setting fruit.

3. Potassium (K):

  • Boosts fruit quality—flavor, color, and size.
  • Improves disease resistance.

4. Secondary Nutrients and Micronutrients:

  • Calcium, magnesium, sulfur, iron, and manganese support overall plant health and sweetness of berries.

A balanced fertilizer delivers these in the right ratio, but that ratio depends on your soil and the time of year.


Step 1: Test Your Soil Before You Feed

Before fertilizing, always test your soil pH and nutrient levels. Strawberries prefer slightly acidic soil with a pH between 5.5 and 6.5.

If the soil is too alkaline, the plants can’t absorb nutrients effectively, no matter how much fertilizer you use. You can fix this by incorporating elemental sulfur or peat moss to lower the pH.


Step 2: Know When to Fertilize Strawberries

Timing is everything. Applying the right fertilizer at the right stage ensures strong growth and maximum fruit yield.

1. Early Spring (Pre-Flowering Stage):

  • Focus: Building strong roots and leaves.
  • Use: A balanced or slightly nitrogen-rich fertilizer (e.g., 10-10-10 or 12-12-12).
  • Application: Lightly work fertilizer into the soil around each plant as new growth emerges.

2. After Flowering (Fruiting Stage):

  • Focus: Producing large, sweet berries.
  • Use: A fertilizer higher in potassium and phosphorus, such as 4-6-8 or 5-10-10.
  • Application: Avoid nitrogen-heavy feeds now—it can reduce fruit size and sweetness.

3. Post-Harvest (Renovation Stage):

  • Focus: Rebuilding plant strength for next season.
  • Use: A balanced fertilizer again (e.g., 10-10-10) to restore nutrients.
  • Application: After trimming old leaves and runners, apply lightly and water thoroughly.

For everbearing and day-neutral varieties that produce fruit throughout the season, smaller, more frequent applications work best every 4–6 weeks.


Step 3: Choose the Right Type of Fertilizer

There are two main categories of strawberry fertilizers: organic and synthetic. Both can work, but the right choice depends on your gardening style and goals.


Organic Fertilizers (Natural and Slow-Release)

Organic fertilizers improve soil structure, boost microbial activity, and release nutrients gradually. They’re perfect for gardeners who prefer an eco-friendly approach.

Best Organic Fertilizer Options for Strawberries:

  1. Compost: Enriches soil and improves moisture retention. Mix it into the bed before planting or use as top-dressing.
  2. Fish Emulsion (5-1-1): Provides a quick nitrogen boost in early spring.
  3. Bone Meal (3-15-0): High in phosphorus for strong roots and blossoms.
  4. Blood Meal (12-0-0): Adds nitrogen for early growth, but use sparingly.
  5. Kelp or Seaweed Extract (1-0-4): Increases potassium and trace minerals, enhancing fruit flavor and stress tolerance.
  6. Manure (aged): Adds organic matter, but never use fresh manure—it can burn plants or introduce pathogens.

Synthetic (Chemical) Fertilizers (Fast-Acting)

These fertilizers deliver nutrients quickly and precisely. They’re great if you need rapid growth or correction of nutrient deficiencies.

Popular Synthetic Fertilizers for Strawberries:

  • 10-10-10 or 12-12-12: Balanced for general growth.
  • 5-10-10: Ideal during flowering and fruiting stages.
  • 20-20-20 Water-Soluble Fertilizer: Great for quick absorption through roots and leaves.

Step 4: How to Apply Fertilizer Correctly

No matter which fertilizer you choose, proper application ensures your strawberries get the maximum benefit without damage.

For In-Ground Plants:

  1. Spread fertilizer evenly around the base, about 3–4 inches away from the crown to avoid burning.
  2. Lightly work it into the top inch of soil.
  3. Water thoroughly after application to help nutrients soak in.

For Container or Hanging Basket Plants:

  • Use a liquid or water-soluble fertilizer for even distribution.
  • Feed every 2–3 weeks during active growth.
  • Flush the soil occasionally to prevent salt buildup from repeated feeding.

Step 5: Don’t Forget Water Management

Fertilizer works best when paired with consistent watering. Strawberries have shallow roots and need 1–1.5 inches of water per week.

  • Water early in the morning to reduce evaporation.
  • Avoid overhead watering when plants are flowering to prevent fungal diseases.
  • Use mulch (straw, pine needles, or bark chips) to retain moisture and maintain acidity.

Step 6: Recognize Signs of Nutrient Imbalance

Even experienced gardeners can misjudge fertilizer needs. Watch your plants—they’ll tell you what they need.

SymptomPossible CauseSolution
Yellowing leavesNitrogen deficiencyApply a nitrogen-rich fertilizer or fish emulsion
Poor floweringLow phosphorusUse bone meal or a high-phosphorus formula (5-10-10)
Weak fruit or poor flavorLow potassiumAdd kelp meal or potash
Burned leaf edgesOverfertilizationFlush soil with water; reduce feeding frequency

Step 7: Seasonal Maintenance and Soil Renewal

Strawberries perform best in soil that’s regularly enriched with organic matter. At the end of each season:

  • Remove dead leaves and runners.
  • Work in compost or aged manure to replenish nutrients.
  • Check pH annually and adjust as needed.

For container-grown strawberries, refresh the potting mix every 1–2 years. Old soil loses structure and fertility over time.


Top Recommended Fertilizers for Strawberry Plants

Here are some trusted brands and formulations (available in most garden stores or online):

Organic Options:

  1. Espoma Organic Berry-Tone (4-3-4): Designed specifically for strawberries and other berries.
  2. Dr. Earth Organic Fruit Tree Fertilizer (5-5-2): Contains beneficial microbes and slow-release nutrients.
  3. Jobe’s Organics Berry Fertilizer Spikes (3-5-5): Convenient slow-release spikes for easy feeding.

Synthetic Options:

  1. Miracle-Gro Water Soluble All-Purpose (24-8-16): Great for quick nutrient delivery.
  2. Jack’s Classic Blossom Booster (10-30-20): Promotes flower and fruit development.
  3. Osmocote Smart-Release Plant Food (14-14-14): Long-lasting, balanced nutrition.

Final Thoughts

Finding the best fertilizer for strawberry plants isn’t about choosing one magic product—it’s about understanding your soil, your plant’s needs, and the growing season.

Start with nutrient-rich, slightly acidic soil, and feed your plants at the right times with the right ratios. Balance nitrogen for leaf growth with phosphorus and potassium for flower and fruit development. Whether you prefer organic compost and kelp or a precision-mixed synthetic fertilizer, consistency is the key to success.

With the right feeding routine, you’ll soon be rewarded with lush green plants, abundant blossoms, and baskets of sweet, sun-ripened strawberries that taste better than anything you’ll find at the store.

Why Your Blueberry Bush Isn’t Producing Fruit

Why Your Blueberry Bush Isn’t Producing Fruit

There’s nothing quite as disappointing as tending to your blueberry bushes all season long—watering, pruning, fertilizing—only to realize they’ve produced little (or no) fruit. Blueberries are known for being hardy, low-maintenance shrubs, but even the most resilient plants need the right conditions to thrive.

If your blueberry bush is all leaves and no berries, don’t worry. You’re not alone—and the problem can usually be traced to a few common mistakes. Let’s take a deep dive into why your blueberry bush isn’t producing fruit—and what you can do to turn things around for a bumper harvest next season.


1. Your Blueberry Bush Is Too Young

One of the most common reasons for a lack of fruit is simply impatience. Blueberry plants take time to mature.

  • Year 1–2: The plant focuses on establishing a strong root system. Most growers recommend pinching off flowers during this time to help the plant conserve energy.
  • Year 3: You’ll start to see small clusters of berries, but yields will still be light.
  • Year 4–5 and beyond: Once mature, the bush can produce several pounds of fruit each season.

2. Your Blueberry Bush Isn’t Getting Proper Pollination

Blueberry bushes need pollination to set fruit, and while some varieties are self-pollinating, most yield much better when cross-pollinated with another variety.

Signs of poor pollination:

  • Flowers bloom beautifully but later shrivel without forming berries.
  • Small, misshapen, or sparse fruits appear.

Common causes:

  • Lack of pollinator activity (few bees or butterflies).
  • Only one variety of blueberry in the area.
  • Rainy or windy weather during bloom time that keeps pollinators away.
  • Plant at least two different varieties with overlapping bloom times (e.g., ‘Bluecrop’ and ‘Jersey’).
  • Encourage pollinators by planting nearby flowers like lavender, coneflowers, or bee balm.
  • Avoid using pesticides during flowering—they can harm bees.

3. Insufficient Sunlight

Blueberries love the sun. Without enough light, they’ll produce lush foliage but very few berries.

Ideal conditions:

  • At least 6–8 hours of direct sunlight daily.
  • Morning sun is especially beneficial—it dries dew from leaves, reducing disease risk.

If your bush is in partial shade:

  • It may flower late, ripen slowly, or fail to produce at all.
  • Move container-grown bushes to a sunnier location.
  • For in-ground plants, consider pruning nearby trees or shrubs that block sunlight.

4. Soil pH Is Too High

Blueberries are acid-loving plants. They need a low soil pH to absorb essential nutrients like iron, manganese, and zinc.

Ideal pH range: 4.5–5.5
Common problem: Many garden soils are closer to neutral (6.5–7.0), which can lead to nutrient lockout—your plant can’t “eat,” even if the soil looks rich.

Symptoms of high pH:

  • Yellowing leaves with green veins (iron deficiency).
  • Poor growth and reduced flowering.
  1. Test your soil using a pH test kit or send a sample to a local extension office.
  2. If it’s too high, amend with:
    • Elemental sulfur or sphagnum peat moss (long-term fix).
    • Acidic mulch like pine needles or bark chips (for maintenance).
  3. Water with rainwater instead of tap water if your local supply is alkaline.

5. Overwatering or Poor Drainage

While blueberries love moisture, too much water can be just as harmful as too little. Soggy roots lead to rot and stress, which can stop the plant from flowering or fruiting.

Key signs of water issues:

  • Wilting leaves despite wet soil.
  • Root rot or blackened roots when you dig around the base.
  • Weak or stunted growth.
  • Blueberries need moist but well-drained soil.
  • Water deeply once or twice a week (more often during hot spells).
  • Improve drainage by adding organic matter and raising the planting bed if your soil is heavy clay.

6. Improper Pruning

Blueberry bushes require regular pruning to encourage fruit production. Without it, the plant diverts energy to old wood or excessive foliage rather than berries.

When and how to prune:

  • Best time: Late winter or early spring, before new growth starts.
  • What to remove:
    • Any dead, damaged, or weak canes.
    • Old canes older than 4 years (they produce fewer berries).
    • Low branches touching the soil.
  • Aim to keep 6–8 healthy canes per bush of varying ages.

7. Over-Fertilizing (or Using the Wrong Type)

Blueberries have delicate roots and are easily damaged by too much fertilizer, especially those high in nitrogen.

Too much nitrogen causes:

  • Excess leafy growth.
  • Fewer flowers and fruits.
  • Increased susceptibility to diseases.
  • Use acid-forming fertilizers designed for azaleas or rhododendrons.
  • Apply slow-release organic fertilizers like cottonseed meal or fish emulsion in early spring.
  • Avoid feeding after midsummer—late fertilization can push new growth that won’t harden before frost.

8. Frost Damage

Late spring frosts can wipe out blossoms before they have a chance to develop into fruit.

Symptoms:

  • Brown or blackened flower tips after a cold night.
  • Shrubs leaf out but never produce berries.
  • Cover plants with frost blankets or burlap when frost is predicted.
  • Avoid pruning too early in spring—extra growth can shield tender buds.
  • Choose cold-hardy varieties like ‘Northblue’ or ‘Patriot’ if you live in cooler climates.

9. Birds and Wildlife

Sometimes your blueberry bush is producing fruit—it’s just not there when you look! Birds, squirrels, and even deer find ripe blueberries irresistible.

Signs:

  • Berries disappearing overnight.
  • Peck marks or missing clusters.
  • Cover bushes with bird netting as soon as berries start to form.
  • Use reflective tape or garden spinners to deter wildlife.
  • For small plantings, a light mesh enclosure works beautifully.

10. Temperature or Climate Stress

Blueberries have specific climate preferences. They need a certain number of chill hours (exposure to cold temperatures) to set fruit properly.

If you live in a warm region:

  • Some northern varieties may not receive enough chilling, leading to poor flowering.

If you live in a cold region:

  • Sudden temperature drops can damage buds.
  • Choose the right variety for your region:
    • Northern highbush for cooler climates.
    • Southern highbush or rabbiteye for warmer areas.
  • Protect plants during extreme weather with mulch or temporary shading.

11. Pests or Diseases

Sometimes invisible attackers are to blame. Blueberries can suffer from fungal diseases and insect pests that reduce vigor and fruiting.

Common issues:

  • Mummy berry: Flowers and berries shrivel and turn gray.
  • Botrytis (gray mold): Fuzzy gray growth on flowers or fruit.
  • Aphids or leafrollers: Cause distorted leaves and reduced photosynthesis.
  • Prune to improve airflow and reduce humidity.
  • Remove and destroy infected fruit or foliage.
  • Apply neem oil or organic fungicides during early spring if needed.

12. Lack of Mulch or Soil Protection

Mulching isn’t just cosmetic—it’s essential for maintaining consistent soil moisture and acidity.

  • Pine needles
  • Bark chips
  • Sawdust (aged)

Apply a 2–4 inch layer around the base (but not touching the stems). This keeps roots cool, suppresses weeds, and maintains the acidic environment blueberries love.


13. Stress from Transplanting

If you’ve recently planted or moved your blueberry bush, it may be suffering from transplant shock. The plant focuses on root establishment before flowering again.

  • Keep the soil evenly moist but not soggy.
  • Avoid fertilizing for a month after transplanting.
  • Give it one full growing season to recover.

Final Thoughts

If your blueberry bush isn’t producing fruit, don’t give up—it’s almost always fixable. Whether the culprit is young age, poor pollination, soil issues, or environmental stress, identifying the root cause will help you get your plant back on track.

Blueberries are resilient and long-lived; once established, they can produce for 15–20 years with proper care. Give them sun, acidic soil, good drainage, and a little patience, and soon you’ll be rewarded with clusters of plump, delicious berries straight from your garden.

So the next time your bush looks barren, take heart—your blueberry harvest might just be one season of smart care away.