How To Grow Strawberries In Hanging Baskets

How To Grow Strawberries In Hanging Baskets

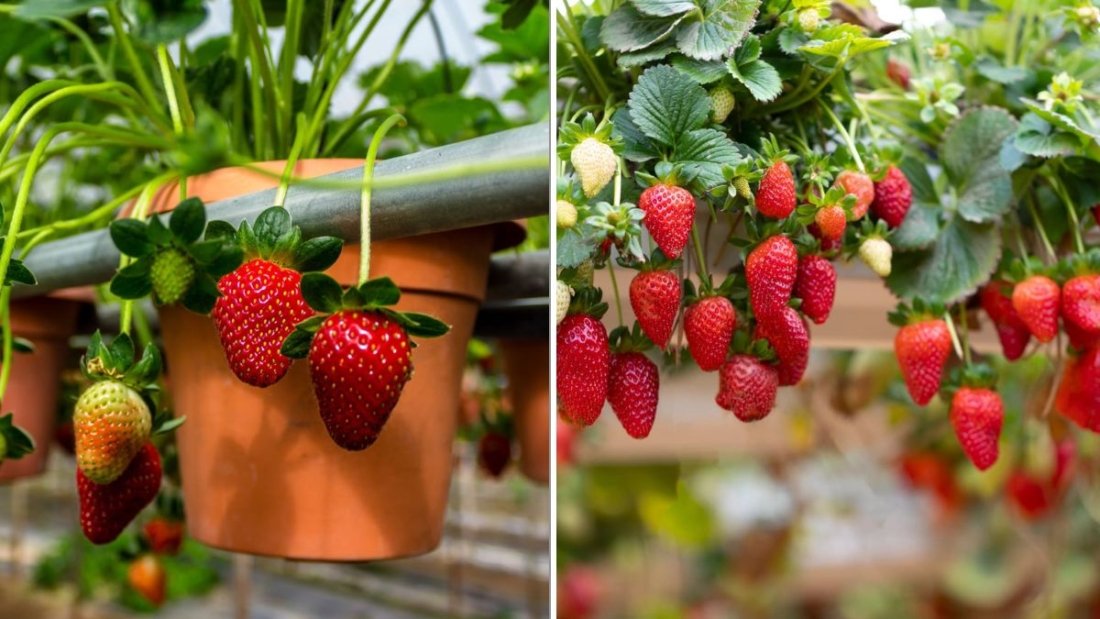
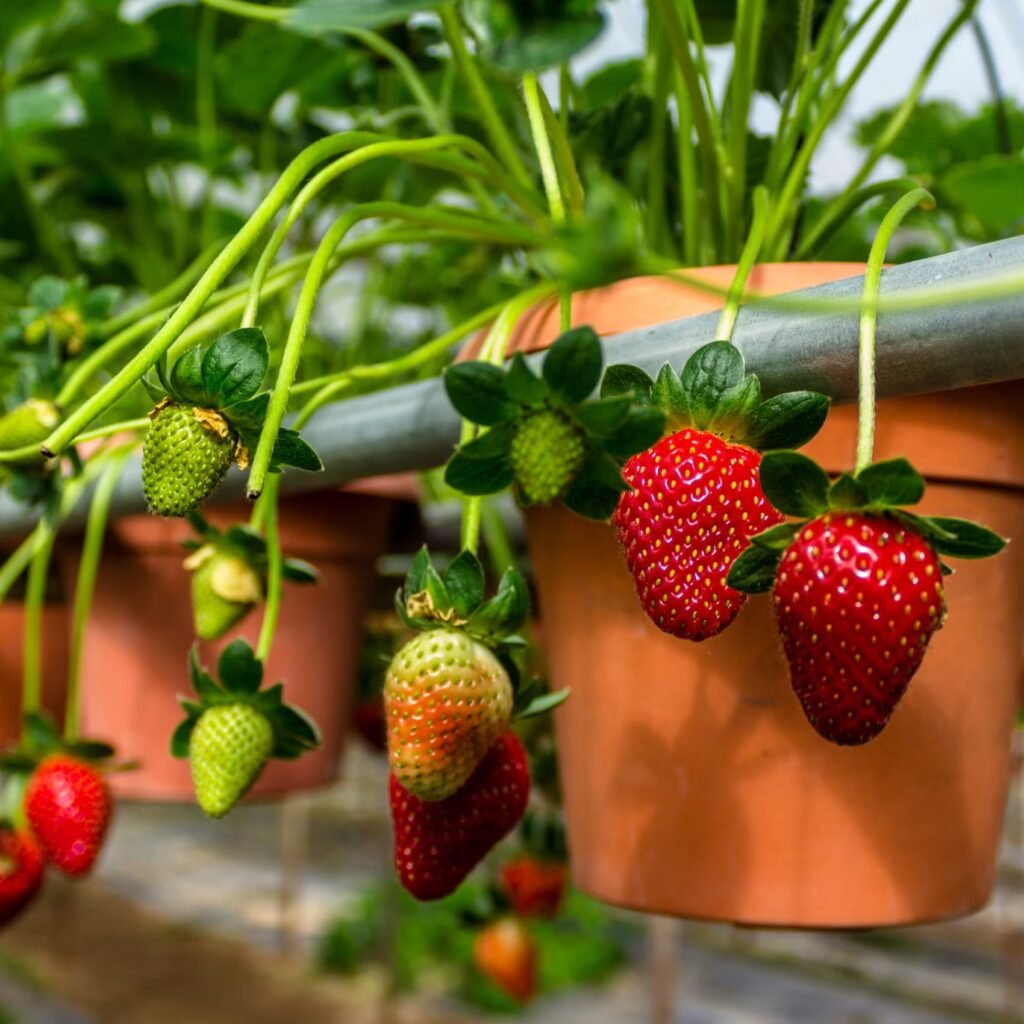
Few things taste better than freshly picked strawberries—sweet, juicy, and sun-warmed. But what if you don’t have space for a garden bed? The good news: strawberries are one of the easiest fruits to grow in containers, and they thrive beautifully in hanging baskets. Whether you live in an apartment with a small balcony or simply want to add a touch of greenery (and flavor) to your patio, hanging strawberry baskets are a practical and charming solution.

Here’s everything you need to know—from choosing the right variety to keeping your plants happy and productive all season long.


Why Grow Strawberries in Hanging Baskets?

Growing strawberries in hanging baskets isn’t just about saving space—it’s about creating the perfect growing environment.

  1. Better Air Circulation: Hanging baskets improve airflow around plants, reducing the risk of fungal diseases like gray mold and powdery mildew.
  2. Fewer Pests: Elevating your plants keeps them out of reach of slugs, snails, and some ground-dwelling insects.
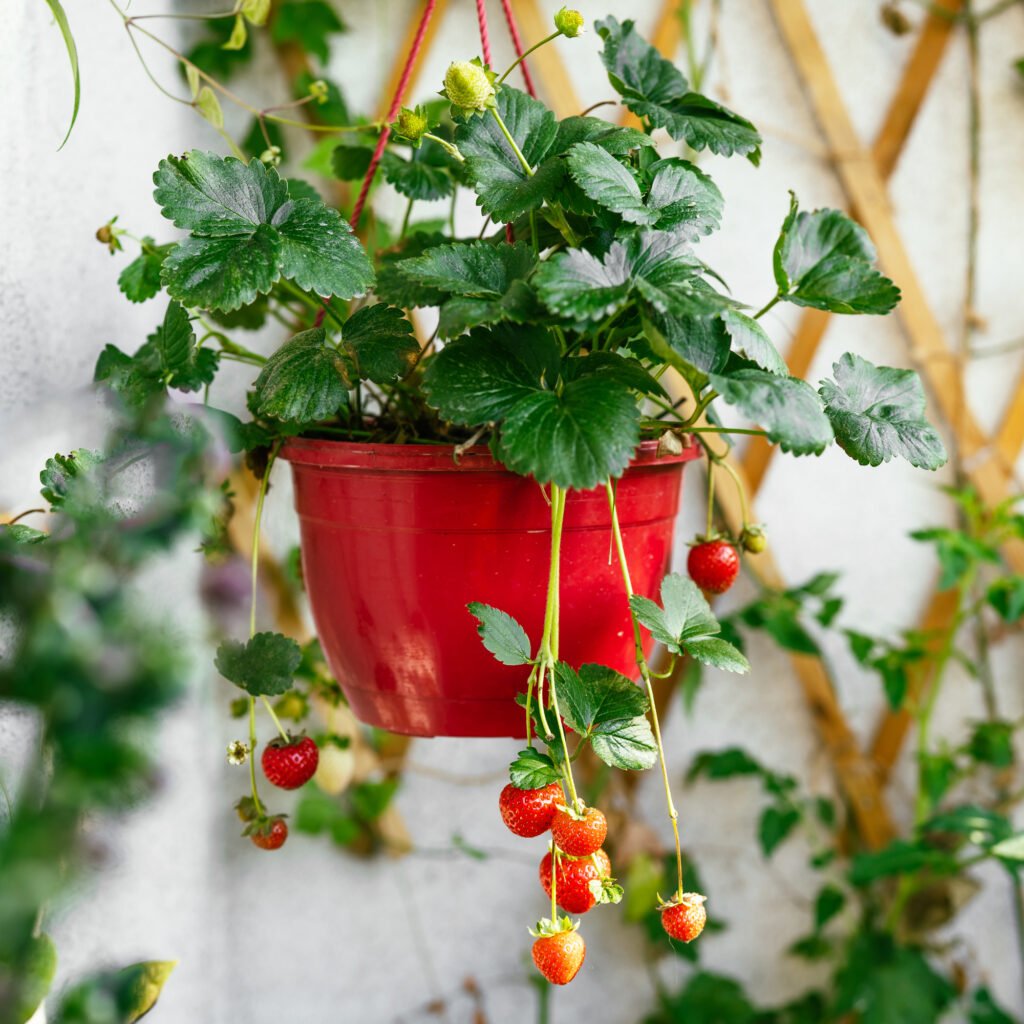
  3. Aesthetic Appeal: Cascading vines laden with red fruit look absolutely stunning on balconies, porches, or garden pergolas.
  4. Convenient Harvesting: No bending, stooping, or weeding—just reach up and pluck your berries straight from the vine.

Step 1: Choose the Right Strawberry Variety

Not all strawberries perform equally well in containers. For hanging baskets, choose varieties that are compact, vigorous, and produce fruit throughout the season.

Best Varieties for Hanging Baskets:

  • ‘Temptation’ – A heavy-bearing, everbearing type with small, sweet berries.
  • ‘Tristar’ – Produces firm, flavorful fruit from early summer to fall.
  • ‘Albion’ – Known for large, juicy, cone-shaped berries and great disease resistance.
  • ‘Toscana’ – A showstopper with pink blooms and decorative, sweet fruit.
  • ‘Seascape’ – Ideal for warmer climates, with continuous production all season long.

Tip: Go for everbearing or day-neutral varieties—they’ll reward you with multiple harvests rather than a single flush.


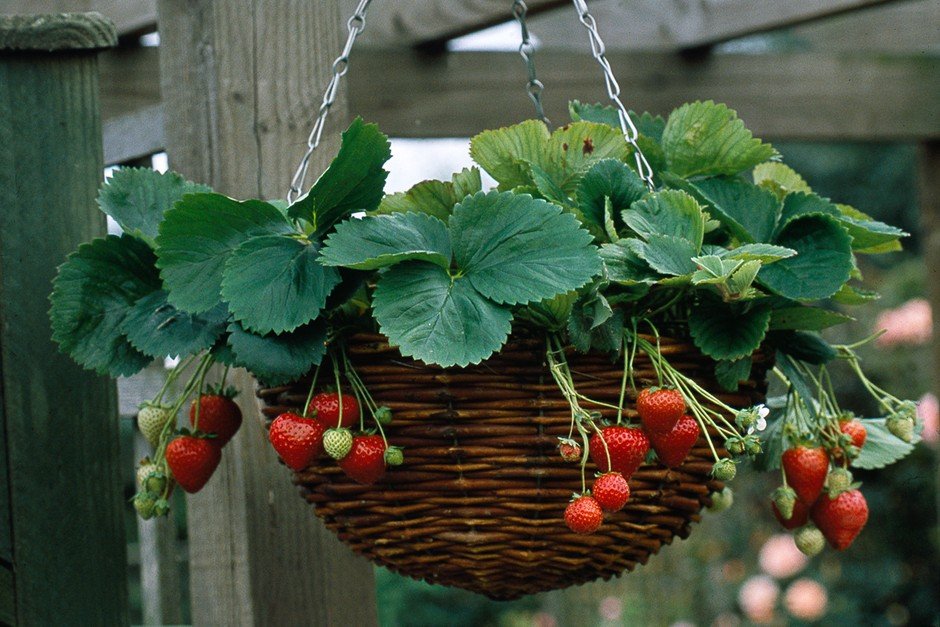
Step 2: Pick the Right Basket and Setup

The container you choose can make a big difference in your success.
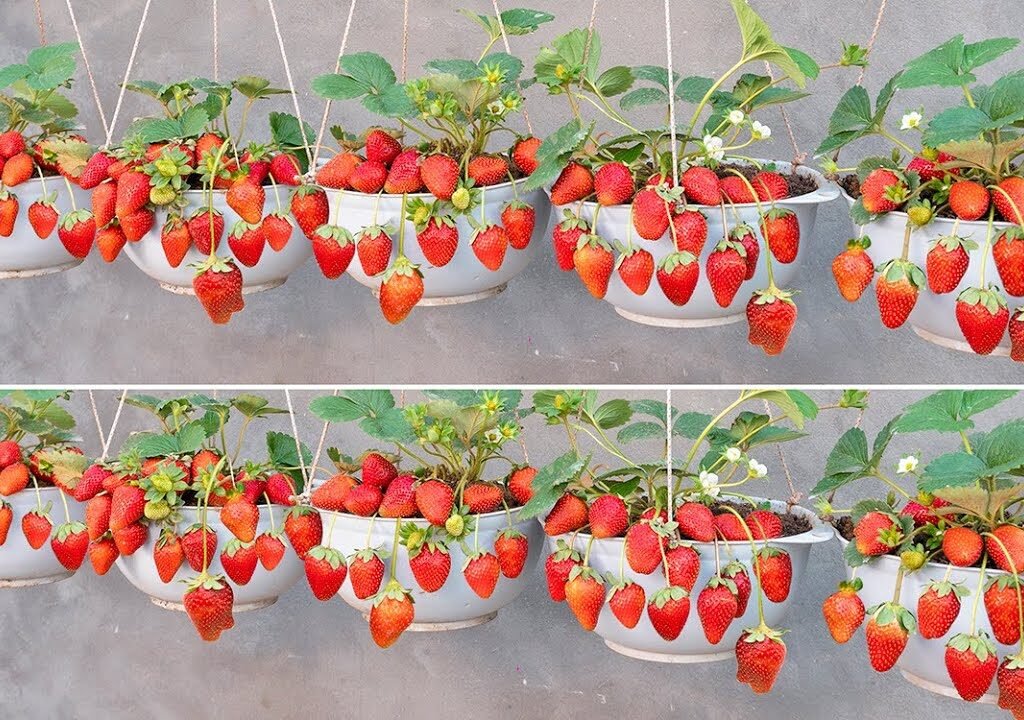
Basket Size:

  • Opt for at least a 12-inch diameter basket to provide ample space for roots and moisture retention.
  • Larger baskets (14–16 inches) allow for more plants and healthier growth.
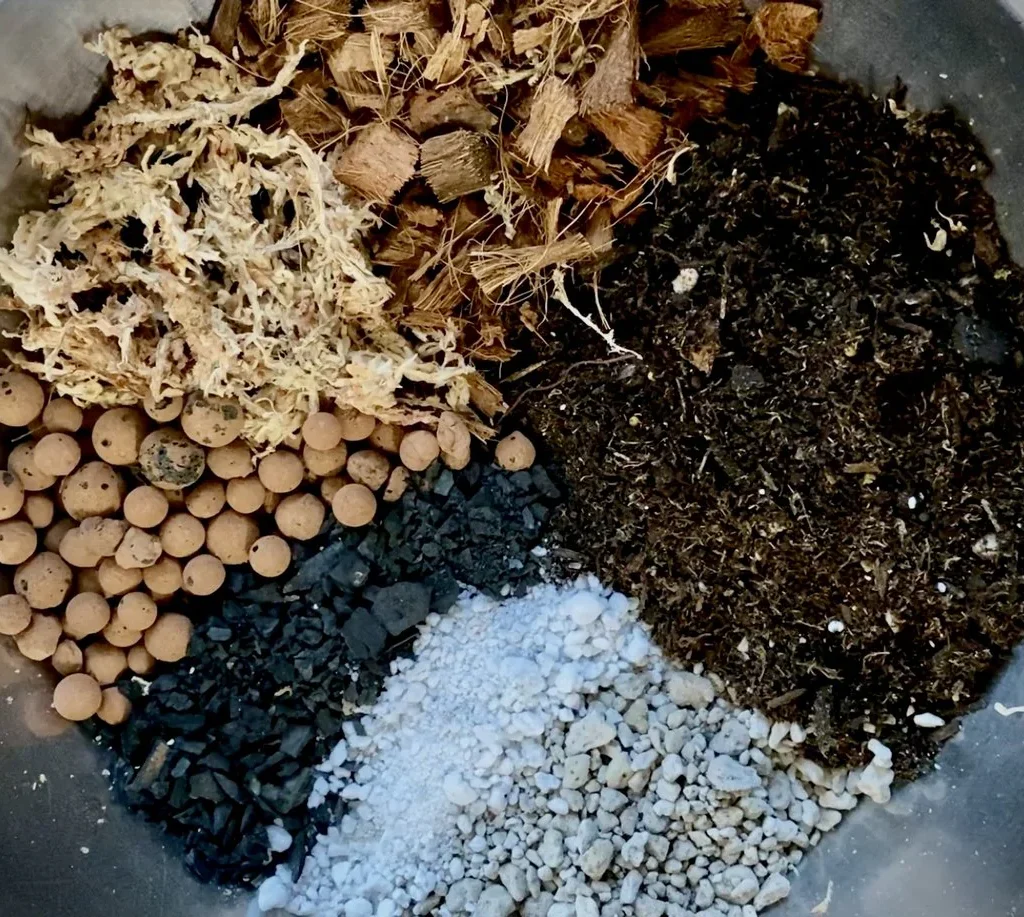
Material:

  • Wire baskets lined with coconut coir or sphagnum moss provide excellent drainage and an organic look.
  • Plastic hanging baskets retain moisture better in hot, dry climates.

Drainage:

  • Strawberries hate soggy soil. Make sure your basket has good drainage holes to prevent root rot.

Placement:

  • Choose a location that receives at least 6–8 hours of full sunlight daily. South- or west-facing balconies or patios are ideal.

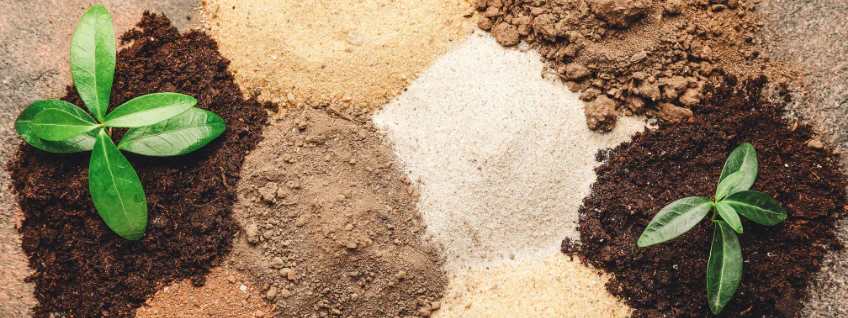
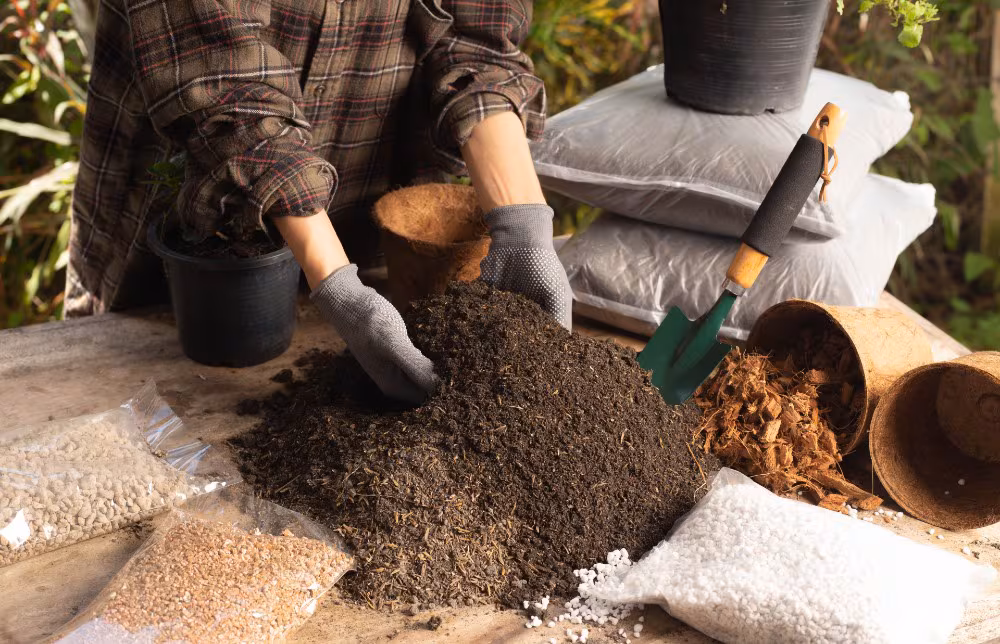
Step 3: Prepare the Perfect Soil Mix

Strawberries love light, fertile soil that drains well but still holds moisture.

Ideal Potting Mix:

  • 2 parts high-quality potting soil
  • 1 part compost (for nutrients)
  • 1 part perlite or vermiculite (for drainage)

Mix in a slow-release organic fertilizer or a balanced 10-10-10 formula before planting. You can also top-dress with compost every few weeks to keep nutrients replenished.

Avoid using garden soil—it’s too dense for containers and may contain pests or diseases.


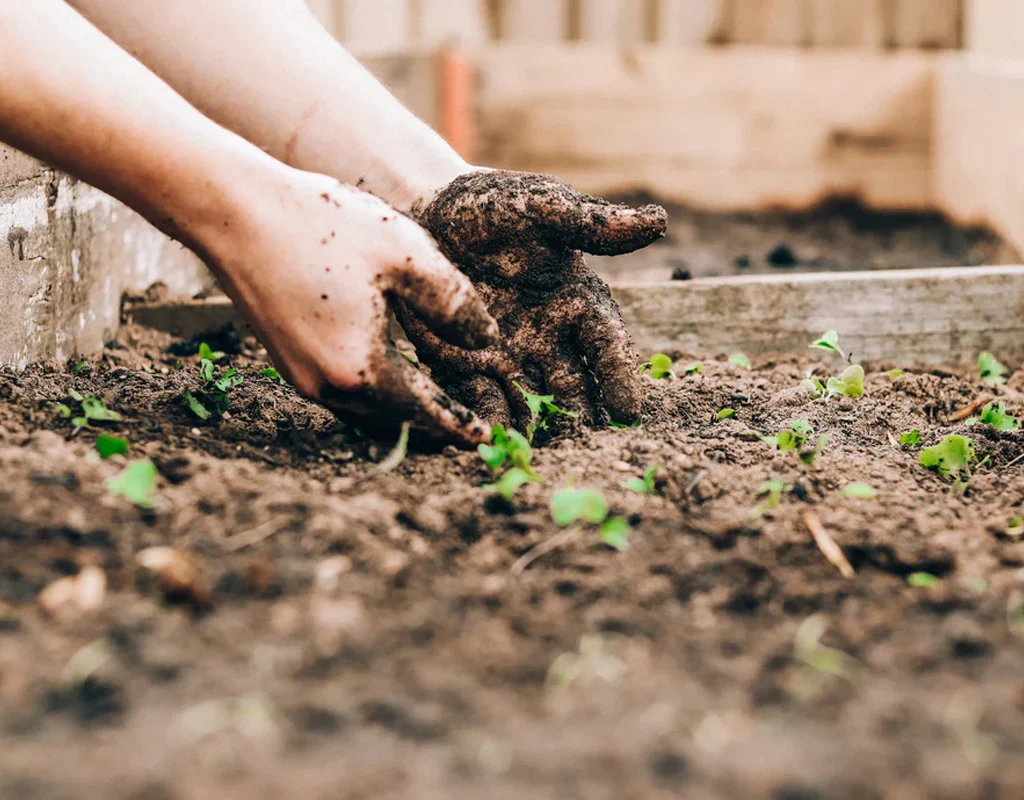
Step 4: Planting Strawberries

  1. Soak bare-root plants in water for 30 minutes before planting to rehydrate them.
  2. Fill the basket about three-quarters full with your potting mix.
  3. Arrange 3–5 plants evenly around the edges of the basket so they can cascade outward as they grow.
  4. Cover roots completely but keep the crown (where leaves meet roots) just above the soil line to prevent rot.
  5. Water thoroughly after planting.

For extra visual appeal, you can also tuck in trailing herbs or flowers like thyme, nasturtiums, or alyssum—they’ll attract pollinators and add a pop of color.


Step 5: Watering and Feeding

Hanging baskets dry out much faster than garden beds, so consistent moisture is key.

Watering Tips:

  • Water daily in summer, especially during hot or windy conditions.
  • Check soil moisture by sticking your finger 1 inch deep—the top layer should feel slightly damp.
  • Avoid overhead watering to prevent fungal issues; water directly at the base of each plant.

Fertilizing Schedule:

  • Feed every 2–3 weeks with a balanced liquid fertilizer or a diluted seaweed/fish emulsion solution.
  • Stop fertilizing about 2 weeks before harvest for the best flavor concentration.

Step 6: Sunlight and Temperature

Strawberries need plenty of sun to produce those sweet, ruby-red berries.

  • Provide 6–8 hours of full sunlight daily.
  • If you’re growing indoors or on a shaded balcony, consider using a grow light to supplement natural light.
  • Ideal temperature range: 60°F to 80°F (15°C–27°C).
  • During extreme heat, move the basket to a partially shaded spot to prevent scorched leaves.

Step 7: Maintenance and Care

Pruning:

  • Remove yellowing or dead leaves regularly to maintain airflow and prevent disease.
  • Snip off runners (long trailing stems) unless you want to propagate new plants.
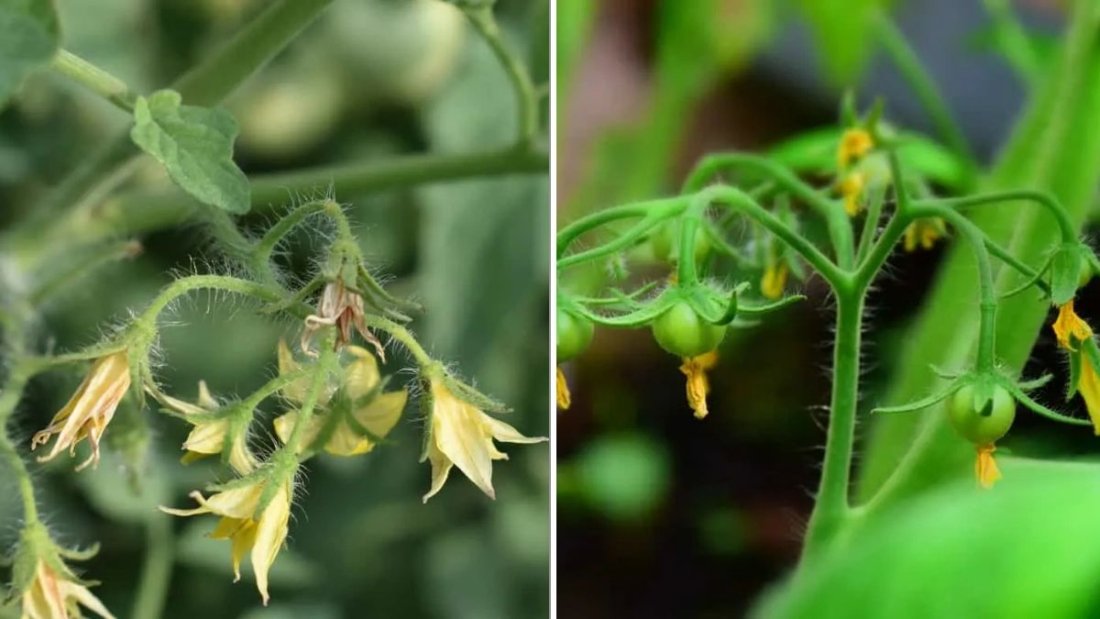
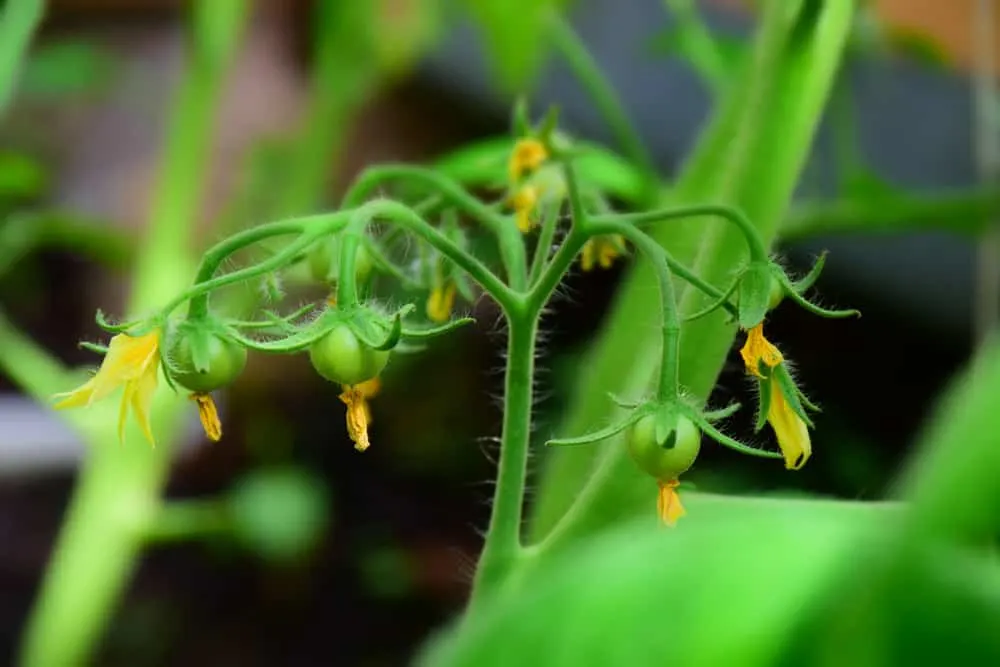
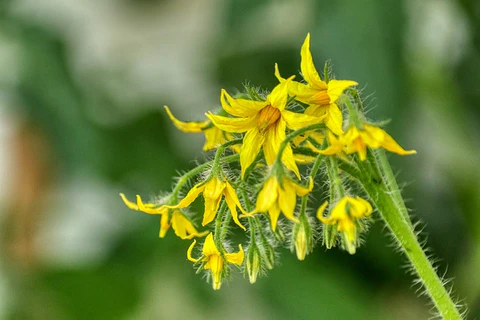
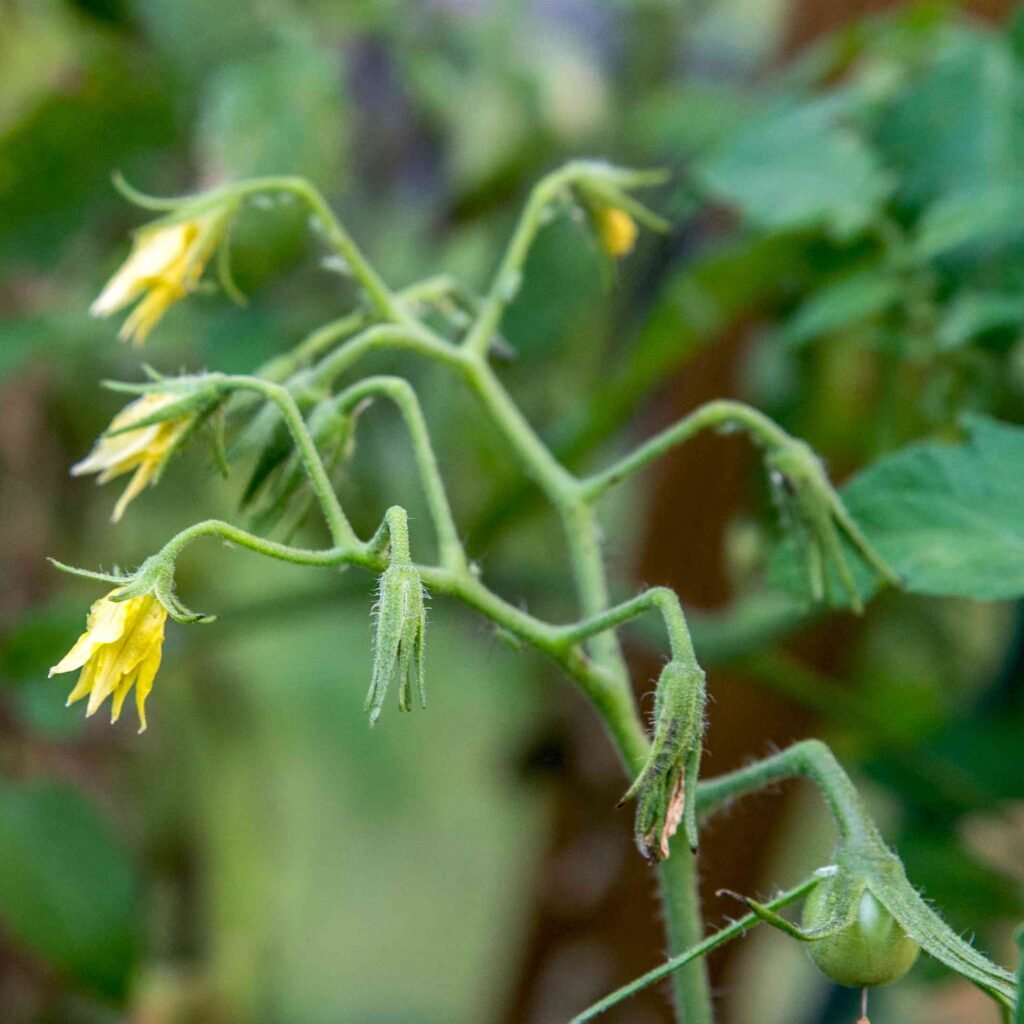
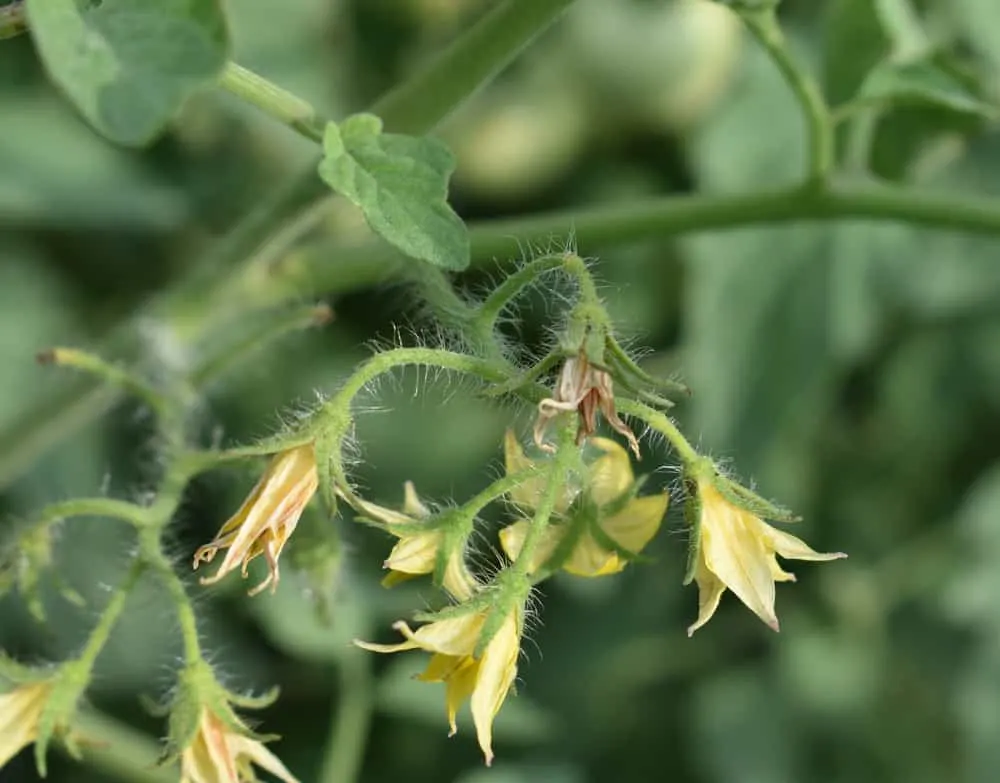
Pollination:

  • Outdoors, bees and butterflies handle pollination.
  • Indoors or in sheltered areas, gently tap the flowers or use a soft paintbrush to transfer pollen.

Pest Control:

  • Watch for aphids, spider mites, and whiteflies. Use neem oil spray or insecticidal soap as needed.
  • To deter birds, drape bird netting over the basket once fruit starts ripening.

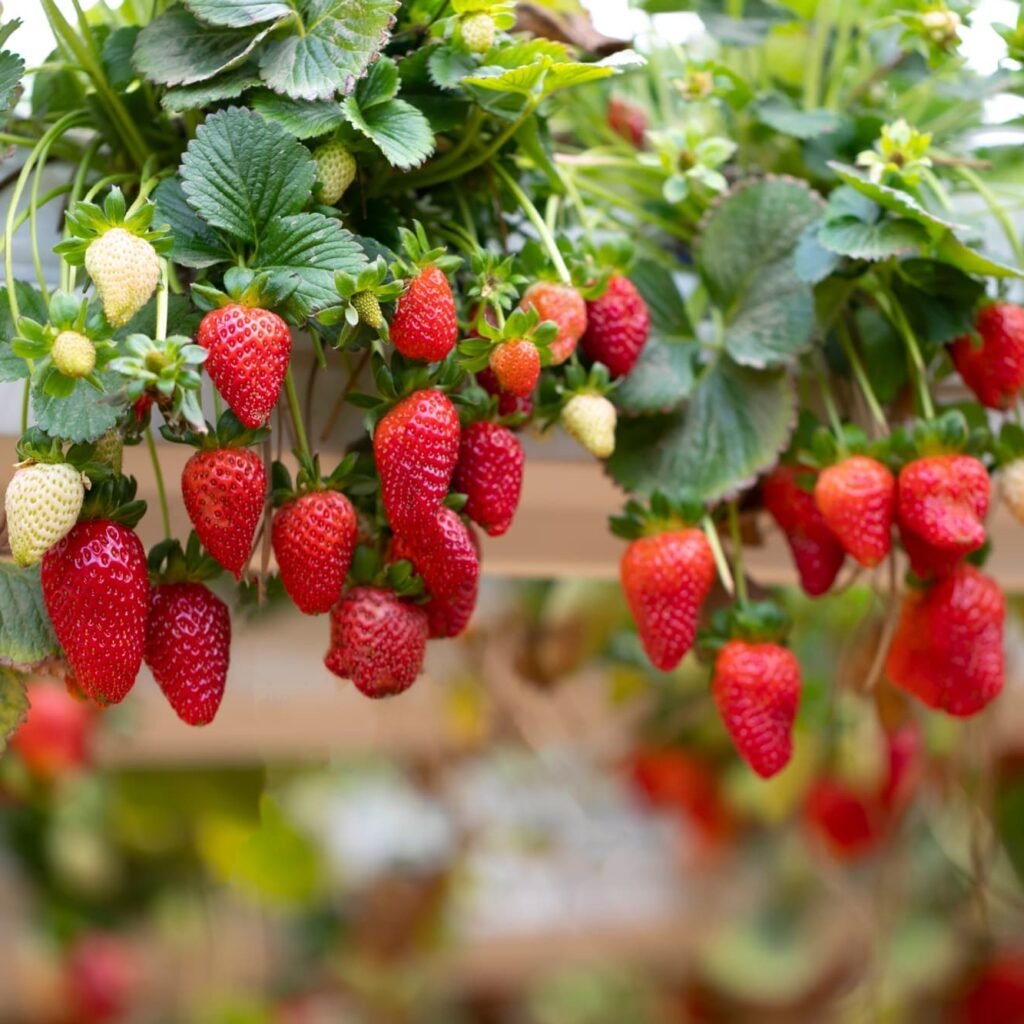
Step 8: Harvesting Your Strawberries

Nothing compares to the joy of picking your own ripe, sun-kissed berries.

When to Harvest:

  • Wait until berries are fully red, plump, and fragrant—color indicates ripeness.
  • Pick every 2–3 days to encourage continued fruiting.

How to Harvest:

  • Gently twist the berry at the stem instead of pulling it to avoid damaging the plant.
  • Eat fresh or refrigerate immediately—homegrown strawberries don’t last long because they’re free from preservatives.

Pro tip: Freshly picked strawberries are perfect for topping yogurt, blending into smoothies, or making small-batch jam.


Step 9: Overwintering Your Strawberry Plants

If you live in a region with cold winters, don’t toss your plants after summer. With a little care, you can overwinter them for another fruitful season.

Here’s how:

  1. Trim away dead leaves and runners after the last harvest.
  2. Move baskets to a sheltered, frost-free area like a garage or greenhouse.
  3. Water sparingly during dormancy—just enough to keep the soil from drying out.
  4. In early spring, move them back outdoors and resume feeding.

Bonus: Creative Hanging Basket Ideas

  • Tiered strawberry towers: Stack multiple baskets vertically for a stunning display.
  • Wall-mounted planters: Great for small balconies or patios.
  • Mix and match: Combine strawberries with trailing mint, petunias, or marigolds for beauty and practicality.

Final Thoughts

Growing strawberries in hanging baskets is an easy, rewarding project for gardeners of all levels. With the right care, your plants will reward you with months of sweet, aromatic berries and lush greenery that brightens up any space.

Whether you’re a city dweller with limited square footage or a country gardener looking to maximize yield, hanging baskets prove that you don’t need a big backyard to enjoy the freshest fruit.

So grab a basket, plant your favorite variety, and get ready to enjoy homegrown strawberries—right from your balcony to your breakfast table.

7 Vegetables You Can Grow Indoors Year-Round

7 Vegetables You Can Grow Indoors Year-Round

Fresh, homegrown vegetables don’t have to be a summer luxury. Even if the weather outside is cold or your outdoor space is limited, you can still enjoy the satisfaction of harvesting crisp greens, crunchy peppers, or sweet tomatoes—all from the comfort of your kitchen or balcony. Growing vegetables indoors year-round is easier than you might think, and with the right setup, you can keep your pantry stocked with fresh produce no matter the season.

Here’s your guide to seven vegetables that thrive indoors year-round, along with tips to help you grow a lush indoor garden full of flavor and color.


1. Lettuce

Why it’s perfect for indoors:
Lettuce grows quickly, doesn’t need deep soil, and loves cooler conditions—making it ideal for windowsills or grow lights. You can harvest baby greens just a few weeks after planting and enjoy continuous yields by snipping leaves as they mature.

How to grow:

  • Container: Use a shallow pot or tray with drainage holes, about 4–6 inches deep.
  • Soil: Choose a loose, well-draining potting mix rich in compost.
  • Light: Lettuce needs about 10–12 hours of light per day. A bright south-facing window or LED grow light works perfectly.
  • Watering: Keep the soil evenly moist but never soggy. Mist lightly if the air is dry.
  • Harvesting: Cut outer leaves when they’re 3–4 inches long. The inner leaves will continue to grow for several harvests.

Best varieties:

  • ‘Buttercrunch’
  • ‘Black-Seeded Simpson’
  • ‘Romaine Little Gem’

2. Tomatoes

Why it’s perfect for indoors:
Tomatoes bring vibrant color and rich flavor to your indoor garden. Cherry and dwarf varieties adapt well to containers and can produce fruit year-round under proper light.

How to grow:

  • Container: At least 12 inches deep with sturdy support for the vine.
  • Soil: Use a high-quality potting mix with added compost or organic fertilizer.
  • Light: Needs 14–16 hours of strong light daily. Position near a sunny window or under full-spectrum grow lights.
  • Watering: Keep soil moist but not waterlogged. Consistency is key—uneven watering can cause cracking or blossom-end rot.
  • Pollination: Gently shake the flowers or use a small paintbrush to transfer pollen between blooms.

Best varieties:

  • ‘Tiny Tim’
  • ‘Red Robin’
  • ‘Patio Princess’

Pro tip: Add a small oscillating fan nearby to mimic outdoor breezes and strengthen the stems.


3. Spinach

Why it’s perfect for indoors:
Spinach loves cool temperatures (around 60–70°F), making it an easy crop to grow indoors year-round. It grows fast, is highly nutritious, and regrows after cutting.

How to grow:

  • Container: 6–8 inches deep, with loose, fertile soil.
  • Light: At least 10–12 hours per day. LED lights are excellent for maintaining consistent growth.
  • Watering: Keep the soil evenly moist; spinach wilts quickly if it dries out.
  • Harvesting: Pick outer leaves when they’re 3–5 inches long. Leave the center intact for regrowth.

Best varieties:

  • ‘Bloomsdale Long Standing’
  • ‘Baby’s Leaf’
  • ‘Tyee Hybrid’

Bonus tip: Spinach does best in slightly cooler rooms, so it’s perfect for a kitchen windowsill or shaded balcony.


4. Green Onions (Scallions)

Why it’s perfect for indoors:
Green onions are one of the easiest and most rewarding vegetables to grow inside. They grow quickly and can be regrown endlessly from store-bought roots.

How to grow:

  • From scraps: Save the white roots from store-bought green onions. Place them in a glass of water with the roots submerged and tops above water.
  • After 5–7 days: When new green shoots appear, transplant them into a small pot of soil.
  • Light: Moderate sunlight or grow light exposure for 6–8 hours per day.
  • Watering: Keep the soil moist and snip greens as needed.

Best varieties:

  • ‘White Lisbon’
  • ‘Evergreen Hardy White’

Fun fact: You can regrow scallions indefinitely by cutting what you need and letting them regrow again—making them the ultimate zero-waste crop.


5. Peppers

Why it’s perfect for indoors:
Peppers—especially small chili or bell varieties—love warmth and light. Indoors, they can thrive as perennials, producing fruit year-round if kept in the right conditions.

How to grow:

  • Container: A pot at least 10–12 inches deep with good drainage.
  • Soil: Use nutrient-rich potting soil and feed with an organic fertilizer every few weeks.
  • Light: Peppers need 14–16 hours of light daily. Place near a south-facing window or use full-spectrum grow lights.
  • Temperature: Keep between 70–80°F for best fruiting.
  • Pollination: Tap flowers lightly or use a brush to move pollen.

Best varieties:

  • ‘Cayenne’
  • ‘Mini Bell’
  • ‘Jalapeño Early’

Pro tip: Peppers appreciate humidity—mist leaves regularly or place a small tray of water nearby.


6. Carrots

Why it’s perfect for indoors:
Carrots can grow beautifully indoors when planted in deep containers. Smaller varieties are ideal for limited space, and they’re fun to harvest right from your kitchen.

How to grow:

  • Container: At least 10–12 inches deep to allow roots to develop fully.
  • Soil: Loose, sandy soil with no rocks or clumps. Avoid heavy clay soils.
  • Light: 12 hours of bright light each day.
  • Watering: Keep the soil evenly moist; drying out can cause roots to crack.
  • Harvesting: Pull carrots gently when the tops are about ½–¾ inch wide.

Best varieties:

  • ‘Thumbelina’ (small and round)
  • ‘Parisian Market’
  • ‘Little Finger’

Pro tip: Carrots don’t like to be transplanted—sow seeds directly in their container.


7. Herbs and Microgreens

Why they’re perfect for indoors:
Technically not vegetables, but herbs and microgreens are too valuable to leave off the list. They’re compact, fast-growing, and full of flavor—perfect for adding freshness to your dishes year-round.

How to grow:

  • Herbs: Basil, parsley, cilantro, and thyme all thrive indoors. Keep them near a sunny window and harvest regularly to encourage new growth.
  • Microgreens: Sow seeds of kale, radish, mustard, or arugula densely in shallow trays. Mist daily, and harvest when they’re about 2–3 inches tall (usually within 10–14 days).
  • Light: 12–14 hours of bright light for herbs; 8–10 hours is enough for microgreens.
  • Watering: Keep soil consistently damp, but avoid standing water.

Bonus benefit: Microgreens are packed with up to 40 times more nutrients than mature plants, making them a healthy indoor gardening choice.


Tips for Successful Indoor Gardening

  1. Invest in good lighting.
    Natural light is great, but most homes need supplemental grow lights for robust vegetable growth. Use LED grow lights with a timer to mimic daylight cycles.
  2. Choose the right containers.
    Drainage holes are essential to prevent root rot. Opt for lightweight plastic or fabric pots that breathe well.
  3. Keep humidity in check.
    Indoor air—especially during winter—can be dry. Use a humidifier or pebble trays to maintain healthy moisture levels.
  4. Feed your plants regularly.
    Container-grown vegetables rely on you for nutrients. Use a balanced liquid fertilizer every 2–3 weeks during active growth.
  5. Rotate and prune.
    Turn pots regularly for even light exposure, and trim leaves to promote airflow and prevent mold.

Final Thoughts

Growing vegetables indoors year-round is more than just a gardening hobby—it’s a lifestyle choice that connects you to nature, boosts your well-being, and ensures your kitchen is always stocked with fresh, chemical-free produce.

From leafy greens and crisp carrots to sweet tomatoes and spicy peppers, there’s a vegetable for every space and skill level. With a bit of light, love, and consistency, your indoor garden can thrive through every season.

So, whether you live in an apartment or a house, start small—plant a pot of lettuce or regrow some green onions—and watch your indoor oasis bloom into a thriving, edible paradise.


Why Your Radishes Are Cracking (And How To Fix It)

Why Your Radishes Are Cracking (And How To Fix It)

Radishes are one of the quickest and most satisfying crops to grow — perfect for impatient gardeners and beginners alike. Within just a few weeks, those tiny seeds transform into crisp, peppery roots ready for salads, snacks, and sandwiches. But sometimes, instead of smooth, round bulbs, you pull up radishes that are split, cracked, or misshapen. If that sounds familiar, don’t worry — you’re not alone. Cracking is a common problem, but it’s also one of the easiest to prevent once you understand what’s going on underground.

In this article, we’ll explore why radishes crack, what environmental factors cause it, and exactly how to fix and prevent it in future harvests.


Why Radishes Crack: The Root of the Problem

Cracking in radishes happens when the internal growth of the root outpaces the elasticity of its skin. Essentially, the inside expands too quickly for the outside to keep up — causing splits or ruptures along the surface.

This imbalance is most often caused by inconsistent moisture, but there are several contributing factors worth understanding.


1. Inconsistent Watering

The number one culprit behind cracking radishes is irregular watering.

Radishes need consistent soil moisture to grow evenly. When the soil dries out and then suddenly receives a heavy watering or rainfall, the roots rapidly absorb water. This sudden influx causes the interior to swell, while the skin can’t expand quickly enough — leading to splitting.

Signs:

  • Radishes split horizontally or vertically.
  • Outer skin may peel away slightly.
  • Roots often appear fine until harvest day.

Solution:

  • Water deeply and evenly, providing about 1 inch of water per week.
  • Avoid allowing the soil to dry completely between waterings.
  • Use mulch (like straw or shredded leaves) to help maintain consistent soil moisture.

2. Delayed Harvesting

Radishes grow fast — most varieties mature in 20 to 30 days. Once they reach full size, they don’t stop growing; instead, they continue to take up water and nutrients, which can cause them to swell beyond their skin’s capacity.

Signs:

  • Cracks appear in overripe radishes left in the ground too long.
  • Roots feel woody or fibrous when cut open.

Solution:

  • Harvest radishes promptly at maturity, typically 3 to 4 weeks after sowing.
  • Check their size regularly — when the tops of the bulbs start to push above the soil, it’s time to pull them.
  • For continuous harvests, succession plant every 7–10 days instead of sowing all your seeds at once.

3. Uneven Growth Conditions

Radishes prefer cool, stable temperatures between 50–70°F (10–21°C). Extreme fluctuations in temperature, sunlight, or nutrient levels can trigger stress responses in plants that affect root development.

For example, if growth slows during a cold or dry spell, then rapidly resumes during warm, wet weather, the roots may expand too fast and crack.

Solution:

  • Plant radishes in early spring or fall, avoiding the heat of summer.
  • Use shade cloth if growing in warmer months.
  • Keep the soil loose and well-draining to encourage uniform growth.

4. Too Much Nitrogen

Excess nitrogen encourages leafy growth at the expense of root development. Not only will your radishes have big tops and small roots, but they’re also more likely to crack as the roots struggle to mature properly.

Solution:

  • Avoid using high-nitrogen fertilizers (such as lawn food or fresh manure).
  • Instead, use a balanced vegetable fertilizer with a ratio close to 5-10-10 (N-P-K).
  • Mix compost into your soil before planting to improve structure without overfeeding nitrogen.

5. Poor Soil Structure

Radishes need loose, friable soil to expand evenly. Compacted or rocky soil restricts growth, causing roots to grow irregularly and sometimes crack as they push through dense layers.

Solution:

  • Prepare your soil by loosening it 8–10 inches deep before planting.
  • Work in organic matter such as compost or aged leaf mold.
  • Avoid walking on garden beds once they’re prepared — use boards or stepping stones to minimize compaction.

How to Prevent Cracking — A Step-by-Step Guide

To keep your radishes smooth and crack-free, follow this simple care routine:

Step 1: Choose the Right Variety

Some radish types are more resistant to cracking than others.
Try reliable varieties like:

  • ‘Cherry Belle’ – Early maturing and consistent.
  • ‘French Breakfast’ – Elongated and tolerant of minor stress.
  • ‘Sparkler’ – Classic round radish with smooth texture.

Step 2: Maintain Consistent Moisture

  • Check soil daily, especially during hot or windy weather.
  • Keep the top 1 inch of soil evenly damp but not soggy.
  • Mulch around plants to retain moisture and reduce temperature swings.

Step 3: Space Plants Properly

Overcrowded radishes compete for water and nutrients, leading to uneven growth.

  • Thin seedlings to 1 inch apart once they have true leaves.
  • Leave 6–8 inches between rows for air circulation.

Step 4: Harvest on Time

  • Begin checking radishes about 20 days after planting.
  • Pull one to check size; if it’s about 1 inch in diameter, harvest the rest.
  • Don’t wait for perfect uniformity — smaller radishes taste better and store longer.

Step 5: Keep Soil Cool

Radishes are cool-weather crops. Warm soil accelerates maturity and increases stress.

  • Grow them in spring (March–April) and fall (September–October).
  • Use shade cloth in summer or plant in partial shade to extend the growing season.

Bonus Tip: Use Cracked Radishes Creatively

Even cracked radishes are still edible and flavorful! They may not look perfect, but they can be used in:

  • Soups and stews, where appearance doesn’t matter.
  • Pickled radishes, sliced thinly and brined in vinegar.
  • Roasted vegetable medleys, which bring out their sweetness.

Just be sure to wash and trim cracked areas well to prevent decay.


Final Thoughts

Cracked radishes may look disappointing, but they’re a valuable signpost in your gardening journey. They tell you that your plants are growing vigorously — they just need a bit more consistency and timing.

By keeping soil moisture steady, harvesting on time, and maintaining balanced soil conditions, you can enjoy crisp, beautiful, unblemished radishes all season long.

So next time you see a crack or split, don’t worry — it’s just your garden teaching you how to be an even better grower. With a little attention, your next batch of radishes will be perfectly round, snappy, and ready for the salad bowl.

How To Grow Celery From Kitchen Scraps

How To Grow Celery From Kitchen Scraps

If you’ve ever chopped up a bunch of celery for soup or salad and tossed the base into the trash or compost, you might be surprised to learn that you’ve been throwing away the beginnings of a whole new plant. Celery is one of the easiest vegetables to regrow from kitchen scraps, and watching those tender green shoots spring to life is both fascinating and rewarding.

Growing celery from scraps isn’t just a fun gardening experiment—it’s a sustainable way to stretch your groceries, reduce waste, and enjoy fresh, homegrown produce right from your windowsill or garden. Whether you have a backyard garden or just a sunny kitchen window, you can regrow celery with very little effort.

Here’s a complete step-by-step guide on how to grow celery from kitchen scraps, including what you’ll need, how to care for your growing plant, and expert tips for a healthy, flavorful harvest.


Why Regrow Celery from Scraps?

Regrowing celery from the base of the stalk is both eco-friendly and budget-friendly. You don’t need seeds, special tools, or fancy garden beds—just a little patience and attention.

Here are a few reasons gardeners love this method:

  • Saves money: You can get a new celery plant from what you’d normally discard.
  • Reduces food waste: It’s a great way to repurpose kitchen scraps.
  • Perfect for small spaces: Even apartment dwellers can grow celery indoors.
  • Fresh flavor anytime: You’ll have crisp, aromatic celery whenever you need it.

Best of all, this project is easy enough for beginners and even makes a great family activity to teach kids about plant life cycles.


What You’ll Need

To regrow celery from kitchen scraps, you’ll only need a few simple materials—most of which you probably already have:

  • A fresh celery bunch (preferably organic)
  • A sharp knife
  • A shallow bowl or jar
  • Clean water
  • Sunny windowsill or a spot with bright, indirect light
  • Pot or raised bed (for later transplanting)
  • Potting soil or rich garden soil

Step 1: Prepare the Celery Base

Start with a fresh, healthy bunch of celery. Trim off the stalks about 2 inches above the base, leaving the root end intact. This base is where new growth will emerge.

Rinse the base gently under cool water to remove any dirt or debris. Avoid using an old or wilted celery base—freshness makes a big difference in how well it regrows.

Pro Tip:
If you’re planning ahead, choose celery that still has a tight, firm base and shows no signs of mold or decay.


Step 2: Start Regrowing in Water

Place the celery base in a shallow bowl or glass jar, cut-side up. Add enough clean, room-temperature water to cover the bottom inch of the base.

Set the container in a sunny windowsill where it will get at least 6 hours of light daily. South-facing windows are ideal.

Within 3 to 5 days, you’ll notice new green shoots sprouting from the center and small roots beginning to form at the bottom.

Maintenance Tips:

  • Change the water every 2 days to prevent mold and bacteria growth.
  • Keep the base moist but not submerged entirely. Too much water can cause rot.
  • Rotate the bowl occasionally so all sides receive light evenly.

After 7 to 10 days, your celery will have grown several inches of new leaves and a small network of roots—it’s now ready for soil.


Step 3: Transplant to Soil

Once the celery has visible roots and sturdy shoots, it’s time to move it to soil for long-term growth. You can transplant it into a pot, raised bed, or directly into your garden.

If planting in a pot:

  • Choose a container that’s at least 8 inches deep with good drainage holes.
  • Fill it with nutrient-rich potting mix, ideally a blend of compost, loamy soil, and a bit of perlite for aeration.
  • Make a small hole in the center and plant the celery so the new growth sits just above the soil line.
  • Gently pat down the soil and water thoroughly.

If planting in the garden:

  • Select a location with full sun and well-drained, fertile soil.
  • Amend the soil with compost to improve fertility and structure.
  • Space celery plants about 8 to 10 inches apart in rows that are 12–18 inches apart.

Water well after planting to help the roots establish.


Step 4: Care and Maintenance

Celery is a moisture-loving plant, so the most important factor after transplanting is consistent watering. Dry soil can lead to tough, stringy stalks.

Watering:
Keep the soil evenly moist at all times—celery prefers soil that feels like a wrung-out sponge. In hot weather, you may need to water daily. Adding a layer of mulch (like straw or shredded leaves) around the base helps retain moisture and keep roots cool.

Sunlight:
Celery loves full sun but will tolerate partial shade, especially in warmer climates. Aim for 6–8 hours of light per day.

Feeding:
Every 2–3 weeks, feed your celery with a balanced organic fertilizer or compost tea to keep it growing vigorously.

Temperature:
Celery thrives in cooler conditions between 60°F–70°F (15°C–21°C). Extreme heat can cause bolting (premature flowering). If you live in a warm region, provide light afternoon shade during summer.


Step 5: Harvesting Your Celery

Celery takes time to mature—typically 3 to 4 months after transplanting. You can either harvest the whole plant or cut the outer stalks as needed for continuous growth.

To harvest individual stalks:
Cut the outer stalks near the soil line, leaving the inner ones to continue developing. This method gives you a longer harvest period.

To harvest the whole plant:
Cut the entire bunch just above the root base when stalks are about 8–12 inches tall and firm. You can then restart the process again using the new base!

Pro Tip:
For the best flavor and texture, water your celery well before harvesting—it helps the stalks stay crisp and mild.


Common Problems and How to Fix Them

Even though celery is easy to regrow, a few common issues can arise. Here’s how to troubleshoot them:

  • Yellowing leaves: Usually a sign of too much direct sunlight or low nutrients. Move the plant to partial shade and add compost or fertilizer.
  • Rotting base: This happens when the water level is too high during the initial regrowth stage. Keep only the bottom submerged.
  • Slow growth: Celery is naturally slow-growing, but lack of nutrients or cold temperatures can slow it further. Use a balanced fertilizer and maintain warmth.
  • Bitter taste: Caused by inconsistent watering or high heat. Keep the soil moist and provide light shade during hot spells.

Bonus: Growing Celery Indoors Year-Round

Don’t have outdoor space? No problem! Celery can grow indoors just as well as outdoors if you provide enough light.

  • Use a deep pot (8–10 inches) with drainage holes.
  • Place it near a sunny window or use LED grow lights for at least 10–12 hours daily.
  • Maintain humidity with a spray bottle or humidity tray.
  • Rotate the pot every few days to ensure even light exposure.

Indoor-grown celery tends to have slightly smaller stalks, but the flavor is every bit as fresh and aromatic.


Sustainability Bonus: Keep the Cycle Going

After harvesting your celery, you can repeat the process again and again. Each time you regrow from a new base, you’re reducing waste and saving money. You can even experiment with other vegetables that regrow from scraps—like green onions, lettuce, bok choy, and leeks—to create a mini “scrap garden.”

By keeping your celery alive and productive through regrowth cycles, you’re not only enjoying fresh produce but also practicing eco-friendly gardening that’s great for the planet.


Final Thoughts

Learning how to grow celery from kitchen scraps is a small step toward sustainable living, but it’s also a deeply satisfying one. Watching those pale green shoots transform into full, leafy stalks is a reminder that nature is generous when given just a little care.

All you need is a celery base, a bit of water, and patience—and you’ll soon have your own crisp, aromatic celery ready to chop into soups, salads, and stir-fries.

So next time you’re prepping dinner, don’t toss that celery base—give it a second life. With this simple method, you’ll turn kitchen waste into kitchen abundance, one stalk at a time.

The Best Soil Mix For Growing Root Vegetables

The Best Soil Mix For Growing Root Vegetables

Growing perfect root vegetables—like carrots, beets, radishes, and turnips—depends on one crucial factor: the soil. Unlike leafy greens or fruiting plants that thrive in a variety of textures, root vegetables need soil that allows their roots to grow straight, long, and tender. Too heavy, and roots become stunted or forked. Too sandy, and nutrients leach away before they can take hold. The right soil mix strikes a perfect balance of drainage, structure, and fertility.

If you’ve ever wondered why your carrots come out twisted or your beets don’t form properly, the answer almost always lies beneath the surface. Let’s dig deep into what makes the best soil mix for growing root vegetables, how to prepare it, and how to maintain it for healthy, flavorful harvests season after season.


Why Soil Quality Matters for Root Vegetables

Root vegetables grow underground, meaning the part you eat is directly shaped by the soil it grows in. Their roots need to push easily through the soil to expand, absorb nutrients, and develop a uniform shape.

When soil is too compacted or clay-heavy, roots struggle to penetrate, resulting in misshapen or undersized crops. On the other hand, overly sandy soil drains too quickly and fails to hold enough moisture or nutrients. The goal is to create a soil mix that is:

  • Loose and well-draining
  • Rich in organic matter
  • Free of large debris or rocks
  • Balanced in nutrients (especially potassium and phosphorus)

This perfect mix provides just the right texture for roots to grow long, smooth, and nutrient-rich.


Understanding the Ideal Soil Texture

The ideal soil texture for root vegetables is loamy, meaning it contains roughly equal parts of sand, silt, and clay, with plenty of organic matter mixed in. Loam holds moisture while allowing excess water to drain away—a must for roots that hate sitting in soggy soil.

Here’s how each component contributes:

  • Sand improves drainage and aeration, ensuring roots can breathe.
  • Silt retains just enough moisture and nutrients to feed growing plants.
  • Clay holds nutrients but must be used sparingly to avoid compaction.
  • Organic matter (like compost or leaf mold) improves fertility and keeps soil crumbly.

When combined properly, this texture creates a soft, fluffy environment where roots can grow straight and healthy.


The Perfect Soil Mix Recipe

To achieve that ideal loamy structure, you can create your own soil mix that’s specifically tailored for root vegetables. Whether you’re filling a raised bed or improving an existing garden plot, this formula provides a great foundation.

DIY Root Vegetable Soil Mix (for raised beds or containers):

  • 40% screened topsoil or loam
  • 30% coarse sand (builder’s sand, not play sand)
  • 30% organic compost (well-rotted manure, leaf mold, or mushroom compost)

Blend these thoroughly before planting. The result should be a light, crumbly mix that falls easily through your fingers—neither sticky nor overly dry.

For in-ground beds:

If your garden soil is heavy clay or compacted, loosen it to a depth of at least 12–18 inches, then mix in:

  • 2 inches of coarse sand
  • 2–3 inches of organic compost
  • A handful of wood ash or bone meal (for potassium and phosphorus)

This combination improves both texture and nutrition, helping roots develop freely.


Key Nutrients Root Vegetables Need

Root crops have different nutritional needs compared to leafy greens or fruiting vegetables. They prefer a soil rich in phosphorus and potassium, but moderate in nitrogen. Too much nitrogen encourages leafy top growth at the expense of root development.

Here’s what to focus on:

  • Phosphorus (P): Promotes strong root formation and healthy cell development.
  • Potassium (K): Enhances disease resistance and helps roots store sugars (for sweeter flavor).
  • Calcium (Ca): Prevents root deformities and helps with nutrient absorption.

To boost these nutrients naturally, add:

  • Bone meal (rich in phosphorus)
  • Wood ash or kelp meal (for potassium)
  • Crushed eggshells or garden lime (for calcium)

Avoid high-nitrogen fertilizers like fresh manure or grass clippings, as they can lead to overly leafy tops and small, fibrous roots.


Soil pH: Getting It Just Right

Most root vegetables prefer a slightly acidic to neutral soil, with a pH between 6.0 and 7.0.

If your soil is too acidic (below 6.0), roots may struggle to absorb nutrients effectively. To correct this, add garden lime or crushed oyster shell. If your soil is too alkaline (above 7.5), mix in composted leaves or peat moss to gently lower the pH.

You can test your soil using a simple pH kit or a digital soil meter—an inexpensive step that can make a huge difference in your harvest.


Preparing the Soil for Planting

Before planting root vegetables, proper soil preparation is essential. Even the best soil mix won’t perform well if it’s compacted or unevenly fertilized.

Follow these steps for best results:

  1. Loosen the Soil Deeply:
    Root vegetables need depth—ideally 12–18 inches of loose soil. Use a garden fork to break up clumps and improve aeration.
  2. Remove Debris:
    Pick out stones, sticks, or clumps of clay. Even small obstacles can cause roots to split or fork.
  3. Add Organic Matter:
    Mix in a few inches of compost or leaf mold before planting. This enriches the soil and improves texture.
  4. Level and Moisten:
    Smooth the surface and water lightly so the soil is evenly moist but not soggy.
  5. Avoid Compacting:
    Don’t walk on prepared soil or press it down too firmly—roots need room to breathe.

Best Soil Mix Adjustments for Specific Root Vegetables

Not all root crops have the same preferences. Here’s how you can fine-tune your soil mix for different varieties:

  • Carrots: Prefer very loose, sandy soil—add extra sand or fine compost. Avoid any lumps that could deform roots.
  • Beets: Like slightly heavier soil with good fertility. Mix in extra compost and keep moisture consistent.
  • Radishes: Thrive in light, well-drained soil; a bit of coarse sand improves aeration.
  • Turnips: Need more organic matter—blend in extra compost to keep roots juicy and sweet.
  • Parsnips: Require deep, rock-free soil—raised beds are ideal. Add sand to promote straight, white roots.

Each type benefits from slightly different conditions, but all prefer soil that is fluffy, balanced, and full of life.


Maintaining Healthy Soil Throughout the Season

Once your root vegetables are in the ground, your job isn’t over. Maintaining soil quality ensures strong, flavorful harvests.

  • Mulch Lightly: Add a thin layer of straw or shredded leaves to keep soil cool and retain moisture.
  • Water Evenly: Inconsistent watering can cause cracking in carrots or woody texture in beets. Aim for deep, steady watering.
  • Avoid Disturbing Roots: When weeding, use a hand tool and be gentle—root crops dislike disturbance.
  • Replenish Nutrients: Mid-season, top-dress with compost or organic fertilizer low in nitrogen.
  • Rotate Crops: Don’t plant root vegetables in the same spot year after year. Rotate with leafy greens or legumes to prevent disease buildup.

Common Soil Problems and Fixes

Even with careful preparation, you might encounter a few soil-related issues. Here’s how to fix them:

  • Forked or Misshapen Roots: Soil too compact or rocky → loosen and sieve soil, add sand.
  • Small Roots, Big Tops: Too much nitrogen → reduce fertilizer, use bone meal instead.
  • Cracked Carrots or Beets: Irregular watering → keep moisture consistent.
  • Pale or Woody Roots: Poor nutrition or over-mature plants → harvest promptly and enrich soil before next planting.

By addressing these issues early, you’ll keep your soil productive and your vegetables picture-perfect.


Final Thoughts

The best soil mix for growing root vegetables is one that combines structure, nutrition, and balance. A blend of loam, coarse sand, and organic compost creates the ideal growing environment—loose enough for roots to stretch, yet rich enough to sustain steady growth.

Think of soil as a living ecosystem. Feed it with compost, aerate it gently, and avoid harsh chemicals. In return, it will reward you with straight, flavorful carrots, plump beets, and crisp radishes that taste like sunshine and effort well spent.

Whether you’re gardening in a raised bed, a backyard plot, or a container, remember: great roots start with great soil. Invest in building it right, and your harvest will show the results for seasons to come.


8 Vegetables That Thrive in Raised Beds

8 Vegetables That Thrive in Raised Beds

Raised bed gardening has taken root across backyards, patios, and even urban balconies—and it’s easy to see why. With their neat borders, nutrient-rich soil, and improved drainage, raised beds make growing vegetables simpler and more productive than traditional in-ground plots. They warm up faster in the spring, drain better after rain, and allow for precise soil control, meaning your plants get exactly what they need to thrive.

But not all vegetables perform equally well in raised beds. Some varieties simply love the structure, aeration, and warmth of this setup, producing lush greens and abundant harvests with very little fuss. Whether you’re a beginner gardener or an experienced grower looking to maximize your yield, here are eight vegetables that truly thrive in raised beds, plus tips to help you get the best from each one.


1. Lettuce

Lettuce is one of the most satisfying crops to grow in raised beds—it’s fast, forgiving, and can provide multiple harvests per season. The loose, rich soil of a raised bed allows lettuce roots to develop easily, resulting in tender, flavorful leaves.

Why It Thrives:
Raised beds offer excellent drainage and temperature control, which lettuce needs to prevent wilting or rot. Since the soil warms quickly in spring and stays cool with mulch, you can extend your growing season for both early and late crops.

Planting Tips:

  • Sow seeds directly into the bed about ¼ inch deep and 6 inches apart.
  • Keep the soil consistently moist—lettuce roots are shallow.
  • For a steady supply, plant new seeds every two weeks.

Pro Tip:
Try mixing varieties like Butterhead, Romaine, and Loose-leaf for colorful, flavorful salads straight from the garden.


2. Carrots

Carrots are a raised bed favorite because they need soft, loose soil to grow long and straight. In traditional gardens, compacted soil often leads to stunted or twisted carrots, but raised beds solve that problem beautifully.

Why It Thrives:
The deep, crumbly soil in raised beds lets carrot roots stretch without resistance. Plus, good drainage helps prevent root rot and splitting.

Planting Tips:

  • Sow seeds ½ inch deep in fine soil free from rocks or clumps.
  • Thin seedlings to 2 inches apart once they sprout.
  • Keep the bed evenly moist, as dry spells can cause bitter roots.

Pro Tip:
Blend sand or compost into your soil mix to encourage smoother, more uniform carrots.


3. Spinach

Spinach grows best in cool, fertile soil, and raised beds make it easy to maintain those ideal conditions. It’s also a quick grower, often ready to harvest in just 5–6 weeks.

Why It Thrives:
Because raised beds warm faster in early spring, spinach can get a jump-start on the growing season. The ability to amend soil easily ensures that the plants get plenty of organic matter and nitrogen for healthy leaf production.

Planting Tips:

  • Sow seeds ½ inch deep and 3 inches apart.
  • Water regularly; spinach prefers consistent moisture.
  • Provide light afternoon shade in hot weather to prevent bolting.

Pro Tip:
Harvest outer leaves first and let the inner ones keep growing—this method can extend your harvest for weeks.


4. Tomatoes

Tomatoes are one of the most popular raised bed crops, and with good reason. They thrive in the warm, well-draining soil raised beds provide, producing vigorous growth and abundant fruit.

Why It Thrives:
The extra warmth from raised beds helps tomatoes grow earlier and stronger. The controlled environment makes it easy to add compost, organic fertilizer, or calcium (which prevents blossom-end rot).

Planting Tips:

  • Plant seedlings deeply—bury them up to the first set of leaves to encourage more root growth.
  • Space plants 18–24 inches apart.
  • Water deeply once or twice a week, rather than shallow daily watering.

Pro Tip:
Add a thick layer of mulch to retain moisture and use stakes or cages to support heavy vines.


5. Radishes

If you want a fast-growing crop that delivers almost instant gratification, radishes are the answer. They’re one of the easiest vegetables to grow in raised beds and can mature in as little as 25 days.

Why It Thrives:
Raised beds allow for loose, airy soil that’s perfect for quick root development. The uniform moisture and drainage help produce crisp, mild radishes.

Planting Tips:

  • Sow seeds ½ inch deep and 1 inch apart.
  • Thin seedlings to about 2 inches once they sprout.
  • Keep soil moist—dry soil can make radishes woody or too spicy.

Pro Tip:
Plant radishes between slower-growing crops like carrots or beets; they’ll be ready to harvest long before the others need more space.


6. Peppers

Peppers—both sweet and hot—love the warm soil and good air circulation of raised beds. They grow compactly, making them ideal for small spaces while rewarding you with a colorful, flavorful harvest.

Why It Thrives:
Peppers prefer consistent warmth and even moisture. Raised beds heat up quickly and provide excellent drainage, reducing the risk of fungal diseases.

Planting Tips:

  • Transplant seedlings 12–18 inches apart once all danger of frost has passed.
  • Water deeply but avoid letting the soil stay soggy.
  • Fertilize with compost or a balanced organic mix every few weeks.

Pro Tip:
Peppers love companions like basil or marigolds—both help repel pests naturally.


7. Beets

Beets are a two-for-one crop: you can enjoy both the earthy roots and the nutrient-rich greens. Raised beds provide the perfect growing conditions for these dual-purpose vegetables.

Why It Thrives:
Beets prefer rich, well-drained soil and moderate moisture. Raised beds prevent waterlogging and allow for easy root expansion.

Planting Tips:

  • Sow seeds ½ inch deep and 2 inches apart.
  • Thin seedlings early, as each “seed” often contains several embryos.
  • Water evenly and harvest when roots reach about 2 inches in diameter.

Pro Tip:
Use the thinned beet greens in salads or sautés—they’re packed with vitamins and minerals.


8. Zucchini

Zucchini is a summer garden staple, and raised beds help it reach its full potential. The plants grow vigorously and produce heavily when given plenty of nutrients and sunlight.

Why It Thrives:
The nutrient-dense soil of raised beds supports large plants and heavy fruiting. The raised structure also promotes air circulation, reducing mildew and rot.

Planting Tips:

  • Sow seeds 1 inch deep, 2–3 feet apart.
  • Water consistently—zucchini plants need lots of moisture to produce tender fruits.
  • Harvest young zucchini (6–8 inches long) for the best flavor and texture.

Pro Tip:
Encourage pollination by planting flowers nearby or gently shaking blooms early in the morning when pollinators are most active.


The Secret to Raised Bed Success

Raised beds offer many benefits beyond just aesthetics. Here’s why they’re a game-changer for vegetable gardeners:

  • Better Drainage: Prevents soggy roots and diseases.
  • Custom Soil Mix: You can fill the bed with ideal soil—rich, loose, and full of organic matter.
  • Extended Season: Soil warms faster in spring and stays productive into fall.
  • Easy Maintenance: Less bending, fewer weeds, and simple watering.
  • Pest Control: The elevated height can deter some common garden pests.

To maximize productivity, rotate your crops annually, refresh your soil with compost, and mulch heavily to conserve moisture and reduce weeds.


Final Thoughts

Raised bed gardening is more than just a space-saving trend—it’s a proven way to grow healthier, more abundant vegetables with less effort. The eight vegetables listed above—lettuce, carrots, spinach, tomatoes, radishes, peppers, beets, and zucchini—are ideal for raised bed conditions, offering reliable yields and rewarding flavor throughout the growing season.

With a bit of planning, quality soil, and consistent care, your raised bed can become a mini produce paradise right in your backyard. Whether you’re after crisp greens, juicy tomatoes, or crunchy roots, these vegetables will make every square inch of your garden thrive.

How To Protect Tomato Plants From Heat Stress

How To Protect Tomato Plants From Heat Stress

Tomatoes love the sun—but there’s a fine line between thriving in warmth and suffering from extreme heat. While these summer favorites grow best in temperatures between 70°F and 85°F (21°C–29°C), once the mercury climbs above 90°F (32°C) during the day or 75°F (24°C) at night, your plants can quickly experience heat stress.

If you’ve noticed drooping leaves, stalled growth, or flowers that suddenly fall off, your tomatoes are telling you they’re overheated. Fortunately, with the right strategies, you can protect your plants and keep them producing even through scorching summer days.

Here’s a detailed guide on how to protect tomato plants from heat stress, including why it happens, how to recognize the signs, and the best ways to keep your garden thriving all season long.


What Is Heat Stress in Tomato Plants?

Heat stress occurs when high temperatures cause your tomato plants to lose water faster than they can absorb it. This imbalance leads to dehydration, slowed photosynthesis, and eventually reduced fruit production.

Even if your plants look green and healthy, sustained heat can silently impact flower development and fruit set, leading to fewer and smaller tomatoes.

Critical temperature thresholds:

  • Above 90°F (32°C): Pollen becomes sterile, reducing fruit set.
  • Above 100°F (38°C): Growth halts, and flowers may drop.
  • Above 104°F (40°C): Leaves and fruit can scorch or sunburn.

In short, tomatoes can handle short bursts of heat—but prolonged exposure can do serious damage.


Common Signs of Heat Stress

Recognizing heat stress early is key to saving your tomato plants. Look for these telltale symptoms:

  1. Wilting or drooping leaves, especially during the hottest part of the day.
  2. Leaf curling (upward or inward) as the plant tries to conserve moisture.
  3. Blossom drop, where flowers dry up and fall off without forming fruit.
  4. Pale or yellowing leaves, especially around the edges.
  5. Sunscald on fruit—white or yellow patches that later turn leathery.
  6. Reduced or misshapen fruit, as heat disrupts pollination and development.

While some midday wilting is normal, if your plants don’t recover by evening, they’re under serious heat stress.


1. Provide Shade During Extreme Heat

One of the most effective ways to prevent heat stress is to shield your tomato plants from direct sunlight during the hottest hours.

How to Do It:

  • Use Shade Cloth:
    Install 30–50% shade cloth over your tomato plants to filter sunlight without blocking it completely.
    • Light-colored (white or silver) shade cloth reflects heat best.
    • Drape it over hoops, stakes, or a simple frame to allow airflow underneath.
  • Temporary Covers:
    Use old bedsheets, lightweight tarps, or row covers on hot afternoons. Remove them in the evening to allow cooling.
  • Natural Shade:
    Plant taller crops (like corn or sunflowers) nearby or use garden trellises to create partial shade.

Pro Tip: Avoid using dark-colored fabrics—they absorb heat and can worsen the problem.


2. Water Deeply and Consistently

Heat increases evaporation, which means your tomatoes need more water—but not too frequently or shallowly. Shallow watering encourages roots to stay near the surface, where soil dries out faster.

How to Do It Right:

  • Water early in the morning (before 9 a.m.) so plants can absorb moisture before the day heats up.
  • Water deeply: Aim for at least 6–8 inches of soil penetration each time.
  • Check soil moisture: Stick your finger 2 inches deep—if it feels dry, it’s time to water.
  • Avoid evening watering during humid weather—it can encourage fungal diseases.

Pro Tip: Use soaker hoses or drip irrigation for slow, even watering. Avoid overhead sprinklers, which waste water and increase leaf disease.


3. Mulch to Lock In Moisture and Cool the Soil

Mulch acts like a protective blanket for your soil—it keeps roots cool, reduces evaporation, and prevents sudden temperature swings.

Best Mulches for Hot Weather:

  • Straw or hay: Reflects sunlight and stays airy.
  • Compost: Adds nutrients and retains moisture.
  • Shredded leaves or grass clippings: Cheap and effective.

Apply 2–3 inches of mulch around the base of your tomato plants, keeping it 2 inches away from the stem to prevent rot.

Bonus Tip: Dark mulches like wood chips can trap heat—use light-colored organic materials during extreme heat.


4. Improve Soil Health for Better Heat Resistance

Healthy soil acts like a buffer—it retains water better and helps plants handle temperature extremes.

How to Build Heat-Resilient Soil:

  • Add organic matter: Compost and aged manure improve structure and water-holding capacity.
  • Avoid over-tilling: It breaks up soil structure and exposes roots to heat.
  • Use cover crops: Plant legumes or clover in the off-season to enrich soil naturally.

Healthy soil = strong roots = heat-tolerant tomatoes.


5. Choose Heat-Tolerant Tomato Varieties

Some tomato varieties are bred to handle higher temperatures better than others. If you live in a consistently hot region, choose heat-tolerant types.

Top Heat-Resistant Varieties:

  • Heatmaster
  • Solar Fire
  • Phoenix
  • Florida 91
  • Sun Leaper
  • Summer Set
  • Arkansas Traveler

These cultivars can set fruit even when daytime temperatures exceed 90°F and nighttime temperatures stay above 75°F.

Pro Tip: Check the label for phrases like “heat set” or “heat tolerant” when buying seeds or seedlings.


6. Time Your Planting Strategically

If your summers are extremely hot, timing your planting is critical. Plant tomatoes so that flowering and fruiting occur before or after peak heat.

How to Time It:

  • Early planting: Start seedlings indoors and transplant outdoors as soon as the danger of frost has passed. This allows plants to mature before the worst heat.
  • Succession planting: Start a second batch of tomatoes in midsummer for a late-season harvest when temperatures cool.

Pro Tip: If your region experiences extreme summer heat, consider container gardening. You can move pots to shaded spots during hot spells.


7. Fertilize Lightly During Heat Waves

When temperatures soar, tomato plants slow down or stop growing. Feeding them during this time can do more harm than good, as excess fertilizer forces growth the plant can’t sustain under stress.

What To Do:

  • Pause heavy feeding during extreme heat.
  • Use a diluted liquid fertilizer (like fish emulsion or compost tea) once temperatures normalize.
  • Focus on soil health and watering, not fertilization, during heat waves.

Pro Tip: Avoid high-nitrogen fertilizers—they encourage leafy growth that loses water quickly.


8. Protect Fruit from Sunscald

Just like humans, tomatoes can get sunburned. Direct exposure to hot sun causes sunscald, leaving white, blistered patches on the fruit’s skin.

Prevention Tips:

  • Maintain healthy leaf cover—don’t over-prune! Leaves shade developing fruit.
  • Add temporary shading with garden fabric or screens.
  • Harvest fruit slightly early and let them ripen indoors if extreme heat continues.

Pro Tip: Leave 2–3 leaves per fruit cluster for natural shading and protection.


9. Boost Airflow Without Overexposing Plants

Good air circulation prevents fungal diseases—but too much exposure can dry out soil and increase heat stress.

Balance Airflow by:

  • Spacing plants 18–24 inches apart.
  • Pruning lower leaves touching the ground to prevent soil splash and improve air movement.
  • Using stakes or cages to keep vines upright and reduce overcrowding.

Avoid excessive pruning during heat waves—leaves protect fruit and roots from the sun.


10. Recovering Tomato Plants After Heat Stress

Even with the best care, sometimes heat damage happens. Don’t give up—tomatoes are resilient.

How to Help Plants Bounce Back:

  1. Prune dead or scorched leaves, but leave as much green growth as possible.
  2. Water deeply and slowly to rehydrate the soil.
  3. Apply compost tea or seaweed extract to stimulate recovery.
  4. Provide shade until plants perk up again.
  5. Once cooler weather returns, resume normal feeding to encourage new growth.

Most tomato plants will recover within a week or two if conditions improve.


Bonus Tip: Consider Companion Planting

Planting heat-tolerant companions can create natural shade and improve resilience.

Best Companions:

  • Basil: Provides partial shade and repels pests.
  • Marigolds: Deter insects and add color.
  • Carrots or onions: Grow low and don’t compete heavily for nutrients.

These plants create a microclimate that helps tomatoes handle heat better.


Final Thoughts

Heat stress is one of the biggest challenges tomato gardeners face, but it’s also one of the easiest to manage with proactive care.

By combining shade, deep watering, mulching, and smart timing, you can protect your plants even during sweltering summers. Remember—tomatoes are tough survivors; with your help, they can power through heat waves and keep producing those juicy, sun-ripened fruits we all love.

So next time the thermometer spikes, don’t panic—just give your tomatoes a little shade, a deep drink, and some mulch, and they’ll reward you with a bumper harvest once the weather cools again.

The Best Mulch To Use Around Tomato Plants

The Best Mulch To Use Around Tomato Plants

If there’s one secret that separates an average tomato grower from a great one, it’s mulching. This simple gardening practice—spreading organic or inorganic material over the soil—can make a dramatic difference in the health, productivity, and flavor of your tomato crop.

Mulch does far more than make your garden look tidy. It helps retain moisture, regulate soil temperature, suppress weeds, and prevent diseases that spread from soil to leaves. But with so many types of mulch available, how do you know which one is best for your tomatoes?

Let’s explore why mulch matters, the different types available, and the best mulch options for juicy, healthy tomatoes all season long.


Why Mulch Matters for Tomato Plants

Before diving into the materials, it’s worth understanding exactly why mulch is so beneficial for tomato plants.

  1. Moisture Retention:
    Tomatoes need consistent soil moisture to thrive. Mulch acts like a protective blanket, reducing evaporation so your plants stay hydrated longer between waterings.
  2. Temperature Regulation:
    Extreme heat or cold stresses tomato roots. Mulch insulates the soil—keeping it cool in summer and warm in early spring or fall.
  3. Weed Suppression:
    Weeds compete with your tomatoes for nutrients and water. A thick layer of mulch blocks sunlight from reaching weed seeds, stopping them from sprouting.
  4. Disease Prevention:
    Splashing water can spread fungal spores from soil to tomato leaves. Mulch creates a barrier that prevents this, reducing problems like blight.
  5. Improved Soil Health:
    Organic mulches decompose over time, adding nutrients and improving soil structure. This means healthier plants year after year.
  6. Cleaner Fruit:
    Mulch prevents rain or irrigation from splashing soil onto developing tomatoes—keeping your harvest cleaner and less prone to rot.

Simply put: if you’re growing tomatoes, mulch isn’t optional—it’s essential.


When To Apply Mulch Around Tomatoes

Timing matters. If you mulch too early, you may trap cold, wet soil around the roots. Wait until:

  • The soil has warmed to at least 60°F (15°C) in late spring.
  • Your tomato seedlings are established and growing strong.
  • There’s no longer a risk of frost.

Then apply a 2–3 inch layer of mulch around the base of each plant, keeping about 2 inches of space around the stem to prevent rot and pest problems.


The Best Mulches for Tomato Plants

Let’s compare the top mulching materials, their pros and cons, and how to use them effectively.


1. Straw: The Classic Tomato Mulch

Straw (not hay!) is one of the most popular mulches for tomatoes—and for good reason.

Pros:

  • Keeps soil cool and moist.
  • Excellent weed control.
  • Decomposes slowly, enriching the soil.
  • Easy to spread and lightweight.

Cons:

  • Can blow away in wind if too dry.
  • Must be replaced each season.

How to Use:

Spread 2–3 inches of clean, seed-free straw around your tomato plants. Avoid hay, which contains weed seeds. You can dampen straw slightly after spreading to help it settle.

Pro tip: Use chopped straw (sold as mulch straw) for a neater look and better moisture retention.


2. Grass Clippings: A Free, Eco-Friendly Option

Fresh or dried grass clippings from your lawn make an excellent tomato mulch—if used correctly.

Pros:

  • Readily available and free.
  • Adds nitrogen to the soil as it breaks down.
  • Retains moisture well.

Cons:

  • Fresh clippings can mat and create odor or mold.
  • May contain herbicides or weed seeds if lawn was treated.

How to Use:

Apply a thin layer (1 inch) of dry clippings at first. Once that dries, add another layer. This prevents matting and allows air circulation. Never use clippings from chemically treated lawns.

Pro tip: Grass clippings are best mixed with straw or leaves for a balanced, long-lasting mulch.


3. Compost: The Nutrient Powerhouse

Compost acts as both mulch and fertilizer—feeding your tomatoes as it protects the soil.

Pros:

  • Adds nutrients like nitrogen, phosphorus, and potassium.
  • Improves soil structure and water retention.
  • Encourages beneficial microbes.

Cons:

  • Weeds can sprout if compost isn’t fully mature.
  • May need topping up mid-season.

How to Use:

Spread a 1–2 inch layer of compost around the base of each plant. It can be used alone or beneath another mulch (like straw) to hold in moisture longer.

Pro tip: Combine compost with shredded leaves or straw for the ultimate organic mulch mix.


4. Shredded Leaves or Leaf Mold

Autumn leaves are a gift from nature—turn them into nutrient-rich mulch for your tomatoes.

Pros:

  • Readily available and free.
  • Retains moisture and enriches soil as it decomposes.
  • Encourages earthworms and beneficial fungi.

Cons:

  • Can compact and reduce airflow if applied too thick.
  • May attract insects if not shredded first.

How to Use:

Run leaves through a shredder or mower before spreading a 2-inch layer around your tomato plants. For best results, mix with compost or grass clippings to balance nitrogen and carbon.

Pro tip: Partially decomposed “leaf mold” is even better—dark, crumbly, and moisture-holding.


5. Pine Needles (Pine Straw)

Pine needles are light, airy, and long-lasting—an excellent mulch for tomato gardens, especially in the South.

Pros:

  • Great airflow and moisture retention.
  • Doesn’t compact easily.
  • Naturally discourages slugs and snails.

Cons:

  • Slightly acidic—may not be ideal for already acidic soil.
  • Doesn’t add as many nutrients as compost or straw.

How to Use:

Spread a 2–3 inch layer around tomato plants. Pine straw interlocks well, making it wind-resistant and tidy.

Pro tip: Mix pine needles with compost or leaves to balance pH and nutrient levels.


6. Newspaper or Cardboard: The Weed Barrier

Simple and effective, newspaper and cardboard are fantastic for keeping weeds away and conserving moisture.

Pros:

  • Inexpensive and biodegradable.
  • Excellent weed suppression.
  • Easy to layer under organic mulch.

Cons:

  • Doesn’t add nutrients.
  • Can dry out or blow away if not weighted down.

How to Use:

Lay down 2–3 layers of newspaper or one sheet of cardboard around plants, then cover with straw, compost, or leaves to hold it in place. Avoid glossy or colored paper.

Pro tip: Use this as a base layer beneath organic mulch for superior weed control.


7. Black Plastic or Landscape Fabric

If you’re growing tomatoes in cooler climates, black plastic mulch can warm the soil early in the season—jumpstarting growth.

Pros:

  • Heats soil in spring.
  • Prevents almost all weeds.
  • Conserves moisture efficiently.

Cons:

  • Doesn’t allow rainwater through.
  • Can overheat soil in hot climates.
  • Non-biodegradable (unless you use eco-friendly film).

How to Use:

Lay the plastic before planting, cutting holes for each tomato. In hotter regions, consider switching to reflective or woven fabric to prevent overheating.

Pro tip: Remove plastic mulch at season’s end and replace it with organic mulch for soil health.


Best Mulch Combinations for Tomatoes

For optimal results, try layering or combining materials:

  • Compost + Straw: Nutrient-rich and moisture-retaining.
  • Newspaper + Grass Clippings: Excellent weed control with a natural look.
  • Leaf Mold + Pine Needles: Great airflow and long-lasting coverage.

Experiment to see which blend performs best in your region’s climate and soil type.


What Mulches To Avoid Around Tomatoes

Not all mulch materials are tomato-friendly. Avoid:

  • Fresh wood chips: Can tie up nitrogen while decomposing.
  • Hay: Often full of weed seeds.
  • Thick fresh grass: Can suffocate soil and cause mold.
  • Colored or rubber mulch: Adds no nutrients and can leach chemicals.

How Much Mulch To Use

Apply 2–3 inches of organic mulch around each plant, spreading it in a circle about 12–18 inches wide. Keep the mulch 2 inches away from the stem to avoid rot and insect problems.

Replenish or fluff the mulch mid-season to maintain depth and airflow.


Final Thoughts

Mulching tomatoes isn’t just about looks—it’s about creating the best possible environment for growth. The right mulch stabilizes moisture, feeds the soil, suppresses weeds, and protects plants from disease and stress.

For most gardeners, a mix of straw and compost or leaf mold and grass clippings offers the perfect balance of moisture control, nutrients, and soil health.

So next time you’re planting tomatoes, don’t stop at the soil—top it off with the perfect layer of mulch. Your plants will reward you with stronger roots, cleaner fruit, and a more abundant harvest.

7 Reasons Your Tomato Leaves Curl (And What To Do About It)

7 Reasons Your Tomato Leaves Curl (And What To Do About It)

Few things are as satisfying as seeing your tomato plants thrive—lush green leaves, strong stems, and clusters of blossoms promising future fruit. But if you’ve noticed your tomato leaves curling, twisting, or cupping inward, it’s a sign that your plants are under stress.

Leaf curl is a common issue, and while it can look alarming, it doesn’t always mean disaster. The trick is understanding why it’s happening and how to fix it before your plants stop growing or producing fruit.

Here are 7 common reasons your tomato leaves curl—and what you can do to bring them back to health.


1. Environmental Stress (Weather and Sun)

Tomatoes love warm weather, but they don’t handle extremes well. Sudden changes in temperature, strong winds, or intense sunlight can cause leaves to curl as a form of self-protection.

When the air is hot and dry, the plant loses moisture faster than it can replace it. To conserve water, tomato leaves curl upward or inward, reducing surface area and slowing evaporation.

How to Identify It:

  • Leaves curl during the hottest part of the day but flatten out in the evening.
  • No yellowing or spotting—just rolling leaves.

What To Do:

  • Water deeply: Ensure consistent moisture 6–8 inches deep.
  • Mulch the soil: A 2–3 inch layer of straw, compost, or shredded leaves helps retain water.
  • Provide shade: Use shade cloth or plant taller crops nearby to reduce heat stress.
  • Avoid overhead watering: Water the base to minimize leaf evaporation.

Pro Tip: Environmental leaf curl usually corrects itself once the weather stabilizes—so don’t panic!


2. Irregular Watering (Too Much or Too Little)

Tomatoes are moisture-sensitive plants. Inconsistent watering—letting the soil swing between soggy and bone dry—can stress the roots, causing the leaves to curl inward or downward.

How to Identify It:

  • Lower leaves start curling first.
  • Wilting during the day despite recent watering.
  • Cracked or split fruits in severe cases.

What To Do:

  • Keep soil evenly moist. Don’t let it completely dry out between waterings.
  • Water early in the morning, allowing plants to absorb moisture before heat sets in.
  • Use drip irrigation or soaker hoses for steady moisture delivery.
  • Add organic mulch to buffer soil moisture fluctuations.

Consistent watering is the simplest way to prevent leaf curl and improve overall tomato health.


3. Excess Nitrogen or Nutrient Imbalance

Fertilizing is essential—but overdoing it can harm more than help. Too much nitrogen encourages lush, leafy growth, often at the expense of flowers and fruit. Those overfed leaves can curl, twist, and look unnaturally dark green.

How to Identify It:

  • Thick, dark green foliage with inward curling leaves.
  • Lots of stems and leaves but few blossoms.

What To Do:

  • Switch to a balanced fertilizer (5-10-10 or 4-6-8).
  • Stop adding manure or high-nitrogen feed temporarily.
  • Flush excess nutrients: Water thoroughly to help leach extra fertilizer salts.
  • Add compost or aged organic matter to balance soil nutrients.

Remember: tomato plants need phosphorus and potassium for strong roots and fruit—not just nitrogen for leaf growth.


4. Herbicide Drift or Chemical Damage

Even if you don’t spray herbicides yourself, nearby lawns, fields, or neighbors might. Airborne herbicides like 2,4-D or glyphosate can drift through the air and affect sensitive crops such as tomatoes.

These chemicals interfere with plant hormones, leading to distorted, curling, or twisted leaves.

How to Identify It:

  • New leaves appear narrow, tightly curled, or cup upward.
  • Leaf veins may thicken or twist.
  • Damage often appears uneven—only on one side of the plant or garden.

What To Do:

  • Remove affected leaves if damage is mild.
  • Water thoroughly to flush residues from the soil.
  • Avoid using grass clippings treated with herbicides as mulch.
  • If exposure is severe, you may need to remove and replace contaminated soil.

To prevent future drift, ask neighbors to spray only on calm days and establish windbreaks or barriers between your garden and nearby sprayed areas.


5. Pests: Aphids, Whiteflies, and Thrips

Tiny sap-sucking insects like aphids and whiteflies are common culprits behind curling tomato leaves. These pests feed on plant juices, causing distortion and transmitting viruses.

How to Identify It:

  • Curling and sticky, shiny leaves (from honeydew secretions).
  • Visible clusters of tiny green, black, or white bugs under the leaves.
  • Ants crawling around plants—often feeding on pest honeydew.

What To Do:

  • Spray with neem oil or insecticidal soap every 5–7 days until pests disappear.
  • Encourage beneficial insects like ladybugs and lacewings.
  • Inspect regularly: Early detection is key.
  • Avoid broad-spectrum pesticides that can kill pollinators and beneficial bugs.

Keeping pests in check not only prevents leaf curl but also reduces the spread of viral diseases.


6. Viral or Fungal Infections

If leaf curling comes with discoloration, mosaic-like patches, or stunted growth, your plant may have a disease rather than an environmental issue.

Common Viral Diseases:

  • Tomato Yellow Leaf Curl Virus (TYLCV): Causes severe leaf curling and yellowing, spread by whiteflies.
  • Tomato Mosaic Virus: Leads to mottled, distorted leaves and poor fruiting.

Fungal Diseases:

  • Root-related fungal infections like Fusarium or Verticillium wilt can cause leaves to curl and droop.

How to Identify It:

  • Leaves curl upward and turn pale or yellow.
  • Plant appears weak even with proper watering.
  • Infected plants stop producing flowers and fruit.

What To Do:

  • Remove and destroy infected plants—don’t compost them.
  • Disinfect tools and stakes before using them again.
  • Use disease-resistant tomato varieties labeled “VFN” (resistant to Verticillium, Fusarium, and Nematodes).
  • Rotate crops annually and avoid planting tomatoes in the same spot for at least 2 years.

Prevention is the best defense—once viral infection sets in, there’s no cure.


7. Pruning, Transplant, or Root Stress

Overhandling tomato plants can lead to leaf curl, especially after heavy pruning or transplanting. When roots are disturbed or too many leaves are removed, the plant goes into “survival mode.”

How to Identify It:

  • Curling occurs right after transplanting or pruning.
  • Upper leaves may look healthy while lower ones curl inward.

What To Do:

  • Harden off seedlings before transplanting to help them adjust to outdoor conditions.
  • Water immediately after transplanting to reduce shock.
  • Avoid excessive pruning—remove only leaves touching the ground or blocking airflow.
  • Apply a balanced organic fertilizer a week after transplanting to support root recovery.

Given time, the plant usually rebounds on its own once it adapts.


Bonus: Physiological Leaf Curl (No Real Problem!)

Sometimes tomato leaves curl naturally—especially in vigorous, indeterminate varieties. Known as physiological leaf curl, this harmless condition often occurs in fast-growing plants during warm weather or after heavy rains.

How to Identify It:

  • Leaves curl upward slightly but remain green and healthy.
  • The plant continues growing and fruiting normally.

What To Do:

Absolutely nothing! It’s just your tomato adjusting to conditions. Maintain steady care and enjoy your harvest.


Quick Diagnosis Chart

CauseTypical SymptomsSolution
Heat or wind stressUpward curl, normal colorMulch, water deeply, provide shade
Irregular wateringWilting, lower leaf curlKeep soil evenly moist
Too much nitrogenThick, dark leavesReduce fertilizer, flush soil
Herbicide driftTwisted, narrow leavesWater deeply, avoid exposure
PestsSticky leaves, visible insectsNeem oil or insecticidal soap
Virus or fungusYellowing, stunted growthRemove infected plants
Transplant stressCurl after movingGentle care, consistent watering

Preventing Tomato Leaf Curl: Long-Term Tips

  1. Water wisely: Deeply and consistently.
  2. Feed moderately: Balanced nutrients promote steady growth.
  3. Mulch regularly: Keeps soil cool and moist.
  4. Inspect weekly: Catch pests and diseases early.
  5. Support plants: Use cages or stakes to prevent breakage.
  6. Rotate crops: Avoid replanting tomatoes in the same spot yearly.
  7. Grow resilient varieties: Choose those bred for your climate and region.

Final Thoughts

Tomato leaf curl might look alarming, but in most cases, it’s your plant’s way of saying, “I’m under stress.” The key is to observe, diagnose, and act calmly rather than overcorrecting.

With steady watering, balanced feeding, and a watchful eye for pests, your tomato plants can recover and flourish.

Remember—healthy leaves mean healthy fruit. By keeping your plants comfortable and stable, you’ll enjoy a bountiful harvest of juicy, vibrant tomatoes all season long.

Why Tomato Flowers Fall Off—And How To Stop It

Why Tomato Flowers Fall Off—And How To Stop It


Few sights are more exciting for a gardener than the first yellow blooms appearing on tomato plants. Those delicate flowers signal that your long-awaited harvest is on the way. But when those blossoms start falling off before producing fruit, frustration quickly sets in. This phenomenon, known as tomato blossom drop, can devastate your harvest if not corrected in time.

Don’t worry—it’s a common issue, and with the right knowledge, it can be fixed. In this guide, we’ll explore exactly why tomato flowers fall off, how to recognize the warning signs, and what you can do to stop it and encourage fruit set.


Understanding Tomato Flower Drop

Tomatoes are self-pollinating plants, meaning each flower contains both male and female parts. Under ideal conditions, pollen transfers within the flower—either by wind, insects, or vibration—allowing the fruit to form. But when a tomato plant experiences stress, it may abort those flowers to conserve energy.

This defense mechanism is called “blossom drop.” The plant’s internal hormones sense environmental stress and essentially decide that producing fruit is too risky. As a result, the flowers wither and fall off before pollination or fruit set occurs.


1. Temperature Stress: The #1 Cause of Flower Drop

Tomatoes love warmth, but they have a narrow comfort zone when it comes to temperature. Extreme heat or cold can both disrupt pollination and trigger blossom drop.

Too Hot

  • Daytime temperatures above 90°F (32°C) or nighttime temperatures above 70°F (21°C) cause pollen to become sterile.
  • Sterile pollen means no pollination, no fruit—and eventually, falling flowers.

Too Cold

  • Nighttime temperatures below 55°F (13°C) interfere with flower development.
  • The plant senses poor reproductive conditions and drops the blooms to conserve energy.

How to Fix It:

  • Provide shade: Use shade cloth during scorching afternoons to cool the plants.
  • Mulch the soil: Keeps roots cooler during heatwaves.
  • Use row covers: Protect plants during chilly nights in early spring.
  • Plant at the right time: Wait until nighttime temperatures stay consistently above 55°F before transplanting outdoors.

Pro tip: Choose heat-tolerant tomato varieties such as Heatmaster, Solar Fire, or Phoenix if you live in a hot region.


2. Inadequate Pollination

Even when conditions are right, tomato flowers still need pollen movement for fruit to form. In still air or enclosed spaces, pollination may not occur naturally.

Why It Happens

  • Lack of pollinating insects such as bees and bumblebees.
  • Indoor or greenhouse conditions without enough air circulation.
  • Extremely high or low humidity affecting pollen’s ability to transfer.

How to Fix It:

  • Encourage pollinators: Plant marigolds, lavender, or basil nearby to attract bees.
  • Hand-pollinate: Gently shake flowers or use a small electric toothbrush to mimic the buzz of a bee.
  • Improve airflow: Use fans in greenhouses or space plants 18–24 inches apart for better circulation.

You can tell pollination has succeeded when a small green swelling appears behind the dried flower—it’s your next tomato in the making!


3. Watering Problems: Too Much or Too Little

Tomatoes require consistent soil moisture. Irregular watering causes stress, which leads to falling blooms.

Overwatering

  • Roots become waterlogged and oxygen-deprived.
  • Plant growth slows, and flower buds fall prematurely.

Underwatering

  • Dehydrated plants wilt, and flowers dry up and drop.
  • Irregular watering also leads to blossom-end rot and fruit cracking later.

How to Fix It:

  • Water deeply but infrequently—about 1 to 1.5 inches per week.
  • Check moisture 2 inches deep; if the soil feels dry, it’s time to water.
  • Apply 2–3 inches of organic mulch (straw, leaves, or compost) to stabilize moisture and reduce evaporation.
  • Avoid overhead watering—use drip irrigation or soaker hoses to keep foliage dry and reduce disease risk.

4. Nutrient Imbalances

Tomatoes are heavy feeders, but the wrong fertilizer balance can lead to leafy plants with few flowers—or stressed plants that shed blossoms.

Too Much Nitrogen

  • Encourages lush, green foliage but discourages flowering and fruiting.

Too Little Phosphorus or Potassium

  • Weakens flower and fruit development.
  • Leads to poor pollination and flower drop.

How to Fix It:

  • Use a low-nitrogen, high-phosphorus fertilizer such as 5-10-10 or 4-6-8.
  • Incorporate organic compost or bone meal before planting.
  • Fertilize lightly every 3–4 weeks once flowers appear.

Balanced nutrition helps your tomatoes focus their energy where it counts—on setting fruit instead of excessive foliage.


5. Humidity Extremes

Humidity plays a surprisingly big role in tomato pollination.

Low Humidity (<40%)

  • Pollen dries out too quickly and won’t stick to the stigma.
  • Result: Poor pollination and falling flowers.

High Humidity (>80%)

  • Pollen becomes sticky and clumps together, preventing transfer.

How to Fix It:

  • Maintain moderate humidity (50–70%) if growing indoors.
  • Use fans or vents to circulate air and prevent stagnant, moist conditions.
  • Water early in the morning to let humidity dissipate by midday.

6. Wind, Rain, and Weather Stress

Strong winds can physically knock flowers off the plant, while heavy rain can wash pollen away. Even long periods of cloudy weather can reduce pollinator activity and flower set.

How to Fix It:

  • Use stakes or tomato cages to stabilize plants.
  • Create windbreaks with tall herbs, garden fabric, or fences.
  • Cover delicate blooms during storms with lightweight row covers or plastic tunnels.

7. Pests and Diseases

Sometimes blossom drop isn’t just environmental—it’s biological. Pests and diseases weaken the plant and interfere with flowering.

Common Culprits

  • Aphids and thrips: Suck sap from stems and buds, causing flowers to fall.
  • Spider mites: Damage foliage and stress the plant.
  • Fungal infections: Such as early blight or powdery mildew, can reduce overall vigor.

How to Fix It:

  • Inspect plants regularly, especially under leaves.
  • Treat with neem oil or insecticidal soap as soon as pests appear.
  • Keep foliage dry and avoid overcrowding to prevent fungal diseases.
  • Rotate crops yearly to keep soil-borne pathogens at bay.

8. Pruning and Stress Mistakes

Too much pruning or sudden changes in care can stress tomatoes. Removing too much foliage reduces photosynthesis, while inconsistent feeding or transplant shock can interrupt blooming.

How to Fix It:

  • Prune only lower leaves touching the soil and occasional suckers.
  • Avoid trimming more than one-third of the plant at a time.
  • Harden off seedlings properly before transplanting outdoors to reduce shock.

9. The Role of Plant Hormones in Flower Drop

When tomato plants experience stress—heat, drought, or nutrient imbalance—they produce ethylene gas, a hormone that signals the plant to abort flowers and redirect energy to survival.

On the other hand, healthy plants produce auxins and gibberellins, which promote flowering and fruit set. Your job as a gardener is to maintain the balance by keeping conditions steady.

Tip: If conditions are unpredictable, you can use a tomato blossom set spray, available at garden centers. These sprays contain natural plant hormones that encourage fruit set even in stressful conditions.


10. How to Prevent Flower Drop Altogether

Once flowers fall, they won’t regrow—but you can encourage new blossoms to stay put. Here’s a quick checklist for prevention:

  1. Plant at the right time – Avoid temperature extremes during planting season.
  2. Water consistently – Keep soil evenly moist but not soggy.
  3. Feed properly – Stick to balanced or bloom-boosting fertilizers.
  4. Encourage pollinators – Avoid pesticides that harm bees.
  5. Control humidity and airflow – Especially in greenhouses.
  6. Protect from wind and storms – Stake or cage your plants.
  7. Monitor for pests – Weekly inspections prevent bigger problems.
  8. Mulch and maintain soil health – A strong root system equals steady blooms.

Quick Reference Table: Diagnosing Flower Drop

ProblemCommon SignSolution
Heat or cold stressFlowers dry upUse covers or shade
Poor pollinationFlowers fall, no fruitEncourage bees, hand-pollinate
Watering issuesWilting or curling leavesKeep soil evenly moist
Nutrient imbalanceLush leaves, few flowersUse low-nitrogen fertilizer
Humidity extremesPollen not transferringImprove ventilation
Pests/diseaseDamaged budsTreat with neem oil or soap

Final Thoughts

When tomato flowers fall off, your plants are sending a clear message: something in their environment is off balance. The key is to stay observant and make gradual adjustments rather than drastic changes.

Once conditions stabilize—temperatures moderate, watering becomes consistent, and pollinators return—your plants will start producing new blossoms that actually set fruit.

Remember, tomato growing is equal parts science and patience. With the right balance of sun, soil, water, and care, your garden will reward you with an abundance of juicy, flavorful tomatoes—and no more fallen flowers.

ChatGPT can make mistakes. Check important info. Se