The Fiery Flavor of America A Complete Guide to Chillies, Their Types, Health Benefits, and Spicy Recipes You’ll Love

The Fiery Flavor of America A Complete Guide to Chillies, Their Types, Health Benefits, and Spicy Recipes You’ll Love

Whether it’s the smoky kick of chipotle, the tangy heat of jalapeños, or the explosive spice of habaneros, chillies (or chiles, as many Americans spell it) have become an essential part of the American culinary experience. From classic Tex-Mex tacos to Nashville hot chicken and fiery buffalo wings, chillies bring life, depth, and intensity to every bite.

But chillies aren’t just about heat—they’re about flavor, culture, and even health. These colorful peppers pack powerful antioxidants, vitamins, and metabolism-boosting compounds that make them as beneficial as they are bold.

In this in-depth guide, we’ll explore the origins of chillies, the most popular varieties in the U.S., their health benefits, how to grow them at home, and spicy recipes that will ignite your taste buds.


1. A Brief History: How Chillies Set America on Fire

Chillies (Capsicum spp.) originated in Central and South America more than 6,000 years ago. Ancient civilizations like the Aztecs and Mayans used them for flavor, medicine, and even rituals. When Christopher Columbus encountered them in the Caribbean, he introduced them to Europe, and from there, chillies spread worldwide.

In the U.S., chillies became a staple through Southwestern and Mexican cuisine, eventually influencing dishes from coast to coast. Today, you’ll find them in everything from hot sauces and BBQ rubs to craft cocktails and chocolate desserts.

The chili pepper revolution didn’t just spice up American food—it helped shape a new culture of flavor exploration, where heat equals happiness.


2. The Science of Spice: Understanding the Heat

The burning sensation you feel when eating chillies comes from capsaicin, a compound found in the pepper’s inner membranes. Capsaicin doesn’t actually “burn” your mouth—it tricks your brain into thinking it’s in pain by stimulating nerve endings.

Spice levels are measured using the Scoville Heat Scale (SHU):

  • Bell Pepper: 0 SHU
  • Jalapeño: 2,500–8,000 SHU
  • Cayenne: 30,000–50,000 SHU
  • Habanero: 100,000–350,000 SHU
  • Ghost Pepper: 1,000,000+ SHU
  • Carolina Reaper: Up to 2.2 million SHU (currently one of the world’s hottest peppers!)

American pepper lovers have even turned heat into a sport, competing in chili cook-offs and hot wing challenges that test tolerance and creativity.


3. The Most Popular Chillies in American Cuisine

From mild to wild, here are the most common and beloved chillies found in American grocery stores, kitchens, and restaurants:

a. Jalapeño

The all-American favorite. Jalapeños are moderately hot and incredibly versatile—great for nachos, salsas, and stuffed “popper” appetizers.

b. Serrano

Smaller and hotter than jalapeños, serranos add a sharp, fresh bite to guacamole, tacos, and hot sauces.

c. Poblano

Mild and earthy, poblanos are perfect for stuffing (think chiles rellenos). When dried, they’re called ancho chillies, known for their smoky sweetness.

d. Cayenne

Long and fiery, cayenne peppers are often dried and ground into the red powder found in every American spice rack.

e. Anaheim

Mild, slightly sweet chillies often used in Southwestern dishes and green chili stews.

f. Habanero

Bright orange and extremely hot, habaneros bring fruity, tropical notes to salsas and marinades.

g. Chipotle

A smoked and dried jalapeño that adds a rich, smoky flavor to BBQ sauces, stews, and grilled meats.

h. Carolina Reaper & Ghost Pepper

For the brave only—these super-hot chillies are used sparingly in specialty hot sauces and extreme spicy challenges.

Each type offers a distinct heat profile and flavor, allowing chefs and home cooks to customize their dishes to perfection.


4. Health Benefits of Chillies

Surprisingly, the same compound that gives chillies their heat—capsaicin—is also responsible for many of their health benefits.

a. Boosts Metabolism

Capsaicin increases thermogenesis (heat production) in your body, helping burn more calories and fat.

b. Improves Heart Health

Chillies can reduce cholesterol levels, improve blood circulation, and lower blood pressure.

c. Strengthens Immunity

High in vitamin C, chillies boost your immune system and protect against common colds and infections.

d. Reduces Pain

Capsaicin is used in topical creams for joint pain and arthritis relief because it desensitizes pain receptors.

e. Fights Inflammation

Chillies’ antioxidants help combat inflammation and oxidative stress, supporting long-term health.

f. Enhances Mood

Eating spicy food releases endorphins—the “feel-good” hormones—giving you a natural energy and mood boost.

So yes, that fiery bite may make your eyes water, but it’s also doing wonders for your health!


5. How to Cook with Chillies: Tips and Tricks

Working with chillies requires a mix of creativity and caution. Here’s how to make the most of their flavor without overwhelming your taste buds:

  • Control the heat: Remove seeds and membranes for milder flavor.
  • Use gloves: When handling very hot peppers like habaneros or ghost peppers.
  • Balance the spice: Combine chillies with creamy or sweet ingredients (like coconut milk, cheese, or honey) to soften the heat.
  • Start small: Add a little at a time—you can always increase the spice, but you can’t take it back!
  • Experiment: Mix different chillies for complex layers of flavor, not just heat.

6. Delicious American Recipes Featuring Chillies

Whether you’re a spice lover or a curious beginner, these recipes highlight the best of America’s love affair with chillies:

a. Classic Chili Con Carne

A Texas favorite—ground beef simmered with beans, tomatoes, chili powder, cayenne, and jalapeños. Hearty, spicy, and full of bold Southwestern flavor.

b. Spicy Buffalo Wings

Crispy fried chicken wings coated in a fiery sauce made from cayenne pepper, vinegar, and butter. Perfect for game day gatherings.

c. Jalapeño Popper Dip

A creamy blend of cream cheese, cheddar, and diced jalapeños, baked until golden and bubbly. Serve with tortilla chips for the ultimate appetizer.

d. Smoky Chipotle BBQ Sauce

Blend chipotle peppers in adobo sauce with ketchup, molasses, and apple cider vinegar. Perfect for ribs, burgers, or grilled vegetables.

e. Habanero Mango Salsa

A tropical, sweet-spicy mix of diced mango, habanero, red onion, and lime juice—amazing on grilled fish or tacos.

f. Chili-Lime Corn on the Cob

Brush grilled corn with butter, lime juice, and a sprinkle of chili powder for a zesty summer favorite.


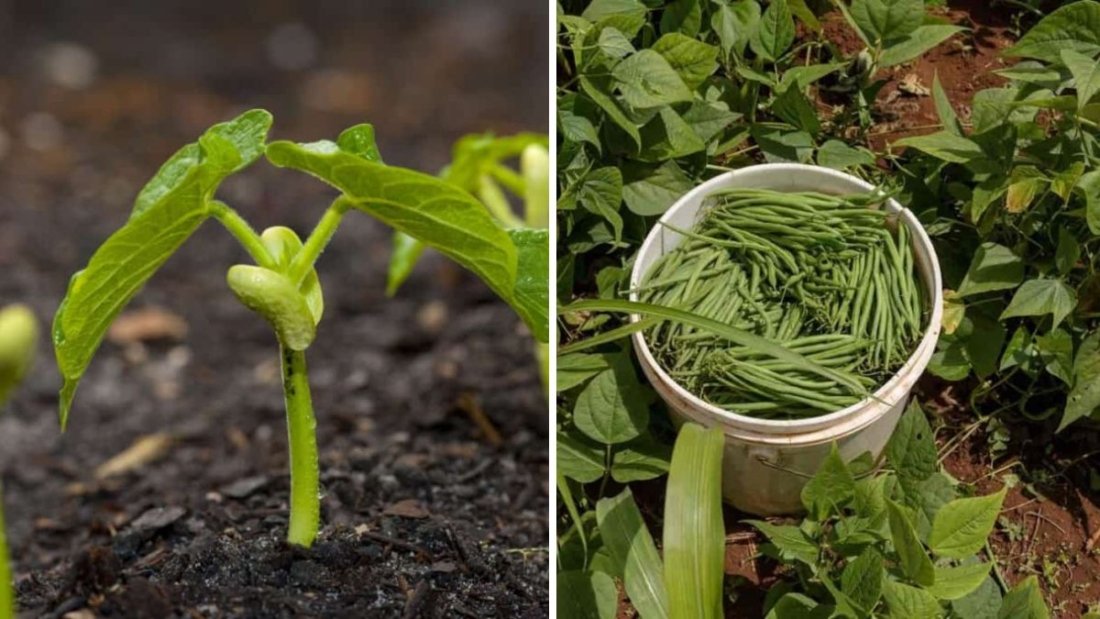
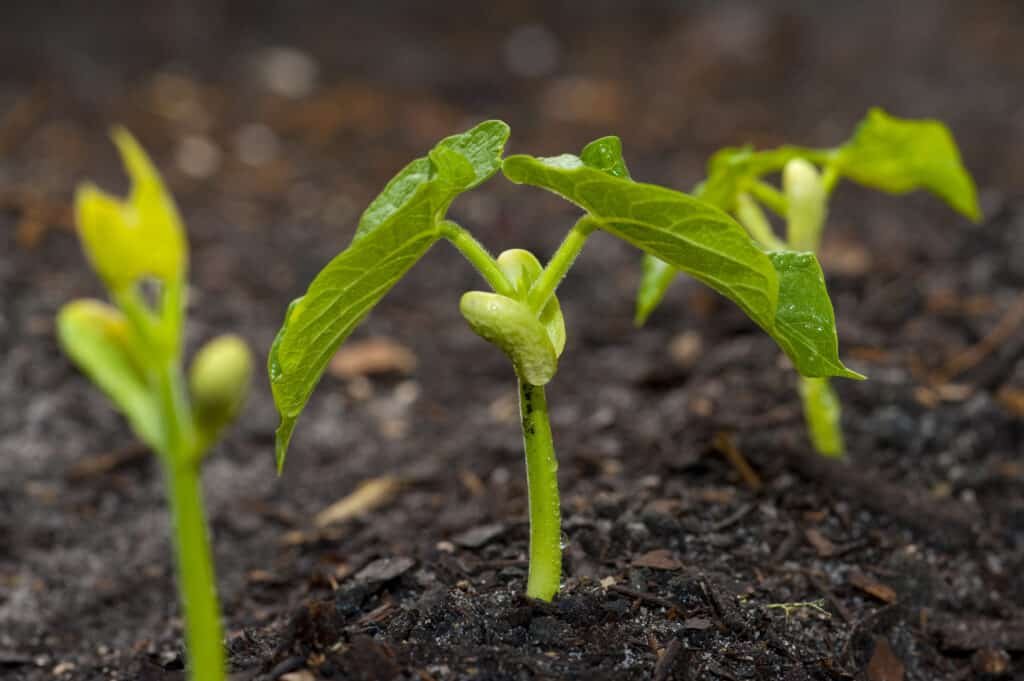
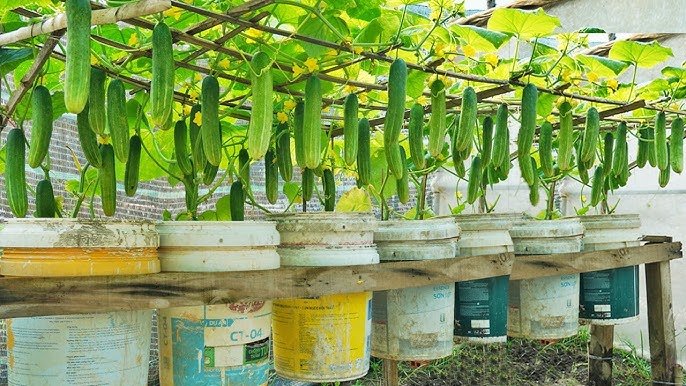
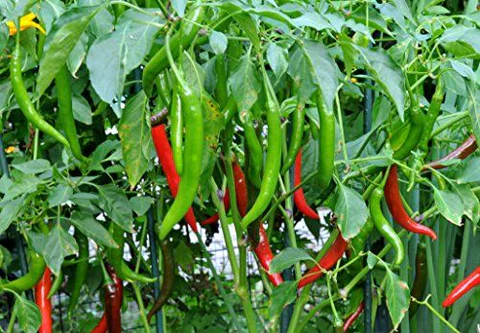
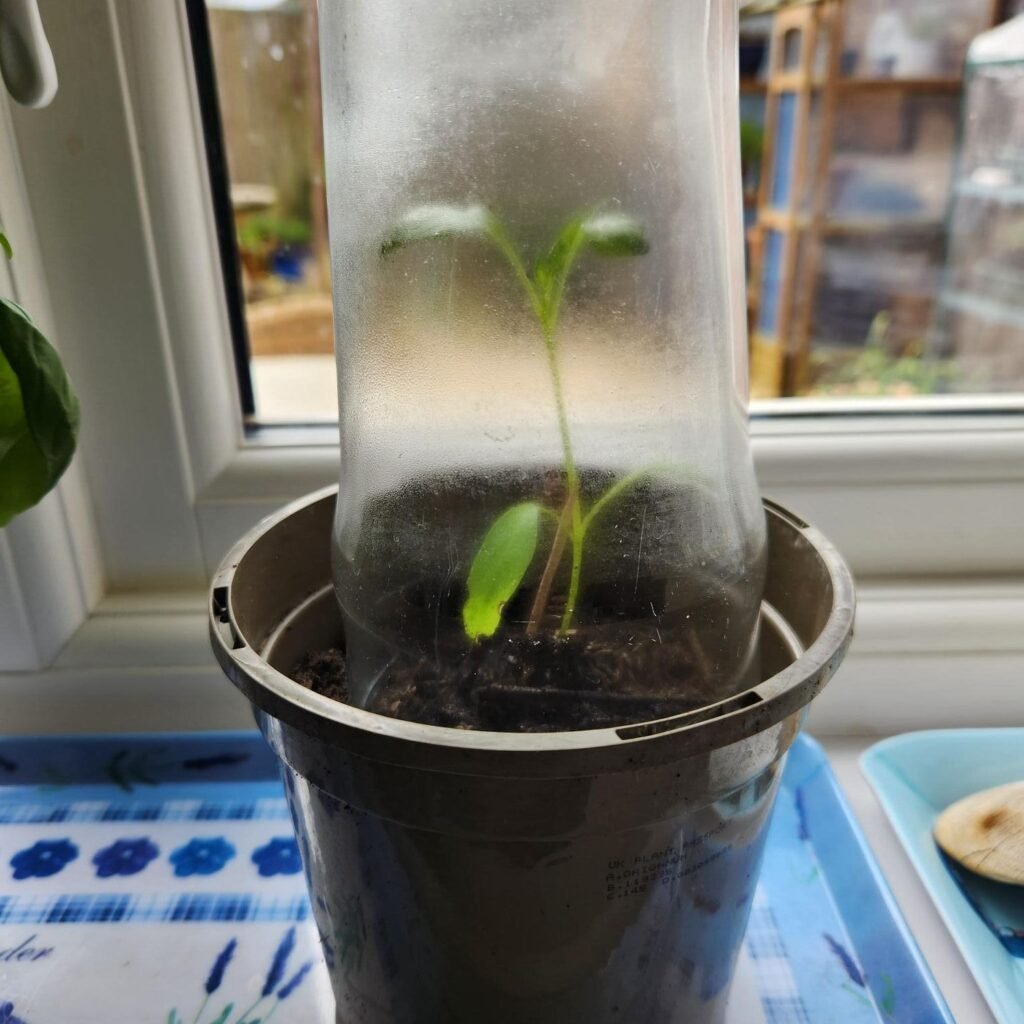
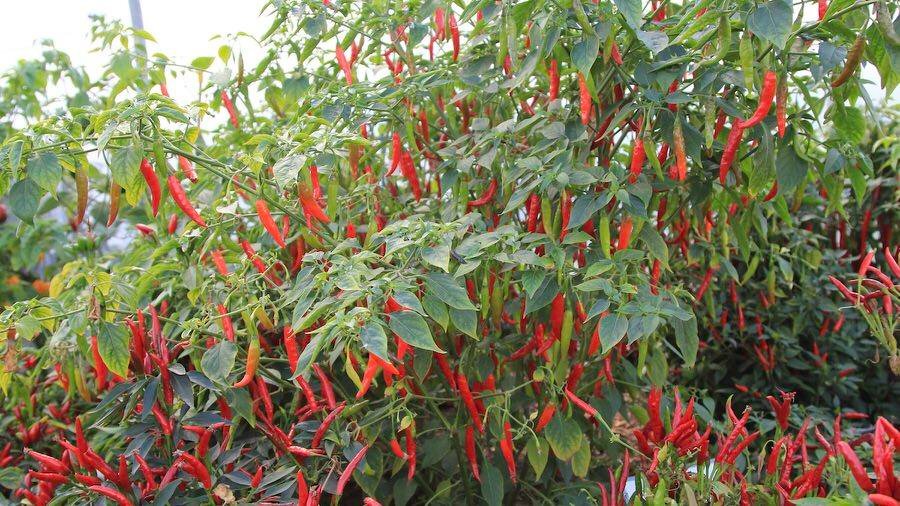
7. Growing Chillies at Home: A Spicy American Hobby

Chillies are among the easiest and most rewarding plants to grow at home—perfect for gardeners and food lovers alike.

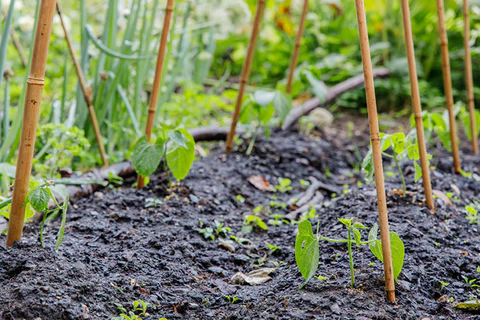
Tips for successful chili growing:

  • Sunlight: Chillies need at least 6–8 hours of direct sunlight daily.
  • Soil: Use well-draining soil rich in organic matter.
  • Watering: Keep the soil evenly moist but not soggy.
  • Fertilizer: Feed with a balanced fertilizer every 2–3 weeks during growth.
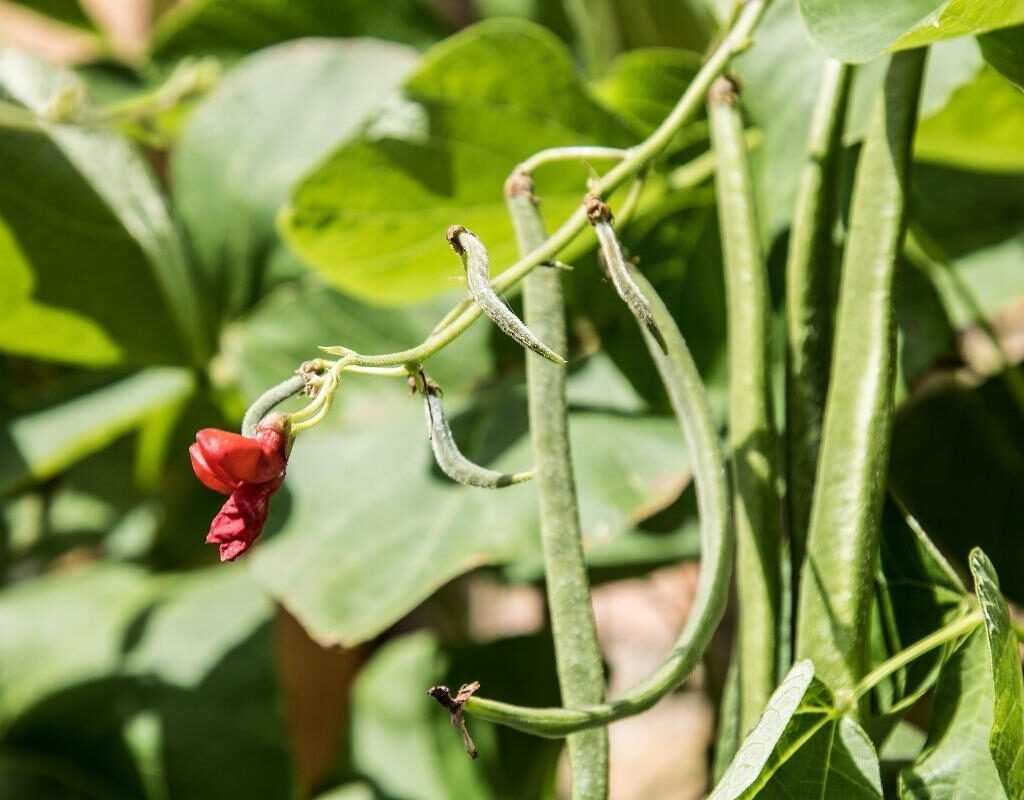
  • Harvesting: Pick chillies once they reach full color and size. For a milder flavor, harvest early.

Popular home-growing varieties: Jalapeños, cayennes, and Thai chillies are perfect for small gardens and container planting.

Homegrown chillies often taste fresher and pack more punch than store-bought ones—plus, they add a splash of color to your garden.


8. Fun Facts About Chillies

  • The world’s hottest pepper, the Carolina Reaper, was developed in South Carolina.
  • Chillies are technically fruits, not vegetables.
  • Birds can eat chillies without feeling the heat—capsaicin doesn’t affect them!
  • New Mexico hosts annual chile festivals celebrating their state’s iconic red and green peppers.
  • The U.S. consumes more than 4.5 billion pounds of chillies annually!

9. Chillies in American Culture

Chillies have become a symbol of passion and adventure in American food culture. Every region puts its spin on spice:

  • Texas & the Southwest: Bold, meaty chili stews and smoky sauces.
  • Louisiana: Spicy Cajun and Creole cuisine featuring cayenne and Tabasco peppers.
  • California: Fresh, health-focused recipes with jalapeños and poblanos.
  • Nashville: Home of the iconic Hot Chicken—crispy, fiery perfection.

Chillies embody the American spirit of diversity and innovation—bold, flavorful, and never afraid to push limits.


10. The Future of Chillies: From Kitchen to Wellness

As Americans embrace healthy, plant-forward diets, chillies are being recognized not just for their flavor but also for their nutritional and medicinal properties.

Capsaicin is now used in:

  • Pain relief creams for arthritis and sore muscles.
  • Weight loss supplements to enhance fat burning.
  • Natural preservatives in clean-label food products.

Meanwhile, chefs and home cooks continue to experiment with new chili-infused creations—hot honey, spicy cocktails, chili chocolate, and even chili ice cream.


Conclusion: America’s Love Affair with Spice

From backyard barbecues to gourmet kitchens, chillies have found a permanent home in American hearts (and mouths). They represent more than just heat—they symbolize passion, creativity, and the joy of flavor exploration.

Whether you prefer a mild jalapeño or a fiery ghost pepper, chillies bring a spark of excitement to every meal. And with their incredible health benefits and easy home-growing potential, there’s no reason not to add a little spice to your life.

So next time you cook, don’t be afraid to turn up the heat—because when it comes to flavor, America runs on chillies.

The Ultimate Guide to Basil America’s Favorite Herb for Flavor, Health, and Home Gardening

The Ultimate Guide to Basil America’s Favorite Herb for Flavor, Health, and Home Gardening

Few herbs can match the universal appeal of basil—a fragrant, flavorful, and nutrient-packed green that’s become a staple in kitchens across the United States. From the classic aroma of Italian pesto to the fresh bite in summer salads and cocktails, basil adds a burst of freshness to countless American dishes.

But basil is more than just a culinary superstar—it’s also a medicinal herb, a natural air purifier, and one of the easiest plants to grow in a backyard or windowsill garden. Whether you’re a home cook, a gardener, or a health enthusiast, basil has something special to offer.

This comprehensive guide dives into the world of basil—its history, types, benefits, growing tips, and mouthwatering recipes—to help you make the most of this green treasure.


1. A Brief History: How Basil Took Root in American Kitchens

Basil (Ocimum basilicum) traces its origins back to India and Southeast Asia, where it was first cultivated over 5,000 years ago. It later spread through the Mediterranean, where it became an essential herb in Italian, Greek, and French cuisine.

When European immigrants brought basil to America, it quickly found a home in U.S. gardens and kitchens. Today, it’s one of the most popular culinary herbs in the United States, especially during summer when fresh basil thrives.

From California to New York, basil can be found in everything from pizzas and pastas to herbal teas, cocktails, and beauty products. Its distinct aroma and health benefits have cemented its place in both traditional and modern American lifestyles.


2. Nutritional Value: Tiny Leaves, Big Benefits

Basil might look delicate, but it’s packed with powerful nutrients and antioxidants that support your overall well-being.

A tablespoon of fresh basil provides:

  • Calories: 1
  • Vitamin A: 4% of daily value
  • Vitamin K: 13%
  • Vitamin C: 2%
  • Calcium: 1%
  • Iron: 1%
  • Antioxidants: Lutein, beta-carotene, and eugenol

Though small in serving size, basil is a nutrient-dense herb that adds health-boosting compounds to your meals without adding calories.


3. The Health Benefits of Basil

Beyond its fresh aroma and flavor, basil offers numerous health benefits supported by modern science and centuries of traditional use.

a. Anti-Inflammatory Powerhouse

Basil contains eugenol, an essential oil known for reducing inflammation. This can help with joint pain, headaches, and muscle soreness.

b. Boosts Immunity

Rich in vitamin C and plant compounds, basil strengthens the immune system and helps the body fight off infections.

c. Supports Heart Health

Basil’s antioxidants can help lower cholesterol and blood pressure levels, promoting a healthier heart.

d. Improves Digestion

The natural oils in basil, such as linalool and citronellol, promote better digestion and reduce bloating.

e. Natural Stress Reliever

Basil has adaptogenic properties—it helps your body cope with stress and mental fatigue. Holy basil (Tulsi), in particular, is used in herbal teas to promote relaxation.

f. Fights Free Radicals

The polyphenols and flavonoids in basil protect cells from oxidative stress, slowing down signs of aging and reducing disease risk.


4. Popular Types of Basil Grown in the U.S.

There are over 150 varieties of basil worldwide, but these are the most loved and widely grown in American gardens and markets:

a. Sweet Basil

The most common variety found in grocery stores and used in Italian dishes. It has a mild, slightly peppery flavor and bright green leaves.

b. Genovese Basil

Famous for its rich flavor and large leaves, Genovese basil is the go-to choice for authentic pesto sauces.

c. Thai Basil

Used in Southeast Asian cuisine, it has smaller leaves, purple stems, and a spicy, anise-like flavor that holds up well to heat.

d. Lemon Basil

This fragrant variety adds a citrusy twist, perfect for teas, desserts, and seafood dishes.

e. Holy Basil (Tulsi)

Used in Ayurvedic medicine, this variety is known for its medicinal and stress-relieving properties.

f. Purple Basil

With striking dark purple leaves and a mild clove flavor, it’s popular for garnishes and infused vinegars.

Each type offers unique flavors, making basil one of the most versatile herbs for American cooking and gardening.


5. Growing Basil at Home: The American Gardener’s Favorite Herb

Basil is one of the easiest herbs to grow—whether you have a backyard garden, balcony, or kitchen windowsill.

Here’s how to grow healthy basil plants at home:

  • Sunlight: Basil loves warmth and sunlight. Give it at least 6–8 hours of direct sunlight per day.
  • Soil: Use well-draining, nutrient-rich soil. Basil thrives in slightly moist but not soggy soil.
  • Watering: Water regularly but avoid overwatering. The soil should stay damp but not waterlogged.
  • Pruning: Pinch off flower buds to encourage leafy growth. Trim leaves regularly to keep the plant bushy.
  • Container Gardening: If growing indoors, place basil near a sunny window or under a grow light.

Pro Tip: Always harvest basil leaves from the top to promote regrowth. With proper care, a single basil plant can provide fresh leaves all season long.


6. Storing and Preserving Fresh Basil

Basil is best enjoyed fresh, but if you have a surplus from your garden or market, you can easily preserve it.

  • Refrigerate: Place basil stems in a glass of water, cover loosely with a plastic bag, and refrigerate for up to a week.
  • Freeze: Chop fresh leaves, place them in ice cube trays, and cover with olive oil. Freeze for future use in soups or sauces.
  • Dry: Air-dry or dehydrate basil leaves, then store them in an airtight jar. Dried basil has a more concentrated flavor but shorter shelf life.
  • Make Pesto: Blend basil with olive oil, garlic, and pine nuts to make classic pesto sauce. Freeze portions for year-round flavor.

7. Delicious American Basil Recipes to Try

Basil’s versatility shines in countless dishes—from appetizers to desserts. Here are a few American favorites:

a. Classic Basil Pesto

Blend fresh basil leaves, garlic, pine nuts, Parmesan cheese, and olive oil. Toss with pasta, spread on sandwiches, or use as a pizza sauce base.

b. Caprese Salad

A timeless summer dish made with fresh mozzarella, ripe tomatoes, basil leaves, olive oil, and balsamic glaze.

c. Basil Lemonade

Muddle fresh basil leaves into homemade lemonade for a refreshing twist. Perfect for warm American summers and backyard barbecues.

d. Grilled Chicken with Basil Marinade

Mix chopped basil with olive oil, lemon juice, and garlic. Marinate chicken breasts and grill for a flavorful, healthy meal.

e. Strawberry Basil Smoothie

Blend strawberries, basil, Greek yogurt, and honey for a unique, antioxidant-packed breakfast drink.

f. Tomato Basil Soup

Comfort in a bowl—this creamy soup pairs perfectly with grilled cheese sandwiches and cozy evenings.


8. Basil in American Wellness and Lifestyle

Beyond the kitchen, basil has made its mark in wellness trends across the U.S.:

  • Basil Essential Oil: Used in aromatherapy for stress relief and mental clarity.
  • Basil Tea (Tulsi Tea): Popular in herbal wellness circles for its calming and detoxifying effects.
  • Natural Skincare: Basil’s antibacterial and antioxidant properties make it a common ingredient in DIY masks and toners.

Americans are increasingly embracing basil as part of holistic health routines, not just as a seasoning.


9. Fun Facts About Basil You Might Not Know

  • The name “basil” comes from the Greek word basileus, meaning “king.”
  • In ancient cultures, basil symbolized love and protection.
  • There’s a National Fresh Basil Day celebrated every August 2nd in the U.S.
  • Basil plants repel mosquitoes and insects, making them great for patios and gardens.
  • Adding basil to your compost can help speed up decomposition naturally.

10. The Sustainable Side of Basil

Basil is not just good for you—it’s good for the planet. It grows quickly, requires minimal resources, and can thrive in small spaces. Many American gardeners plant basil alongside tomatoes and peppers as a natural pest deterrent, reducing the need for chemical pesticides.

Supporting local basil farmers or growing your own helps reduce your carbon footprint while ensuring fresh, organic herbs year-round.


11. Conclusion: A Leaf of Health, Flavor, and Freshness

From Italian kitchens to American backyard gardens, basil remains a timeless symbol of freshness, flavor, and wellness. It enhances every dish it touches—bringing brightness to salads, depth to sauces, and calm to your mind and body.

Whether you sprinkle it on a pizza, blend it into pesto, or grow it on your windowsill, basil adds a touch of green magic to everyday life. Easy to grow, bursting with nutrients, and rich in cultural history—this “king of herbs” truly deserves its crown in every American home.

So go ahead—plant some basil, cook with it, and enjoy the countless ways it can transform your meals and your health.

The Ultimate Guide to Sweet Potatoes Nutrition, Benefits, and Delicious American Recipes You’ll Love

The Ultimate Guide to Sweet Potatoes Nutrition, Benefits, and Delicious American Recipes You’ll Love

Few foods capture the warmth and comfort of home-cooked American meals like sweet potatoes. Whether mashed, roasted, baked, or turned into crispy fries, sweet potatoes have earned their spot as a beloved staple on dinner tables across the United States. From classic Thanksgiving casseroles topped with toasted marshmallows to modern power bowls at trendy cafés, this humble root vegetable has evolved into both a comfort food and a superfood.

But sweet potatoes are more than just delicious—they’re a powerhouse of nutrients that support overall wellness, energy, and heart health. In this detailed guide, we’ll explore the history, types, health benefits, cooking methods, and mouthwatering recipes that make sweet potatoes one of America’s most versatile and nutritious ingredients.


1. A Brief History: From Ancient Roots to Modern Superfood

Sweet potatoes (Ipomoea batatas) have a fascinating history. Native to Central and South America, they’ve been cultivated for over 5,000 years. European explorers brought them to North America in the 1600s, where they quickly became a Southern staple due to their adaptability and sweet flavor.

Today, the U.S. ranks among the top sweet potato producers globally, with North Carolina, Mississippi, and Louisiana leading the way. American farmers harvest millions of pounds each year, and consumption has skyrocketed thanks to the growing popularity of healthy, plant-based diets.


2. Nutritional Profile: Nature’s Sweet Powerhouse

Sweet potatoes pack a serious nutritional punch. Despite their naturally sweet taste, they’re a low-glycemic food loaded with vitamins, minerals, and fiber.

Here’s what one medium-sized baked sweet potato (about 130 grams) provides:

  • Calories: ~112
  • Carbohydrates: 26 grams
  • Fiber: 4 grams
  • Protein: 2 grams
  • Fat: 0 grams
  • Vitamin A: 400% of your daily recommended intake
  • Vitamin C: 30%
  • Potassium: 15%
  • Manganese: 25%

Key Takeaway: Sweet potatoes are rich in beta-carotene, an antioxidant that your body converts into vitamin A—vital for eye health, immunity, and glowing skin.


3. Health Benefits of Sweet Potatoes

Sweet potatoes aren’t just tasty—they offer a wide range of health benefits that make them a top choice for anyone pursuing a balanced diet.

a. Boosts Immunity

Thanks to their high vitamin A and C content, sweet potatoes strengthen the immune system and protect against infections.

b. Promotes Digestive Health

Their high fiber content supports gut health, aiding digestion and preventing constipation. Fiber also helps you feel full longer, making sweet potatoes ideal for weight management.

c. Regulates Blood Sugar

Unlike refined carbs, sweet potatoes have a low glycemic index. They release energy slowly, preventing blood sugar spikes—perfect for diabetics and anyone watching their carb intake.

d. Supports Eye and Skin Health

Beta-carotene keeps your eyes sharp and your skin glowing. It also acts as a natural sun protectant by reducing UV damage.

e. Heart-Friendly Food

Potassium and magnesium in sweet potatoes help regulate blood pressure, reduce stress on the cardiovascular system, and maintain a healthy heartbeat.

f. Anti-Inflammatory Properties

The antioxidants in sweet potatoes—especially in purple varieties—help reduce inflammation, potentially lowering the risk of chronic diseases.


4. Different Types of Sweet Potatoes in the U.S.

Not all sweet potatoes are created equal. In the United States, several varieties are loved for their unique flavors, colors, and textures.

a. Beauregard Sweet Potatoes

The most common type in grocery stores—known for their copper-colored skin and deep orange flesh. Moist, sweet, and perfect for mashing or baking.

b. Jewel Sweet Potatoes

Slightly milder in sweetness, these are often used in casseroles and fries for their smooth texture.

c. Garnet Sweet Potatoes

With dark reddish skin and rich orange flesh, Garnets have a bold, caramel-like sweetness that shines when roasted.

d. Purple Sweet Potatoes

Gaining popularity for their striking color and antioxidant power, these are denser and less sweet—ideal for baking or smoothies.

e. White Sweet Potatoes

Milder in flavor and fluffier in texture, white sweet potatoes make a good substitute for regular potatoes in savory dishes.


5. How to Select and Store Sweet Potatoes

Selecting the right sweet potatoes can make a big difference in flavor and shelf life.

When shopping:

  • Choose firm, smooth potatoes with no soft spots or cuts.
  • Avoid any with sprouts or a musty smell—they’re past their prime.

Storage tips:

  • Keep sweet potatoes in a cool, dark, and well-ventilated place—not the refrigerator.
  • Properly stored, they can last up to 3–4 weeks.

6. Delicious American Sweet Potato Recipes to Try

Sweet potatoes shine in countless recipes—from classic Southern comfort food to modern healthy meals. Here are some American favorites you’ll want to try:

a. Classic Sweet Potato Casserole

A holiday must-have! Mash baked sweet potatoes with butter, brown sugar, and cinnamon. Top with mini marshmallows and bake until golden. Sweet, nostalgic, and irresistible.

b. Crispy Sweet Potato Fries

Cut sweet potatoes into thin wedges, toss with olive oil, paprika, and sea salt. Bake until crisp for a healthier alternative to French fries.

c. Roasted Sweet Potato and Quinoa Salad

Combine roasted cubes of sweet potato with quinoa, baby spinach, cranberries, and feta cheese. Drizzle with a lemon-honey dressing for a refreshing, protein-packed lunch.

d. Sweet Potato Pancakes

Mix mashed sweet potato into your pancake batter for extra moisture and natural sweetness. Top with maple syrup and pecans for a cozy weekend breakfast.

e. BBQ Chicken and Sweet Potato Bowls

Layer roasted sweet potatoes with shredded BBQ chicken, black beans, corn, and avocado. This protein-rich meal is perfect for meal prepping.

f. Sweet Potato Pie

The ultimate Southern dessert—smooth, spiced filling in a buttery crust. It’s a delicious cousin to pumpkin pie and a Thanksgiving favorite.


7. Sweet Potatoes in American Culture

Sweet potatoes hold a special place in American cuisine and culture. From Southern kitchens to health-conscious cafes, they’ve stood the test of time as both comfort food and wellness staple.

  • Thanksgiving Tradition: No holiday table feels complete without sweet potato casserole or pie.
  • Southern Cuisine: Dishes like candied yams and sweet potato biscuits are treasured Southern recipes passed down for generations.
  • Modern Health Trend: Today, sweet potatoes feature in smoothie bowls, tacos, vegan burgers, and gluten-free baking.

They’ve managed to bridge the gap between traditional and contemporary cooking—a true symbol of versatility.


8. Sweet Potatoes vs. Yams: What’s the Difference?

In the U.S., the terms “sweet potato” and “yam” are often used interchangeably, but they’re actually different vegetables.

  • Sweet Potatoes: Soft, sweet, and available in orange, white, or purple varieties.
  • Yams: Starchy, dry, and native to Africa and Asia. True yams are rarely found in American grocery stores.

The confusion dates back to the 20th century when orange-fleshed sweet potatoes were labeled as “yams” to distinguish them from white varieties.


9. Growing Sweet Potatoes at Home

If you have a sunny garden, sweet potatoes are surprisingly easy to grow.

Here’s how:

  • Start with slips: These are small sprouts from mature sweet potatoes.
  • Soil: Choose well-draining, sandy soil.
  • Sunlight: Sweet potatoes need at least 6 hours of direct sunlight daily.
  • Watering: Keep soil moist but not soggy.
  • Harvest time: Around 90–120 days after planting, once the leaves begin to yellow.

Freshly harvested sweet potatoes taste sweeter after curing for about two weeks in a warm, humid space.


10. The Sustainable Side of Sweet Potatoes

Sweet potatoes are not only nutritious but also environmentally friendly. They require less water than many staple crops and enrich the soil through nitrogen fixation. Their versatility in both food and biofuel production makes them a sustainable crop for the future of American agriculture.

Buying locally grown sweet potatoes supports U.S. farmers and reduces your carbon footprint—making every bite better for both your body and the planet.


11. Fun Facts About Sweet Potatoes

  • North Carolina produces over 60% of America’s sweet potatoes.
  • Sweet potatoes are not actually potatoes—they belong to the morning glory family.
  • November is officially National Sweet Potato Awareness Month in the U.S.
  • The average American eats about 7 pounds of sweet potatoes per year.
  • NASA considers sweet potatoes a key food for future space missions due to their nutrition and easy cultivation!

Conclusion: Sweet, Nutritious, and Truly American

From soulful Southern dishes to trendy health bowls, sweet potatoes have earned their reputation as a timeless American favorite. They’re vibrant, affordable, and packed with nutrients that benefit every part of your body. Whether you roast them for dinner, bake them into a pie, or toss them in a salad, sweet potatoes always deliver flavor, comfort, and health in one bite.

So next time you’re at the grocery store, grab a few of these orange gems—you’ll be bringing home not just a delicious ingredient but a true symbol of American nourishment and tradition.

The Ultimate Guide to Melons Health Benefits, Types, and Delicious Ways to Enjoy America’s Favorite Summer Fruit

The Ultimate Guide to Melons Health Benefits, Types, and Delicious Ways to Enjoy America’s Favorite Summer Fruit

When the summer heat hits hard, nothing refreshes quite like a perfectly ripe melon. From juicy watermelons at backyard barbecues to sweet cantaloupes served at breakfast buffets, melons are an American summer staple. These fruits don’t just taste amazing—they’re also packed with vitamins, antioxidants, and hydration-boosting nutrients that make them a guilt-free indulgence.

In this ultimate guide, we’ll explore everything you need to know about melons—their types, nutritional value, how to pick the best ones, and creative ways to enjoy them all season long.


1. The All-American Love Affair with Melons

Melons have long been part of American culture, symbolizing refreshment and family togetherness. From Fourth of July picnics to poolside parties, slices of watermelon or honeydew are almost always on the menu. The U.S. is one of the world’s largest producers of melons, especially in states like California, Arizona, Texas, and Florida, where sunny climates create the perfect growing conditions.

Beyond their sweet, hydrating flavor, melons carry a nostalgic charm—reminding many Americans of carefree childhood summers and family gatherings.


2. Popular Types of Melons You’ll Find in the U.S.

There are dozens of melon varieties grown across the country, but a few stand out for their popularity, taste, and versatility. Here’s a closer look at America’s favorite melons:

a. Watermelon

The undisputed king of summer fruits, watermelon is about 92% water, making it the ultimate thirst-quencher. With its bright red flesh and crisp texture, it’s perfect for barbecues, fruit salads, and smoothies. Seedless varieties have become a major hit in American grocery stores for convenience and easy snacking.

b. Cantaloupe (Muskmelon)

Cantaloupe is known for its netted rind and deep orange interior. It’s rich in vitamins A and C and makes an excellent breakfast fruit. Americans love cantaloupe paired with cottage cheese, yogurt, or prosciutto for a quick yet gourmet snack.

c. Honeydew Melon

Honeydew is often found in fruit platters and brunch spreads thanks to its subtle sweetness and pale green flesh. It’s a great choice for people who prefer a less intense flavor but still want that juicy melon refreshment.

d. Galia, Canary, and Crenshaw Melons

These specialty melons are gaining traction in American farmers’ markets.

  • Galia: A cross between cantaloupe and honeydew, with a floral aroma and tropical sweetness.
  • Canary: Named for its bright yellow skin, this melon has a crisp bite and mild, sweet flavor.
  • Crenshaw: Known for its spicy-sweet flesh and creamy texture, it’s ideal for gourmet fruit salads.

Each of these melons offers something unique—making them great options for adventurous fruit lovers.


3. Nutritional Powerhouse: Why You Should Eat More Melons

Melons aren’t just delicious—they’re incredibly healthy. Let’s break down their impressive nutritional profile:

  • Hydration Hero: With over 90% water content, melons help replenish fluids and electrolytes, especially during hot summer days.
  • Low in Calories: One cup of diced melon contains fewer than 60 calories, making it a diet-friendly snack.
  • Packed with Vitamins: Cantaloupe and honeydew are loaded with vitamin C, which boosts immunity, while watermelon contains vitamin A for healthy vision and skin.
  • Heart Health Benefits: Watermelon contains lycopene, an antioxidant linked to lower cholesterol and improved cardiovascular function.
  • Digestive Support: Melons are rich in dietary fiber, which aids digestion and promotes a healthy gut.

In short, melons check all the boxes for a healthy, refreshing snack—low-calorie, nutrient-rich, and naturally hydrating.


4. How to Choose a Perfectly Ripe Melon

Picking the right melon can be tricky, but these tips will make you a pro:

For Watermelon:

  • Look for the Field Spot: A creamy yellow patch indicates ripeness (it’s where the melon rested on the ground).
  • Check the Sound: Tap the melon—it should have a deep, hollow sound, not a dull thud.
  • Inspect the Shape: Uniformly shaped melons tend to ripen evenly.

For Cantaloupe:

  • Sniff the Stem End: It should have a sweet, musky fragrance.
  • Feel the Rind: A slight softness and raised netting indicate ripeness.

For Honeydew:

  • Check the Color: A ripe honeydew has a creamy, yellowish hue—not bright green.
  • Touch Test: It should feel heavy for its size with a faintly sticky surface.

5. Delicious Ways to Enjoy Melons

Melons are incredibly versatile and can be enjoyed in countless ways beyond basic fruit slices. Here are some creative and easy recipes to try at home:

a. Melon Salad with Mint and Feta

Cube watermelon, honeydew, and cantaloupe, then toss them with crumbled feta, fresh mint leaves, and a drizzle of lime juice. This sweet-salty combo is perfect for summer picnics.

b. Melon Smoothie Bowl

Blend frozen melon chunks with coconut water, banana, and a splash of yogurt. Pour into a bowl and top with granola, chia seeds, and berries for a refreshing breakfast.

c. Prosciutto-Wrapped Melon Bites

A classic Italian-inspired appetizer—wrap thin slices of prosciutto around cantaloupe wedges. Add a drizzle of balsamic glaze for an elegant twist.

d. Watermelon Popsicles

Blend seedless watermelon with lemon juice and freeze in molds for a naturally sweet treat kids and adults will love.

e. Melon Salsa

Dice cantaloupe, watermelon, and red onion. Mix with cilantro, lime juice, and jalapeños for a colorful salsa that pairs perfectly with grilled chicken or fish.


6. Growing Melons in Your Backyard

If you have a sunny garden patch, growing melons at home can be rewarding. Here are a few quick tips:

  • Planting Time: Sow seeds after the last frost when soil temperatures are at least 70°F.
  • Soil Needs: Melons prefer well-drained, sandy soil rich in organic matter.
  • Watering: Keep the soil consistently moist but avoid waterlogging. Drip irrigation works best.
  • Pollination: Bees are essential for melon pollination, so avoid using pesticides during bloom time.
  • Harvesting: Most melons are ready to harvest 70–90 days after planting, once they emit a sweet aroma and easily detach from the vine.

Homegrown melons tend to be sweeter and more flavorful—plus, you’ll enjoy the satisfaction of growing your own fruit.


7. Fun Facts About Melons You Probably Didn’t Know

  • Watermelons originated in Africa but have been grown in the U.S. since the 1600s.
  • The world’s largest watermelon weighed over 350 pounds!
  • Melons belong to the Cucurbitaceae family, the same as cucumbers, pumpkins, and squash.
  • National Watermelon Day is celebrated every August 3rd in the U.S.
  • In Japan, certain rare melons like the Yubari King can sell for thousands of dollars per pair!

8. Sustainability and Melon Farming in America

Modern melon farms are increasingly adopting sustainable practices—like water-efficient irrigation and integrated pest management—to reduce environmental impact. Many local U.S. farmers are turning to organic melon production, avoiding synthetic fertilizers and pesticides to offer cleaner, eco-friendly fruits.

By buying locally grown melons at farmers’ markets, Americans can support sustainable agriculture while enjoying fresher, tastier produce.


9. Melons in American Cuisine and Culture

Beyond being a summer snack, melons have found their way into modern American cuisine. Chefs across the country are using melons in innovative dishes—think grilled watermelon steaks, melon gazpacho, and melon margaritas. In states like California and Florida, melon festivals celebrate the fruit’s versatility and cultural significance, featuring contests, tastings, and farm tours.


10. Final Thoughts: A Slice of Sweet, Healthy Summer

Melons are more than just a seasonal fruit—they’re a symbol of summer joy, health, and togetherness. Whether you’re savoring a juicy watermelon at a backyard barbecue or blending a cantaloupe smoothie for breakfast, every bite captures the essence of sunny days and carefree living.

Packed with nutrients, low in calories, and endlessly versatile, melons deserve a permanent spot in every American kitchen. So next time you hit the farmer’s market or grocery store, pick up a few melons—and taste the sweet side of summer.

The Ultimate Guide to Beans Nutrition, Benefits, and Delicious Ways to Add Them to Your American Diet

The Ultimate Guide to Beans Nutrition, Benefits, and Delicious Ways to Add Them to Your American Diet

Beans have long been a staple food around the world — and for good reason. They’re affordable, packed with nutrients, and incredibly versatile. From the creamy black beans in your burrito bowl to the hearty kidney beans in chili, these tiny powerhouses are a cornerstone of healthy eating.

In recent years, beans have made a big comeback in the American kitchen, thanks to the growing interest in plant-based diets, heart health, and sustainable eating. Whether you’re vegan, vegetarian, or just trying to eat healthier, beans are an easy and delicious way to boost your meals with protein, fiber, and essential nutrients.

In this guide, we’ll explore everything you need to know about beans — their types, nutritional benefits, how to cook them perfectly, and creative recipes to try. Let’s dig in!


1. What Exactly Are Beans?

Beans belong to the legume family — plants that produce pods containing edible seeds. They’ve been cultivated for thousands of years and remain one of the most sustainable protein sources available today.

Common beans include:

  • Black Beans – Smooth, earthy, and a staple in Latin American cuisine.
  • Kidney Beans – Large, red, and perfect for chili or soups.
  • Pinto Beans – Creamy and flavorful, often found in Mexican refried beans.
  • Chickpeas (Garbanzo Beans) – Nutty and firm, great in hummus or salads.
  • Lentils – Technically not beans but close relatives, often used in soups and stews.
  • Navy Beans – Small, white, and mild; the key ingredient in baked beans.
  • Cannellini Beans – Italian white beans with a smooth texture.
  • Soybeans – Used to make tofu, soy milk, and tempeh.

Each variety brings its own flavor, texture, and nutritional perks, making beans one of the most diverse foods you can add to your kitchen rotation.


2. The Incredible Health Benefits of Beans

Beans aren’t just tasty — they’re nutritional goldmines. Packed with protein, fiber, vitamins, and minerals, they support a wide range of health benefits.

1. Heart Health

Beans are rich in soluble fiber, which helps lower LDL (“bad”) cholesterol levels. Studies show that regularly eating beans can significantly reduce your risk of heart disease.

2. Excellent Source of Plant Protein

For those reducing meat consumption, beans are a fantastic plant-based protein alternative. A single cup of cooked beans offers around 15 grams of protein — perfect for muscle repair and energy.

3. Helps Control Blood Sugar

The complex carbohydrates in beans are digested slowly, preventing sharp spikes in blood sugar. That’s why beans are highly recommended for people with diabetes or anyone managing their glucose levels.

4. Supports Digestive Health

With high fiber content, beans promote healthy digestion and regularity. They feed good gut bacteria, which improves your microbiome health.

5. Great for Weight Management

Beans are filling but low in fat, making them ideal for maintaining or losing weight. They help you stay full longer and reduce cravings for less healthy foods.

6. Packed with Nutrients

Beans are loaded with iron, magnesium, potassium, folate, and B vitamins — all essential for energy, nerve function, and overall vitality.


3. How to Cook Beans Perfectly (From Dry or Canned)

Cooking beans might sound intimidating, but it’s actually quite simple once you get the hang of it. You can start from scratch with dried beans or use convenient canned ones for quick meals.

Cooking Dried Beans

  1. Rinse and Sort: Remove any small stones or debris, then rinse under cold water.
  2. Soak:
    • Overnight Soak: Soak beans in plenty of water for 8–12 hours.
    • Quick Soak: Boil for 2 minutes, remove from heat, and let sit for 1 hour.
  3. Cook: Drain the soaked beans, cover with fresh water, and simmer gently for 1–2 hours (depending on the type). Add salt only at the end to avoid toughening the skins.
  4. Test for Doneness: Beans should be tender but not mushy.

Pro Tip: Add a bay leaf, onion, or garlic to the water for extra flavor during cooking.

Using Canned Beans

Canned beans are a convenient shortcut — they’re pre-cooked and ready to use.

  • Drain and rinse them under water to remove excess sodium.
  • Use them in soups, salads, tacos, pasta, or even smoothies for a protein boost!

Storage Tip: Cooked beans can be refrigerated for up to 4 days or frozen for up to 3 months.


4. Delicious Ways to Add Beans to Your Diet

Beans are endlessly versatile and can be added to almost any dish. Here are some delicious, American-style ideas to get you inspired.

1. Southwestern Black Bean Tacos

Swap out the meat and fill soft tortillas with black beans, avocado, salsa, and shredded lettuce. A quick, protein-packed dinner!

2. Chickpea Salad Bowl

Combine chickpeas with cucumbers, cherry tomatoes, red onion, olive oil, and lemon juice for a refreshing Mediterranean lunch.

3. Hearty Three-Bean Chili

Mix kidney beans, black beans, and pinto beans with tomato sauce, peppers, and chili spices for a comforting one-pot meal.

4. Veggie Bean Burgers

Mash cooked beans with breadcrumbs, onions, and spices, then form into patties and grill. Serve with your favorite burger toppings.

5. Crispy Roasted Chickpeas

Toss chickpeas in olive oil, paprika, and garlic powder, then roast until crunchy. They make a great high-protein snack!

6. White Bean Soup

Simmer white beans with carrots, celery, herbs, and broth for a cozy, hearty meal.

7. Pasta with Cannellini Beans

Add cannellini beans to pasta with sautéed spinach, garlic, and parmesan for a creamy, wholesome twist.

Creative Tip: Blend beans into sauces, dips, or spreads — they add creaminess without extra fat.


5. Common Myths About Beans (Debunked!)

Despite their benefits, beans sometimes get an undeserved bad rap. Let’s bust a few myths:

“Beans cause too much gas.”

While it’s true beans can cause bloating, soaking and rinsing them well helps remove oligosaccharides — the sugars responsible for gas. Over time, your digestive system also adjusts.

“Canned beans aren’t healthy.”

Canned beans are just as nutritious as dried beans! Choose low-sodium or no-salt-added versions for the healthiest option.

“Beans aren’t good for low-carb diets.”

While beans contain carbs, they’re rich in fiber and protein, which help regulate blood sugar and keep you full. They’re an excellent carb choice for balanced eating.


6. Beans and Sustainability: A Planet-Friendly Food

Beans aren’t just good for you—they’re good for the planet.

  • They require less water and fertilizer compared to animal protein.
  • They enrich soil with nitrogen, reducing the need for chemical fertilizers.
  • They’re affordable, accessible, and a key ingredient in fighting food insecurity.

By incorporating more beans into your meals, you’re making an environmentally conscious choice that benefits both your health and the planet.


7. A Simple and Delicious Bean Recipe to Try Tonight

Creamy Garlic White Bean Stew

A cozy, comforting dish perfect for weeknights!

Ingredients:

  • 2 cans (15 oz each) cannellini beans, drained and rinsed
  • 2 tablespoons olive oil
  • 1 onion, chopped
  • 3 cloves garlic, minced
  • 2 cups vegetable broth
  • 1 cup baby spinach
  • ½ teaspoon thyme
  • ¼ teaspoon red chili flakes
  • Salt and pepper, to taste
  • Juice of half a lemon

Instructions:

  1. Heat olive oil in a pot over medium heat.
  2. Add onions and sauté until soft.
  3. Stir in garlic and chili flakes, cooking for 1 minute.
  4. Add beans, broth, and thyme. Simmer for 10 minutes.
  5. Use a fork to mash some of the beans for a creamier texture.
  6. Stir in spinach and cook until wilted.
  7. Season with salt, pepper, and a squeeze of lemon juice before serving.

Serve with crusty bread for a wholesome, satisfying meal.


8. Tips for Buying and Storing Beans

Buying Tips:

  • Choose dried beans that are smooth and uniform in color.
  • Check expiration dates on canned beans — older ones can be mushy.
  • Look for low-sodium or BPA-free cans when possible.

Storage Tips:

  • Keep dried beans in an airtight container in a cool, dark place.
  • Store cooked beans with their liquid in the fridge for up to 4 days.
  • Freeze in portion-sized containers for easy meal prep.

Sustainability Tip: Buy beans in bulk — it’s cheaper, reduces packaging waste, and ensures you always have a healthy protein option on hand!


Conclusion: Small Beans, Big Benefits

Beans may be small, but they pack an enormous punch when it comes to nutrition, flavor, and versatility. Whether you’re trying to eat healthier, save money, or reduce your carbon footprint, beans are a true all-around winner.

From classic American chili to international dishes like hummus and dal, these humble legumes adapt to any cuisine and lifestyle. So, the next time you plan your weekly meals, think of beans — they’re budget-friendly, filling, and brimming with health benefits.

Make them the star of your table, and enjoy the power of plant-based goodness in every bite!

The Ultimate Guide to Growing Corn Tips for a Thriving American Garden

The Ultimate Guide to Growing Corn Tips for a Thriving American Garden

Corn, often called maize, is one of the most iconic and widely grown vegetables in the United States. Known for its sweet, juicy kernels, corn is a summer favorite, perfect for grilling, boiling, or adding to salads, salsas, and soups. Beyond its culinary appeal, corn is a rewarding crop for gardeners, offering tall, impressive plants and abundant harvests with the right care.

Whether you’re growing corn in a spacious backyard, raised beds, or even large containers, understanding its growth requirements is key to a bountiful, flavorful harvest. This guide covers everything from selecting the best corn varieties to planting, caring for, and harvesting your crop.


1. Choosing the Right Corn Variety

Corn comes in several types, each suited for different climates, tastes, and uses. Choosing the right variety ensures successful growth and maximum flavor.

Popular Corn Varieties in the U.S.:

  • Sweet Corn: Ideal for fresh eating; varieties include ‘Silver Queen,’ ‘Honey Select,’ and ‘Peaches & Cream.’
  • Popcorn: Perfect for home-popped snacks; varieties include ‘Strawberry Pop’ and ‘Red Zea.’
  • Flint Corn: Often used for decoration or cornmeal; hardy and colorful.
  • Dent Corn: Typically used for animal feed and processed foods.

For home gardeners, sweet corn is the most popular choice due to its tenderness and versatility. Consider your growing season and space before selecting a variety.


2. Starting Corn Seeds

Corn is a warm-season crop that grows best in soil temperatures between 60–95°F. Unlike some vegetables, corn generally performs better when sown directly outdoors rather than started indoors.

Seed Starting Tips:

  • Direct Sowing: Plant seeds 1–2 inches deep once the soil temperature is at least 60°F and danger of frost has passed.
  • Spacing: Space seeds 8–12 inches apart, with rows 24–36 inches apart. Plant in blocks of at least 4 rows to improve pollination.
  • Thinning: Once seedlings emerge, thin to the strongest plant per spot, leaving 12–18 inches between plants.

Corn is wind-pollinated, so planting in blocks rather than single rows increases pollination success and leads to fuller ears.


3. Preparing the Soil

Corn is a heavy feeder, requiring fertile, well-draining soil for optimal growth. Proper soil preparation encourages tall stalks, healthy leaves, and abundant ears.

Soil Preparation Tips:

  • pH: Aim for 6.0–6.8.
  • Organic Matter: Mix in 2–4 inches of compost or well-aged manure before planting.
  • Fertility: Incorporate a balanced fertilizer (10-10-10) at planting, then side-dress with nitrogen as plants grow.
  • Drainage: Raised beds or mounds can improve drainage in wetter regions.

Healthy soil not only supports robust corn growth but also reduces susceptibility to pests and disease.


4. Planting and Spacing

Corn grows tall and requires adequate sunlight, airflow, and room for roots to thrive.

Planting Guidelines:

  • Plant in full sun with at least 6–8 hours of direct sunlight per day.
  • Space seeds 12 inches apart in rows that are 30–36 inches apart.
  • For small gardens, consider dwarf corn varieties that reach 3–4 feet in height.

Corn is best grown in blocks rather than single long rows, as wind-pollination ensures better kernel development when plants are close together.


5. Watering and Fertilizing

Corn requires consistent moisture, especially during pollination and ear development.

Watering Tips:

  • Provide 1–1.5 inches of water per week, more during dry spells.
  • Water at the base to prevent fungal diseases.
  • Mulching around plants retains moisture and reduces weeds.

Fertilizing Tips:

  • Side-dress with nitrogen-rich fertilizer when plants are about 12 inches tall and again when tassels appear.
  • Avoid over-fertilizing late in the season, as this can encourage leafy growth over ear production.

6. Supporting Corn Plants

Corn stalks are tall and can be vulnerable to wind or heavy rains.

Support Tips:

  • Planting in blocks provides natural support.
  • For exposed areas, consider using stakes or windbreaks to prevent lodging (falling over).
  • Avoid overcrowding to ensure strong stalks and healthy ears.

7. Pollination and Flower Care

Successful pollination is key to developing full, plump ears.

  • Tassels and Silks: Male flowers produce pollen at the top (tassels), while female flowers form ears with silks that catch pollen.
  • Timing: Pollination occurs over several days; hand-pollinating by brushing pollen onto silks can increase yields.
  • Monitoring: Ensure at least 50–60% of plants have healthy silks during tassel bloom.

Proper pollination leads to uniform kernels and larger ears.


8. Common Pests and Diseases

Corn can face pests and diseases that affect yield and quality.

Common Pests:

  • Corn Earworms: Feed on kernels; handpick or use organic sprays.
  • Aphids: Sap-sucking insects that weaken plants; blast with water or use insecticidal soap.
  • Cutworms: Can damage seedlings; use collars or barriers.

Common Diseases:

  • Rust: Orange-brown pustules on leaves; maintain spacing and airflow.
  • Northern Leaf Blight: Gray-green lesions; rotate crops annually.
  • Smuts: Black spore masses on ears; remove affected plants promptly.

Crop rotation, good spacing, and vigilant monitoring reduce most pest and disease issues.


9. Harvesting Corn

Timing is crucial for sweet corn to achieve peak flavor.

Harvesting Tips:

  • Pick corn when silks turn brown, and ears feel full but still tender.
  • Test kernels by pressing a fingernail into one; milky juice indicates readiness.
  • Harvest early in the morning for the best flavor.
  • Pick regularly, as leaving ears too long on the stalk reduces sweetness.

Freshly harvested corn can be boiled, grilled, or roasted immediately for the best taste.


10. Using and Preserving Corn

Corn is versatile and can be enjoyed fresh, frozen, or preserved for later use.

Culinary Uses:

  • Boiled or Grilled Corn on the Cob: A summer favorite.
  • Corn Salads and Salsas: Adds sweetness and texture.
  • Corn Chowder and Soups: Classic comfort foods.
  • Canning and Freezing: Blanch and freeze kernels for winter meals.
  • Cornmeal: Dry varieties can be ground for cornbread and baking.

Proper storage ensures sweetness and freshness, maintaining the classic flavor that makes homegrown corn irresistible.


Conclusion: Grow Corn with Confidence

Corn is a rewarding crop for American gardeners, offering abundant harvests, versatility in cooking, and visual appeal with its tall, leafy stalks. By choosing the right variety, providing consistent care, and ensuring proper pollination, you can enjoy sweet, homegrown corn all season long.

Whether grilled on the barbecue, added to salads, or preserved for winter meals, nothing compares to the taste of freshly harvested corn from your own garden. With patience, planning, and proper care, your garden can yield ears of corn that are as flavorful as they are impressive.


The Ultimate Guide to Growing Okra Tips for a Thriving American Garden

The Ultimate Guide to Growing Okra Tips for a Thriving American Garden

Okra, often called “lady’s finger”, is a staple of Southern cuisine and a favorite in American gardens for its versatility and resilience. This heat-loving vegetable produces tender, edible pods perfect for frying, stewing, grilling, or adding to soups like the classic gumbo. Beyond its culinary uses, okra is easy to grow and produces an abundant harvest, making it ideal for beginner and experienced gardeners alike.

Whether you have a backyard garden, raised beds, or large containers, growing okra successfully requires understanding its needs and following key planting and care strategies. This guide will walk you through everything you need to know to grow healthy, high-yielding okra plants from seed to harvest.


1. Choosing the Right Okra Variety

Selecting the right variety is crucial for maximizing yield, flavor, and adaptability to your region. Okra varieties differ in height, pod size, color, and disease resistance.

Popular American Okra Varieties:

  • ‘Clemson Spineless’ – Most popular in the U.S.; spineless pods, vigorous growth, high yield.
  • ‘Emerald’ – Medium-sized green pods, tender and flavorful.
  • ‘Jambalaya’ – Resistant to common diseases and ideal for Southern gardens.
  • ‘Burgundy’ – Deep red pods, perfect for salads and ornamental appeal.
  • ‘Annie Oakley II’ – Dwarf variety suited for container or small gardens.

Choose a variety based on your garden size, climate, and intended culinary use. Taller varieties like Clemson Spineless thrive in spacious backyards, while dwarf types are perfect for patio containers.


2. Starting Okra Seeds

Okra thrives in warm weather, with optimal growth at 75–95°F. Seeds can be started indoors in cooler climates to extend the growing season.

Seed Starting Tips:

  • Sow seeds ½–1 inch deep in seed trays or small pots with well-draining seed-starting mix.
  • Keep soil warm, ideally 75–85°F, to encourage germination.
  • Provide 12–16 hours of light daily with a grow light or sunny window.
  • Transplant seedlings outdoors when nighttime temperatures remain above 60°F and seedlings have 2–3 true leaves.

Direct Sowing Outdoors:

  • In warm climates, sow seeds directly after the last frost.
  • Space seeds 12–18 inches apart in rows 3 feet apart.

3. Preparing the Soil

Okra grows best in well-draining, fertile soil rich in organic matter. Proper soil preparation encourages strong growth and abundant pod production.

Soil Preparation Tips:

  • pH: Aim for 6.0–6.8.
  • Organic Matter: Incorporate 2–3 inches of compost or aged manure into the soil.
  • Drainage: Raised beds or mounds are ideal for preventing waterlogged roots.
  • Sunlight: Okra requires full sun for at least 6–8 hours daily.

Healthy soil ensures vigorous plants and higher yields, while mulch helps conserve moisture, regulate soil temperature, and reduce weeds.


4. Planting and Spacing

Proper spacing is crucial to allow okra plants to grow tall, develop strong stems, and produce abundant pods.

Planting Guidelines:

  • Space plants 12–18 inches apart in rows 36–48 inches apart.
  • For container gardening, use large pots (5–10 gallons) and plant one okra per pot.
  • Ensure adequate sunlight and airflow to prevent disease and encourage pod formation.

Okra plants can reach 3–6 feet in height, so spacing is essential to prevent overcrowding and allow for easy harvesting.


5. Watering and Fertilizing

Okra is drought-tolerant but performs best with consistent watering. Water and nutrients play a critical role in flower and pod development.

Watering Tips:

  • Provide 1–1.5 inches of water per week, especially during flowering and pod growth.
  • Water deeply at the base of the plant to encourage deep root systems.
  • Mulching helps retain soil moisture during hot summer days.

Fertilizing Tips:

  • Apply a balanced fertilizer (10-10-10 NPK) at planting.
  • Side-dress with compost or nitrogen-rich fertilizer when plants start flowering.
  • Avoid over-fertilization, which can encourage leafy growth at the expense of pods.

6. Supporting and Caring for Okra

While okra is relatively low-maintenance, proper care maximizes yield and reduces disease risk.

Tips for Healthy Growth:

  • Stake taller varieties if needed to prevent breakage in strong winds.
  • Remove weeds around plants regularly to reduce competition for nutrients.
  • Thin seedlings if overcrowded to maintain airflow and plant health.
  • Encourage pollinators like bees, as they help improve pod formation.

Okra produces flowers that mature into pods rapidly, often ready for harvest within 50–60 days from planting.


7. Common Pests and Diseases

Okra can be affected by pests and diseases, but proactive management ensures healthy plants.

Common Pests:

  • Aphids: Use insecticidal soap or blast with water.
  • Flea Beetles: Small holes in leaves; protect young plants with row covers.
  • Stink Bugs: Feed on pods and leaves; handpick or use organic insecticides.

Common Diseases:

  • Powdery Mildew: White, powdery spots on leaves; ensure proper spacing.
  • Verticillium Wilt: Causes yellowing and wilting; practice crop rotation.
  • Leaf Spots: Remove infected leaves promptly to prevent spread.

Healthy soil, proper spacing, and regular monitoring are key to preventing pest and disease issues.


8. Harvesting Okra

Timing is critical for tender, flavorful pods. Overgrown okra becomes tough and fibrous.

Harvesting Tips:

  • Pick pods 2–4 inches long, depending on variety.
  • Harvest every 1–2 days during peak production.
  • Use garden scissors or a knife to snip pods carefully, leaving the stem intact.
  • Wear gloves if pods have fine hairs that can irritate skin.

Regular harvesting encourages plants to produce continuously throughout the growing season.


9. Using and Preserving Okra

Okra is versatile in the kitchen, offering a range of culinary uses.

Culinary Uses:

  • Fried Okra: Classic Southern comfort food.
  • Gumbo: Essential in traditional Louisiana recipes.
  • Roasted or Grilled: Toss with olive oil, salt, and pepper for a simple side dish.
  • Pickled Okra: Crunchy, tangy, and perfect for snacking.
  • Soups and Stews: Adds flavor and natural thickening.

Storage Tips:

  • Fresh okra pods can be stored in the refrigerator for up to 5 days.
  • Blanching and freezing pods allows for long-term preservation.

10. Tips for Maximum Okra Yield

  • Ensure full sun exposure for robust plant growth.
  • Keep soil consistently moist but well-drained.
  • Mulch to regulate soil temperature and conserve water.
  • Harvest frequently to encourage continuous pod production.
  • Rotate crops annually to reduce disease buildup.

Conclusion: Grow Okra with Confidence

Okra is a rewarding addition to any American garden, offering abundant harvests, versatility in cooking, and vibrant summer foliage. By choosing the right variety, providing proper care, and harvesting consistently, gardeners can enjoy fresh, homegrown okra all season long.

Whether you’re frying it, adding it to gumbo, roasting it, or pickling it, homegrown okra provides flavor, nutrition, and the satisfaction of growing your own food. Start planting this season and enjoy the crisp, tender pods that only a garden-fresh okra plant can provide.


How to Grow Pumpkins Like a Pro A Complete Guide for a Thriving American Garden

How to Grow Pumpkins Like a Pro A Complete Guide for a Thriving American Garden

Pumpkins are synonymous with autumn, Halloween, and Thanksgiving in the United States, but they are much more than seasonal decorations. These versatile gourds are perfect for pies, soups, roasted dishes, and even seeds for healthy snacking. Growing pumpkins in your garden is both fun and rewarding, providing vibrant, nutritious fruits and a sense of accomplishment for any gardener.

Whether you have a spacious backyard or a few raised beds, pumpkins can flourish with the right planning, care, and attention. In this guide, we’ll explore everything you need to grow pumpkins successfully—from choosing the right variety to harvesting, storing, and even enjoying them in delicious recipes.


1. Choosing the Right Pumpkin Variety

Pumpkins come in various shapes, sizes, and colors. Selecting the right variety ensures that your garden space, climate, and culinary goals align with your harvest.

Popular Pumpkin Types in the U.S.:

  • ‘Howden’ – The classic Halloween carving pumpkin, bright orange and medium-sized.
  • ‘Jack Be Little’ – Miniature pumpkins, ideal for decorations and small spaces.
  • ‘Sugar Pie’ – Small, sweet pumpkins perfect for baking pies and desserts.
  • ‘Cinderella’ (Rouge Vif d’Etampes) – Flattened, deep orange pumpkins for decorative and culinary use.
  • ‘Lumina’ – White pumpkins, great for modern autumn décor and savory recipes.

Consider your purpose: large pumpkins for carving, small pumpkins for tablescapes, or sweet pumpkins for cooking. Your choice also depends on how much space you have and the length of your growing season.


2. Starting Pumpkin Seeds

Pumpkins are warm-season crops that thrive in full sun and rich, fertile soil. Starting seeds indoors gives a head start, especially in northern climates where the growing season is shorter.

Seed Starting Tips:

  • Sow seeds 1 inch deep in seed trays or small pots filled with well-draining seed-starting mix.
  • Maintain soil temperatures of 70–85°F for optimal germination.
  • Provide 12–16 hours of light per day using a grow light or sunny window.
  • Transplant seedlings outdoors once all danger of frost has passed and soil temperatures are at least 65°F.

For gardeners in warmer regions, you can also direct sow pumpkin seeds into prepared soil after the last frost date.


3. Preparing the Soil

Pumpkins are heavy feeders, requiring nutrient-rich, well-draining soil to support their sprawling vines and large fruits.

Soil Preparation Tips:

  • pH Level: Aim for 6.0–6.8 for optimal growth.
  • Organic Matter: Incorporate 3–4 inches of compost or aged manure into the soil.
  • Raised Beds or Mounds: These improve drainage, warmth, and root development.

Healthy soil encourages strong vines, vibrant leaves, and large, uniform pumpkins. Mulching around plants helps retain moisture and suppress weeds while keeping fruits off the soil.


4. Planting and Spacing

Pumpkin vines can sprawl up to 10–20 feet, so ample spacing is essential.

Planting Guidelines:

  • Plant seeds or transplants in hills spaced 4–6 feet apart, with rows 6–8 feet apart for larger varieties.
  • Each hill should contain 2–3 plants, later thinned to the strongest one.
  • Provide full sun (6–8 hours daily) to maximize photosynthesis and fruit production.

For smaller gardens, consider bush-type pumpkins like ‘Baby Pam,’ which require less space and still produce a good yield.


5. Watering and Fertilizing

Pumpkins need consistent moisture, particularly during flowering and fruit set. Uneven watering can cause bitter, misshapen, or cracked pumpkins.

Watering Tips:

  • Provide 1–2 inches of water per week, ideally early in the day.
  • Avoid overhead watering to reduce the risk of fungal diseases.
  • Mulching helps conserve moisture during hot, dry periods.

Fertilizing Tips:

  • Apply a balanced fertilizer (10-10-10 NPK) at planting time.
  • Side-dress with compost or a phosphorus-rich fertilizer when vines begin to run.
  • Avoid excessive nitrogen late in the season, as it encourages leaf growth over fruit development.

6. Supporting Pumpkin Plants

While most pumpkins are grown on the ground, providing some support or careful management can improve growth and reduce disease.

Support Tips:

  • Use mulch or straw to keep fruits clean and prevent rot.
  • For smaller pumpkins, consider elevating fruits on wooden boards to prevent soil contact.
  • Train vines along trellises for compact spaces, but note that very large pumpkins are best grown on the ground.

7. Pollination and Flower Care

Pumpkins produce separate male and female flowers, and successful pollination is key to fruit development.

  • Pollinators: Bees are crucial. Avoid insecticides during flowering.
  • Hand Pollination: If pollinators are scarce, transfer pollen from male to female flowers using a small brush or by gently touching flowers together.
  • Flower Health: Remove damaged or diseased flowers promptly to prevent fungal growth.

Successful pollination leads to well-formed, large pumpkins.


8. Common Pests and Diseases

Pumpkins can be affected by several pests and diseases, so early detection and prevention are essential.

Common Pests:

  • Squash Bugs: Feed on leaves and stems; remove by hand or use neem oil.
  • Cucumber Beetles: Can transmit bacterial wilt; row covers protect young plants.
  • Aphids: Use insecticidal soap or blast with water to control populations.

Common Diseases:

  • Powdery Mildew: White, powdery growth on leaves; maintain airflow and space plants properly.
  • Downy Mildew: Yellow spots on leaves; avoid wet foliage and rotate crops.
  • Bacterial Wilt: Remove infected plants immediately to prevent spread.

Proper spacing, crop rotation, and vigilant care keep pumpkins healthy and productive.


9. Harvesting Pumpkins

Timing is crucial for pumpkins to reach peak flavor and durability.

Harvesting Tips:

  • Pick pumpkins when the skin is hard, and color is fully developed.
  • The stem should be firm and slightly dried.
  • Use a sharp knife or pruners to cut the pumpkin from the vine, leaving 2–4 inches of stem attached.
  • Avoid leaving pumpkins on the vine after frost, as cold temperatures can damage them.

Properly harvested pumpkins store well for 2–3 months in a cool, dry place.


10. Using and Enjoying Pumpkins

Pumpkins are incredibly versatile in the kitchen and around the home.

Culinary Uses:

  • Pumpkin Pie and Muffins: Classic American favorites for fall.
  • Roasted Pumpkin: Delicious as a side dish or in soups.
  • Pumpkin Seeds: Toast for a healthy snack.
  • Pumpkin Puree: Ideal for sauces, breads, and baby food.

Decorative Uses:

  • Carve jack-o’-lanterns for Halloween.
  • Use mini pumpkins as table décor during Thanksgiving.

Conclusion: Grow Pumpkins with Confidence

With their vibrant colors, rich flavor, and cultural significance, pumpkins are a rewarding addition to any American garden. By following these tips—from selecting the right variety to proper watering, pollination, and harvesting—you can enjoy bountiful, healthy pumpkins all season long.

Whether you’re aiming for the perfect jack-o’-lantern, baking sweet pies, or roasting savory seeds, growing pumpkins at home offers a blend of beauty, flavor, and satisfaction. Start planting this season and watch your garden flourish with these iconic autumn treasures.

The Ultimate Guide to Growing Zucchini Tips for a Productive and Flavorful American Garden

The Ultimate Guide to Growing Zucchini Tips for a Productive and Flavorful American Garden

Few vegetables are as versatile, easy to grow, and satisfying to harvest as zucchini. This summer squash has captured the hearts of American gardeners for decades. With its tender flesh and mild flavor, zucchini is perfect for sautés, grills, breads, casseroles, and even spiralized noodles.

Whether you have a sprawling backyard garden, raised beds, or even a few large containers on your patio, zucchini is an ideal choice for gardeners of all experience levels. With the right care, it produces an abundant harvest that can last all summer.

In this comprehensive guide, we’ll walk you through everything you need to know to grow healthy, high-yielding zucchini plants in American gardens—from selecting the perfect variety to harvesting your flavorful fruits.


1. Choosing the Right Zucchini Variety

Zucchini comes in multiple shapes, colors, and growth habits, and selecting the right variety can make a big difference in your harvest.

Popular Varieties in the U.S.:

  • ‘Black Beauty’ – Classic dark green zucchini, heavy-yielding and reliable.
  • ‘Cocozelle’ – Italian heirloom with lightly striped skin and tender flesh.
  • ‘Golden Zucchini’ – Bright yellow fruits that add visual appeal to any dish.
  • ‘Raven’ – Disease-resistant and compact, ideal for smaller gardens.
  • ‘Spineless Beauty’ – Easy-to-harvest variety with smooth skin.

When choosing, consider your garden size, local climate, and how you plan to use the zucchini—whether for fresh dishes, baking, or canning.


2. Starting Zucchini Seeds

Zucchini is a warm-season crop, thriving in temperatures between 70–95°F. To maximize your growing season, start seeds indoors or sow directly into the garden.

Starting Seeds Indoors:

  • Sow seeds 1 inch deep in seed trays filled with well-draining seed-starting mix.
  • Maintain a temperature of 70–80°F for germination.
  • Provide 12–16 hours of light daily with grow lights or a sunny window.
  • Transplant seedlings outdoors when they have 2–3 true leaves and nighttime temperatures are consistently above 55°F.

Direct Sowing Outdoors:

  • Wait until the soil warms to at least 65°F, usually late spring in most U.S. regions.
  • Plant seeds 1 inch deep, spaced about 24–36 inches apart, with rows spaced 3–4 feet apart.

3. Preparing the Soil

Zucchini thrives in rich, well-drained soil with plenty of organic matter. Healthy soil encourages rapid growth and reduces the risk of pests and diseases.

Soil Preparation Tips:

  • pH Level: Aim for 6.0–7.5.
  • Organic Matter: Mix in 3–4 inches of compost or aged manure before planting.
  • Drainage: Raised beds or mounds work well for gardeners in wetter climates.

Adding mulch helps retain moisture, suppress weeds, and keeps the soil temperature stable, which zucchini plants love.


4. Planting and Spacing

Proper spacing is crucial for zucchini, as sprawling plants need room for sunlight and airflow.

Planting Tips:

  • Plant 2–3 seeds per hill, thinning to the strongest seedling after 1–2 weeks.
  • Space hills 24–36 inches apart, with rows 3–4 feet apart.
  • Ensure the planting site receives full sun (6–8 hours daily).
  • If growing in containers, choose large pots (5–10 gallons) and plant one zucchini per pot.

5. Watering and Fertilizing

Zucchini requires consistent moisture to thrive, particularly when producing flowers and fruits.

Watering Tips:

  • Provide 1–2 inches of water per week.
  • Water at the base of the plant to prevent fungal diseases.
  • Mulch helps retain moisture during hot summer months.

Fertilizing Tips:

  • Before planting, mix a balanced organic fertilizer into the soil.
  • Once plants begin flowering, side-dress with compost or a high-phosphorus fertilizer to support fruiting.
  • Avoid excessive nitrogen; it encourages leafy growth over fruit production.

6. Supporting and Caring for Zucchini Plants

While zucchini can sprawl on the ground, providing some support or training can improve air circulation and reduce disease risk.

Support Tips:

  • Trellising: Vertical growing saves space and keeps fruits clean.
  • Pruning: Remove older leaves near the soil to improve airflow.
  • Pollination: Zucchini flowers need pollinators. If you see few fruits, hand-pollinate flowers using a small brush.

Regular monitoring for pests and diseases ensures a healthy crop and reduces damage to fruits.


7. Common Pests and Diseases

Zucchini plants can attract pests and face fungal diseases. Awareness and prevention are key to maintaining healthy plants.

Common Pests:

  • Squash Bugs: Feed on leaves; remove eggs and adults by hand or use neem oil.
  • Cucumber Beetles: Cause damage and spread bacterial wilt; row covers can protect seedlings.
  • Aphids: Use water sprays or insecticidal soap for control.

Common Diseases:

  • Powdery Mildew: White coating on leaves; improve spacing and airflow.
  • Downy Mildew: Yellow spots on leaves; avoid overhead watering.
  • Bacterial Wilt: Remove infected plants immediately to prevent spread.

Crop rotation, proper spacing, and clean gardening practices help prevent most problems.


8. Harvesting Zucchini

Zucchini grows rapidly, and harvesting at the right time ensures the best flavor and continued fruit production.

Harvesting Tips:

  • Pick fruits 6–8 inches long for tender texture.
  • Check plants daily—zucchini can double in size in 24 hours.
  • Use a sharp knife or scissors to cut fruits, leaving a small stem attached.
  • Frequent harvesting encourages plants to produce more fruits throughout the season.

Overgrown zucchini becomes tough and seedy, so harvesting regularly is essential for flavor and productivity.


9. Using and Preserving Zucchini

Homegrown zucchini is versatile and can be used fresh, cooked, or preserved for later use.

Culinary Ideas:

  • Sautéed or Grilled: Lightly seasoned, perfect for summer meals.
  • Baked Goods: Zucchini bread, muffins, and cakes add moisture and nutrition.
  • Zoodles: Spiralize for a low-carb alternative to pasta.
  • Freezing: Blanch and freeze slices for winter use.
  • Pickling: Make sweet or spicy pickled zucchini for long-term storage.

10. Tips for Maximum Zucchini Yield

  • Sunlight is essential: More sun = more abundant fruit.
  • Consistent care: Regular watering, feeding, and monitoring for pests ensures healthy plants.
  • Mulching: Keeps soil moist and prevents weeds.
  • Companion planting: Plant with beans or nasturtiums to improve growth and deter pests.
  • Vertical growing: Saves space and reduces rot.

Conclusion: Grow Abundant, Delicious Zucchini

Zucchini is one of the most rewarding vegetables to grow in American gardens. With its rapid growth, prolific yields, and versatile culinary uses, it’s a must-have for gardeners of all skill levels.

By selecting the right variety, providing proper care, and harvesting regularly, you can enjoy fresh, homegrown zucchini all season long. Whether for salads, baked goods, grilled dishes, or creative recipes, there’s nothing quite like the flavor of a zucchini straight from your garden.

This season, plant zucchini, nurture it with care, and experience the joy of fresh, crisp, and flavorful fruits that make every meal a little brighter.

The Ultimate Guide to Growing Crisp, Juicy Cucumbers Tips for a Thriving American Garden

The Ultimate Guide to Growing Crisp, Juicy Cucumbers Tips for a Thriving American Garden

Few vegetables epitomize summer freshness quite like cucumbers. Crisp, refreshing, and versatile, cucumbers are a staple in American gardens—from backyard plots to container gardens on city patios. Whether you’re tossing them into salads, pickling them for homemade pickles, or adding them to refreshing beverages, homegrown cucumbers simply taste better than store-bought.

But growing cucumbers successfully requires more than planting a seed and hoping for the best. They need warm soil, consistent care, and proper support to produce abundant, healthy fruits. This comprehensive guide will walk you through everything you need to know to grow cucumbers successfully in the United States, from selecting the best varieties to harvesting crisp, flavorful fruits.


1. Understanding Cucumber Varieties

Cucumbers come in several types, each suited for different culinary uses and growing conditions. Choosing the right variety is the first step to a successful cucumber harvest.

Slicing Cucumbers

These are the traditional cucumbers you’ll find in salads or served fresh. They are usually longer, thicker-skinned, and less bitter.
Popular American varieties:

  • ‘Marketmore 76’ – Disease-resistant, high-yielding, and classic slicing cucumber.
  • ‘Straight Eight’ – Known for straight, uniform fruits with mild flavor.
  • ‘Bush Champion’ – Ideal for smaller gardens and containers.

Pickling Cucumbers

Shorter, thinner, and crispier, these are perfect for pickling.
Popular varieties:

  • ‘Boston Pickling’ – Produces abundant small fruits ideal for jars.
  • ‘National Pickling’ – Early-maturing and resistant to powdery mildew.

Specialty Cucumbers

Unique shapes, colors, and flavors for adventurous gardeners:

  • ‘Lemon Cucumber’ – Round, yellow, mild-tasting fruits.
  • ‘Armenian Cucumber’ – Long, slender, and slightly ribbed; technically a melon.

Select varieties based on your climate, garden space, and culinary preferences.


2. Starting Cucumbers from Seed

Cucumbers are warm-season vegetables that thrive in soil temperatures of 70–95°F. Starting seeds indoors gives you a head start, especially in cooler northern regions.

Seed Starting Tips:

  • Timing: Sow seeds indoors 3–4 weeks before the last frost date.
  • Containers: Use seed trays or small pots filled with a light seed-starting mix.
  • Planting Depth: Plant seeds ½ inch deep and keep soil consistently moist.
  • Light & Heat: Provide 12–16 hours of light per day with a grow light or sunny window; maintain 70–80°F for best germination.
  • Transplanting: Harden off seedlings by gradually exposing them to outdoor conditions for 7–10 days before planting in the garden.

Alternatively, direct sow seeds outdoors once the soil has warmed to at least 70°F — usually late spring or early summer in most U.S. regions.


3. Preparing the Soil

Cucumbers are heavy feeders and prefer loose, fertile, well-draining soil. Proper preparation ensures strong growth and abundant fruit production.

Soil Preparation Steps:

  • pH Level: Aim for 6.0–7.0.
  • Fertility: Mix in 3–4 inches of compost or well-aged manure.
  • Tilling: Loosen soil 8–12 inches deep to allow for deep root growth.

Pro Tip: Cucumbers grow best when planted after nitrogen-fixing crops like beans or peas. Avoid planting in areas where cucurbits (squash, melons) grew the previous year to prevent disease buildup.


4. Planting and Spacing

Proper spacing and planting techniques are essential to prevent overcrowding and improve airflow, reducing the risk of disease.

Planting Tips:

  • Spacing: Sow seeds 12 inches apart in rows spaced 36–48 inches apart.
  • Depth: Plant seeds ½ inch deep. For transplants, plant slightly deeper than they were in pots.
  • Mounding: Many gardeners plant cucumbers on raised mounds or hills to improve drainage and warmth.
  • Sunlight: Choose a location that receives 6–8 hours of full sun daily.

Cucumbers are natural climbers, so consider vertical growing techniques to save space and improve air circulation.


5. Supporting Cucumbers

While cucumbers can sprawl on the ground, vertical support has multiple benefits:

  • Keeps fruits clean and straight
  • Improves air circulation, reducing mildew and rot
  • Makes harvesting easier

Support Options:

  • Trellises: Wooden or metal trellises allow vines to climb and stay off the ground.
  • Cages: Tomato cages work well for smaller cucumber varieties.
  • Netting or Fencing: Lightweight garden netting can guide vines upward.

Tie vines loosely to the support as they grow to prevent breakage.


6. Watering and Fertilizing

Cucumbers need consistent moisture, especially during flowering and fruit set. Uneven watering can lead to bitter fruit or poor yields.

Watering Tips:

  • Water deeply once or twice per week, depending on rainfall.
  • Avoid wetting the foliage to reduce fungal disease risk.
  • Use mulch to retain soil moisture and regulate temperature.

Fertilizing Tips:

  • Incorporate a balanced, slow-release fertilizer (10-10-10) at planting.
  • Side-dress with compost or liquid fertilizer every 3–4 weeks during the growing season.
  • Ensure adequate potassium for fruit development and calcium to prevent blossom-end rot.

7. Pest and Disease Management

Cucumbers can face several common pests and diseases. Monitoring plants closely helps prevent infestations.

Common Pests:

  • Cucumber Beetles: Yellow-green beetles that feed on leaves and transmit bacterial wilt. Use row covers and neem oil.
  • Aphids: Sap-sucking insects. Spray with water or insecticidal soap.
  • Spider Mites: Thrives in hot, dry conditions; increase humidity or use miticides if needed.

Common Diseases:

  • Powdery Mildew: White, powdery growth on leaves. Prevent with good airflow and resistant varieties.
  • Downy Mildew: Causes yellow spots on leaves; remove infected leaves promptly.
  • Bacterial Wilt: Spread by cucumber beetles; remove infected plants immediately.

Crop rotation, proper spacing, and vigilant monitoring will help keep your cucumber patch healthy.


8. Harvesting Cucumbers

Cucumbers are ready to harvest 50–70 days after planting, depending on the variety. Regular harvesting encourages continuous production.

Harvesting Tips:

  • Pick cucumbers when they are firm, smooth, and reach the expected size for the variety.
  • Avoid letting cucumbers overmature—they can become bitter and seedy.
  • Use garden shears or scissors to cut fruits gently, leaving a small stem attached.
  • Harvesting every 2–3 days ensures the plant keeps producing.

9. Preserving and Using Cucumbers

Homegrown cucumbers can be enjoyed fresh or preserved for later enjoyment.

Ideas:

  • Salads and Sandwiches: Fresh, crisp slices.
  • Pickles: Sweet, dill, or spicy pickles for long-term storage.
  • Infused Water: Slice and add to water for a refreshing drink.
  • Relishes and Chutneys: Perfect for summer canning.

Store unwashed cucumbers in the fridge for up to a week for optimal freshness.


10. Tips for Maximum Flavor and Yield

  • Sunlight is key: Cucumbers grown in full sun are sweeter and more productive.
  • Mulch: Keeps roots cool, retains moisture, and reduces weeds.
  • Consistent care: Watering, fertilizing, and pest control ensure higher yields.
  • Vertical growing: Saves space and prevents rot.

Conclusion: Grow Crisp, Refreshing Cucumbers at Home

With their refreshing crunch and versatility in the kitchen, cucumbers are a must-have in any American garden. By following the right planting techniques, providing proper care, and protecting your plants from pests and disease, you can enjoy a bountiful harvest all season long.

Whether you’re a beginner gardener or a seasoned pro, growing cucumbers offers the satisfaction of fresh, homegrown produce that elevates salads, pickles, and summer dishes to a whole new level.

This season, plant cucumbers, watch them climb, and savor the taste of crisp, juicy, garden-fresh cucumbers straight from your backyard.