Kale America’s Ultimate Supergreen for Health, Flavor, and Everyday Cooking

Kale America’s Ultimate Supergreen for Health, Flavor, and Everyday Cooking

When it comes to superfoods that pack a punch, kale reigns supreme. This dark, leafy green has captured America’s attention for its exceptional nutrition, versatility, and unmistakable earthy flavor. From morning smoothies to crispy chips and hearty salads, kale is everywhere — and for good reason.

Once considered a humble farm crop, kale has now become a nutrition superstar on dinner tables, juice bars, and restaurant menus across the United States. In this 1200-word article, we’ll explore everything about kale — what makes it a superfood, its powerful health benefits, the best ways to cook it, and why every American kitchen needs it.


1. What Is Kale?

Kale (scientifically known as Brassica oleracea) belongs to the same plant family as broccoli, cabbage, and Brussels sprouts. It’s a hardy, cold-tolerant vegetable that thrives in many parts of the U.S., making it a local favorite among farmers and home gardeners.

This leafy green is available in several varieties, including:

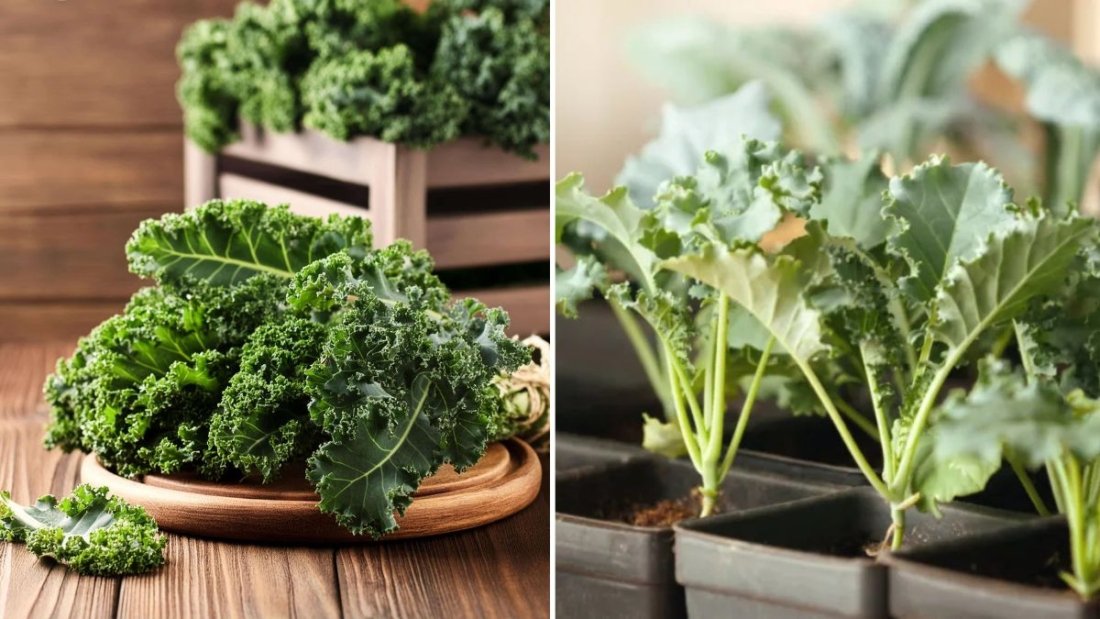
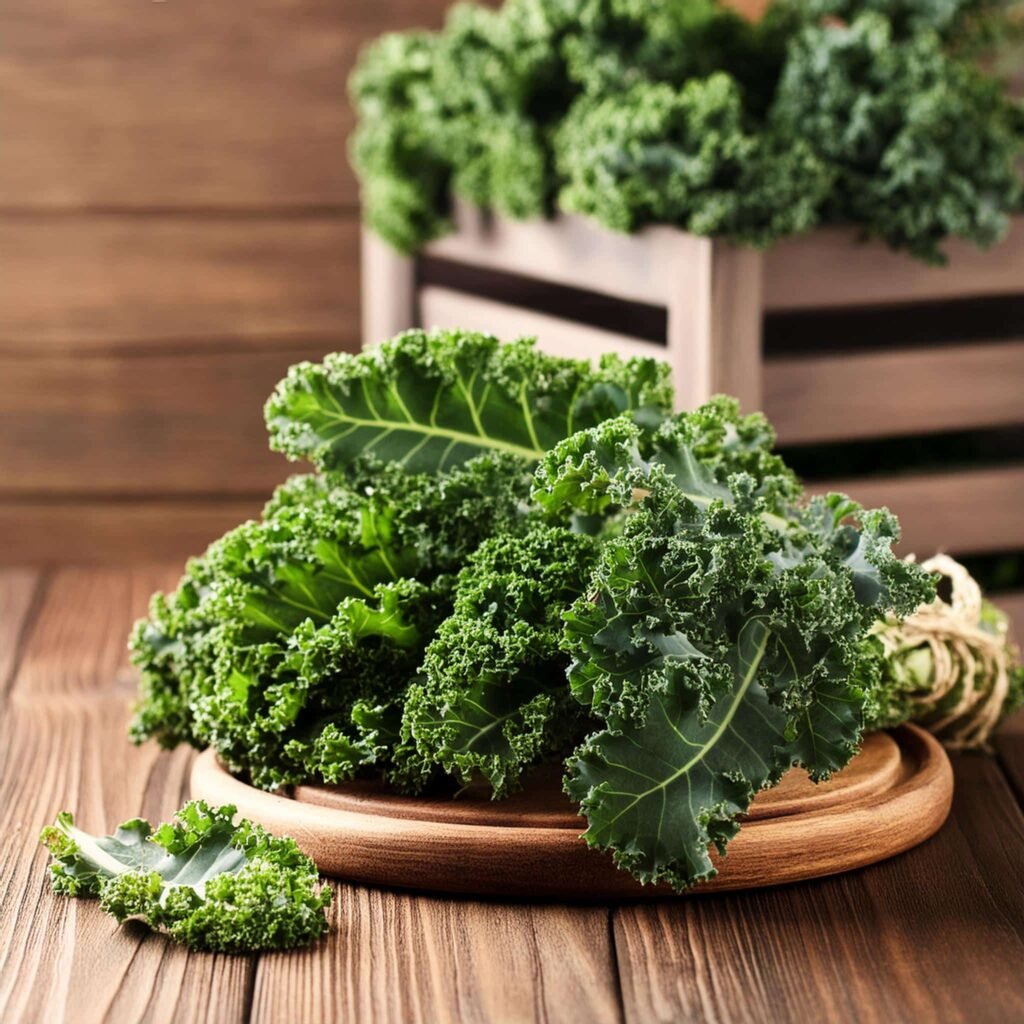
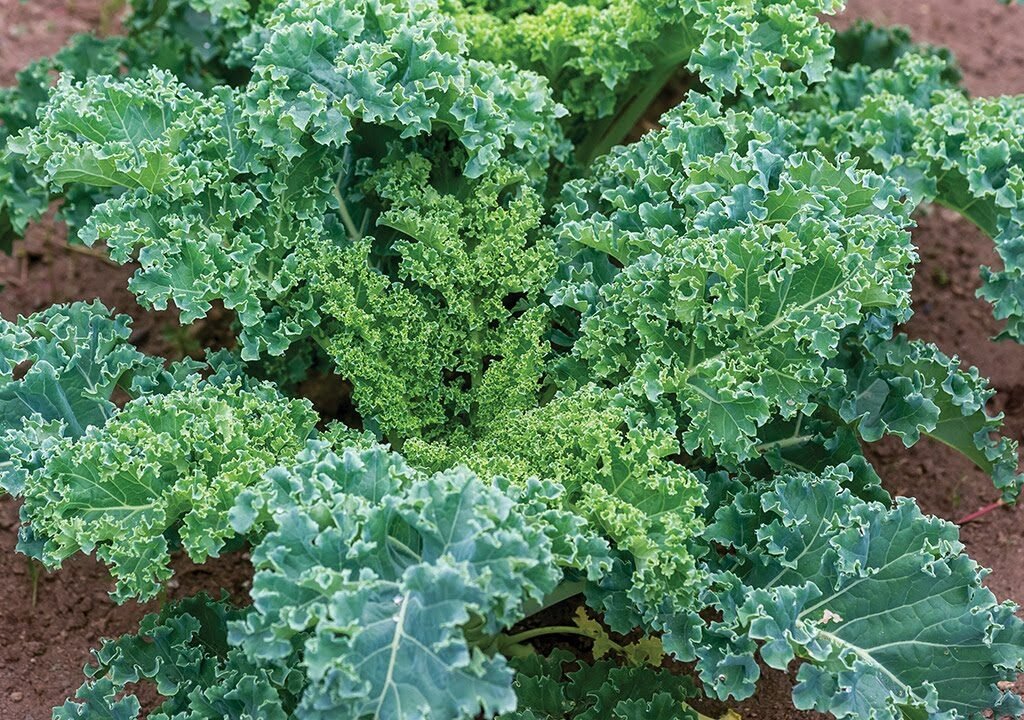
  • Curly Kale: The most common type found in supermarkets, with frilly edges and a peppery bite.
  • Lacinato Kale (Dinosaur Kale): Deep green leaves with a slightly sweeter, nutty flavor.
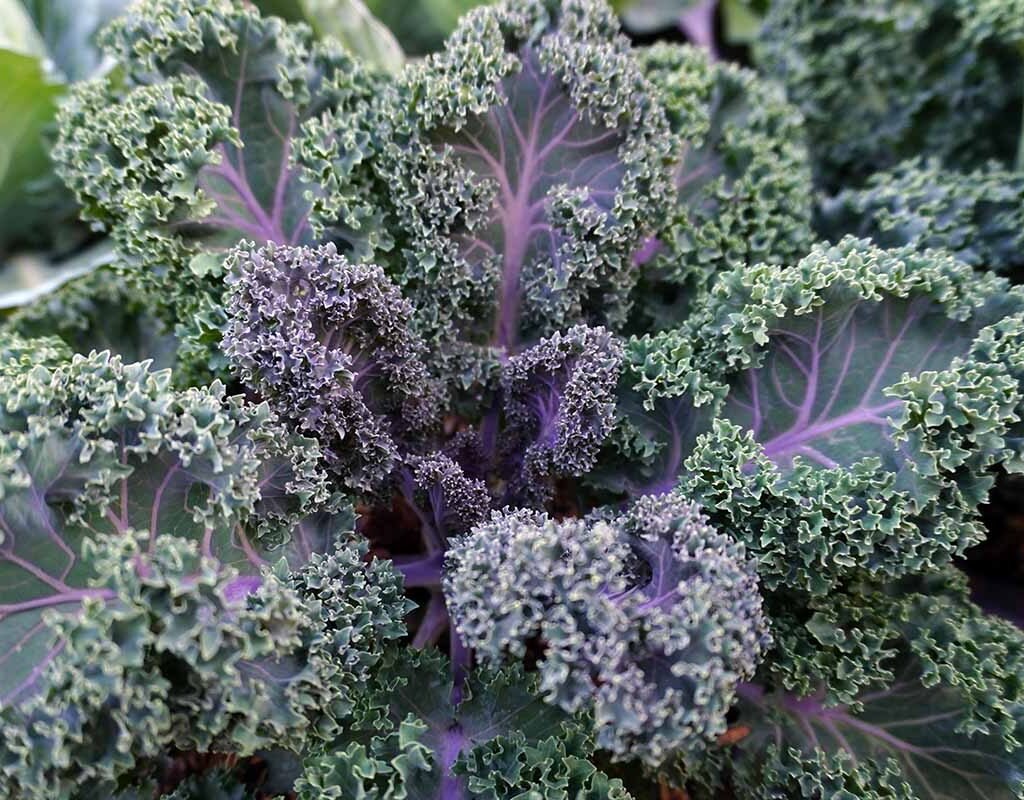
  • Red Russian Kale: Tender, flat leaves with reddish stems, great for salads and sautéing.
  • Baby Kale: Young leaves that are tender and mild, perfect for raw dishes.

Each variety has its unique flavor and texture, but they all share the same nutrient-dense profile that makes kale a go-to for health enthusiasts across America.


2. The Nutritional Powerhouse of Kale

Kale isn’t just trendy — it’s one of the most nutrient-rich foods on the planet. One cup of raw kale (about 67 grams) provides an astonishing amount of vitamins and minerals for very few calories.

Here’s a quick look at kale’s nutritional breakdown:

  • Calories: 33
  • Protein: 3 grams
  • Fiber: 2.5 grams
  • Vitamin A: Over 200% of the Daily Value (DV)
  • Vitamin C: 134% of the DV
  • Vitamin K: 684% of the DV
  • Calcium, Potassium, and Magnesium: Essential minerals for bones and muscles
  • Antioxidants: Lutein, zeaxanthin, quercetin, and kaempferol

Kale is also a great plant-based source of iron and omega-3 fatty acids, making it ideal for vegans and vegetarians who want to boost their nutrition naturally.


3. Top Health Benefits of Kale

The phrase “eat your greens” makes perfect sense when it comes to kale. Regularly including kale in your diet can have profound effects on your health — from glowing skin to a stronger heart.

a) Strengthens Immunity

Kale’s high vitamin C and antioxidant content supports the immune system, helping your body fight off colds, infections, and inflammation.

b) Promotes Heart Health

Kale’s fiber helps lower cholesterol by binding with bile acids in the digestive system, which can reduce the risk of heart disease. Its potassium content also supports healthy blood pressure.

c) Supports Bone Health

Kale is rich in vitamin K, which plays a critical role in bone formation and calcium absorption. Just one cup of kale provides over six times your daily vitamin K requirement.

d) Aids in Weight Loss

Low in calories and high in fiber, kale helps you feel full longer, reducing the urge to snack. It’s a staple ingredient in many American weight-loss diets.

e) Detoxifies the Body

Kale contains sulfur and chlorophyll, both known for their detoxifying properties. They help the liver eliminate toxins, making kale a favorite in cleansing juices and detox smoothies.

f) Improves Eye Health

The carotenoids lutein and zeaxanthin found in kale protect your eyes from harmful UV rays and reduce the risk of age-related macular degeneration.


4. Kale in American Cuisine: From Trendy to Timeless

Kale has become a culinary star across the United States, evolving from a health trend to a permanent pantry staple. Its versatility allows it to shine in a wide range of dishes — raw, cooked, blended, or baked.

Here are some delicious ways Americans are enjoying kale:

a) Kale Smoothies

Blending kale with fruits like banana, apple, or pineapple makes for a refreshing and nutrient-packed breakfast smoothie.

b) Kale Salads

Massage kale leaves with olive oil and lemon juice to soften them. Add quinoa, roasted nuts, avocado, or cranberries for a colorful, hearty salad.

c) Sautéed Kale

Quickly sauté chopped kale with garlic and olive oil for a side dish that complements grilled meats, fish, or tofu.

d) Kale Chips

Toss kale leaves with olive oil and sea salt, then bake them until crispy. A guilt-free, crunchy snack that’s high in fiber and flavor.

e) Kale Soups and Stews

Add kale to soups and stews for extra nutrients and texture. It pairs beautifully with beans, lentils, and root vegetables.

f) Kale Pesto

Replace basil with kale in your pesto recipe. Blend it with olive oil, nuts, Parmesan cheese, and garlic for a rich, earthy sauce.


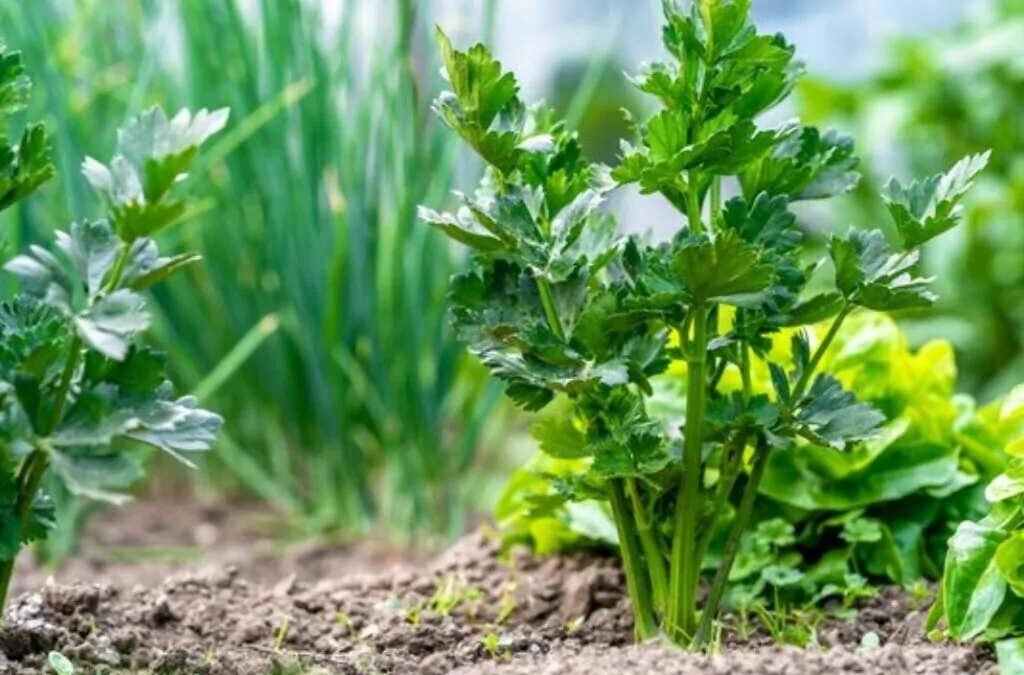
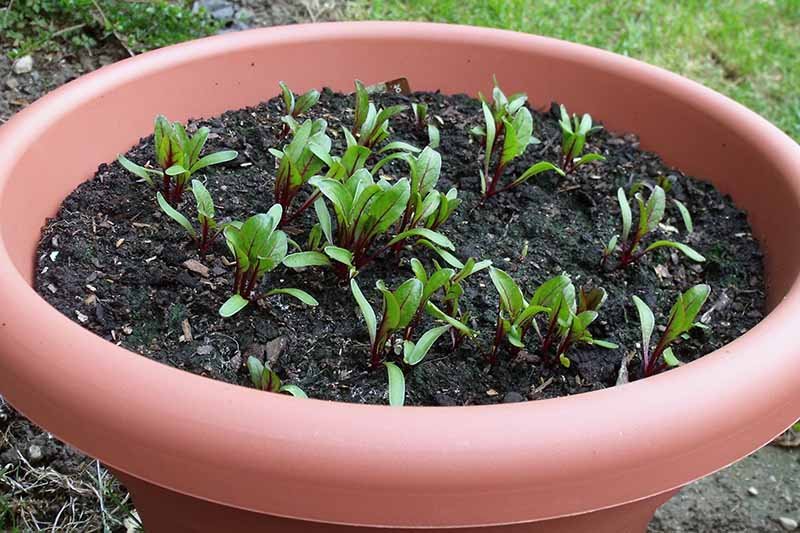
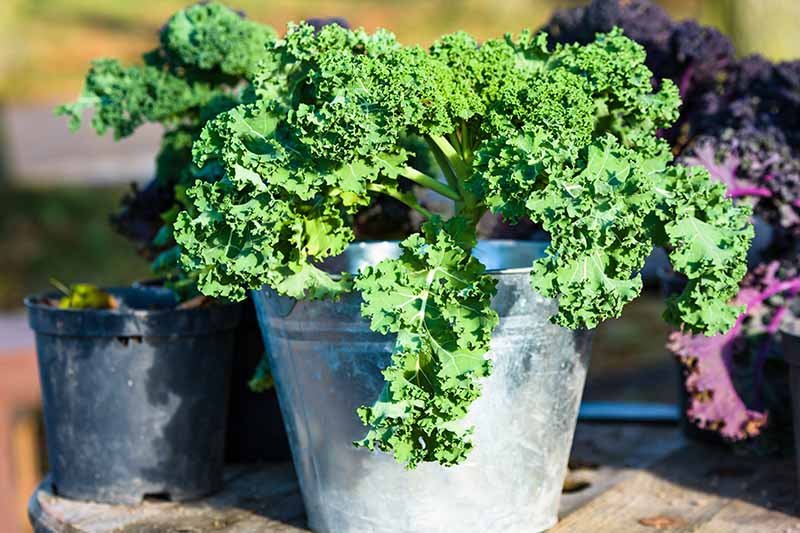
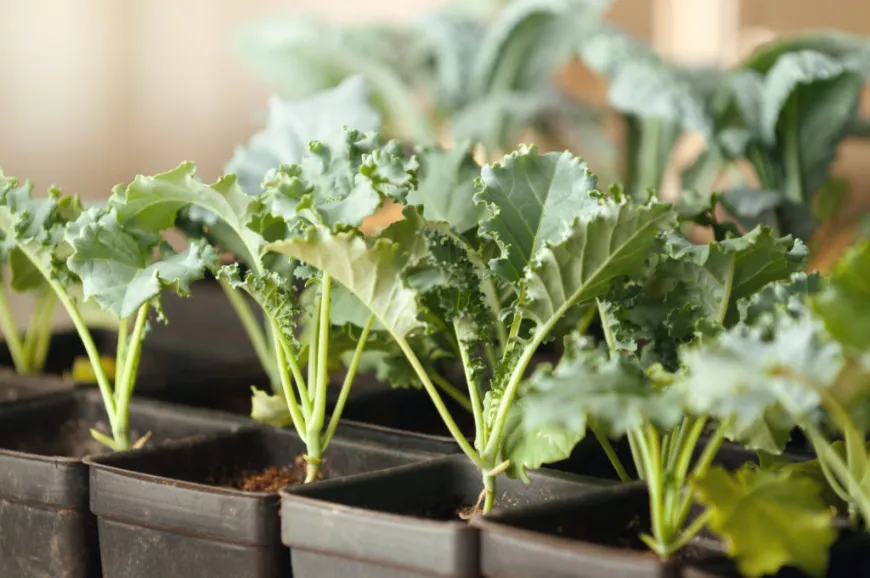
5. Growing Kale at Home

Kale is one of the easiest greens to grow in American gardens, even for beginners. It thrives in cooler climates but can adapt to different conditions.

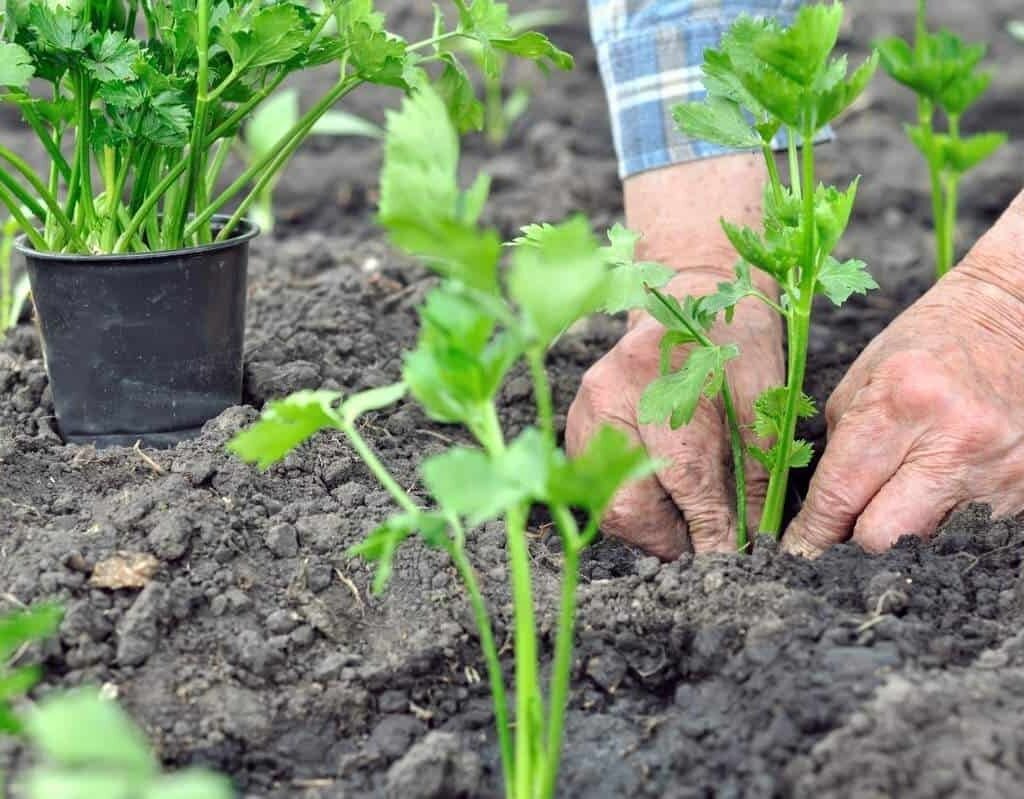
Here’s how to grow kale successfully:

  1. Choose the Right Variety: Curly kale is great for most U.S. regions.
  2. Soil Preparation: Use nutrient-rich, well-draining soil with a slightly acidic pH (6.0–6.8).
  3. Planting: Sow seeds directly in the ground or start indoors and transplant later. Keep spacing around 12–18 inches apart.
  4. Sunlight: Kale needs at least 6 hours of sunlight daily.
  5. Watering: Keep soil moist but not soggy.
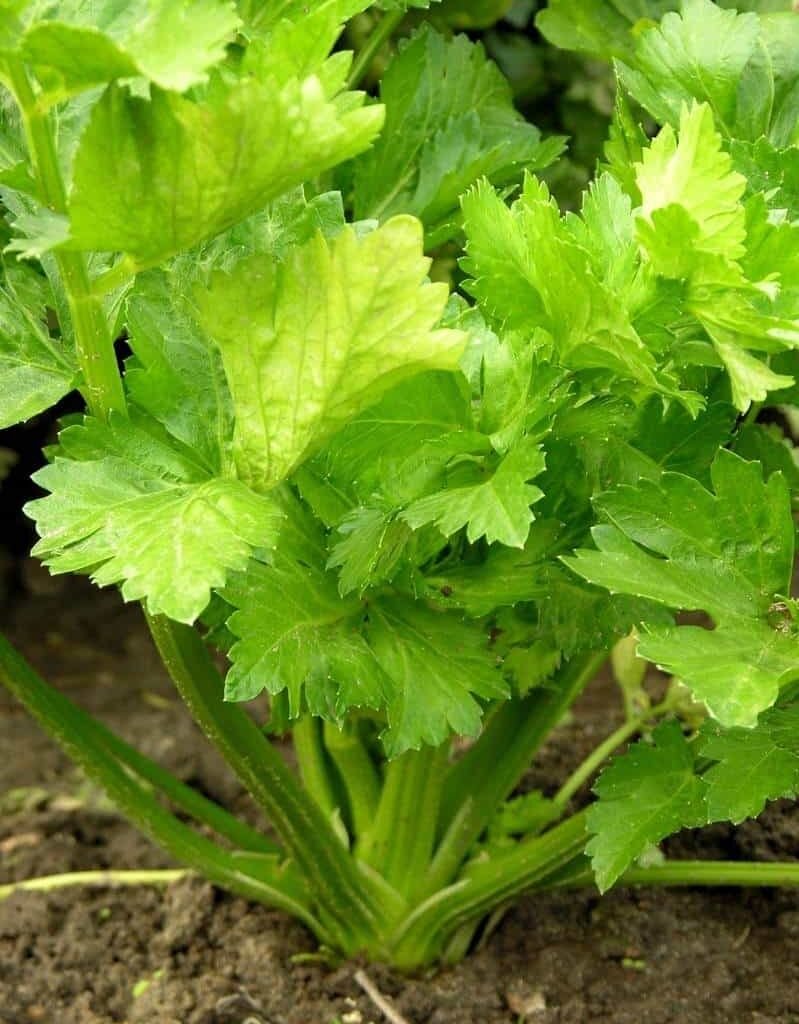
  6. Harvesting: Pick outer leaves when they reach 8–10 inches long. The plant will keep producing new leaves for weeks.

Pro Tip: Kale’s flavor actually improves after a light frost — the cold turns some of its starches into natural sugars, making it sweeter.


6. Storage and Preparation Tips

Fresh kale can last up to a week in the refrigerator if stored correctly.

To keep it fresh:

  • Wrap in a paper towel and store in a plastic or reusable produce bag.
  • Wash only before use to prevent wilting.
  • For long-term storage, blanch and freeze kale in airtight containers.

When preparing kale, always remove the tough stems before cooking or eating raw. This ensures a tender texture and better flavor balance.


7. Kale in American Health Trends

Kale’s rise to fame wasn’t accidental. It became the poster child of America’s health revolution — symbolizing clean eating, plant-based diets, and sustainable living.

Kale in Smoothie Bars and Cafés

Across cities like New York, Los Angeles, and Austin, kale has become a staple in green juices and power bowls. It’s the star of “supergreen” blends, often paired with spinach, apple, and ginger.

Kale in Vegan and Keto Diets

For those following plant-based or low-carb lifestyles, kale offers essential nutrients without excess carbs or fat. It’s also a key ingredient in vegan Caesar salads and keto-friendly wraps.

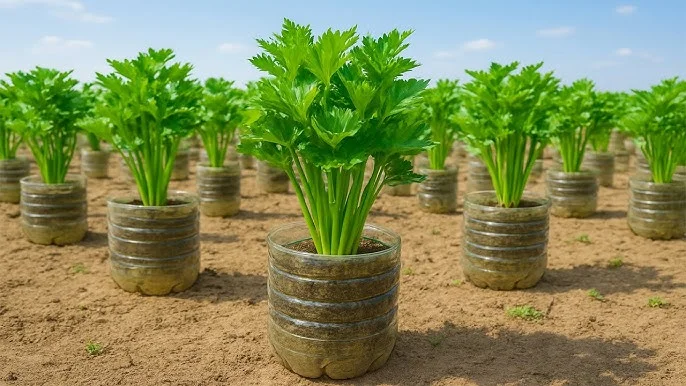
Kale in Farm-to-Table Cooking

With the growth of local farming movements, American chefs now prefer fresh kale sourced directly from local farms, adding authenticity and sustainability to their menus.


8. Fun Facts About Kale

  • Kale has been cultivated for over 2,000 years and was a staple in ancient Roman and Greek diets.
  • During World War II, the U.K. promoted kale as a victory garden crop for its nutrition and easy growth.
  • National Kale Day is celebrated in the U.S. every first Wednesday of October.
  • Celebrities like Gwyneth Paltrow and Jennifer Aniston helped popularize kale smoothies in Hollywood’s wellness culture.

9. Common Kale Myths — Busted

Despite its popularity, kale has its share of myths. Let’s clear a few up:

  • Myth: Kale tastes too bitter.
    Truth: Baby kale and frost-touched kale are mild and slightly sweet. Massaging the leaves or cooking them reduces bitterness.
  • Myth: Kale causes thyroid problems.
    Truth: Only excessive raw kale consumption may affect thyroid function due to goitrogens. Cooking neutralizes these compounds completely.
  • Myth: Kale is hard to digest.
    Truth: When cooked or blended properly, kale is gentle on the stomach and supports healthy digestion due to its fiber content.

10. Why Kale Belongs in Every American Kitchen

Kale isn’t just another food trend — it’s a timeless supergreen that supports modern American lifestyles. It’s nutrient-dense, affordable, locally grown, and endlessly adaptable to different diets.

Whether you’re blending it into smoothies, baking it into chips, or tossing it into salads, kale delivers robust flavor and powerful nutrition. It’s a vegetable that supports health goals — from heart wellness and detoxification to glowing skin and strong bones.

So, next time you’re at the grocery store or farmer’s market, don’t walk past that bunch of curly green leaves. Bring home some kale, and unlock the potential of this ultimate American superfood.

Garlic Greens America’s Next Superfood for Flavor, Freshness, and Full-Body Wellness

Garlic Greens America’s Next Superfood for Flavor, Freshness, and Full-Body Wellness

If you love the taste of garlic but crave something milder and fresher, it’s time to meet garlic greens — the tender, flavorful shoots of young garlic plants. Known for their vibrant color, aromatic flavor, and impressive nutritional profile, garlic greens are fast becoming a favorite among American home cooks, gardeners, and health enthusiasts.

From their immune-boosting benefits to their culinary versatility, these green wonders bring the perfect balance of taste and nutrition to your plate. In this comprehensive 1200-word guide, we’ll explore everything about garlic greens — what they are, their health benefits, how to use them in your kitchen, and even how to grow them in your own backyard.


1. What Are Garlic Greens?

Garlic greens are the tender, leafy shoots that sprout from young garlic bulbs before they mature. Think of them as the “spring onions” of the garlic world — slender, bright green, and bursting with mild garlic flavor.

They’re sometimes confused with garlic scapes (the curly flower stems of hardneck garlic plants), but garlic greens are different. While scapes appear later in the growing season, greens are the first shoots — harvested much earlier, when the garlic plant is still young and tender.

Garlic greens are especially popular in Asian and Mediterranean cuisines, and in recent years, American chefs have embraced them as a trendy farm-to-table ingredient for their color, aroma, and nutrition.


2. Nutritional Value of Garlic Greens

Don’t let their delicate appearance fool you — garlic greens are loaded with nutrients and powerful plant compounds.

Here’s what makes garlic greens a true superfood:

  • Rich in Vitamins A and C: Boosts immunity, supports eye health, and enhances skin glow.
  • Packed with Antioxidants: Fights inflammation and protects against free radicals.
  • Contains Allicin: The same compound found in garlic bulbs that helps lower cholesterol and fight bacteria.
  • High in Fiber: Supports digestion and gut health.
  • Low in Calories: Only around 30 calories per cup, making them ideal for low-calorie diets.
  • Contains Minerals like Iron and Calcium: Essential for energy and bone strength.

In short, garlic greens give you all the health benefits of garlic — but in a fresher, milder, and more versatile form.


3. Health Benefits of Garlic Greens

Garlic greens are not just flavorful — they’re functional. Including them in your diet can support multiple aspects of your health.

a) Boosts Immunity

Rich in vitamin C and natural sulfur compounds, garlic greens strengthen your immune response and help your body fight infections and seasonal colds.

b) Supports Heart Health

The allicin in garlic greens helps relax blood vessels, potentially reducing blood pressure and improving overall heart function.

c) Aids Digestion

The natural fiber in garlic greens promotes a healthy gut and prevents constipation, while the plant’s mild antimicrobial properties support good bacteria in your digestive system.

d) Anti-Inflammatory Power

Garlic greens contain antioxidants that reduce inflammation, benefiting your joints, skin, and overall cellular health.

e) Helps Detoxify the Body

Their chlorophyll-rich leaves aid in flushing toxins and purifying the liver — making them a go-to for clean eating plans and detox diets.


4. Garlic Greens vs. Garlic Scapes vs. Garlic Bulbs

It’s easy to mix up the different parts of the garlic plant, so here’s a quick comparison:

FeatureGarlic GreensGarlic ScapesGarlic Bulb
Stage of GrowthYoung shootsFlower stemsMature root
FlavorMild and freshPungent and grassyStrong and spicy
TextureTender and leafyFirm and curlyFirm cloves
Best ForSalads, stir-fries, soupsPestos, grillingRoasting, seasoning
AvailabilitySpringLate spring/early summerLate summer/fall

Garlic greens are ideal for dishes that call for subtle garlic flavor without overpowering the main ingredients.


5. Culinary Uses: How to Cook with Garlic Greens

One of the best things about garlic greens is how versatile they are in American cooking. Their mild, garlicky flavor makes them suitable for a wide range of dishes — from stir-fries to smoothies!

Here are several delicious ways to use garlic greens in your everyday meals:

a) Sautéed Garlic Greens

  • Heat olive oil in a skillet.
  • Add chopped garlic greens and sauté for 3–4 minutes until tender.
  • Season with salt, pepper, and a squeeze of lemon.

Perfect as a side dish for grilled fish, chicken, or tofu.

b) Garlic Green Omelet

Whisk eggs, add chopped garlic greens, salt, and pepper. Cook for a light, flavorful breakfast that boosts your morning energy.

c) Garlic Green Pesto

Blend garlic greens with olive oil, Parmesan cheese, walnuts, and lemon juice for a vibrant twist on classic pesto. Spread it over toast, pasta, or roasted vegetables.

d) Garlic Green Soup

Add a handful of garlic greens to soups for extra depth and aroma. They blend beautifully into creamy potato soups or clear broths.

e) Salad Booster

Chop raw garlic greens and toss them into salads or coleslaw for a mild garlicky crunch that complements vinaigrettes and citrus dressings.

f) Smoothie Upgrade

Add a few garlic greens to your green smoothie — combined with spinach, apple, and cucumber — for a detoxifying, nutrient-rich drink.


6. Growing Garlic Greens at Home

The great news? You don’t need a garden to grow garlic greens — they thrive indoors, in containers, or even in your kitchen window.

Here’s how to grow garlic greens easily at home:

  1. Choose Garlic Cloves: Use fresh, organic cloves (avoid chemically treated ones).
  2. Planting:
    • Fill a pot with moist, well-draining soil.
    • Plant cloves pointy side up, about 1 inch deep and 2 inches apart.
  3. Sunlight: Place in a sunny spot (at least 6 hours of sunlight daily).
  4. Watering: Keep soil evenly moist, not soggy.
  5. Harvest: In about 2–3 weeks, you’ll see bright green shoots. Snip them when they’re 6–8 inches tall.

You can regrow new greens several times from the same cloves, making this one of the most sustainable home crops.

Bonus Tip: Garlic greens can also be grown in water — simply place garlic cloves in a shallow dish of water and watch them sprout!


7. Storage and Freshness Tips

To keep garlic greens fresh:

  • Refrigerate: Wrap them in a damp paper towel and store inside a perforated plastic bag. They’ll stay fresh for up to a week.
  • Freeze: Chop and freeze them in olive oil in ice cube trays for quick cooking use.
  • Drying Option: Dehydrate the greens and grind them into powder for a homemade “garlic green seasoning.”

8. Where to Find Garlic Greens in the U.S.

Garlic greens are becoming more available across the country as Americans embrace farm-fresh, local ingredients.

You can find them at:

  • Farmers’ Markets: Especially in springtime.
  • Specialty Grocery Stores: Whole Foods and Sprouts often stock them in the fresh produce section.
  • Asian Markets: Garlic greens are a staple in many Asian cuisines.
  • Community Supported Agriculture (CSA) Boxes: Many local farms include garlic greens in seasonal produce deliveries.

If you can’t find them locally, growing your own at home is the next best option — fresh, organic, and always within reach.


9. Garlic Greens in Modern American Cuisine

Garlic greens are now making their way into mainstream American dishes. Chefs are using them as a garnish, flavor base, and healthy ingredient substitute for garlic cloves.

Some creative uses include:

  • Garlic Green Aioli: Blended into mayonnaise for sandwiches and seafood.
  • Green Garlic Pizza: Used as a topping with ricotta and mushrooms.
  • Garlic Green Risotto: Stirred into creamy rice dishes for mild garlic notes.
  • Spring Pastas: Combined with peas, asparagus, and lemon for a light seasonal meal.

They not only add flavor but also elevate the presentation — making any dish look gourmet with their fresh green hue.


10. Why Garlic Greens Belong in Every American Kitchen

Garlic greens embody everything Americans love about modern eating: clean, healthy, flavorful, and sustainable. They’re easy to cook, simple to grow, and endlessly versatile — from smoothies to soups, omelets to pestos.

These young shoots combine the bold essence of garlic with the freshness of spring vegetables, giving you the best of both worlds. Whether you’re boosting your immune system, experimenting with farm-to-table recipes, or just adding color to your plate, garlic greens are a must-try ingredient this season.

So next time you spot these bright, aromatic greens at your local market — or in your own backyard — bring them to your kitchen. One handful of garlic greens can transform an ordinary dish into something extraordinary.

Celery Sticks The Ultimate American Snack for Healthy Living and Fresh Flavor

Celery Sticks The Ultimate American Snack for Healthy Living and Fresh Flavor

In the world of health-conscious eating, few foods are as simple, crisp, and refreshing as celery sticks. Whether served alongside peanut butter, added to a salad, or paired with buffalo wings, celery has earned its place in American kitchens as both a crunchy snack and a versatile cooking staple.

Beyond its reputation as a diet-friendly veggie, celery offers a wealth of nutritional benefits and culinary potential. From heart health and hydration to creative recipes and growing tips, this comprehensive guide explores everything you need to know about celery sticks — the humble yet mighty green that’s taking center stage in modern American diets.


1. What Are Celery Sticks?

Celery sticks are the tender, fibrous stalks of the celery plant (Apium graveolens), known for their crisp texture and mild, slightly peppery flavor. In the U.S., celery is a grocery staple, often found pre-cut into sticks and sold as a ready-to-eat snack.

Each celery stalk naturally separates into long, ribbed sections — making them perfect for dipping, stuffing, or eating raw. Celery has been cultivated for centuries, but its popularity in America skyrocketed in the 20th century as consumers sought low-calorie, high-water foods that support a healthy lifestyle.


2. Nutritional Powerhouse: The Health Benefits of Celery Sticks

Don’t be fooled by celery’s light appearance — these green stalks are full of essential nutrients and antioxidants.

Here’s what makes celery sticks a super-snack:

  • Low in Calories, High in Fiber: One cup of chopped celery contains just 16 calories and nearly 2 grams of dietary fiber. It’s the perfect guilt-free munchie.
  • Hydration Hero: Celery is over 95% water, helping you stay hydrated and refreshed throughout the day.
  • Rich in Antioxidants: Contains vitamin C, flavonoids, and beta carotene — all of which fight inflammation and protect against oxidative stress.
  • Supports Digestion: Natural fiber promotes healthy gut movement and prevents bloating.
  • Heart-Healthy Compounds: Celery’s phthalides help relax artery walls, potentially lowering blood pressure.
  • Alkaline Properties: Helps balance body pH and reduce acidity.
  • Aids in Weight Management: Its high water and fiber content increase fullness without adding calories.

These benefits make celery sticks a top choice for Americans following balanced diets such as Whole30, keto, and low-sodium meal plans.


3. The History of Celery in America

Celery was first introduced to the United States by European settlers in the 1600s. By the late 1800s, it had become a fashionable delicacy at dinner parties and in restaurant dishes. In the 20th century, California’s fertile valleys turned into celery-growing hubs, and the vegetable became a national favorite.

Today, the U.S. produces over 1 billion pounds of celery annually, with California and Michigan leading the charge. Its crisp texture and versatility make it a must-have ingredient in classic American cuisine — from Thanksgiving stuffing to Bloody Mary garnishes.


4. Ways to Enjoy Celery Sticks

Celery sticks are one of the most flexible snacks you can have in your fridge. They can be eaten raw, cooked, or even juiced. Here are some fun, tasty, and creative ways to use them:

a) Classic Snacks

  • Celery with Peanut Butter: The quintessential American snack! Add a sprinkle of raisins to make “Ants on a Log,” a kid-friendly favorite.
  • Celery and Cream Cheese: Perfect for quick appetizers — add paprika or chopped herbs for extra flavor.
  • Hummus Dippers: Celery sticks pair beautifully with hummus for a fiber- and protein-rich bite.

b) In Soups and Stews

Celery is a staple in the “holy trinity” of cooking — along with onions and carrots. It adds depth, aroma, and a subtle sweetness to soups, stews, and sauces.

c) Juices and Smoothies

Celery juice has become a wellness trend in America. It’s known for cleansing and hydrating properties. Combine it with cucumber, lemon, and apple for a refreshing green drink.

d) Stuffed Celery Appetizers

Fill celery sticks with tuna salad, chicken salad, or pimento cheese for easy party bites.

e) Roasted or Stir-Fried

Cooked celery has a mild flavor and soft texture. Roast with olive oil, salt, and garlic or toss into a vegetable stir-fry for a new twist.


5. Easy Celery Stick Recipes for Everyday Eating

If you’re tired of the same old celery and dip routine, try these easy and delicious recipes that bring out the best in this crunchy green veggie.

a) Buffalo Celery Bites

Ingredients:

  • Celery sticks (cut into 3-inch pieces)
  • ½ cup shredded rotisserie chicken
  • 2 tbsp buffalo sauce
  • 1 tbsp ranch dressing
  • Crumbled blue cheese (optional)

Instructions:

  1. Mix chicken, buffalo sauce, and ranch.
  2. Spoon the mixture into celery sticks.
  3. Top with blue cheese and serve chilled.

Perfect for game days or healthy snacks during football season!

b) Celery Apple Detox Smoothie

Ingredients:

  • 2 celery sticks
  • 1 green apple
  • ½ cucumber
  • 1 cup spinach
  • ½ lemon (juiced)
  • 1 cup cold water

Blend until smooth. This nutrient-packed drink is great for mornings or post-workout hydration.

c) Creamy Celery Soup

Ingredients:

  • 2 tbsp olive oil
  • 1 onion (chopped)
  • 4 cups celery (chopped)
  • 3 cups vegetable broth
  • 1 potato (cubed)
  • Salt and pepper to taste

Instructions:

  1. Sauté onion and celery in olive oil until soft.
  2. Add broth and potato; simmer for 20 minutes.
  3. Blend until creamy and season to taste.

Serve warm with crusty bread — a cozy, low-calorie comfort food.


6. Celery Sticks for Weight Loss and Fitness

Celery sticks are one of the most popular low-calorie snacks among Americans trying to lose weight or stay fit. Here’s why:

  • Low Calorie Density: You can eat a generous portion without consuming many calories.
  • Natural Diuretic: Helps reduce water retention and bloating.
  • Pre-Workout Fuel: Provides hydration and light carbohydrates.
  • Post-Workout Snack: Pair with hummus or nut butter for protein recovery.

Many dietitians recommend celery sticks as part of a balanced snack plan — especially for those following calorie-controlled or plant-based diets.


7. How to Store and Keep Celery Sticks Fresh

Nothing’s worse than limp celery! To keep your sticks fresh and crisp, follow these storage hacks:

  • In the Fridge: Wrap celery in aluminum foil and store in the crisper drawer. It can last up to 3 weeks.
  • In Water: Cut celery into sticks, place them in a jar of cold water, and refrigerate. Change the water every 2–3 days.
  • Freezing Tip: Blanch celery pieces in boiling water for 3 minutes, then freeze for later use in soups and stews.

These tips keep your celery crunchy and ready to eat whenever hunger strikes.


8. Growing Your Own Celery at Home

If you love gardening, growing celery can be a rewarding experience. It thrives in mild climates and moist soil — ideal for American home gardens from California to the Carolinas.

Steps to Grow Celery:

  1. Start Indoors: Begin seeds 10–12 weeks before the last frost.
  2. Transplant Outdoors: Move seedlings to garden beds or large containers in full sunlight.
  3. Keep Soil Moist: Celery needs consistent watering to stay tender.
  4. Harvest Time: Cut stalks when they’re 12–18 inches tall — usually after 3–4 months.

Bonus Tip: Regrow celery from store-bought stalks! Place the base in a bowl of water, and new shoots will sprout within days.


9. Fun Facts About Celery Sticks

  • Celery was once considered a luxury food in 19th-century America and was often displayed in glass “celery vases” on dining tables.
  • The phrase “negative-calorie food” often refers to celery because it supposedly takes more energy to chew and digest than the calories it provides.
  • Celery leaves and seeds are edible too — they’re often used to make celery salt, a key ingredient in the classic American Bloody Mary cocktail.

10. Why Celery Sticks Belong in Every American Kitchen

Celery sticks are more than just a healthy snack — they’re a culinary chameleon that fits effortlessly into any diet or lifestyle. From classic American snacks to gourmet recipes, celery brings crunch, freshness, and nutrition to the table.

Whether you’re meal-prepping for the week, making after-school snacks for kids, or whipping up a party platter, celery sticks are a budget-friendly, nutrient-rich choice that complements almost any dish.

So, the next time you’re at the grocery store, grab a bunch of fresh celery. Slice it, crunch it, dip it — and discover why this timeless American favorite continues to be the go-to veggie for healthy, happy living.

Baby Beetroot The Superfood Gem Every American Kitchen Needs This Season

Baby Beetroot The Superfood Gem Every American Kitchen Needs This Season

When it comes to nutrient-packed, flavor-rich vegetables, few can compete with the mighty baby beetroot. These small, vibrant root vegetables are more than just a colorful addition to your plate — they’re loaded with vitamins, minerals, and antioxidants that boost your health from head to toe. Loved by chefs, nutritionists, and home cooks alike across the United States, baby beets are quickly becoming a farm-to-table favorite in American households.

In this detailed guide, we’ll explore everything you need to know about baby beetroot — from its nutritional power and health benefits to cooking tips, recipes, and even how to grow it at home. Whether you’re a wellness enthusiast or just someone looking to add more color and flavor to your meals, this article will show you why baby beetroot deserves a permanent spot in your kitchen.


1. What Is Baby Beetroot?

Baby beetroot is the young, tender version of the common beet (Beta vulgaris). These small roots are harvested early — typically when they’re about the size of a golf ball — and are prized for their mild, sweet flavor and soft texture. Unlike mature beets, which can sometimes taste earthy or bitter, baby beets offer a naturally sweet, delicate flavor that pairs beautifully with both savory and sweet dishes.

Baby beetroot typically comes in shades of deep red, golden yellow, or even striped varieties like Chioggia, which displays stunning pink-and-white rings when sliced.

Across America, baby beetroot is especially popular in health-conscious kitchens and modern restaurants, where it’s used in everything from gourmet salads to colorful smoothies.


2. Nutrition and Health Benefits of Baby Beetroot

Baby beets may be small, but they pack an incredible nutritional punch. They’re low in calories, rich in essential vitamins, and filled with plant compounds that promote overall wellness.

Here’s what makes baby beetroot a true superfood:

  • Rich in Folate (Vitamin B9): Essential for red blood cell formation and cell growth.
  • High in Fiber: Promotes healthy digestion and gut health.
  • Loaded with Antioxidants: The deep red pigment (betacyanin) fights inflammation and oxidative stress.
  • Supports Heart Health: Contains nitrates that can help lower blood pressure naturally.
  • Improves Athletic Performance: Studies show beetroot juice boosts stamina by enhancing oxygen use.
  • Promotes Detoxification: Beets aid liver function and help flush toxins from the body.
  • Supports Brain Health: Beet nitrates improve blood flow to the brain, enhancing focus and memory.

A one-cup serving of cooked baby beets contains only about 60 calories, making them a smart, nutrient-dense choice for anyone looking to maintain a healthy diet.


3. Baby Beetroot vs. Regular Beetroot

While both varieties share similar nutrients, baby beetroot offers a few distinct advantages:

FeatureBaby BeetrootRegular Beetroot
SizeSmall and tenderLarge and firm
FlavorMild, sweet, delicateEarthier and stronger
Cooking TimeShorter (10–15 minutes)Longer (30–45 minutes)
TextureSmooth and butteryDense and fibrous
Best ForSalads, roasting, picklingSoups, baking, juicing

Baby beets are perfect for quick-cook recipes, making them ideal for busy American households that still want to eat fresh, healthy meals without spending hours in the kitchen.


4. How to Prepare and Cook Baby Beetroot

Preparing baby beetroot is easy, and their versatility allows for a variety of cooking methods. Here are some popular techniques:

a) Boiling

  1. Wash thoroughly without cutting off the root or stem — this prevents color bleeding.
  2. Boil in salted water for 10–15 minutes until tender.
  3. Cool slightly and rub off the skin with a paper towel.

Tip: Add a splash of vinegar or lemon juice to the boiling water to help retain color.

b) Roasting

Roasting enhances the natural sweetness of baby beets.

  • Preheat oven to 400°F (200°C).
  • Toss beets in olive oil, salt, and pepper.
  • Roast for 20–25 minutes until tender.
    Serve them warm over salads, or as a vibrant side dish with grilled meats or tofu.

c) Steaming

A great option to retain nutrients. Steam whole baby beets for 10–12 minutes until fork-tender.

d) Raw

Thinly slice or grate baby beetroot for salads or slaws — their sweet crunch adds both flavor and color.

e) Pickling

Quick-pickled baby beets make a tangy, crunchy snack. Just simmer vinegar, sugar, and spices, then pour over boiled beets and refrigerate overnight.


5. Delicious Baby Beetroot Recipes

Want to add baby beetroot to your meal plan? Here are three irresistible American-style recipes:

a) Roasted Baby Beet and Goat Cheese Salad

Ingredients:

  • 1 lb baby beets (red or golden)
  • 2 tbsp olive oil
  • 1 cup arugula
  • ¼ cup crumbled goat cheese
  • 2 tbsp chopped walnuts
  • 1 tbsp balsamic glaze

Instructions:

  1. Roast the beets until tender, peel, and slice.
  2. Arrange arugula on a plate, add beets, goat cheese, and walnuts.
  3. Drizzle with olive oil and balsamic glaze.

This elegant salad is a restaurant-quality dish that’s perfect for fall dinners or weekend brunches.

b) Baby Beet Smoothie

Ingredients:

  • 2 small boiled baby beets
  • 1 banana
  • 1 cup almond milk
  • 1 tbsp honey
  • ½ tsp cinnamon

Blend until smooth. This smoothie is nutrient-dense, naturally sweet, and great for post-workout recovery.

c) Baby Beet and Quinoa Bowl

Ingredients:

  • 1 cup cooked quinoa
  • 6–8 roasted baby beets (halved)
  • 1 avocado (sliced)
  • ¼ cup feta cheese
  • Lemon-tahini dressing

Combine everything in a bowl for a wholesome, protein-packed lunch.


6. Growing Baby Beetroot at Home

If you enjoy gardening, baby beetroot is one of the easiest root vegetables to grow in your backyard or container garden.

Here’s how to get started:

  1. Choose a sunny spot: Beets love full sunlight (at least 6 hours daily).
  2. Soil preparation: Use well-draining soil rich in organic matter.
  3. Sowing seeds: Plant beet seeds ½ inch deep and 1 inch apart.
  4. Water regularly: Keep the soil evenly moist but not soggy.
  5. Thin seedlings: Once they sprout, thin them to 2 inches apart for proper root growth.
  6. Harvest time: Baby beets are ready in about 40–50 days, when the roots are 1–2 inches wide.

Bonus: The leafy tops of baby beets are also edible! Sauté them with garlic and olive oil for a nutritious side dish.


7. Storing Baby Beetroot

Proper storage keeps baby beets fresh for weeks.

  • Refrigerator: Trim the greens (leave 1 inch of the stem) and store the roots in a perforated plastic bag in the crisper drawer. They last up to 2 weeks.
  • Freezing: Cook, peel, and slice before freezing in airtight containers.
  • Pickling: Preserves flavor and extends shelf life for months.

Pro tip: Always store greens separately — they draw moisture from the roots if left attached.


8. Where to Buy Baby Beetroot in the U.S.

Baby beets are widely available across America, especially during spring and fall. You can find them at:

  • Farmers’ Markets: Fresh, organic baby beets with greens still attached.
  • Grocery Stores: Chains like Whole Foods, Trader Joe’s, and Sprouts often stock them in the produce aisle.
  • Community Supported Agriculture (CSA) Programs: Local farms deliver seasonal produce, including baby beets, right to your doorstep.
  • Online Grocery Services: FreshDirect and Misfits Market offer farm-fresh baby beets shipped nationwide.

9. Fun and Creative Ways to Use Baby Beetroot

Beyond cooking, baby beetroot can also play a creative role in your lifestyle:

  • Natural Food Coloring: Use beet juice to color frostings, pasta dough, or drinks.
  • Beet Chips: Slice thinly, season, and bake until crispy for a healthy snack.
  • Smoothie Cubes: Freeze beet puree in ice cube trays and pop one into your morning smoothie.
  • DIY Beetroot Lip Stain: Mix beet juice with coconut oil for a natural tint.

These fun hacks show just how versatile this tiny root vegetable can be.


10. Why Baby Beetroot Belongs in Every American Diet

Baby beetroot’s appeal goes far beyond its beautiful color. It’s a superfood that supports heart health, aids digestion, boosts energy, and enhances your skin’s natural glow. Its mild flavor makes it approachable for picky eaters, while its quick cooking time suits busy American lifestyles.

Whether you’re roasting them for a salad, blending them into a smoothie, or growing them in your backyard, baby beets deliver a delicious dose of health in every bite.

So next time you’re at your local market, skip the ordinary and reach for a bunch of fresh baby beets — small roots with a big nutritional impact.

Mini Pumpkins The Ultimate Fall Decor and Recipe Guide for Every American Home

Mini Pumpkins The Ultimate Fall Decor and Recipe Guide for Every American Home

As the crisp air of autumn sweeps across the United States, one charming little symbol of the season begins popping up everywhere — the mini pumpkin. These pint-sized versions of the classic orange gourd are more than just adorable; they’re versatile, affordable, and bursting with seasonal spirit. Whether you’re decorating your home, crafting fall centerpieces, or experimenting in the kitchen, mini pumpkins are the ultimate multitaskers of the harvest season.

In this guide, we’ll explore everything you need to know about mini pumpkins — from creative décor ideas and seasonal recipes to expert storage tips. By the end, you’ll see why these tiny treasures deserve a spot in every American household this fall.


1. What Are Mini Pumpkins?

Mini pumpkins, also known as “Jack Be Littles” or “Baby Boos,” are small ornamental pumpkins typically measuring 2–4 inches in diameter. While many people assume they’re purely decorative, several mini pumpkin varieties are perfectly edible and packed with nutrients.

Popular types include:

  • Jack Be Little: Bright orange, classic pumpkin shape, great for both décor and cooking.
  • Baby Boo: White and ghostly, these are ideal for Halloween themes and elegant tablescapes.
  • Wee-B-Little: A slightly larger mini pumpkin that’s smooth-skinned and excellent for baking.
  • Munchkin: Richly orange and ribbed — perfect for kids’ crafts or rustic displays.

These pumpkins are often grown in American farms across states like Illinois, California, and Pennsylvania — regions known for their abundant fall harvests.


2. Mini Pumpkins for Fall Décor: Big Impact in a Small Package

When it comes to home décor, mini pumpkins are the easiest way to capture that cozy, autumnal charm without spending much. Their compact size and variety of colors (orange, white, green, even striped) make them perfect for mixing and matching.

Here are some creative decorating ideas:

Table Centerpieces
Cluster a mix of orange and white mini pumpkins down the center of your dining table. Add eucalyptus leaves, pinecones, and LED candles for a warm, farmhouse-style look.

Mantel Magic
Line your fireplace mantel with Baby Boos and string fairy lights across them. Pair with fall leaves or acorns for a Pinterest-worthy aesthetic.

Porch Displays
Arrange mini pumpkins on your front steps with hay bales and mums. It instantly boosts curb appeal and gives a festive first impression to guests.

Pumpkin Candle Holders
Cut small circles into the tops of mini pumpkins and insert tea lights. These natural candle holders give your fall evenings a beautiful, flickering glow.

Rustic Bowls & Trays
Fill a wooden bowl with mini pumpkins, cinnamon sticks, and dried oranges for a quick, fragrant fall display.

Tip: Spray a light coat of clear varnish on decorative pumpkins to help them last longer through the season.


3. Edible Mini Pumpkins: Delicious Fall Recipes

Not all mini pumpkins are just for looks — some are tasty too! The Jack Be Little and Wee-B-Little varieties are edible and make the perfect vessels for autumn-inspired dishes.

Here are a few crowd-pleasing recipes:

a) Roasted Mini Pumpkins with Maple Butter

Ingredients:

  • 4 edible mini pumpkins
  • 2 tbsp butter
  • 1 tbsp maple syrup
  • Salt, pepper, and a pinch of cinnamon

Instructions:

  1. Preheat oven to 375°F (190°C).
  2. Cut off pumpkin tops and scoop out seeds.
  3. Place pumpkins on a baking sheet.
  4. Melt butter with maple syrup, then brush the mixture inside each pumpkin.
  5. Roast for 25–30 minutes until tender.
  6. Sprinkle with cinnamon before serving.

These make a beautiful side dish or a unique addition to Thanksgiving dinner.

b) Mini Pumpkin Soup Bowls

Turn your pumpkins into edible bowls!

  1. Hollow out a few Jack Be Littles.
  2. Fill each with creamy butternut squash soup or pumpkin bisque.
  3. Garnish with croutons and herbs.

It’s a restaurant-worthy presentation right in your home kitchen.

c) Sweet Mini Pumpkin Pies

Bake individual pumpkin pies inside hollowed-out pumpkins — simply fill them with spiced pumpkin custard and bake until set. These mini desserts are perfect for Halloween parties or fall brunches.


4. Kid-Friendly Pumpkin Fun

Mini pumpkins are fantastic for kids’ fall crafts because they’re lightweight and easy to handle. Here are a few family-friendly ideas:

  • Painted Pumpkins: Instead of carving, paint fun faces using acrylics or markers. It’s safer and lasts longer!
  • Pumpkin Tic-Tac-Toe: Paint five orange pumpkins and five white ones, then draw a game board on a piece of cardboard.
  • Nature Faces: Use leaves, twigs, and seeds to decorate pumpkin “faces” for an eco-friendly art project.
  • Glitter Pumpkins: Apply glue and sprinkle glitter for a sparkly Halloween twist.

These crafts not only bring families together but also keep kids entertained during chilly fall afternoons.


5. How to Grow Mini Pumpkins at Home

Love gardening? Mini pumpkins are surprisingly easy to grow in American backyards or even large containers on patios.

Here’s how:

  1. Choose the right seeds: Opt for small-variety seeds like Jack Be Little or Munchkin.
  2. Planting time: Sow seeds outdoors after the last frost (usually around late May or early June).
  3. Soil & sunlight: Mini pumpkins need full sunlight (at least 6 hours daily) and well-drained soil.
  4. Water regularly: Keep the soil moist but not soggy.
  5. Pollination: Bees usually handle this, but if growing indoors, gently transfer pollen between flowers using a small brush.
  6. Harvest time: Pumpkins are ready in about 90–100 days when they turn fully colored and firm.

Store harvested mini pumpkins in a cool, dry area to make them last for months.


6. Seasonal Shopping: Where to Buy Mini Pumpkins in the U.S.

In America, mini pumpkins are everywhere during the fall season. You can find them at:

  • Local Farmers’ Markets: Fresh, organic, and often cheaper than supermarket options.
  • Pumpkin Patches: Great for a family day out and photo ops.
  • Grocery Stores: Chains like Trader Joe’s, Whole Foods, and Walmart offer various decorative and edible minis.
  • Online Retailers: Amazon, Etsy, and local farm delivery services sell mini pumpkins in bulk for décor or events.

Pro tip: If you’re hosting a fall wedding, buying mini pumpkins in bulk can be a budget-friendly way to create stunning centerpieces or wedding favors.


7. Storing and Preserving Mini Pumpkins

If you plan to keep your pumpkins throughout the fall season, proper storage is key.

For decorative use:

  • Keep them in a cool, dry area (ideally 50–55°F).
  • Avoid stacking to prevent bruising.
  • Wipe with a mild bleach solution to prevent mold.

For edible pumpkins:

  • Store in a cool pantry or refrigerator.
  • Use within 2–3 months for best flavor.
  • Cooked mini pumpkin puree can be frozen for up to six months — perfect for off-season baking!

8. Eco-Friendly Ways to Use Mini Pumpkins After Fall

When the season ends, don’t toss your pumpkins in the trash. Here are sustainable ways to reuse them:

  • Compost them: Pumpkins decompose quickly and enrich garden soil.
  • Feed wildlife: Squirrels and birds love pumpkin flesh (remove any candles or paint first).
  • Make pumpkin puree: Even leftover decorative minis can be roasted and blended into soup or pie fillings.

This helps reduce waste and honors the true spirit of the harvest season.


Conclusion: Why Mini Pumpkins Are a Must-Have This Fall

Mini pumpkins are small but mighty — they’re decorative, delicious, and deeply symbolic of the cozy fall season. From DIY crafts and festive décor to creative recipes and sustainable reuse, these tiny gourds bring endless charm to American homes.

Whether you’re setting up a rustic Thanksgiving table, crafting with kids, or experimenting with fall flavors, mini pumpkins make every activity feel special. So next time you’re at a local farmers’ market or grocery store, grab a handful of these pint-sized pumpkins — because big autumn vibes come in small packages.

Lettuce Mixes The Fresh, Flavorful Trend Redefining Salads in American Kitchens

Lettuce Mixes The Fresh, Flavorful Trend Redefining Salads in American Kitchens

In recent years, lettuce mixes have transformed from a simple salad base into a vibrant culinary staple in American households, restaurants, and farmers’ markets. Gone are the days of boring iceberg lettuce — today’s lettuce blends bring color, texture, and nutrition to every bowl. Whether you’re crafting a hearty lunch, a gourmet side dish, or a quick grab-and-go meal, mixed lettuces make healthy eating effortless and exciting.

From crisp romaine and tender butterhead to spicy arugula and red oakleaf, mixed greens offer variety in taste and nutrients that single-type salads simply can’t match. They’re easy to grow, even easier to prepare, and perfect for the modern American lifestyle focused on freshness, flavor, and convenience.

In this detailed guide, we’ll explore everything about lettuce mixes — their varieties, nutritional benefits, growing tips, and creative ways to use them in your everyday meals.


1. What Are Lettuce Mixes?

Lettuce mixes, often labeled as “spring mix,” “mesclun,” or “baby greens,” are blends of several lettuce varieties (and sometimes herbs or edible greens). They’re designed to deliver a balance of flavors (sweet, bitter, spicy) and textures (crisp, tender, crunchy) in one ready-to-eat package.

In American grocery stores, popular blends include combinations of:

  • Romaine – crisp and slightly sweet
  • Butterhead (Boston or Bibb) – soft and buttery
  • Oakleaf – delicate and mild
  • Lollo Rosso – curly and slightly bitter
  • Red Leaf Lettuce – colorful and tender
  • Arugula – peppery and bold
  • Frisée or Endive – slightly bitter with curly edges

These blends cater to diverse palates and are ideal for Americans who want restaurant-quality salads at home without the prep time.


2. The Popularity of Lettuce Mixes in the U.S.

In the U.S., lettuce mixes have become a $3+ billion industry, driven by consumer demand for healthier, convenient, and visually appealing foods. According to the USDA, leafy greens are among the most purchased vegetables nationwide, especially pre-washed bagged mixes available in supermarkets.

The reasons for their growing popularity include:

  • Convenience: Pre-washed and ready to serve.
  • Health Focus: Low in calories but rich in vitamins, fiber, and antioxidants.
  • Visual Appeal: Bright colors and varied textures make salads more appetizing.
  • Flavor Diversity: Combines mild, bitter, and spicy leaves for balanced taste.
  • Sustainability: Often grown locally and harvested young, reducing environmental impact.

For busy Americans balancing work and wellness, lettuce mixes are the perfect shortcut to nutritious meals.


3. The Health and Nutritional Benefits of Lettuce Mixes

Each variety in a lettuce mix contributes its own unique nutrients, creating a super-blend of vitamins and minerals that supports a healthy diet.

Here’s why adding lettuce mixes to your meals is one of the easiest ways to boost your wellness:

NutrientHealth BenefitBest Lettuce Source
Vitamin ASupports eye health and immune functionRomaine, Red Leaf
Vitamin KAids bone strength and blood clottingGreen Leaf, Butterhead
FolateEssential for cell growth and metabolismBibb, Romaine
Vitamin CPromotes collagen production and immunityArugula, Frisée
FiberImproves digestion and gut healthAll types
AntioxidantsProtect cells from damageRed and dark green varieties

Because most lettuce mixes are low in calories and high in water content, they’re ideal for weight management, hydration, and heart health.


4. Growing Lettuce Mixes in Your Home Garden

Lettuce mixes aren’t just a grocery store convenience — they’re also one of the easiest crops to grow in American home gardens. Whether you have a backyard plot, balcony planters, or small containers, lettuce thrives in cool weather and grows quickly.

Step-by-Step Guide to Growing Lettuce Mixes

1. Choose Your Seeds:
Opt for pre-blended “mesclun mix” seed packets or combine your own favorites like romaine, oakleaf, and arugula for a personalized blend.

2. Planting Time:
Lettuce prefers cool temperatures (45°F–75°F). In most U.S. regions, plant in early spring or fall for the best results.

3. Soil and Location:
Use well-drained, nutrient-rich soil with a pH between 6.0 and 7.0. Choose a sunny to partially shaded spot.

4. Sowing Seeds:

  • Scatter seeds evenly and cover lightly with soil.
  • Keep rows about 6–8 inches apart.
  • Water gently to keep soil moist but not waterlogged.

5. Watering and Care:
Regular watering is crucial. Lettuce has shallow roots and dries quickly. Aim for consistent moisture, especially during warmer weather.

6. Harvesting:
Harvest young leaves in 3–4 weeks when they reach 3–4 inches tall. You can cut individual leaves or trim the entire patch about an inch above the soil to allow regrowth.

Pro Tip: For a continuous supply, succession plant every two weeks during the growing season.


5. The Best Lettuce Mix Varieties for American Gardens

For those growing their own blends, consider these popular lettuce types that perform well across U.S. climates:

  • Green Oakleaf – Soft texture, mild flavor, easy to grow.
  • Red Romaine – Adds color and a slightly sweet crunch.
  • Lollo Rosso – Deep red curls that hold dressing beautifully.
  • Butterhead – Smooth, buttery texture; great for wraps.
  • Arugula – Peppery bite for contrast.
  • Endive or Frisée – Adds bitterness and volume.

Blending these creates the perfect mix of taste, color, and nutrition for fresh salads straight from your garden.


6. Lettuce Mixes and Sustainable Eating in America

The growing interest in local, organic, and sustainable produce has propelled lettuce mixes into the spotlight. Many small farms and home gardeners now produce eco-friendly greens that use minimal pesticides and water.

Here’s how lettuce mixes support sustainability:

  • Short Growth Cycle: Harvest-ready in just 30 days, reducing resource use.
  • Low Carbon Footprint: Often grown close to markets or at home.
  • Water-Efficient: Require less water than many fruiting vegetables.
  • Zero Waste: Even imperfect leaves can be composted.

For eco-conscious Americans, growing or buying local lettuce mixes aligns perfectly with farm-to-table and clean eating trends.


7. Delicious Ways to Use Lettuce Mixes in Your Kitchen

Lettuce mixes aren’t limited to salads — they can enhance all kinds of American dishes, from sandwiches to smoothies. Here are creative and nutritious ways to use them:

1. Classic Garden Salad

Toss a mix of greens with cherry tomatoes, cucumbers, avocado, and a light vinaigrette for a refreshing side.

2. Protein Power Bowl

Combine grilled chicken, quinoa, mixed lettuce, roasted chickpeas, and a lemon tahini dressing for a balanced, high-protein meal.

3. Lettuce Wraps

Use large butterhead or romaine leaves as low-carb wraps filled with sautéed veggies or ground turkey.

4. Smoothie Booster

Blend baby lettuce and spinach with pineapple, banana, and almond milk for a nutrient-packed green smoothie.

5. Sandwich and Burger Base

Layer lettuce mixes on burgers, wraps, and sandwiches for a crisp bite and extra vitamins.

6. Grilled Salad

Lightly char romaine or red leaf lettuce on the grill for a smoky twist — a trending favorite in American summer barbecues.

7. Soup Garnish

Add a handful of chopped greens to soups right before serving for extra freshness and color.

The versatility of lettuce mixes makes them an easy way to incorporate more greens into your diet while keeping meals exciting and satisfying.


8. How to Store Lettuce Mixes for Maximum Freshness

To keep your lettuce mixes fresh and crisp, proper storage is key:

  • Refrigerate Immediately: Store in a perforated plastic bag or sealed container in the crisper drawer.
  • Avoid Excess Moisture: Wrap leaves in a paper towel to absorb extra humidity.
  • Optimal Temperature: Keep between 34°F and 40°F.
  • Shelf Life: Fresh mixes last about 5–7 days when stored properly.

Pro Tip: Wash only before eating, not before storage — moisture accelerates spoilage.


9. Lettuce Mixes and American Culinary Trends

From California cafés to New York delis, lettuce mixes have become a centerpiece in the American healthy eating movement. They align perfectly with today’s top food trends:

  • Meal Prep Revolution: Easy to portion into grab-and-go containers.
  • Plant-Based Diets: Ideal for vegans and vegetarians.
  • Gourmet Home Dining: Mixed greens elevate any dish with restaurant-style presentation.
  • Organic Lifestyle: Increasing demand for pesticide-free, locally grown greens.

Chefs and home cooks alike embrace lettuce mixes as a foundation for creativity — combining fresh produce, lean proteins, and vibrant dressings to craft nutrient-rich, Instagram-worthy meals.


10. Fun Facts About Lettuce Mixes

  • “Mesclun” originates from Provence, France, meaning “mixture.”
  • Lettuce was once considered a medicinal herb by ancient Romans.
  • Americans consume over 13 pounds of lettuce per person per year.
  • The darker the leaves, the higher the nutrient content.
  • Lettuce is 95% water — making it one of the most hydrating vegetables.

Conclusion: Freshness and Flavor in Every Bite

From garden beds to grocery aisles, lettuce mixes represent the perfect blend of nutrition, convenience, and taste. Their diverse textures and flavors make eating healthy feel indulgent, not restrictive. Whether you grow your own or grab a pre-mixed bag, these greens are a simple step toward a fresher, cleaner, and more sustainable lifestyle.

So next time you’re craving something light, crisp, and colorful, reach for a bowl of lettuce mix — the modern American answer to effortless health and gourmet flavor.

Radishes The Crisp, Colorful Powerhouse Root Taking Over American Gardens and Kitchens

Radishes The Crisp, Colorful Powerhouse Root Taking Over American Gardens and Kitchens

Peppery, crisp, and delightfully colorful, radishes are one of the most underrated yet versatile vegetables in America’s gardens and kitchens. From bright red globes in your salad to elegant white “icicle” varieties and vibrant purple or watermelon types at farmers’ markets, radishes bring a unique burst of flavor, texture, and nutrition to any meal.

Whether you’re a home gardener looking for an easy crop to grow or a food enthusiast eager to add crunch to your dishes, radishes deliver on every front. They’re fast-growing, low-maintenance, and thrive in nearly every U.S. region — making them a staple in spring and fall gardens across the country.

In this detailed guide, we’ll explore everything you need to know about radishes: their history, nutritional benefits, popular varieties, growing tips, and creative ways to use them in your cooking.


1. The Fascinating History of Radishes

Radishes (Raphanus sativus) have been cultivated for thousands of years, originating in Southeast Asia before spreading to Europe and eventually North America. They were among the first vegetables brought to the New World by European settlers. Early American farmers loved them for their quick harvest and hardy nature.

Today, radishes are grown throughout the U.S., with major production in California, Florida, and Texas. They’ve become a farmers’ market favorite, beloved for their variety of colors, shapes, and flavors — from mild and sweet to fiery and spicy.


2. Why Radishes Are a Must-Have in Every American Garden

Radishes are the perfect crop for beginner gardeners and seasoned growers alike. Here’s why they’re a favorite in the U.S.:

  • Fast-Growing: Most varieties mature in just 25 to 35 days — perfect for impatient gardeners.
  • Ideal for Small Spaces: Grow easily in garden beds, raised planters, or containers.
  • Cool-Weather Crop: Thrive in spring and fall, offering multiple growing windows in many U.S. climates.
  • Soil-Friendly: Help loosen compact soil, improving conditions for other plants.
  • Versatile in Cooking: Their crisp texture and peppery flavor complement countless American dishes.

Radishes are not only easy and quick but also provide the satisfaction of homegrown freshness within weeks of planting.


3. Top Radish Varieties to Grow in the U.S.

From the traditional red globe to unique heirlooms, radishes come in many shapes, colors, and flavors. Here are some of the best varieties for American home gardeners:

1. Cherry Belle

  • The classic round, red radish found in most grocery stores.
  • Matures in just 22 days.
  • Crisp, mildly spicy, and great for salads or snacks.

2. French Breakfast

  • An heirloom variety with oblong red roots and white tips.
  • Sweet, tender, and less spicy than round types.
  • Popular in gourmet kitchens and farmers’ markets.

3. Easter Egg

  • A colorful mix of white, pink, purple, and red radishes.
  • Perfect for salads or decorative platters.
  • Matures in about 28 days.

4. Daikon (Japanese Radish)

  • Long, white, and mild-flavored.
  • Great for pickling or grating into salads.
  • Commonly grown in southern and coastal U.S. climates.

5. Watermelon Radish

  • Pale green on the outside with a vibrant pink-red center.
  • Mild and slightly sweet flavor.
  • Stunning visual appeal for gourmet dishes.

6. White Icicle

  • Slender, elongated roots with a crisp texture.
  • Matures in about 25–30 days.
  • Excellent for roasting and snacking.

No matter your taste preference or region, there’s a radish variety suited to your American garden and kitchen.


4. How to Grow Radishes Successfully

Radishes are among the easiest vegetables to grow — making them a favorite for school gardens and home gardeners across the U.S. Here’s a step-by-step guide:

Step 1: Choose the Right Spot

Pick a sunny location with at least 6 hours of sunlight daily. While radishes tolerate light shade, full sun helps them grow faster and develop better flavor.

Step 2: Prepare the Soil

Radishes love loose, well-drained soil. Avoid heavy clay, which restricts root growth. Mix in compost or organic matter to improve texture and fertility.
Ideal soil pH: 6.0 to 7.0.

Step 3: Planting

  • Sow seeds directly outdoors — radishes don’t transplant well.
  • Plant seeds ½ inch deep and about 1 inch apart.
  • Space rows 8–12 inches apart.
  • Thin seedlings once they sprout to give each root room to expand.

Step 4: Watering

Keep the soil evenly moist, but not waterlogged. Irregular watering can make radishes split or develop a woody texture.

Step 5: Harvesting

Radishes mature quickly — usually in 3–5 weeks. Harvest when they’re firm and about 1 inch in diameter. Leaving them in the ground too long can make them tough or overly spicy.

Pro Tip: For continuous harvests, sow new seeds every 7–10 days during the growing season.


5. Common Radish Growing Problems and Solutions

ProblemCauseSolution
Roots too smallOvercrowding or lack of sunlightThin seedlings and ensure full sun
Radish splitsIrregular wateringMaintain consistent moisture
Leaves but no rootsToo much nitrogen in soilUse balanced or low-nitrogen fertilizer
Pest damageFlea beetles or root maggotsUse row covers and rotate crops annually

By following these simple fixes, your radish harvest will be smooth, healthy, and abundant.


6. Nutritional Benefits of Radishes

Radishes aren’t just crunchy and colorful — they’re incredibly nutritious too. These small roots pack a powerful punch of vitamins, minerals, and antioxidants.

Here’s what makes radishes a standout in healthy American diets:

  • Low in Calories: One cup of sliced radishes has only about 20 calories.
  • Hydration Boost: Composed of over 90% water, helping maintain hydration.
  • Rich in Vitamin C: Strengthens the immune system and supports skin health.
  • High in Fiber: Aids digestion and helps control blood sugar.
  • Detoxifying Properties: Support liver function and natural cleansing.
  • Antioxidant Compounds: Contain anthocyanins and sulfur compounds that help fight inflammation.

They’re the perfect low-calorie addition to salads, sandwiches, and even smoothies — making them a popular choice among American health-conscious eaters.


7. Delicious Ways to Use Radishes in the Kitchen

Radishes are incredibly versatile — they can be raw, roasted, pickled, grilled, or sautéed, adding both crunch and color to any meal.

1. Fresh Salads

Slice thinly and mix with greens, cucumbers, and vinaigrette for a crisp, peppery bite. The Easter Egg and Watermelon varieties add color contrast.

2. Pickled Radishes

A staple in many U.S. kitchens and restaurants, pickled radishes bring tang and spice to tacos, burgers, and sandwiches.

3. Roasted Radishes

Toss with olive oil, salt, and pepper, then roast at 400°F for 15–20 minutes. The heat transforms their sharp bite into a mild, buttery flavor.

4. Radish Chips

Thinly slice and bake for a healthy alternative to potato chips — a popular low-carb snack trend in the U.S.

5. Radish Greens

Don’t toss the tops! Sauté them like spinach or add to soups for a slightly peppery flavor.

6. Breakfast Toppers

Add sliced radishes to avocado toast or omelets for a fresh, crunchy twist.

With their bright color and zesty taste, radishes are one of the easiest ways to elevate American home cooking.


8. Storing Radishes for Freshness

To keep your radishes crisp and flavorful:

  • Remove the leafy greens before storing to prevent moisture loss.
  • Store roots in a plastic bag or container in the refrigerator crisper.
  • Keep greens separately and use within a few days.
  • Fresh radishes last up to two weeks when properly stored.

For longer storage, pickle or ferment them to enjoy that tangy crunch year-round.


9. Radishes and the Sustainable Gardening Movement

As Americans shift toward sustainable, organic, and small-space gardening, radishes fit perfectly into the trend. They:

  • Grow quickly, requiring minimal resources.
  • Improve soil health by breaking up compact layers.
  • Pair well with other crops like lettuce or spinach in companion planting.
  • Reduce food waste since both roots and greens are edible.

For urban gardeners, radishes are an easy and sustainable way to grow fresh produce right at home — even in containers or window boxes.


10. Fun Facts About Radishes

  • Radishes are part of the mustard family (Brassicaceae), related to cabbage and kale.
  • The world’s largest radish, a giant Daikon, weighed over 100 pounds!
  • Ancient Egyptians used radishes as rations for pyramid builders.
  • National Radish Day is celebrated on December 23rd in Oaxaca, Mexico — known as the Night of the Radishes.

Conclusion: Rediscover the Power of Radishes

Crisp, colorful, and full of character, radishes are making a comeback in American gardens and kitchens. Their quick-growing nature, refreshing taste, and impressive health benefits make them an essential crop for anyone — from home gardeners to food lovers.

Whether you slice them into a salad, roast them for a cozy dinner, or grow them in your backyard, radishes prove that even the simplest vegetables can bring vibrancy, nutrition, and sustainability to your plate.

So this season, grab some seeds or a fresh bunch from your local market and rediscover this peppery little powerhouse — the humble radish, America’s next great garden hero.


Baby Carrots The Crunchy, Nutritious Snack That’s Taking Over American Kitchens and Gardens

Baby Carrots The Crunchy, Nutritious Snack That’s Taking Over American Kitchens and Gardens

Crisp, sweet, and perfectly snackable — baby carrots have become one of America’s favorite healthy treats. Found in lunchboxes, salad bars, and grocery produce aisles across the country, these tiny orange delights are much more than just miniature versions of regular carrots. In fact, baby carrots have a fascinating story, impressive nutritional value, and a strong presence in both U.S. diets and home gardens.

Whether you’re munching them with hummus, tossing them into a salad, or growing them in your backyard, baby carrots offer the perfect blend of convenience, health, and flavor. This in-depth guide explores everything you need to know — from what baby carrots really are to how they’re grown, their benefits, and delicious ways to enjoy them.


1. What Exactly Are Baby Carrots?

The term “baby carrots” can mean two different things — and that’s where most people get confused.

  1. True baby carrots are young carrots harvested early before they reach full size. They’re naturally small, tender, and sweet. These are often found at farmer’s markets or grown at home.
  2. Baby-cut carrots, the kind most Americans find in stores, are full-sized carrots that have been machine-trimmed and peeled into small, uniform pieces. These were first popularized in California in the 1980s to reduce waste from oddly shaped carrots — and the idea revolutionized the vegetable industry.

Both types are healthy and delicious, but baby-cut carrots are the reason the snack-sized vegetable became a household staple across the U.S.


2. A Brief History: The American Baby Carrot Boom

The baby carrot craze began in Bakersfield, California, in the early 1980s. A farmer named Mike Yurosek noticed that perfectly edible carrots were being discarded simply because they were misshapen or too long for packaging. His solution? Peel and cut them into smaller, more appealing pieces.

This simple innovation turned what was once considered waste into a billion-dollar industry. Within a decade, baby-cut carrots had taken over grocery shelves and became a symbol of healthy, convenient snacking — perfectly aligning with the busy, health-conscious American lifestyle.

Today, the U.S. produces over 2 billion pounds of baby carrots annually, and their popularity continues to rise thanks to their versatility, long shelf life, and kid-friendly appeal.


3. Nutritional Benefits: Why Baby Carrots Are a Smart Choice

Baby carrots may be small, but they’re packed with essential vitamins, antioxidants, and fiber. Here’s what makes them a nutritional powerhouse:

  • Rich in Beta-Carotene: Baby carrots are loaded with beta-carotene, which the body converts into vitamin A, vital for healthy eyes, skin, and immunity.
  • High in Fiber: A single serving provides about 2 grams of dietary fiber, supporting digestion and heart health.
  • Low in Calories: With just 30–35 calories per serving, they’re the perfect guilt-free snack.
  • Hydrating: Composed of nearly 90% water, they help maintain hydration.
  • Antioxidant-Rich: Contain lutein and zeaxanthin, known to support brain and vision health.

These benefits make baby carrots one of the top choices for Americans looking to balance convenience and nutrition — whether in school lunches, office snacks, or pre-workout meals.


4. Growing Baby Carrots at Home

If you love gardening, growing baby carrots is a fun and rewarding project. They’re perfect for small gardens, raised beds, and even deep containers, making them an excellent choice for urban and suburban gardeners alike.

Step 1: Choose the Right Variety

Not all carrots are suited for baby harvests. The best varieties for growing true baby carrots include:

  • ‘Little Finger’ – A classic mini variety that grows only 3–4 inches long.
  • ‘Thumbelina’ – Round, sweet carrots perfect for container gardening.
  • ‘Parisian Heirloom’ – A small, globe-shaped variety ideal for shallow soils.
  • ‘Adelaide’ – A cylindrical baby carrot with smooth skin and tender texture.

Step 2: Soil and Location

Baby carrots prefer loose, well-drained soil with a slightly sandy texture. Avoid clay-heavy soils, which can cause deformities. Ensure the planting site receives at least 6 hours of full sunlight daily.

Step 3: Planting

  • Sow seeds directly outdoors once the soil warms to 55°F–65°F.
  • Plant seeds about ¼ inch deep and 1 inch apart in rows 12 inches apart.
  • Thin seedlings to prevent overcrowding — baby carrots need space to grow evenly.

Step 4: Watering and Care

Keep soil consistently moist, especially during germination. Water deeply once or twice a week, depending on your climate. Add mulch to retain moisture and suppress weeds.

Step 5: Harvesting

Baby carrots are ready in 50–65 days depending on the variety. Gently loosen the soil and pull up carrots when they’re about 3–4 inches long.

Pro Tip: The earlier you harvest, the sweeter and more tender your carrots will be!


5. How Baby Carrots Are Made for the Market

For those curious about the store-bought kind, here’s how baby-cut carrots are produced in the U.S.:

  1. Farmers harvest full-sized carrots, primarily from California’s San Joaquin Valley.
  2. Carrots are washed, sorted, and trimmed.
  3. They’re then cut into 2-inch pieces and shaped using specialized machines.
  4. The carrots are lightly rinsed in a water-based solution (often containing trace amounts of chlorine or citric acid) to prevent spoilage and maintain crispness.
  5. Finally, they’re packaged and shipped nationwide.

This process ensures consistent size, sweetness, and crunch — making baby-cut carrots a reliable, ready-to-eat snack for millions of Americans.


6. Culinary Uses: From Snacks to Gourmet Dishes

Baby carrots shine in more than just snack packs. They’re incredibly versatile and can elevate both everyday meals and gourmet recipes. Here are some delicious ways to use them:

1. Roasted Baby Carrots

Toss with olive oil, honey, and herbs, then roast at 400°F for 20–25 minutes until caramelized. The result? A naturally sweet, tender side dish.

2. Glazed Carrots

Simmer baby carrots in butter, brown sugar, and orange juice for a glossy, flavorful glaze that pairs perfectly with grilled meats or holiday dinners.

3. Stir-Fried Baby Carrots

Slice lengthwise and toss in soy sauce, ginger, and sesame oil for a quick, colorful stir-fry.

4. Carrot Hummus Snack

Pair fresh baby carrots with homemade hummus or ranch dip for the ultimate crunchy snack.

5. Soups and Stews

Add baby carrots to chicken noodle soup, beef stew, or vegetable broth for extra texture and natural sweetness.

Whether served raw, roasted, or pureed, baby carrots adapt beautifully to nearly any American recipe — from comfort food to modern cuisine.


7. Storage and Freshness Tips

To keep baby carrots crisp and fresh:

  • Store them in the refrigerator at 32°F–40°F.
  • Keep them in a sealed container or zip-lock bag with a damp paper towel to prevent drying.
  • Avoid storing near ethylene-producing fruits like apples or bananas, which can cause premature spoilage.

Fresh baby-cut carrots typically last 2–3 weeks in the fridge, while homegrown true baby carrots (with greens removed) can last about 7–10 days.


8. Baby Carrots and American Lifestyle Trends

Baby carrots fit seamlessly into the modern American lifestyle. With the rise of health-conscious snacking, plant-based diets, and meal prep culture, their demand has surged in recent years.

Here’s why they continue to be a favorite across the U.S.:

  • Convenience: Ready-to-eat and mess-free for work, school, or travel.
  • Kid-Friendly: Naturally sweet, bite-sized, and perfect for picky eaters.
  • Eco-Friendly: Modern production uses previously wasted carrots, reducing food waste.
  • Fitness-Friendly: Popular among athletes and dieters for being low-calorie yet filling.

From California produce farms to New York health cafés, baby carrots are celebrated for their simplicity, versatility, and sustainability.


9. Fun Facts About Baby Carrots

  • Baby carrots were not genetically modified — they’re simply reshaped versions of regular carrots.
  • The average American eats over 10 pounds of carrots annually, much of that in baby-cut form.
  • Carrots were originally purple and yellow before the familiar orange variety became popular in the 17th century.
  • Baby carrots made up nearly 70% of U.S. carrot sales by the mid-2000s — a true vegetable success story.

Conclusion: The Tiny Vegetable That Made a Big Impact

From their humble beginnings in California to becoming a national snack-time hero, baby carrots embody everything Americans love in a food — they’re healthy, convenient, and endlessly versatile. Whether you grow true baby carrots in your backyard or grab a bag of baby-cuts from the store, these little orange powerhouses deliver nutrition, crunch, and flavor in every bite.

So next time you’re packing lunch, prepping dinner, or planning your garden, don’t overlook these miniature marvels. Baby carrots prove that even the smallest foods can make the biggest impact — on your health, your plate, and your planet.


Dwarf Peppers The Ultimate Guide to Growing Compact Pepper Plants for Small-Space Gardens in the U.S.

Dwarf Peppers The Ultimate Guide to Growing Compact Pepper Plants for Small-Space Gardens in the U.S.

If you’ve ever dreamed of growing fresh, colorful peppers but thought you didn’t have the space — think again. Dwarf peppers, also known as compact or mini pepper plants, are transforming how Americans garden in tight spaces. Whether you have a sunny windowsill in an apartment, a small patio, or a balcony garden, these little plants deliver big flavor, vibrant colors, and impressive yields without needing a large backyard.

Perfect for urban gardeners, apartment dwellers, and container gardening enthusiasts, dwarf peppers are both ornamental and practical. They come in an array of stunning hues — from fiery reds to sunny yellows and deep purples — and can be sweet, mildly spicy, or blazing hot. In this in-depth guide, we’ll explore everything from the best dwarf pepper varieties to expert growing tips, so you can cultivate your own mini pepper paradise right at home.


1. What Are Dwarf Peppers?

Dwarf peppers are compact varieties of the pepper plant (Capsicum spp.) bred or selected for their small stature and high productivity. While standard pepper plants can grow 2–4 feet tall, dwarf peppers usually stay under 12–18 inches, making them ideal for containers, raised beds, and balcony gardens.

These miniatures don’t compromise on beauty or taste. In fact, many varieties produce abundant, colorful fruit clusters that look as good as they taste. Depending on your preference, you can grow dwarf versions of sweet bell peppers, chili peppers, or ornamental varieties that double as edible décor.


2. Why Grow Dwarf Peppers in the U.S.?

As more Americans embrace urban gardening and sustainable living, compact crops like dwarf peppers are becoming household favorites. Here’s why these mini plants are perfect for American gardeners:

  • Space-Saving: Ideal for balconies, patios, or small backyard gardens.
  • High Yield: Despite their size, they produce plenty of fruit.
  • Low Maintenance: Require minimal pruning and care.
  • Perfect for Containers: Thrive in pots, planters, and even hanging baskets.
  • Decorative Appeal: Add vibrant color to outdoor and indoor spaces.
  • Culinary Versatility: Great for fresh salads, stir-fries, pickling, or salsas.

Whether you live in a downtown apartment in Chicago or a suburban home in Texas, dwarf peppers adapt beautifully to the American climate with the right sunlight and care.


3. Popular Dwarf Pepper Varieties for Home Gardens

Here are some of the best dwarf and compact pepper varieties loved by U.S. gardeners for both aesthetics and productivity:

1. ‘Numex Easter’

  • Grows about 10–12 inches tall.
  • Produces small, cone-shaped fruits that shift from purple to yellow to red.
  • Perfect ornamental and edible variety for pots.

2. ‘Cayenne Compact’

  • A dwarf version of the traditional cayenne pepper.
  • Produces long, thin, fiery red peppers with a strong kick.
  • Grows beautifully in containers with sturdy stems.

3. ‘Mini Bell Mix’

  • Offers small, sweet peppers in red, yellow, and orange.
  • Grows about 18 inches tall and yields dozens of miniature bell peppers.
  • Excellent for stuffing, grilling, or salads.

4. ‘Hot Thai Compact’

  • A compact Thai chili variety ideal for container growing.
  • Produces hot, flavorful peppers for stir-fries and curries.
  • Matures quickly, even in short growing seasons.

5. ‘Medusa’

  • An ornamental dwarf pepper with mild, edible fruits.
  • Displays a stunning range of colors — cream, orange, red, and yellow.
  • Safe and attractive even around children and pets.

6. ‘Apache’

  • Compact chili pepper plant reaching about 14 inches in height.
  • Produces numerous small, hot peppers with classic chili heat.
  • Great for window boxes or sunny patios.

Each of these varieties offers unique flavor profiles and visual appeal — allowing you to choose between fiery, sweet, or decorative options depending on your gardening goals.


4. How to Grow Dwarf Peppers in Containers

Growing dwarf peppers at home is easy and highly rewarding. Follow these step-by-step tips to ensure your plants thrive:

Step 1: Choose the Right Container

Use pots that are at least 10–12 inches deep and have drainage holes. Terracotta, ceramic, or plastic planters all work well. For multiple plants, a raised bed or long planter box can also be ideal.

Pro Tip: Choose darker pots if you live in cooler northern states to keep soil warm, or light-colored containers in hot southern regions to prevent overheating.

Step 2: Use Nutrient-Rich Soil

Dwarf peppers love well-draining, nutrient-dense soil. Use a high-quality potting mix with compost or organic fertilizer. Peppers thrive in slightly acidic soil (pH between 6.0 and 6.8). Add perlite or coco coir to improve aeration and moisture retention.

Step 3: Planting and Sunlight

Peppers need warmth and light. If starting from seed, sow them indoors 8–10 weeks before your region’s last frost date. Transplant outdoors when temperatures stay consistently above 60°F.

Dwarf peppers need at least 6–8 hours of full sun daily. For indoor setups, use grow lights to mimic natural sunlight.

Step 4: Watering and Feeding

Water regularly but avoid soggy soil. Allow the top inch of soil to dry before watering again. In hotter climates like Arizona or Florida, daily watering might be necessary.

Fertilize every two to three weeks with a balanced organic fertilizer or a mix high in potassium and phosphorus to promote fruiting.

Step 5: Support and Maintenance

While dwarf varieties are compact, heavy fruit clusters can cause stems to bend. Add small stakes or a mini tomato cage for gentle support. Remove any yellow leaves and prune lightly for airflow.


5. Managing Common Pests and Problems

Even low-maintenance plants like dwarf peppers can face occasional issues. Here’s how to identify and fix them:

ProblemCauseSolution
Leaf curlOverwatering or poor drainageLet soil dry out slightly between waterings
No fruitingToo little sunlight or excess nitrogenMove to a sunnier spot and adjust feeding
Aphids or spider mitesCommon pests in warm weatherUse neem oil or insecticidal soap spray
Blossom dropSudden temperature changeMaintain consistent watering and shelter from cold

Pro Tip: Rotate your plants or replace soil yearly to prevent pest buildup in containers.


6. Harvesting Dwarf Peppers

Dwarf pepper plants typically start producing within 60–80 days after transplanting, depending on the variety. You’ll know the peppers are ready when they reach full color — whether that’s deep red, orange, yellow, or purple — and feel firm to the touch.

Use sharp scissors or pruning shears to cut the fruits, leaving a small stem attached. Frequent harvesting encourages continuous production throughout the season.


7. Best Ways to Use Dwarf Peppers in the Kitchen

Dwarf peppers may be small, but their uses in the kitchen are endless. Try these delicious ideas:

  • Sweet Mini Bells: Slice raw for salads, grill, or stuff with cheese.
  • Hot Dwarf Chilies: Perfect for spicy salsas, sauces, or pickling.
  • Thai Varieties: Add heat to noodles, stir-fries, and curries.
  • Ornamental Types: Dry and crush for colorful homemade chili flakes.

Their size makes them perfect for appetizers, canapés, and decorative garnishes, adding both taste and visual flair to your meals.


8. Seasonal Care Tips for U.S. Gardeners

  • Spring: Start seeds indoors or buy seedlings; transplant after frost.
  • Summer: Keep soil moist and feed regularly during peak growth.
  • Fall: Harvest frequently; move pots indoors in cooler northern states.
  • Winter: In warm regions (like Florida or southern California), peppers can grow year-round; otherwise, overwinter indoors near a sunny window.

For cold regions, overwintering your dwarf peppers can extend their lifespan for multiple seasons.


9. Ornamental and Sustainable Appeal

Dwarf peppers are not just practical — they’re stunning. With their jewel-toned fruits and lush foliage, they add color and charm to patios, window boxes, and garden borders. Many gardeners in U.S. cities use them as dual-purpose plants — attractive ornamentals that also provide fresh, homegrown food.

From a sustainability perspective, dwarf peppers are eco-friendly because they:

  • Reduce grocery trips and packaging waste.
  • Require minimal water and fertilizer.
  • Fit easily into small-space or rooftop gardens.

They’re a great choice for anyone looking to live greener and more self-sufficiently in an urban setting.


10. Final Thoughts: Small Plants, Mighty Flavor

Dwarf peppers are proof that good things come in small packages. Whether you’re cultivating fiery chilies, sweet mini bells, or rainbow-colored ornamentals, these compact plants deliver a big harvest with minimal space.

From bustling city balconies in New York to sunny patios in California, Americans everywhere are discovering the joy of growing their own peppers — no large garden required. With the right container, sunlight, and care, your dwarf pepper plants will reward you with vibrant color, fresh flavor, and a touch of gardening pride all season long.

So grab a few pots, plant some dwarf pepper seeds, and turn your small space into a flavorful garden oasis.

Growing Dwarf Eggplants The Ultimate Guide to Compact Varieties for Urban Gardens in the U.S.

Growing Dwarf Eggplants The Ultimate Guide to Compact Varieties for Urban Gardens in the U.S.

When you think of eggplants, you might picture large, glossy purple fruits sprawling across a garden bed. But there’s a whole world of compact, flavorful, and colorful dwarf eggplant varieties that are perfect for modern lifestyles. These petite powerhouses are ideal for urban gardeners, balcony growers, and container gardening enthusiasts across the U.S. — delivering the same rich taste and nutrition as their full-sized cousins, all from a small and manageable plant.

Whether you’re in sunny California, the humid South, or a compact city apartment in New York, dwarf eggplants make it easy to grow your own vegetables without needing a large yard. In this detailed guide, we’ll explore everything you need to know about growing, caring for, and harvesting these miniature garden gems.


1. What Are Dwarf Eggplants?

Dwarf eggplants are compact, short-growing varieties bred specifically for limited spaces and containers. Unlike traditional eggplants that can reach 3 to 4 feet tall, dwarf varieties typically grow between 12 and 24 inches, making them ideal for patios, balconies, or raised garden beds.

Despite their smaller size, dwarf eggplants are highly productive, often yielding dozens of fruits per plant throughout the growing season. Their fruits can range from deep purple and glossy black to lavender, white, or even striped, depending on the variety.

Many home gardeners love them not only for their taste but also for their ornamental appeal — their flowers and colorful fruits add beauty to outdoor spaces while serving a functional purpose.


2. Why Grow Dwarf Eggplants in the U.S.?

Urban and suburban gardeners across America are turning to dwarf crops due to space constraints and the rise of container gardening. Dwarf eggplants are an ideal choice for several reasons:

  • Space Efficiency: Perfect for small gardens, balconies, and decks.
  • Adaptability: Thrive in containers, raised beds, or sunny windowsills.
  • High Yield: Produce ample fruit despite compact growth.
  • Easy Maintenance: Require less pruning and support than full-sized plants.
  • Aesthetic Appeal: Their vibrant fruits and blossoms double as décor.

Plus, dwarf eggplants adapt well to the diverse climates of the U.S. — from hot Southern states like Texas and Florida to cooler regions such as Oregon or Michigan (with a bit of greenhouse help).


3. Top Dwarf Eggplant Varieties to Try

Here are some of the most popular dwarf and container-friendly eggplant varieties available in U.S. nurseries and seed catalogs:

1. ‘Fairy Tale’

  • Small, striped lavender fruits with white streaks.
  • Grows about 18 inches tall.
  • Ideal for containers and quick harvests (ready in 50 days).
  • Sweet, tender flavor with few seeds.

2. ‘Patio Baby’

  • A true favorite among urban gardeners.
  • Compact plant (12–18 inches tall).
  • Bears small, glossy purple fruits perfect for grilling or roasting.
  • Early maturing and high yielding.

3. ‘Hansel’ and ‘Gretel’

  • Award-winning varieties from All-America Selections.
  • ‘Hansel’ produces glossy dark-purple fruits, while ‘Gretel’ offers creamy white ones.
  • Both thrive in containers and produce continuously through summer.

4. ‘Little Fingers’

  • Slender, dark purple fruits that can be harvested early.
  • Mild and tender texture.
  • Grows up to 24 inches, perfect for patio pots.

5. ‘Bambino’

  • True to its name, this mini eggplant variety is compact and bushy.
  • Produces adorable round fruits with rich flavor.
  • Ideal for decorative edible landscapes.

Each of these varieties offers a unique look and flavor profile, making them excellent choices for home chefs and garden enthusiasts alike.


4. How to Grow Dwarf Eggplants at Home

Growing dwarf eggplants is surprisingly simple — and incredibly rewarding. Here’s a step-by-step guide tailored for U.S. home gardeners:

Step 1: Choose the Right Container

Use a container that’s at least 12 inches deep and wide with good drainage. Eggplants don’t like “wet feet,” so ensure the pot has holes and is elevated slightly to avoid soggy soil.

Pro Tip: Use a dark-colored pot to keep roots warm in cooler climates, or a light-colored one in hot states like Arizona to prevent overheating.

Step 2: Use Quality Soil

Eggplants love rich, well-draining soil. Use a premium potting mix enriched with compost or organic fertilizer. The ideal pH is between 5.8 and 6.5.

Mix in perlite or coco coir for added aeration — perfect for container growth.

Step 3: Planting and Sunlight

Start seeds indoors 6–8 weeks before your last frost date, or buy healthy seedlings from a local nursery. Transplant outdoors when nighttime temperatures consistently stay above 55°F.

Eggplants thrive in full sun (6–8 hours daily), so place them in the brightest spot you have.

Step 4: Watering and Feeding

Water deeply but avoid overwatering. The soil should remain moist, not soggy. In warm states, watering every other day may be necessary.

Feed your plants with a balanced vegetable fertilizer every two weeks or a slow-release organic mix once a month. Fertilizers rich in potassium and phosphorus will boost flowering and fruiting.

Step 5: Support and Maintenance

Although dwarf eggplants are compact, they can become heavy with fruit. Use a small stake or tomato cage to support the plant if needed.

Regularly prune yellowing leaves and harvest fruits early to encourage continuous production.


5. Common Challenges and Solutions

Even low-maintenance crops like dwarf eggplants can face a few issues. Here’s how to handle them:

ProblemCauseSolution
Yellow LeavesOverwatering or poor drainageCheck soil moisture and pot drainage
Blossom DropTemperature fluctuationsMove to a sheltered spot; maintain consistent watering
Flea BeetlesCommon pest in warm climatesUse neem oil spray or floating row covers
Slow GrowthLack of sunlight or nutrientsMove to full sun and feed regularly

Tip: Rotate your container crops each season to reduce pest buildup.


6. Harvesting and Using Dwarf Eggplants

Dwarf eggplants typically mature within 50–70 days depending on the variety. Harvest fruits when they’re glossy, firm, and about 3–5 inches long. Dull skin means the fruit is overripe.

Use a sharp knife or pruning shears to cut fruits from the stem, leaving a small cap attached. Frequent harvesting encourages the plant to produce more fruit.

Culinary Uses

These mini eggplants shine in various dishes:

  • Grilled or roasted for smoky flavor.
  • Stir-fried or sautéed with garlic and olive oil.
  • Stuffed and baked with cheese and herbs.
  • Added to curries, pasta, or salads.

Their tender texture and mild taste make them a perfect substitute for larger varieties in any recipe.


7. Seasonal Growing Tips for the U.S.

  • Spring: Start seeds indoors or buy seedlings from local nurseries.
  • Summer: Move containers to sunny patios and water frequently.
  • Fall: Continue harvesting; consider moving pots indoors in cooler zones.
  • Winter: In southern states like Florida or Texas, you can grow them year-round with proper sunlight.

In northern areas, extend the growing season by using greenhouses, grow lights, or indoor hydroponic setups.


8. Sustainable and Aesthetic Benefits

Beyond producing tasty vegetables, dwarf eggplants offer eco-friendly and decorative advantages:

  • Reduce your food miles by growing produce at home.
  • Add color and charm to small balconies or patios.
  • Attract pollinators like bees with their vibrant flowers.
  • Teach kids about sustainable food and easy gardening.

Many urban gardeners even mix dwarf eggplants with herbs like basil or parsley for a beautiful and functional mini-ecosystem.


Conclusion: Small Plants, Big Impact

Dwarf eggplants prove that size doesn’t define productivity or beauty. Whether you live in a cozy apartment, a suburban home, or a rural area with limited garden space, these compact varieties allow anyone to enjoy the satisfaction of growing fresh produce.

From ‘Patio Baby’ to ‘Fairy Tale’, there’s a dwarf eggplant variety suited to every American gardener’s climate and taste. With minimal effort and maximum reward, these charming plants bring a blend of color, flavor, and sustainability to any space.

So this season, grab a few pots, some good soil, and let your miniature eggplant garden flourish — right on your balcony or patio.