
If you’ve ever dreamed of growing your own vegetables but thought you didn’t have the space, here’s some good news — you can build a vertical garden with automatic watering right at home!
Vertical gardening is one of the most innovative and practical ways to grow fresh produce in small areas like balconies, patios, or even indoor walls. Combine that with a smart self-watering system, and you’ve got the ultimate low-maintenance, eco-friendly garden that saves time, water, and effort.
Whether you live in a city apartment or a suburban home, this setup lets you enjoy crisp lettuce, juicy tomatoes, and aromatic herbs — all growing vertically, in a modern and sustainable way.
Let’s dive into how you can build your own vertical vegetable garden with automatic watering, step-by-step.
Why Choose a Vertical Garden with Automatic Watering?
Before we start building, let’s look at why this method is becoming a favorite among urban gardeners across America:
- Space-Saving Design – Perfect for apartments, balconies, and small backyards.
- Water Efficiency – Automatic watering systems deliver just the right amount of water, reducing waste.
- Low Maintenance – Ideal for busy homeowners or beginners who forget to water plants regularly.
- Healthier Plants – Consistent watering helps prevent root rot and nutrient stress.
- Stylish and Modern – A vertical green wall adds a beautiful touch to any home decor.
With this smart system, you can grow everything from lettuce and spinach to cherry tomatoes and peppers — right from your wall!
What You’ll Need
You don’t need a professional setup to make your own DIY vertical vegetable garden with an automatic watering system. Here’s your materials checklist:

Materials for the Vertical Garden
- A sturdy wooden pallet, PVC board, or metal frame (depending on your space)
- Planting pockets or small plastic containers
- High-quality potting mix
- Vegetable seedlings or seeds (lettuce, spinach, cherry tomatoes, herbs, etc.)
- Plastic sheeting (to protect walls from moisture)
- Hooks or mounting brackets for support
Materials for the Automatic Watering System
- Plastic tubing or drip irrigation kit
- Small submersible water pump (available online or in garden stores)
- Water reservoir or tank (a 5-gallon bucket works great)
- Digital timer or smart plug
- Connector joints and drippers
All these items are easily available at U.S. home improvement stores like Home Depot, Lowe’s, or on Amazon.
Step-by-Step: How to Build Your Vertical Garden
Step 1: Choose the Perfect Spot
Pick a sunny location — your balcony, patio wall, or indoor wall near a window are great options. Most vegetables need at least 4–6 hours of sunlight daily.
If you’re building indoors, consider using LED grow lights to supplement natural light.
Step 2: Prepare the Frame
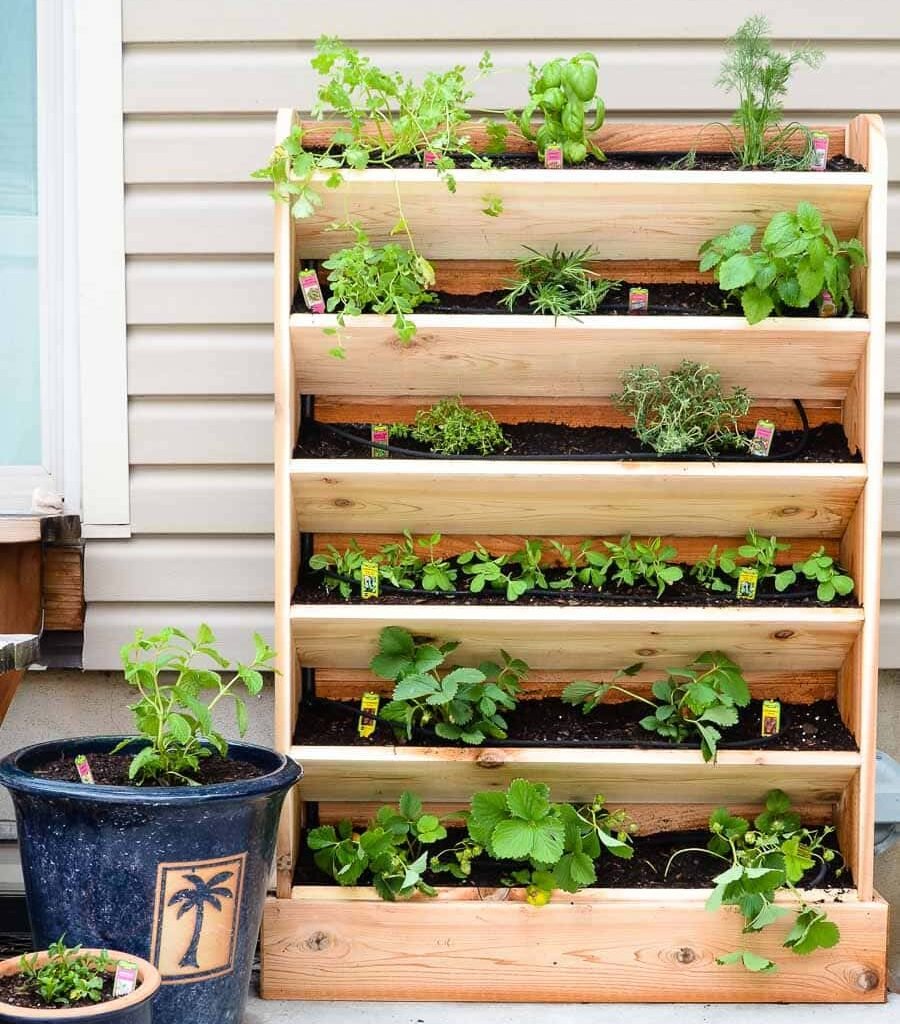
A wooden pallet is one of the most affordable and effective vertical garden structures. Sand it down to avoid splinters, and cover the back and sides with plastic sheeting or a waterproof liner to protect your wall from moisture.
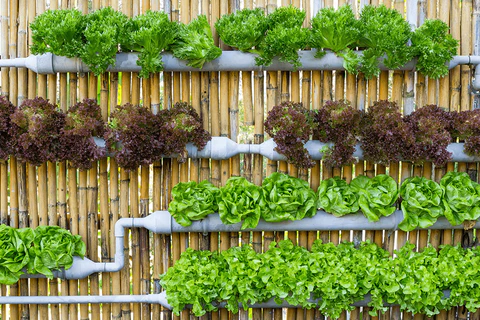
If you prefer a sleeker look, use PVC pipes or modular vertical garden planters — both are lightweight and easy to assemble.
Step 3: Add the Planting Pockets
Attach fabric planting pockets or small plastic containers to your frame using screws or zip ties. Make sure each pocket has a drainage hole.
Arrange them in staggered rows to maximize light exposure and air circulation.
For a beginner-friendly setup, 12–15 pockets are ideal — enough to grow a mix of leafy greens and herbs.
Step 4: Fill with Soil and Plant Your Vegetables
Fill each pocket with nutrient-rich potting mix. Add a little compost or organic fertilizer to encourage healthy growth.
Plant your favorite vegetables — here are a few that thrive in vertical gardens:
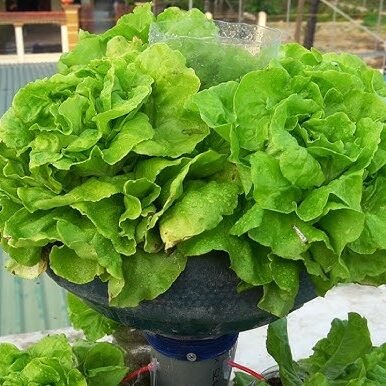
- Lettuce and Spinach – Fast-growing and shallow-rooted.
- Cherry Tomatoes – Compact and ideal for hanging growth.
- Cucumbers (mini varieties) – Great for trellising vertically.
- Peppers and Chilies – Thrive in sunny spots.
- Herbs like basil, parsley, and thyme – Perfect for the upper rows.
Water lightly after planting to help the roots settle.
Setting Up the Automatic Watering System
Now comes the smart part — the automatic watering setup that keeps your plants hydrated without daily effort.
Step 5: Connect the Tubing
Start by connecting thin plastic tubing (¼-inch drip line) along the top row of your garden. You can use connector joints to run lines down to each pocket.
Attach drippers or small holes near the base of each plant so that water flows directly to the roots.

Step 6: Set Up the Water Source
Place your water reservoir or bucket near the base of the structure. Submerge the small water pump inside it and connect the outlet to your main tubing line.
If you’re growing outdoors, you can also connect the system to a garden hose or rainwater barrel for a more eco-friendly setup.
Step 7: Automate with a Timer
Plug your water pump into a digital timer or smart plug. Set it to water for 5–10 minutes twice a day (adjust depending on your local climate and plant needs).
This simple automation ensures your vegetables receive consistent hydration — even when you’re away on vacation.
Step 8: Maintain and Monitor
Once everything is running, maintenance becomes minimal.
- Check the water reservoir weekly and refill as needed.
- Clean the drippers monthly to prevent clogging.
- Trim and harvest regularly to encourage new growth.
- Add compost or organic fertilizer every few weeks to keep your plants nourished.
With the automatic watering system doing most of the work, you’ll spend more time enjoying your garden and less time maintaining it.
The Benefits: Why Gardeners Love This System
Here’s why vertical gardening with automatic watering is trending across America:

- Saves Up to 70% Water – Drip irrigation reduces waste compared to hand watering.
- Perfect for Busy Lifestyles – No need to remember watering schedules.
- Improves Air Quality – Living walls filter toxins and increase oxygen indoors.
- Grows More in Less Space – Ideal for small homes and city living.
- Year-Round Harvests – Grow fresh vegetables indoors, even during winter.
It’s a sustainable and stylish solution that transforms unused walls into lush, productive green spaces.
Pro Tips for Success
- Use Moisture Sensors – Add a smart sensor to monitor soil moisture and optimize watering.
- Choose Lightweight Soil Mixes – Heavy soil can strain your structure.
- Start Small, Then Expand – Begin with 6–8 plants, and scale up once you master the system.
- Regularly Rotate Plants – Ensures even sunlight and prevents crowding.
- Try Companion Planting – Pair basil with tomatoes or lettuce with carrots for natural pest control.
These small adjustments can make your vertical garden thrive effortlessly.
Eco-Friendly and Budget-Friendly
A DIY vertical garden with automatic watering is not only practical but also environmentally conscious.
By reusing materials like plastic bottles, wood pallets, or old containers, you reduce waste. And by using a water-efficient drip system, you conserve water — which is especially important in drier regions of the U.S.
Best of all, you save money by growing your own organic vegetables instead of buying them at the store.
Common Mistakes to Avoid
Even the best systems can go wrong without care. Here’s what to watch out for:
- Overwatering – Always test soil moisture before adjusting timers.
- Poor Drainage – Ensure all pockets have holes to prevent root rot.
- Wrong Plant Choices – Avoid deep-rooted or sprawling vegetables like pumpkins.
- Insufficient Sunlight – Most vegetables need direct light for 6 hours daily.
With a little attention, your vertical garden will flourish year-round.
Final Thoughts: Grow Smart, Live Green
Building a vertical vegetable garden with automatic watering is one of the smartest ways to bring fresh, organic produce into your home — without needing a large yard or hours of daily care.
This project blends technology, sustainability, and creativity, allowing you to grow healthy vegetables in a modern, efficient way. It’s perfect for city dwellers, families, and anyone who wants to eat fresher while living greener.
So grab that old pallet, a few seedlings, and a water pump — and start your own smart vertical garden today. You’ll be amazed at how much life (and flavor!) a wall can grow.