If you’ve ever wanted to turn your kitchen scraps and garden waste into rich, dark, crumbly “black gold” for your plants, composting is your answer. It’s nature’s recycling system—simple, sustainable, and incredibly rewarding. But if you’re new to composting, it can feel a little intimidating: What can you compost? What can’t you? How long does it take?
Don’t worry—this beginner-friendly guide will walk you through everything you need to know to get started. From choosing the right compost bin to balancing the ingredients and speeding up decomposition, here are the best composting tips for beginners to help you create nutrient-rich compost for your garden or terrace plants.
What Is Composting, and Why Does It Matter?
Composting is the natural process of breaking down organic materials—like food scraps, leaves, and garden trimmings—into a nutrient-rich soil conditioner. Microorganisms, worms, and fungi work together to decompose these materials, turning waste into a valuable soil amendment.
Why composting matters:
- Reduces landfill waste: Up to 30% of household waste can be composted, keeping it out of landfills.
- Improves soil health: Compost adds organic matter, improves texture, and enhances water retention.
- Saves money: You’ll need fewer fertilizers and soil conditioners.
- Eco-friendly: It reduces methane emissions from organic waste in landfills.
In short, composting is one of the easiest and most impactful ways to live sustainably.
Step 1: Choose the Right Composting Method

Before you toss your first banana peel, decide how and where you’ll compost. Your choice depends on your available space, lifestyle, and patience level.
1. Outdoor Compost Bin or Pile
Perfect for backyards or terrace corners. You can build a simple compost pile or use a store-bought bin.
- Pros: Handles large amounts of waste, natural aeration.
- Cons: Needs outdoor space, may attract pests if not managed.
2. Compost Tumbler
A sealed barrel on a stand that you can rotate.
- Pros: Speeds up decomposition and keeps pests out.
- Cons: Limited capacity, more expensive.
3. Indoor Compost Bin (Bokashi or Vermicomposting)
Ideal for apartments or small spaces.
- Bokashi: Uses fermentation and beneficial microbes.
- Vermicomposting: Uses worms to break down food waste.
- Pros: Odor-free, compact, quick.
- Cons: Requires maintenance and balance.
If you’re just starting, a small compost bin or tumbler is a great choice—it’s manageable and helps you learn the basics.

Step 2: Understand the Composting Ingredients

The secret to good compost lies in balancing two key types of materials:
“Greens” – Nitrogen-rich Materials
These are moist, fast-decaying items that provide protein for microbes:
- Fruit and vegetable scraps
- Coffee grounds and tea bags
- Fresh grass clippings
- Plant trimmings
“Browns” – Carbon-rich Materials
These are dry, fibrous materials that provide energy and structure:
- Dry leaves
- Shredded newspaper or cardboard
- Sawdust (untreated)
- Straw or dried stems
Ideal Ratio:
A good rule of thumb is 3 parts brown to 1 part green. Too much green causes odor and sogginess; too much brown slows down decomposition.
Step 3: Balance Moisture and Air

Compost needs the right amount of moisture and oxygen to break down effectively.

- Moisture: The pile should feel like a damp sponge—moist but not dripping.
- If it’s too dry, sprinkle water or add more green materials.
- If it’s too wet, add shredded paper or dry leaves.
- Aeration: Microbes need oxygen to do their work.
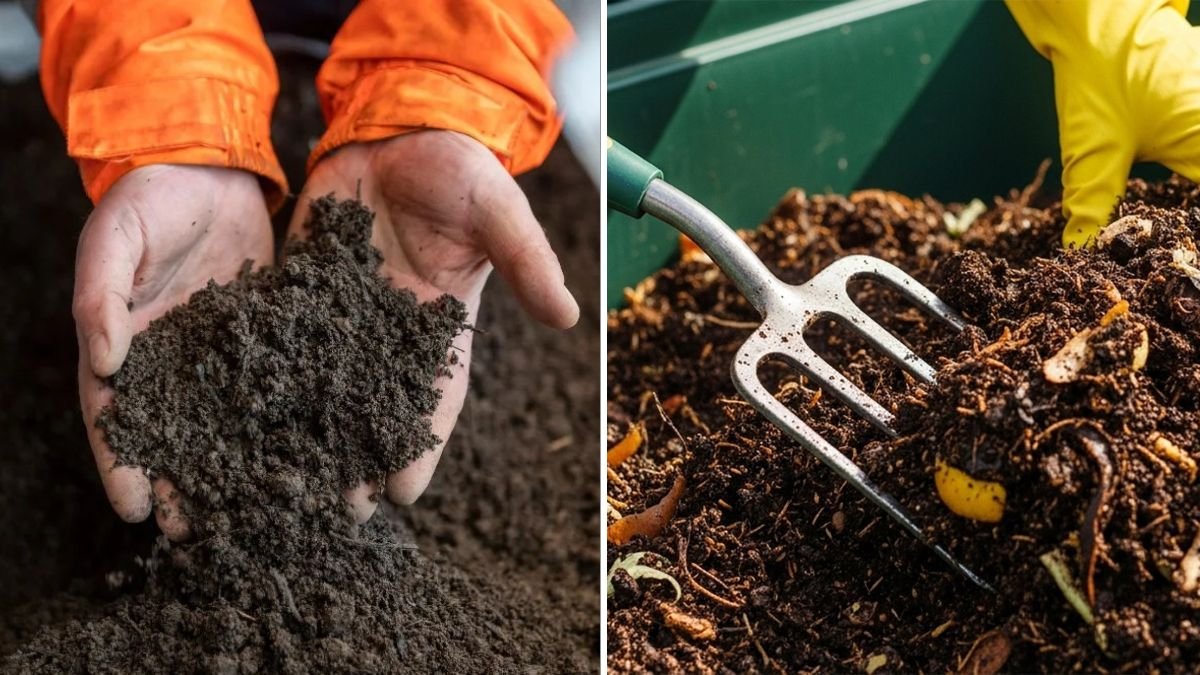
- Turn your compost pile every 7–10 days with a pitchfork or by spinning your tumbler.
- Aeration prevents foul odors and speeds up decomposition.
Step 4: Know What to Compost (and What Not To)
Knowing what belongs in your compost is essential for keeping it healthy and odor-free.
Compostable Items
- Fruit and vegetable scraps
- Coffee grounds and filters
- Tea leaves (without plastic bags)
- Eggshells (crushed)
- Grass clippings
- Dead flowers and leaves
- Shredded paper or cardboard
- Small amounts of plant-based kitchen waste
Avoid Composting
- Meat, fish, and dairy (attract pests and smell)
- Oily or greasy foods
- Pet waste
- Diseased plants
- Glossy paper or magazines
- Plastic or synthetic fibers
Keeping your compost clean and plant-safe ensures a high-quality final product.
Step 5: Speed Up the Composting Process
Composting can take anywhere from 2 months to 8 months, depending on conditions. But you can speed it up with a few tricks:
- Chop or shred materials: Smaller pieces decompose faster.
- Maintain warmth: Composting works best at 50–70°C (122–158°F). Keep your pile in a sunny spot.
- Turn it often: Regular mixing boosts oxygen and microbial activity.
- Add compost activators: Items like old compost, garden soil, or commercial activators introduce beneficial microbes.
- Avoid neglect: If your compost cools down or smells sour, check for moisture or nitrogen imbalance.
Step 6: Recognize When Your Compost Is Ready

Finished compost looks, smells, and feels like rich, dark soil. It should:
- Have a pleasant, earthy scent
- Be crumbly and uniform in texture
- Contain no recognizable food scraps or leaves
If it’s still chunky or smells ammonia-like, give it a few more weeks to mature. You can sift finished compost through a mesh to remove large pieces, which can go back into your next batch.

Step 7: Use Your Compost Effectively
Now for the fun part—using your homemade compost!
In the Garden
- Mix it into garden beds to enrich soil structure.
- Use it as a mulch layer around plants to retain moisture.
- Blend with potting soil for seed starting or container gardening.
For Terrace and Potted Plants
- Add a handful to each pot monthly.
- Mix one part compost with two parts soil for a nutrient boost.
- Sprinkle compost tea (soaked compost in water) for liquid fertilization.
For Lawns
- Spread a thin layer of compost over your lawn to improve soil aeration and grass health.
Compost is gentle, organic, and safe—it won’t burn your plants like chemical fertilizers might.
Common Composting Problems (And How To Fix Them)
Even seasoned composters face a few hiccups. Here’s how to handle the most common ones:
| Problem | Likely Cause | Simple Fix |
|---|---|---|
| Bad odor | Too wet or too much green | Add dry leaves or paper; turn the pile |
| Pile not heating | Not enough nitrogen or moisture | Add kitchen scraps or sprinkle water |
| Attracts pests | Meat, dairy, or uncovered scraps | Bury new waste or use a closed bin |
| Pile too dry | Lack of moisture | Add water or more green material |
| Slow decomposition | Not enough air or wrong balance | Turn more often; adjust ratio |
Troubleshooting is part of the learning process—don’t get discouraged!
Step 8: Embrace the Composting Mindset

Composting isn’t just about reducing waste—it’s about reconnecting with nature’s cycles. Each time you toss a banana peel or wilted flower into your bin, you’re participating in a regenerative process that gives back to the Earth.
Start small, observe the changes, and adjust as you go. In a few months, you’ll be amazed at how your scraps transform into something life-giving.
Final Thoughts: Turn Waste Into Wealth
Composting is one of the most empowering habits you can adopt for your home and the planet. It turns everyday waste into a treasure trove of nutrients, reduces your environmental footprint, and helps your plants thrive naturally.
So, grab a bin, start collecting your scraps, and watch the magic happen. Within a season or two, you’ll be harvesting your very own “black gold”—a gift from nature that keeps on giving.
In short: Composting doesn’t need to be complicated. All you need are the right ingredients, a little patience, and a curious heart. Once you start, you’ll wonder why you didn’t do it sooner.